Introduction the SunSights panel monitoring system
The SunSights monitoring platform provides monitoring the technical and financial performance of one or more Solar system. It provides accurate information about the present and past performance of each module individually and about the system as a whole, enabling users to diagnose and troubleshoot issues, and analyze sites. Provide a feature for continuously track the voltage, current, and power of the inverter and panels.
How to use SunSights platform
To use the SunSights Live portal, your Provider/Supplier will first register you in the system. Once your registration initiates successfully, you will receive registration details which are used to sign up in the system. Without Sign Up, you are not able to login into the system.
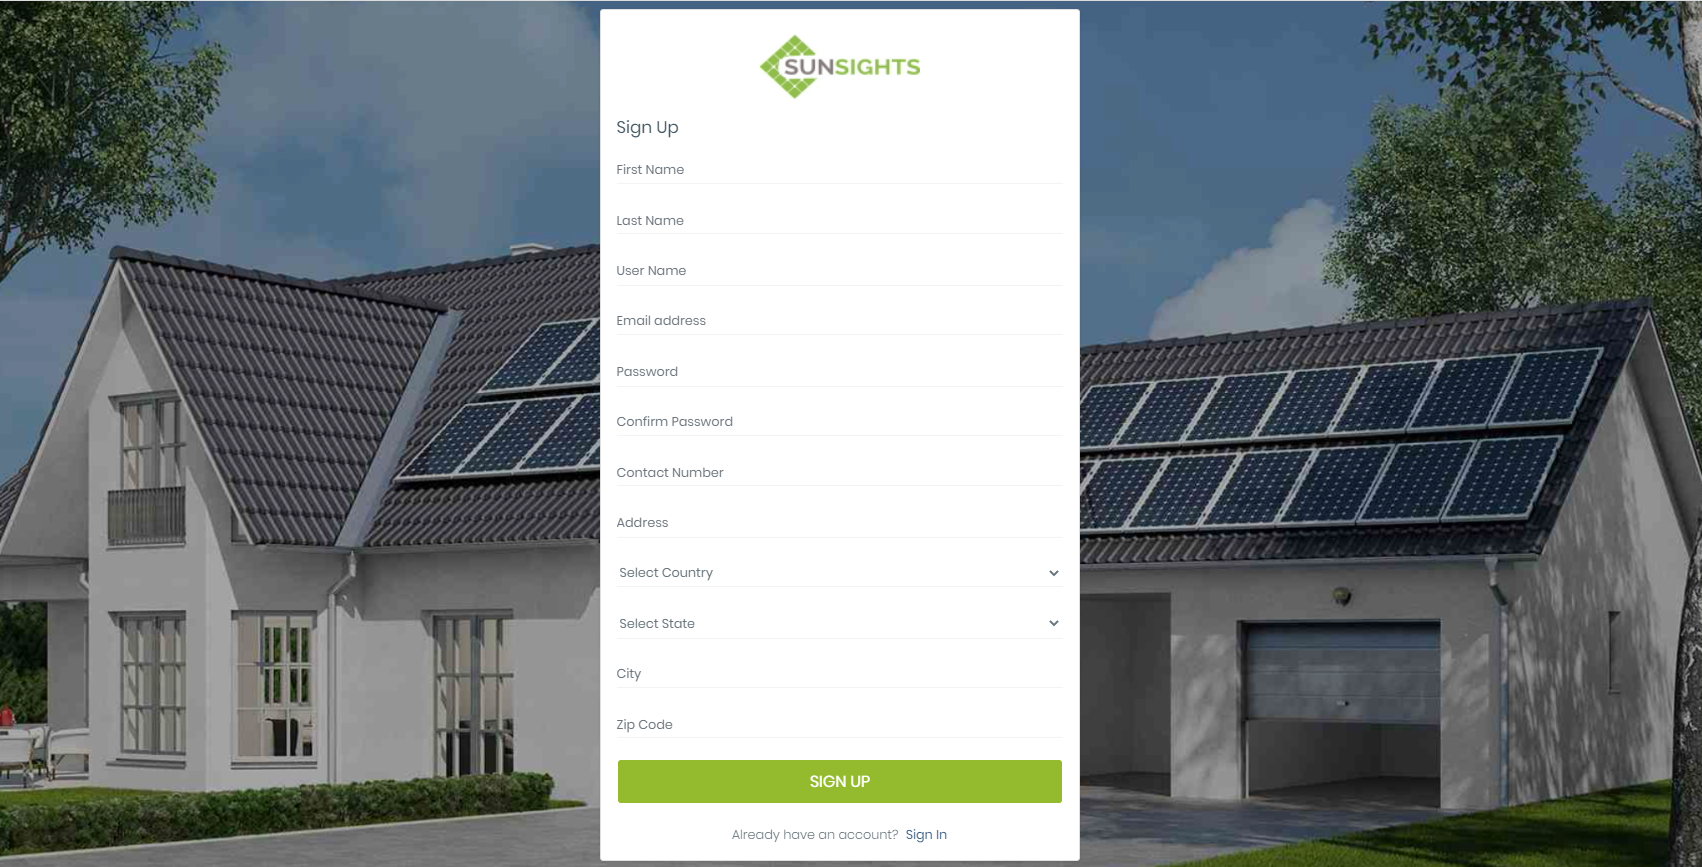
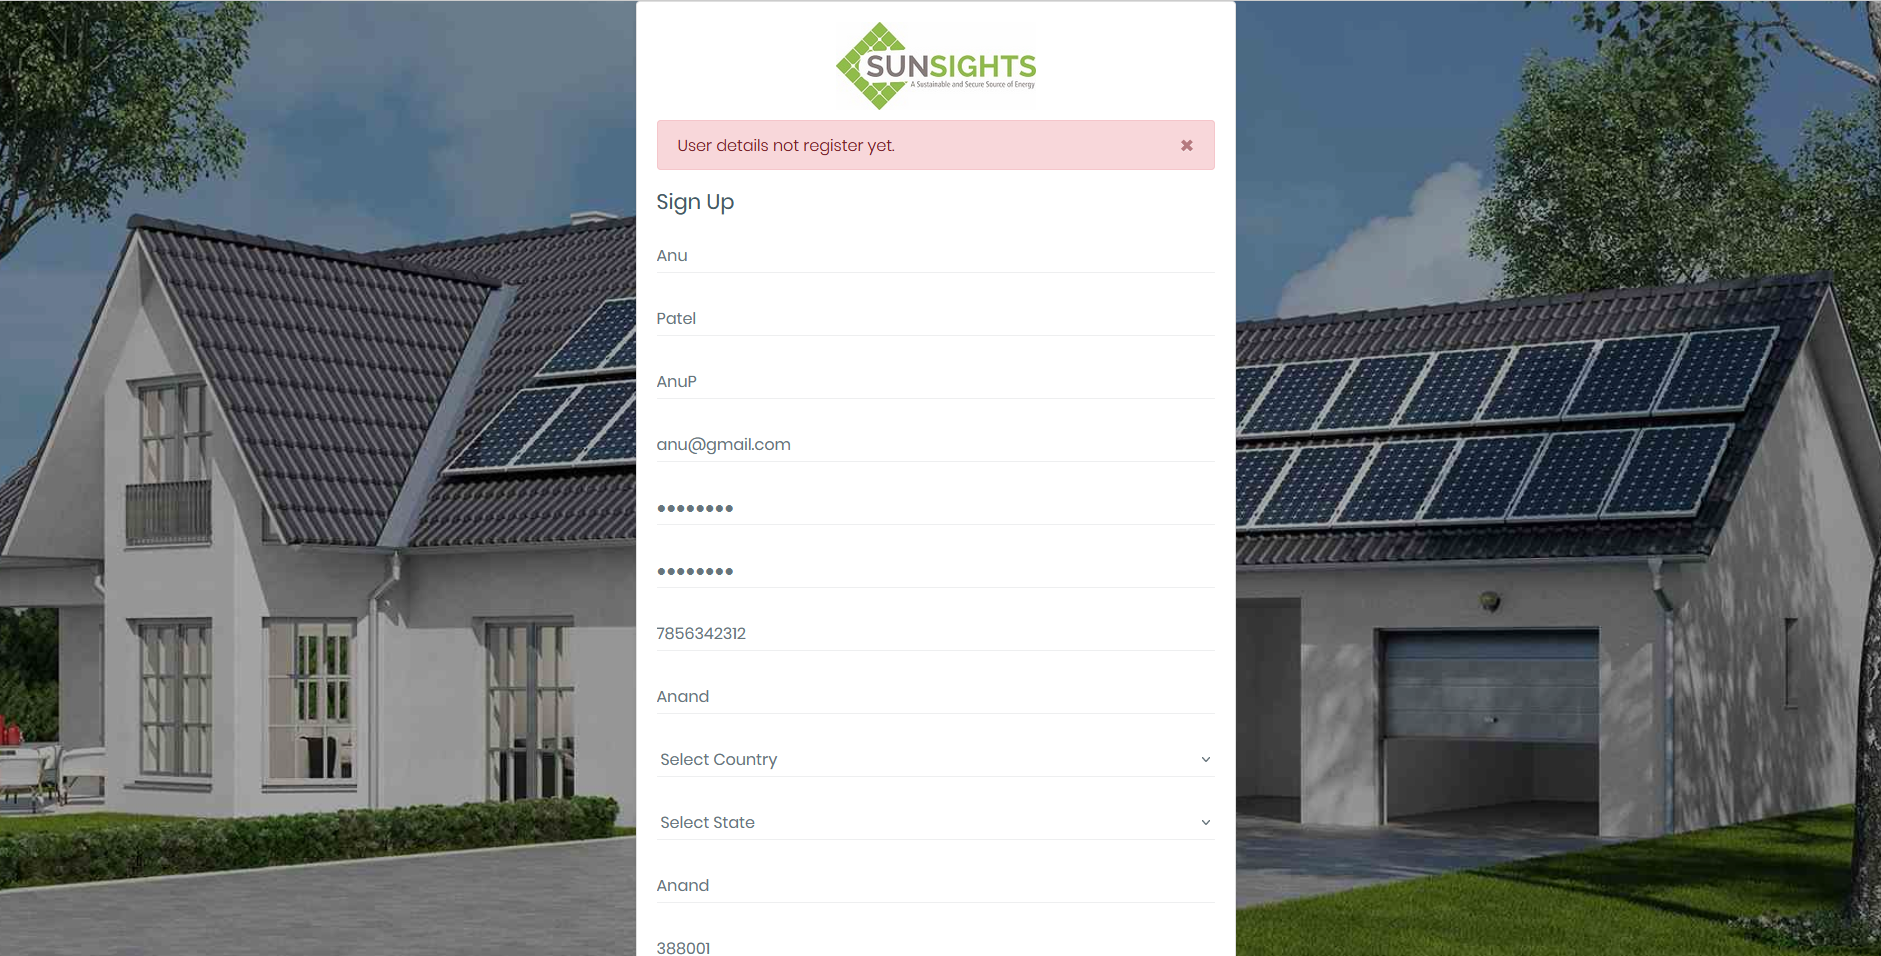
Sign Up
- Open SunSights Live portal (https://live.getsunsights.com/) in the browser
- Click on Sign Up Link
- Sign Up form contains a lot of information. All are mandatory fields. Here you must have required "Last Name", "Email Address", and "Contact Number" provided at the time of registration.
- Fill the signup form with valid data and click on the SIGNUP button
- You also get the Sign In link in this form for the already active users.
- Once you successfully Sign Up, you get the Login page


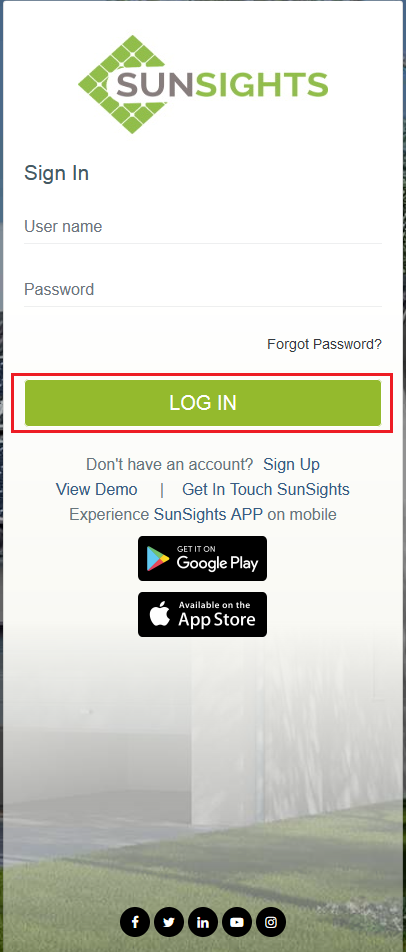
Login
- Open SunSights Live portal (https://live.getsunsights.com/) in the browser
- Enter valid username and password and click on Login button
- If you login successfully then get Dashboad page
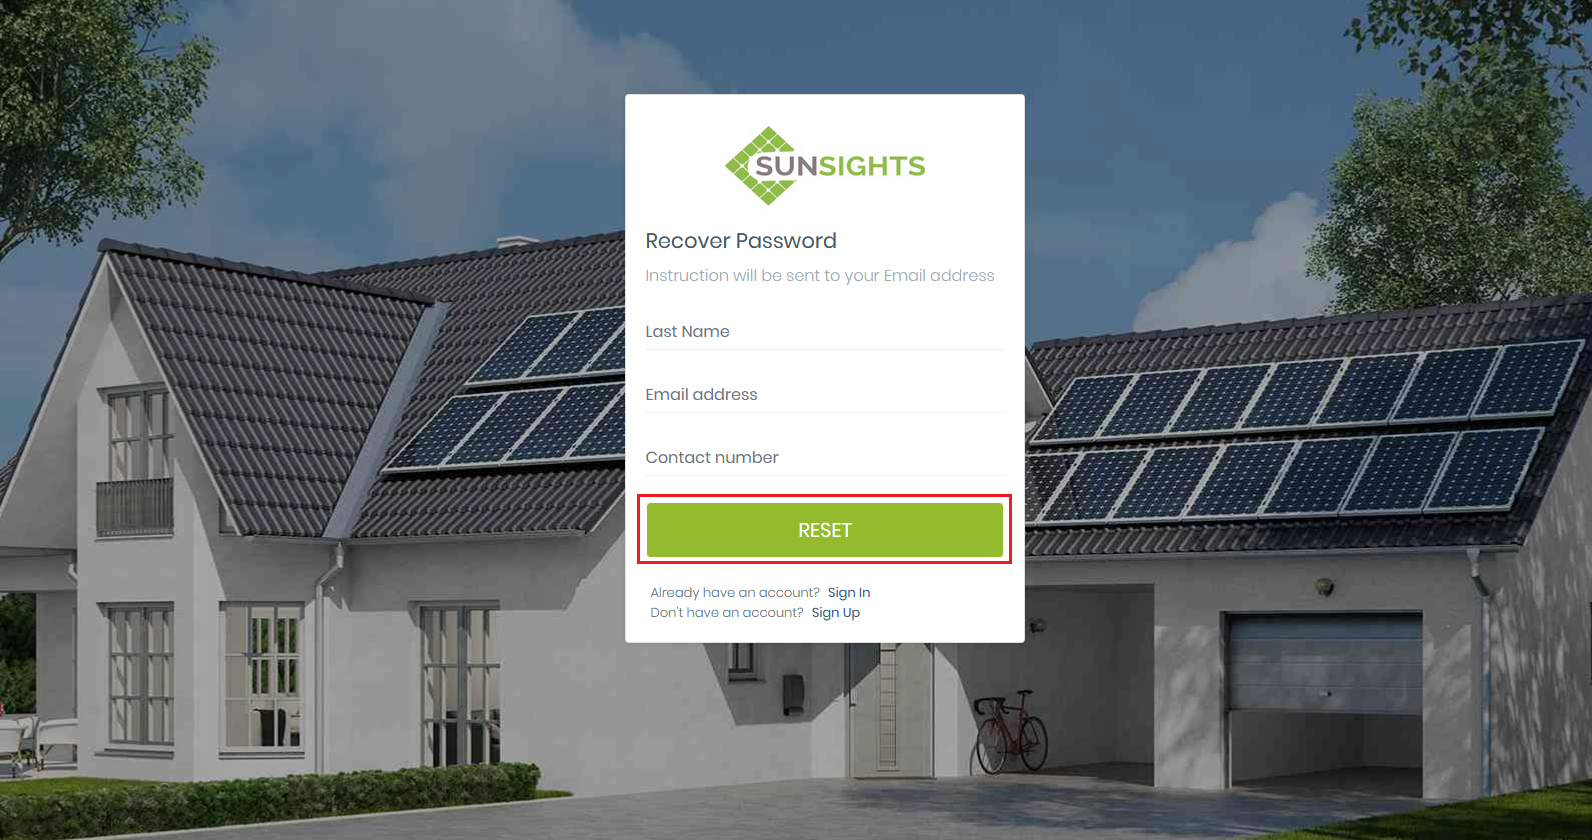
Forgot Password
- If you forgot your password then no worry we provide the reset password functionality. For the reset, the password follows the following steps
- Open SunSights Live portal (https://live.getsunsights.com/) in the browser
- You get the "Forgot Password" link on the login page. Click on it. You get Recover Password Page
- In this form, you required to enter "Last Name", "Email Address", and "Contact number" provided during Registration and then click on the "RESET" Button
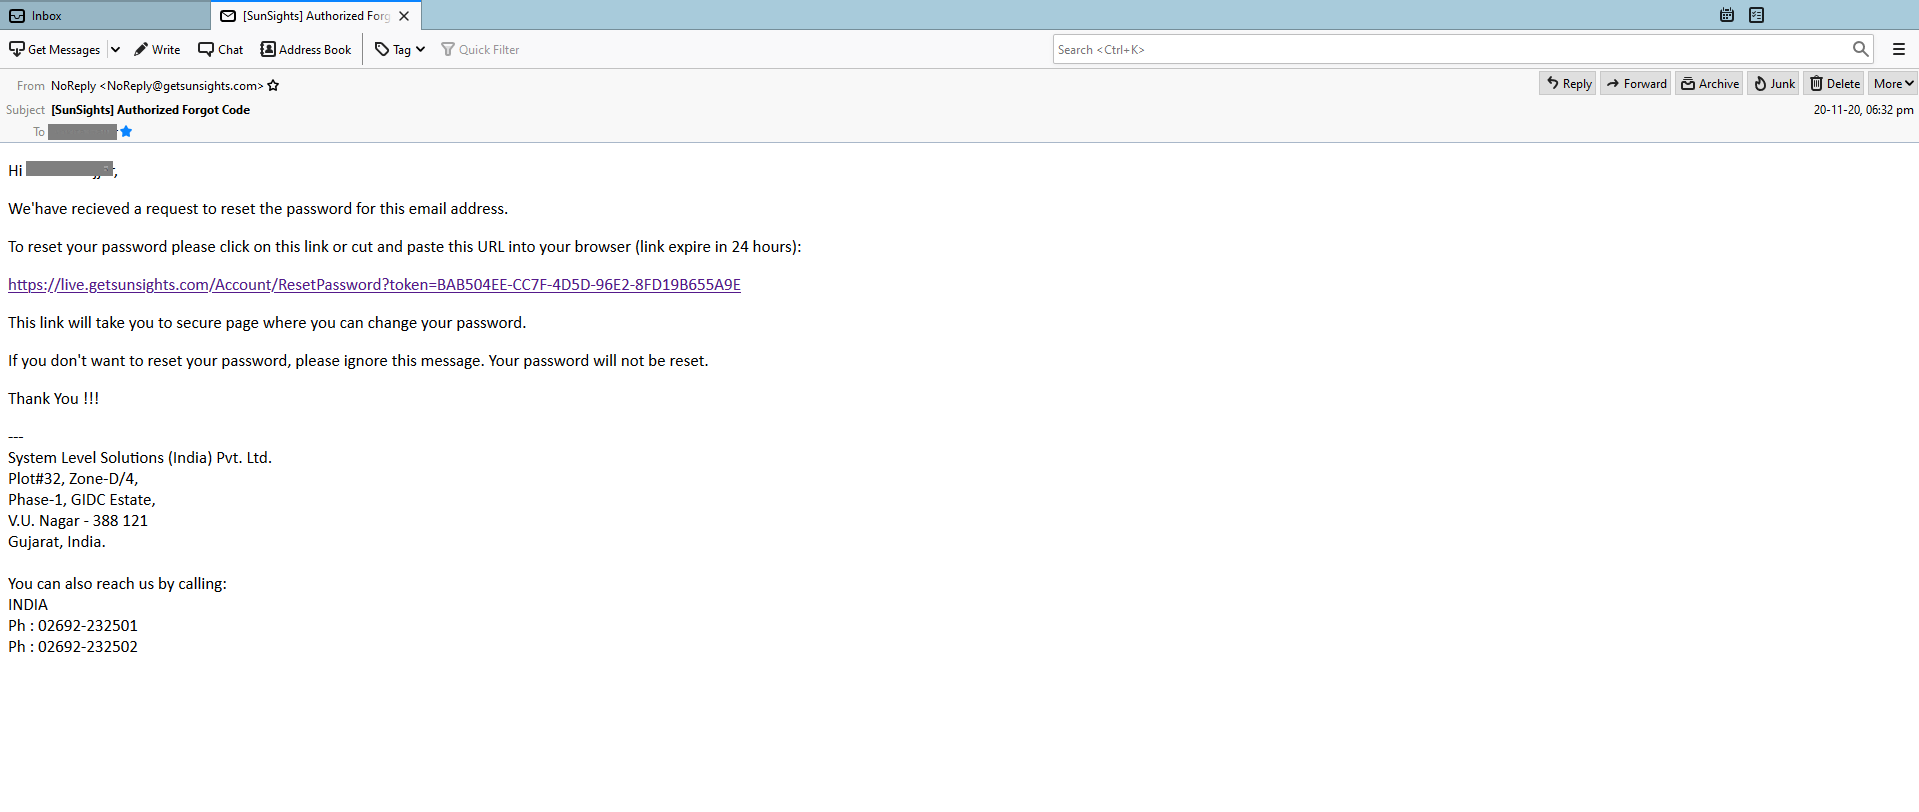
- Check your inbox. You get the link to reset the password with the instruction, which will expire in 24 hours.
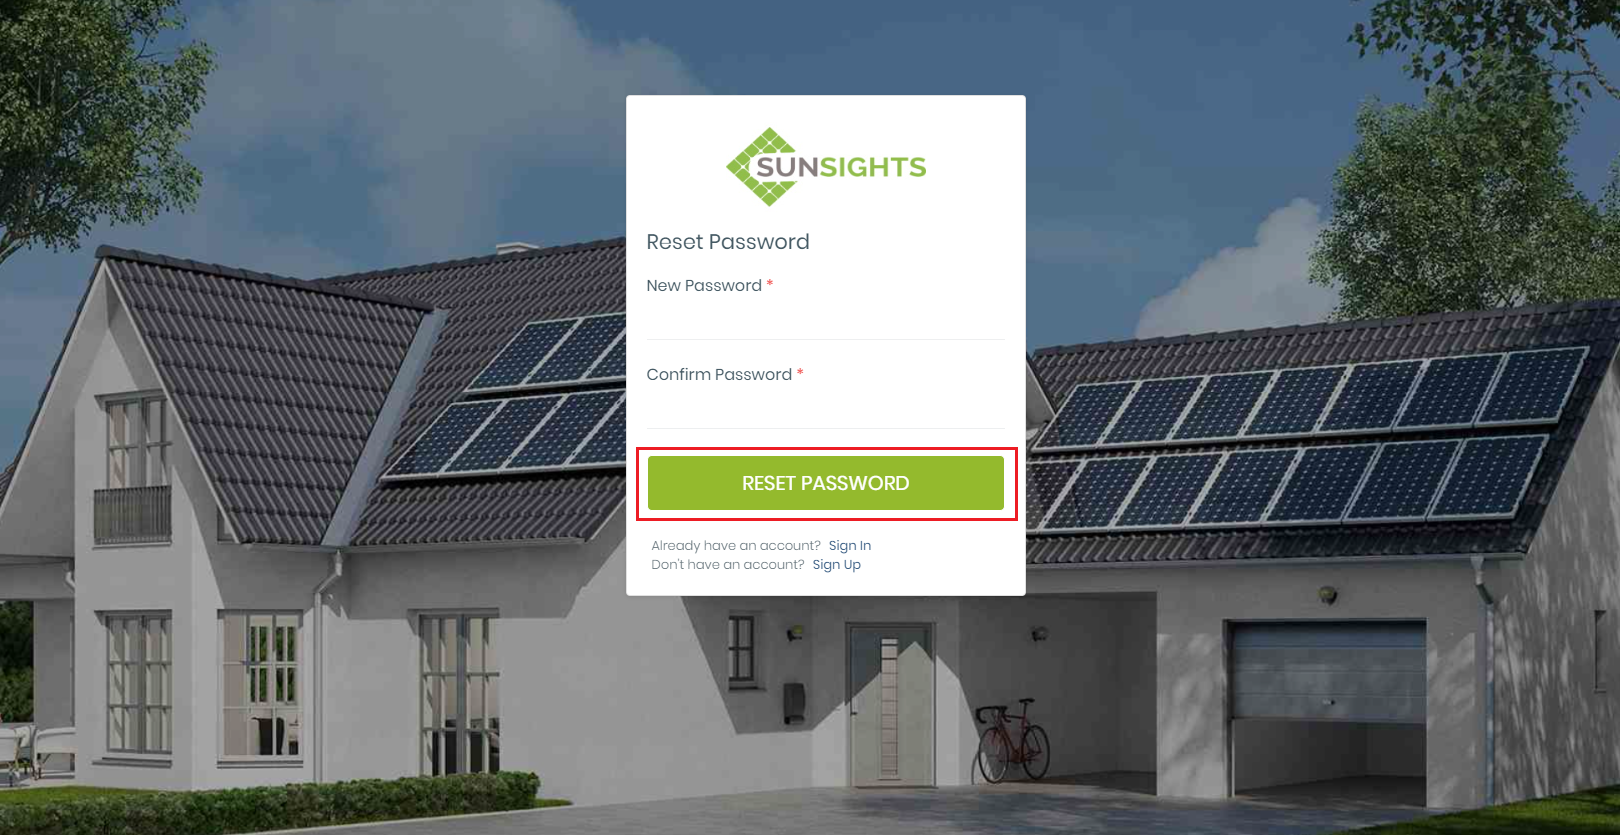
- Click on the link, you get reset password Form
- Here you have to add a new password which must contain at least one number, special character, and an uppercase letter and 8-12 character long. Also, enter the same password in Confirm Password and click on "RESET PASSWORD"
- Now try to login into the portal with a new password.


Dashboard
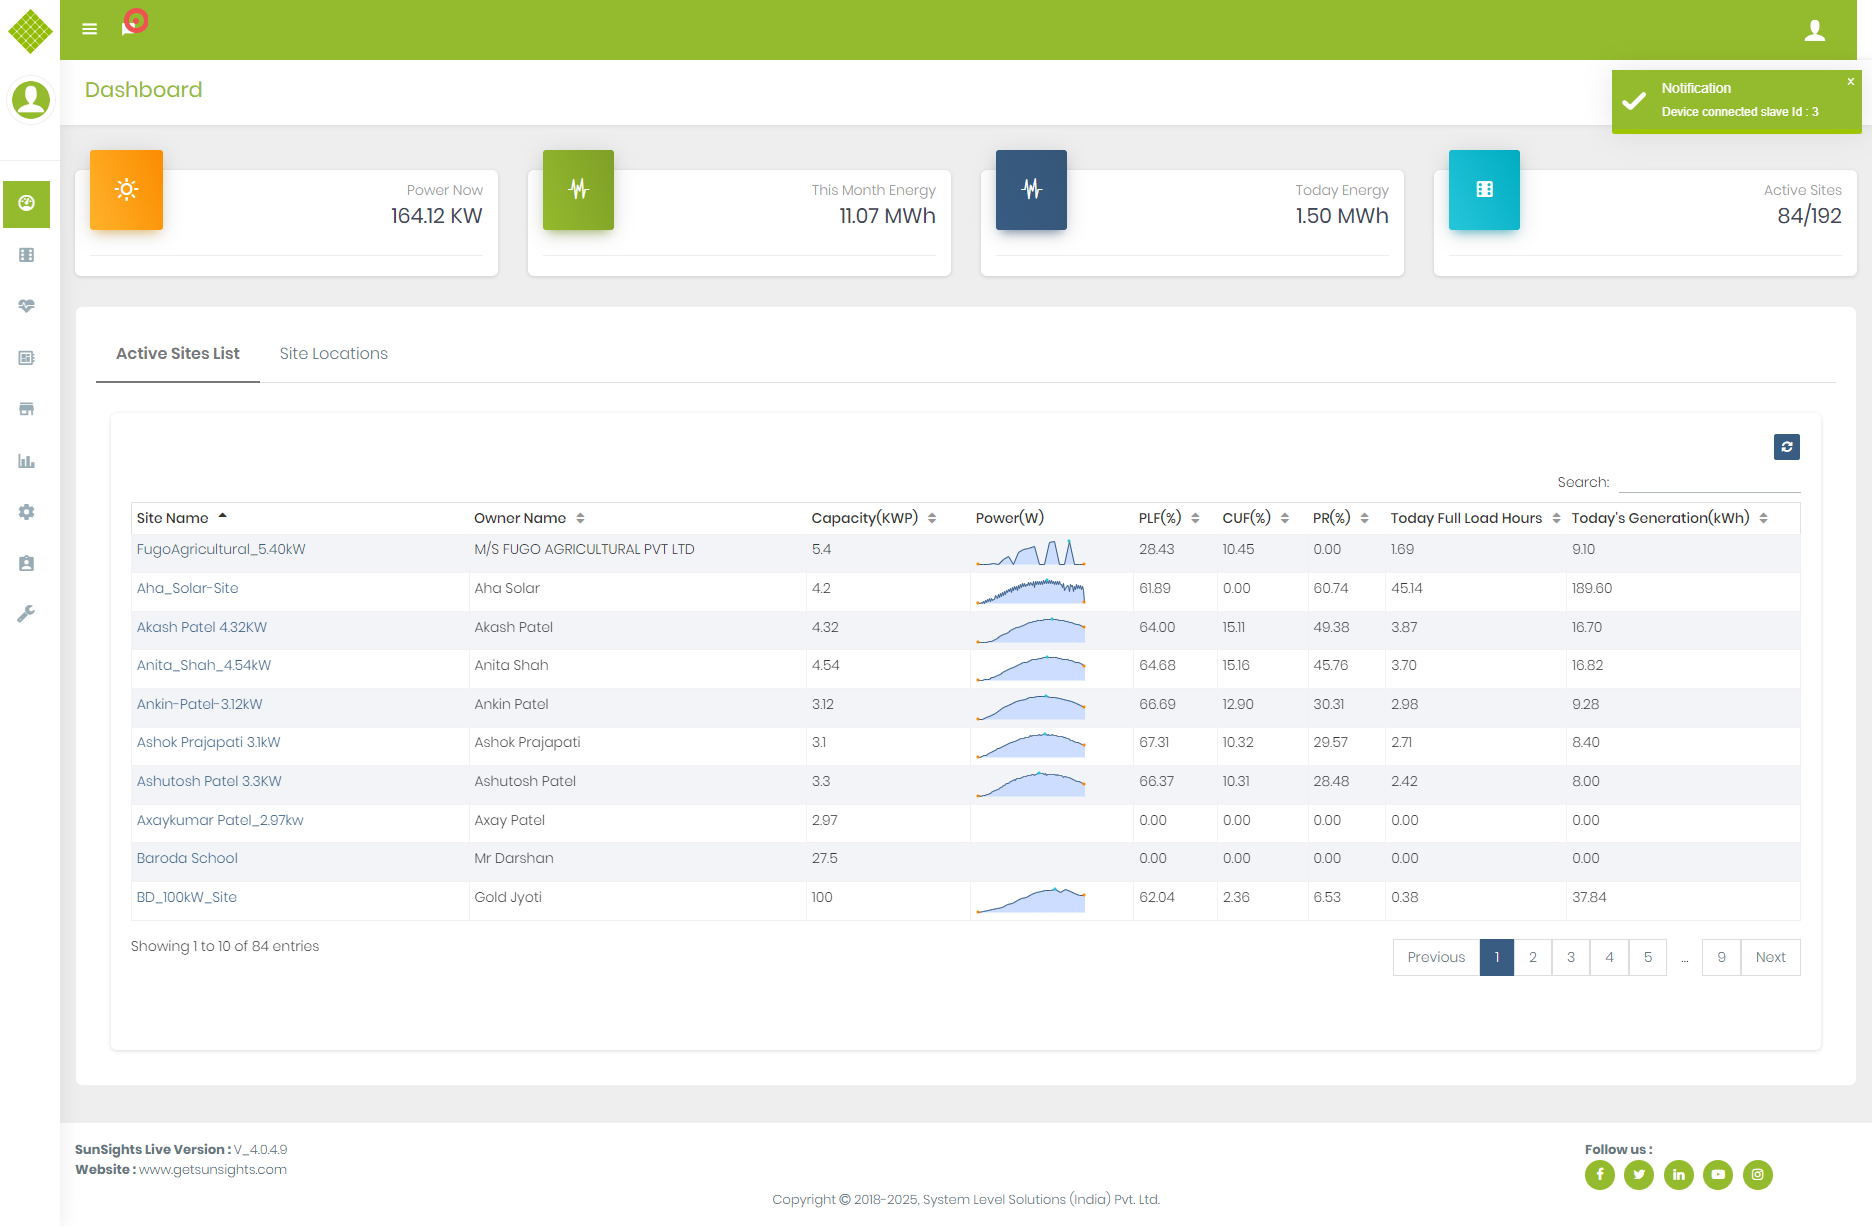
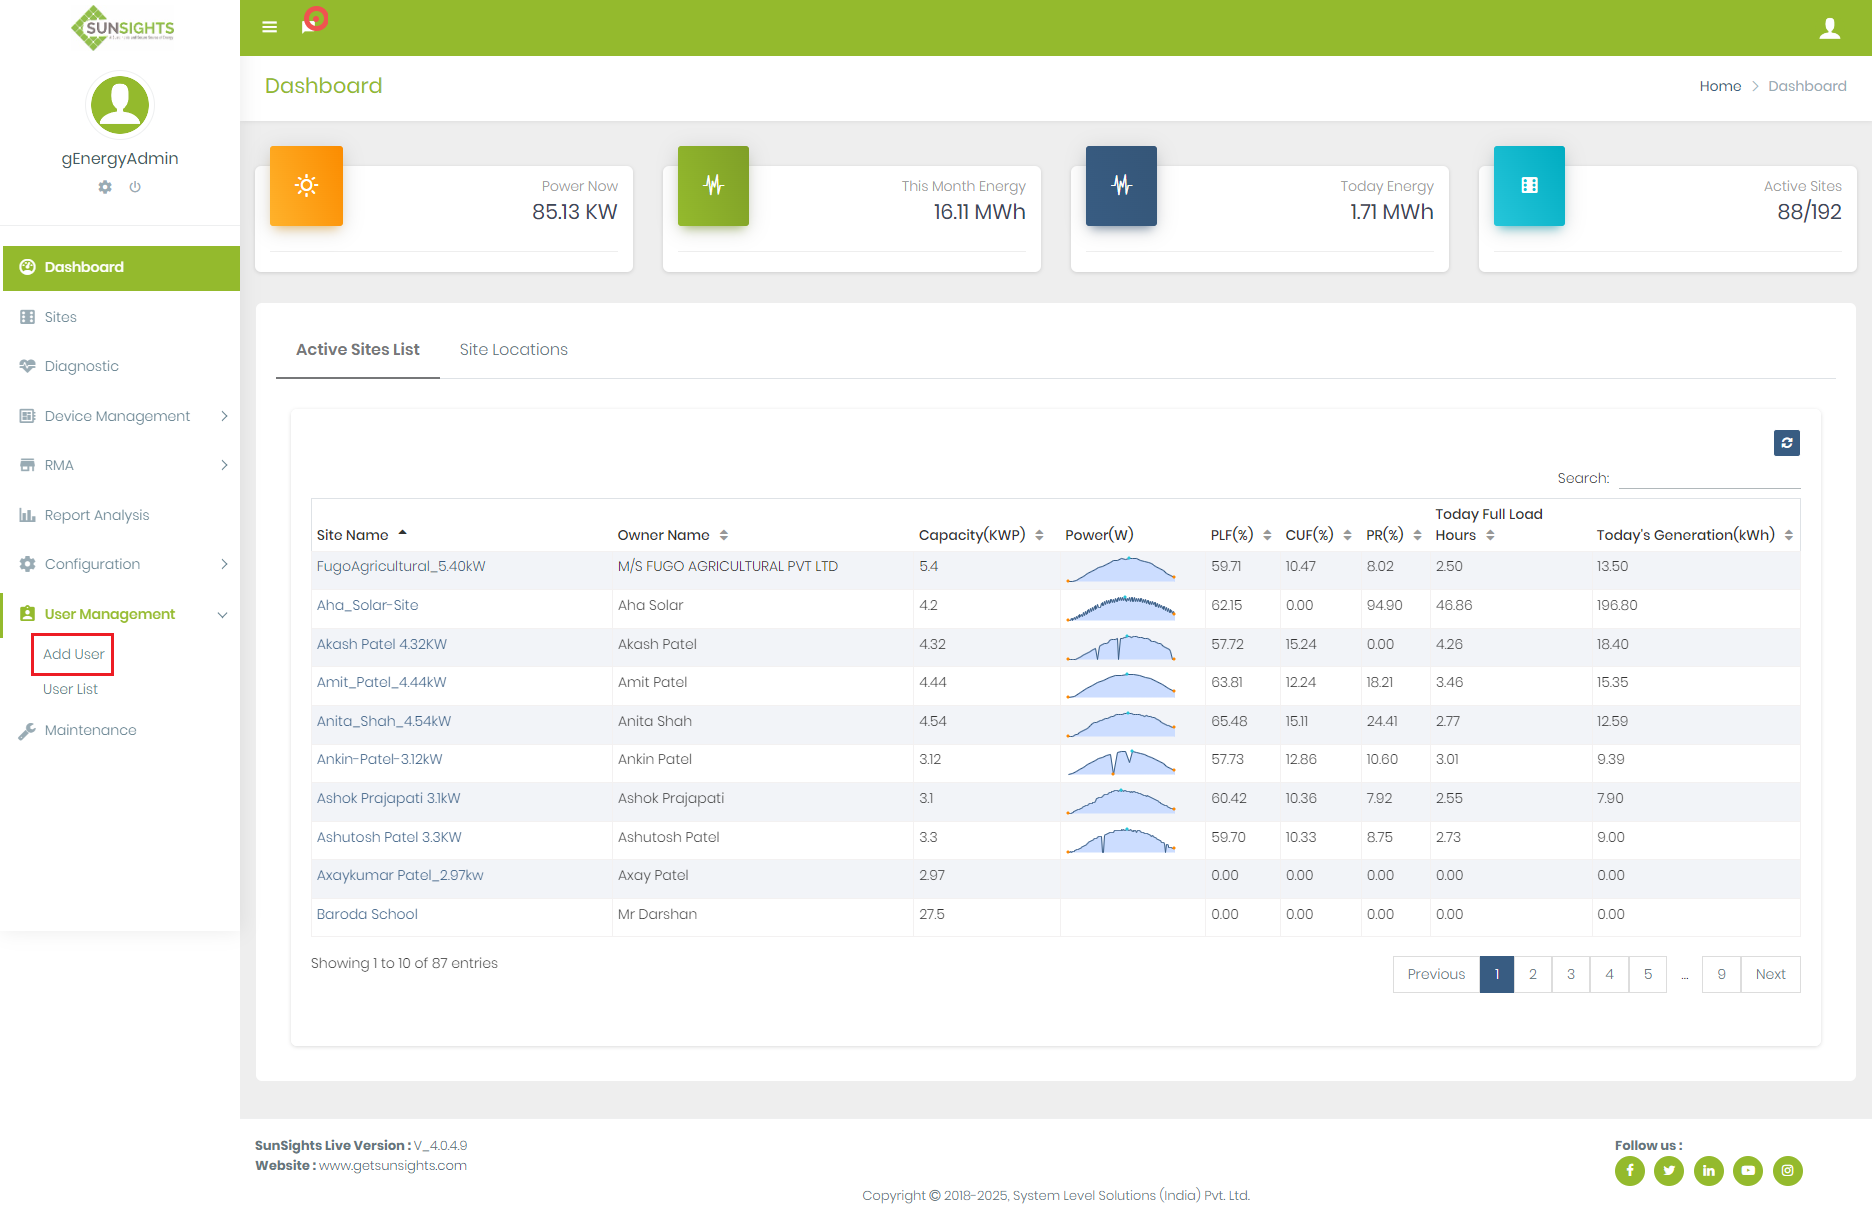
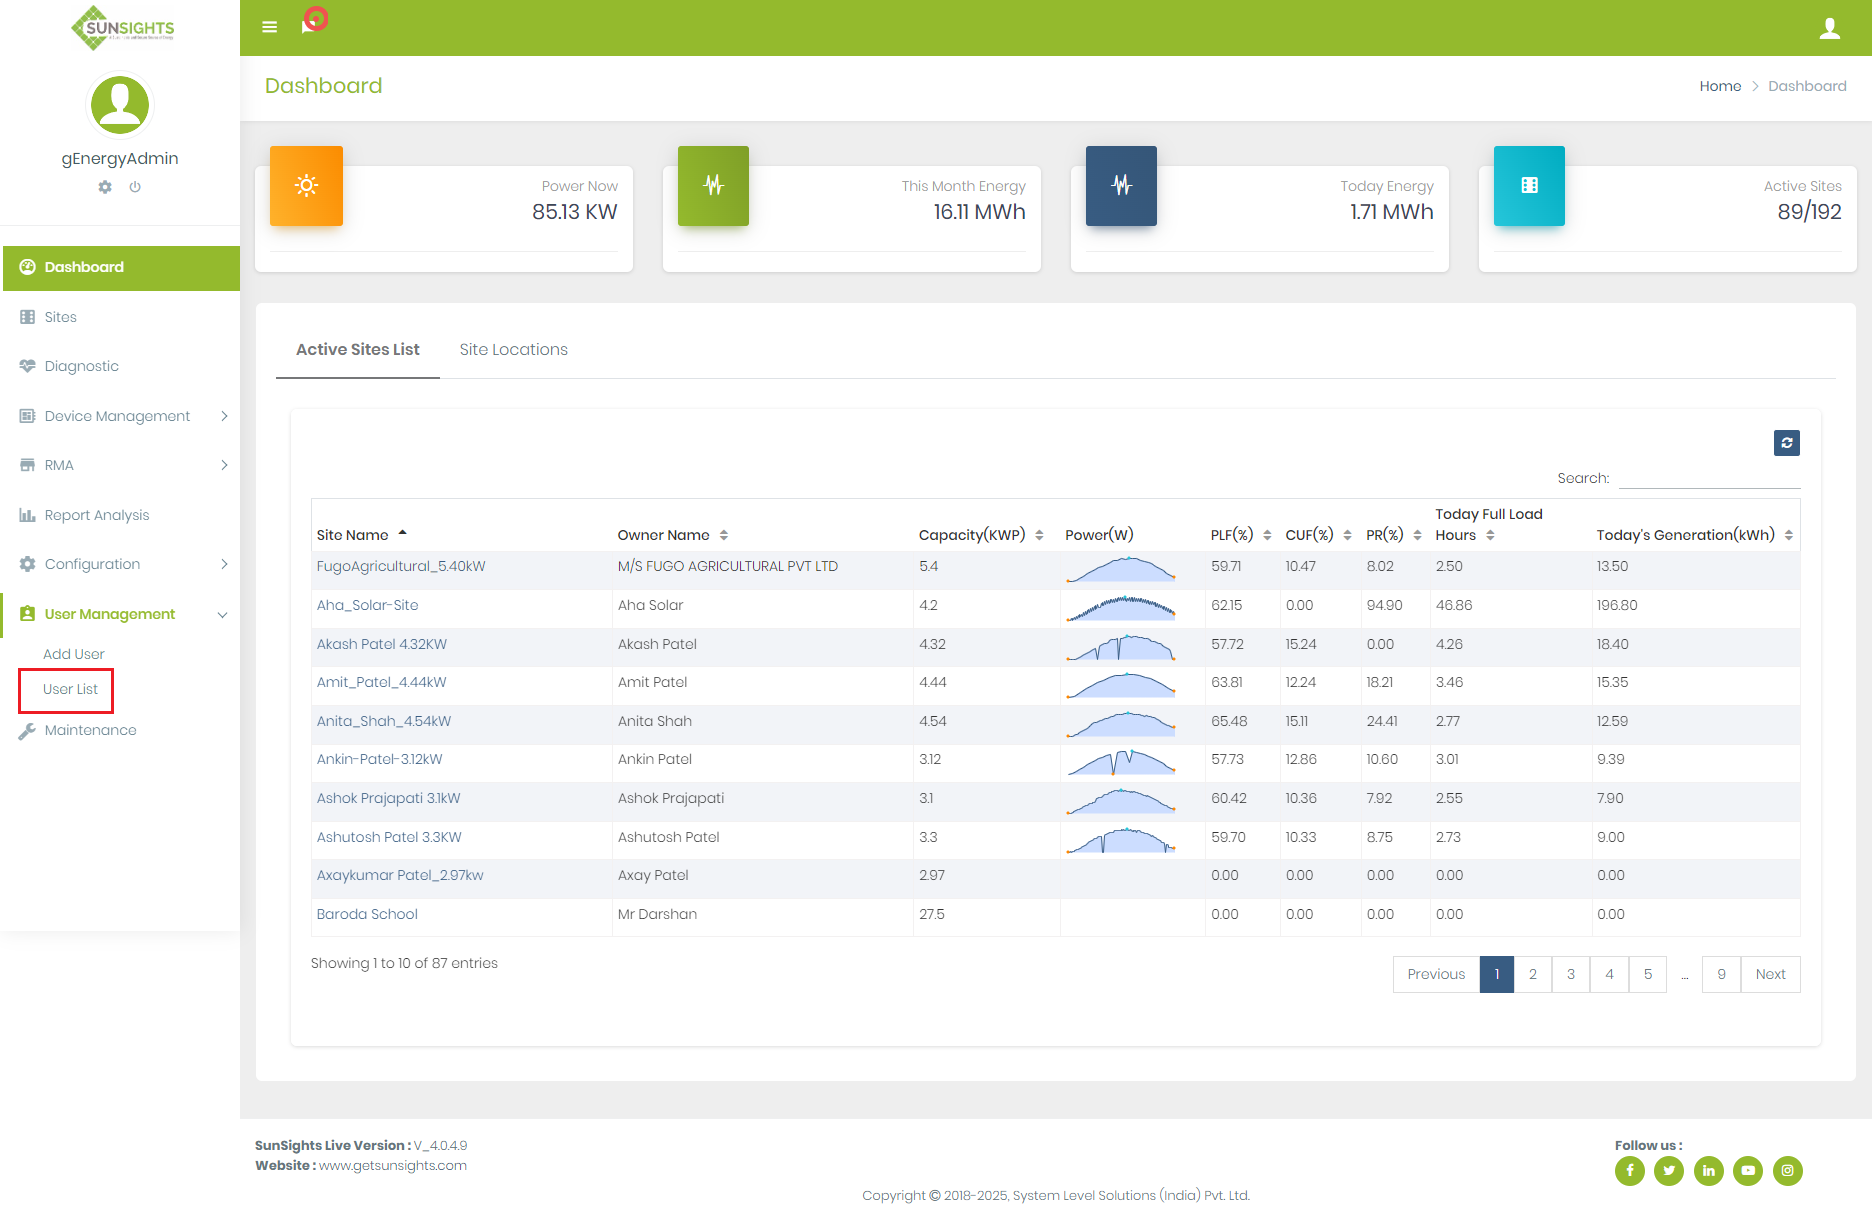
- After successful login into the web portal, you get a Dashboard page. Page view will be very(different menu options) based on user role
- Note: There is 2 different dashboard page. 1) Multiple site Dashboard and 2) Single Site Dashboard
- Multiple site Dashboard (This type of dashboard view for "Admin", "Supplier" and "Customer with multiple site" user)
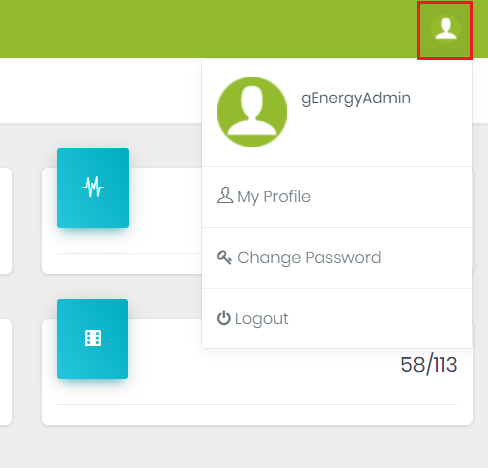
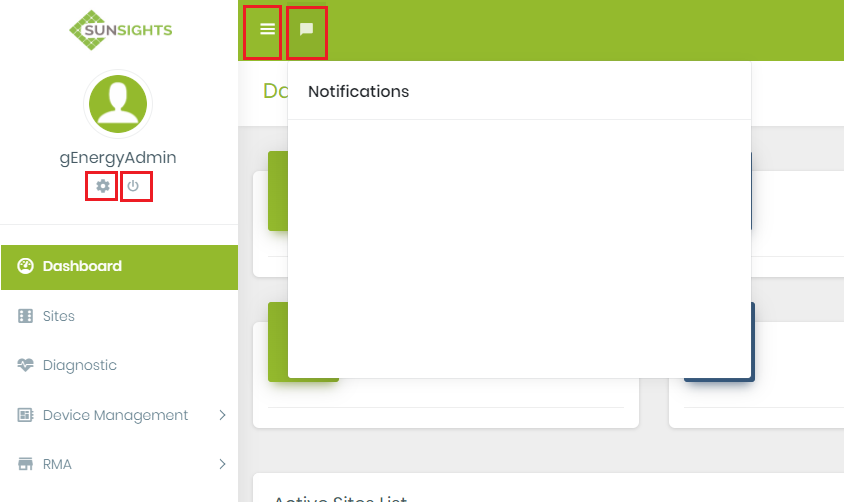
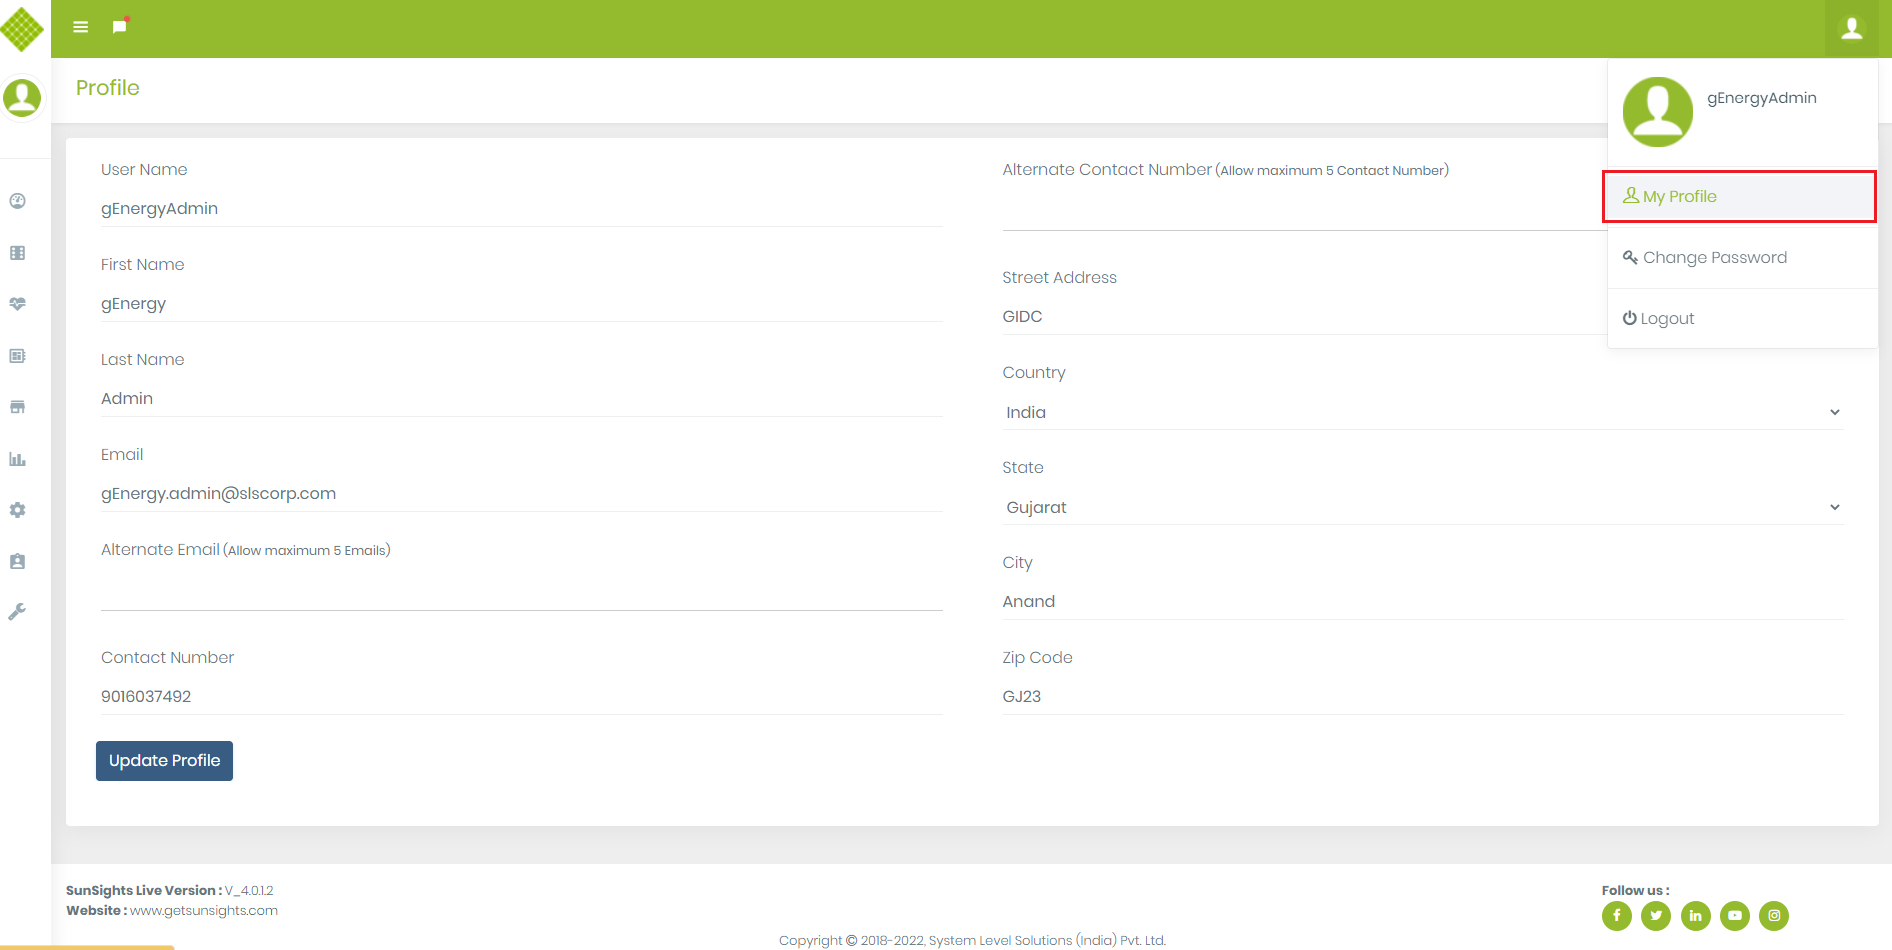
- On the Dashboard page at the right top corner, you find the profile symbol. Click on that to get following
- Here you get the My Profile link to view Use Profile and Logout link for exit from the portal.
- On the Left top side, you find the Menu expand and collapse button, Notification button and under profile, the image gets View Profile and a Logout link.
- You also get Basic information like "Power", "Current month energy", "Today's energy" and "Current Active sites" as below
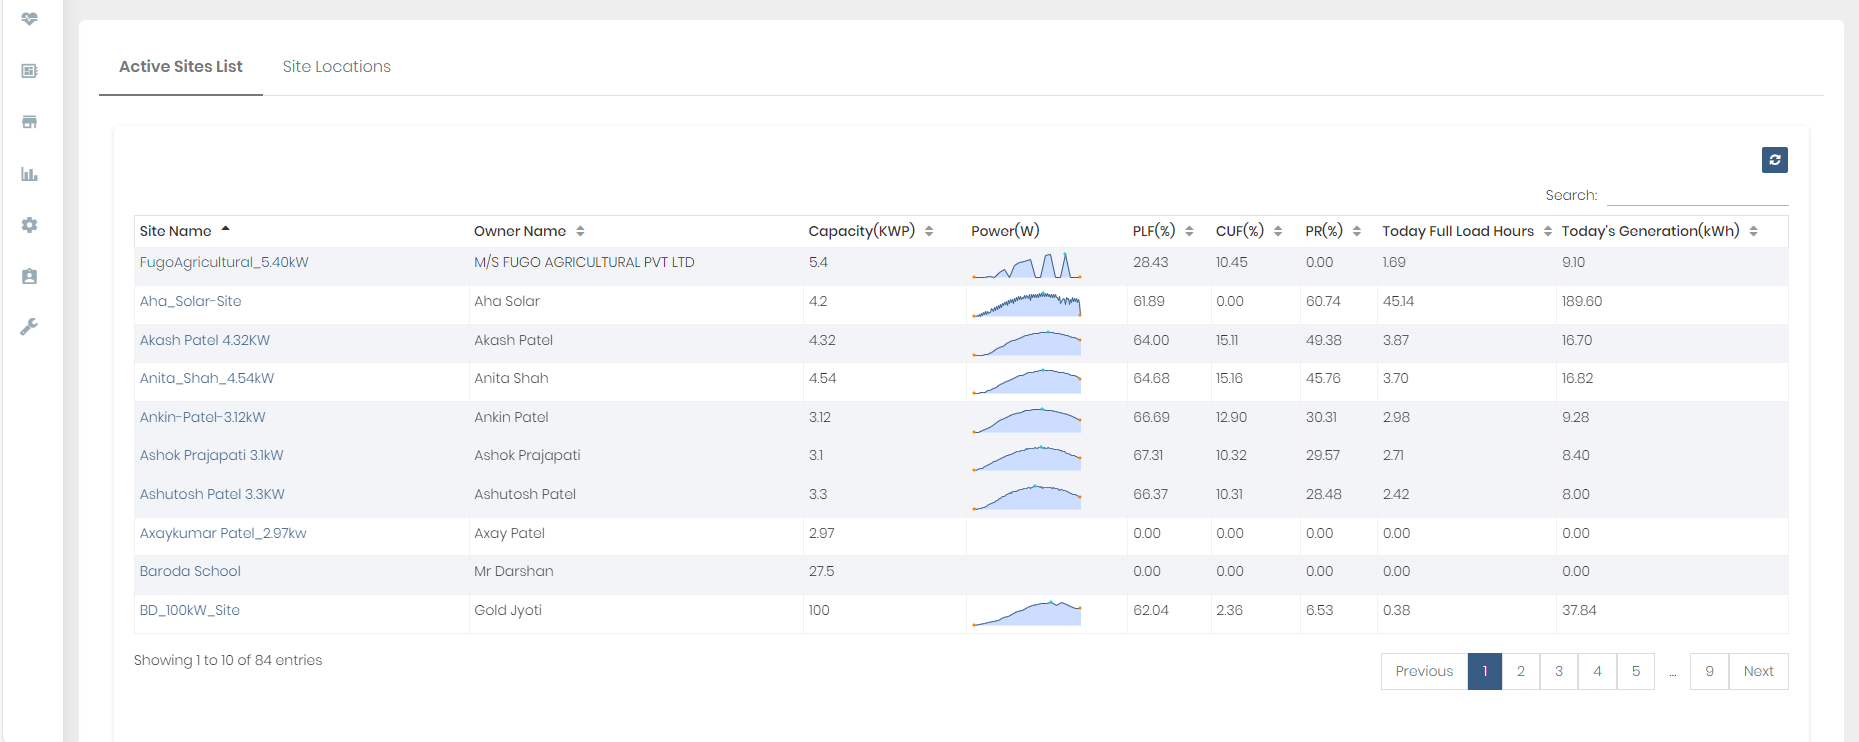
- Dashboard page contains a list of the active site with Current Power, PLF, CUF, PR, Today's full load hours and Today's Generation Information
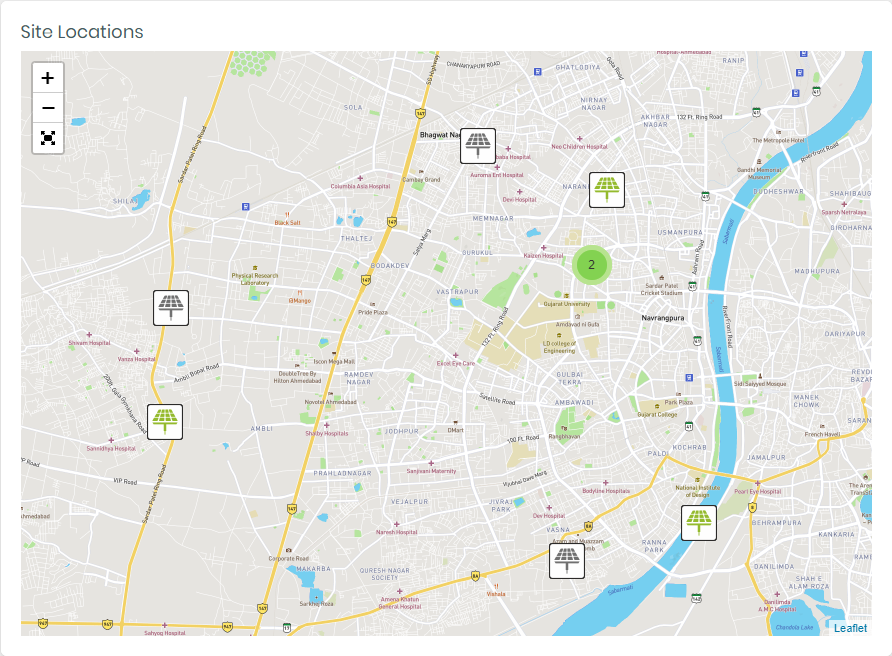
- You can navigate to site details by using site location
- Here from the site icon image and based on that color we identify the type of site and currently it is online/offline. Gray color images indicate offline and green indicate the online site. Also when you hover the mouse on the site icon it will display the site name with online/offline status.
 |
| : Online/Offline Rooftop Site
 |
| : Online/Offline Hybrid Site
 |
| : Online/Offline Windmill Site
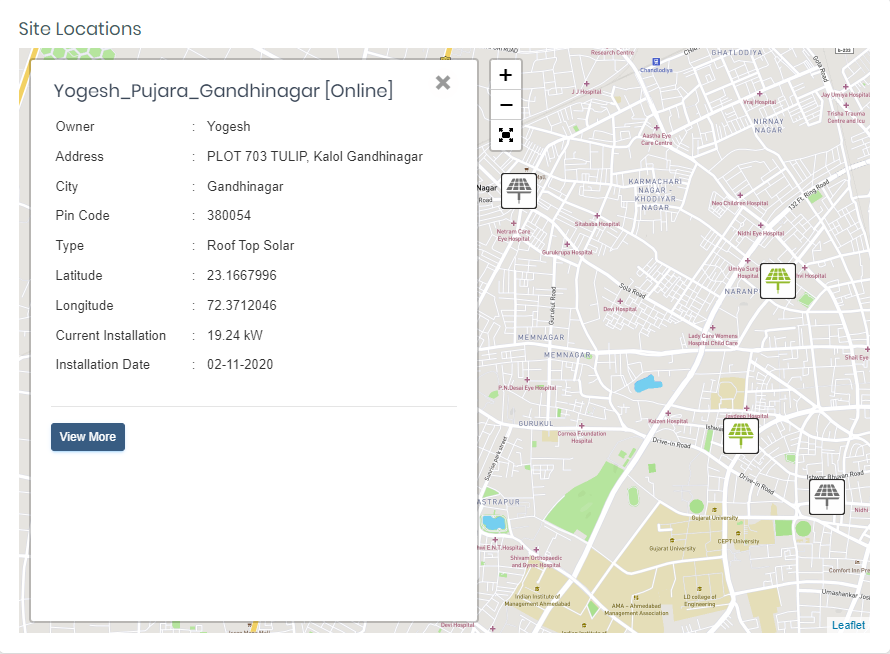
- Click on any site icon to get brief side details
- For more site details click on the View More button.
- In the footer at the bottom of the page, you find the Current SunSights Live version, WebSite URL, and Social Media Links
- Single site Dashboard (This type of dashboard view for "Customer with the only single site")
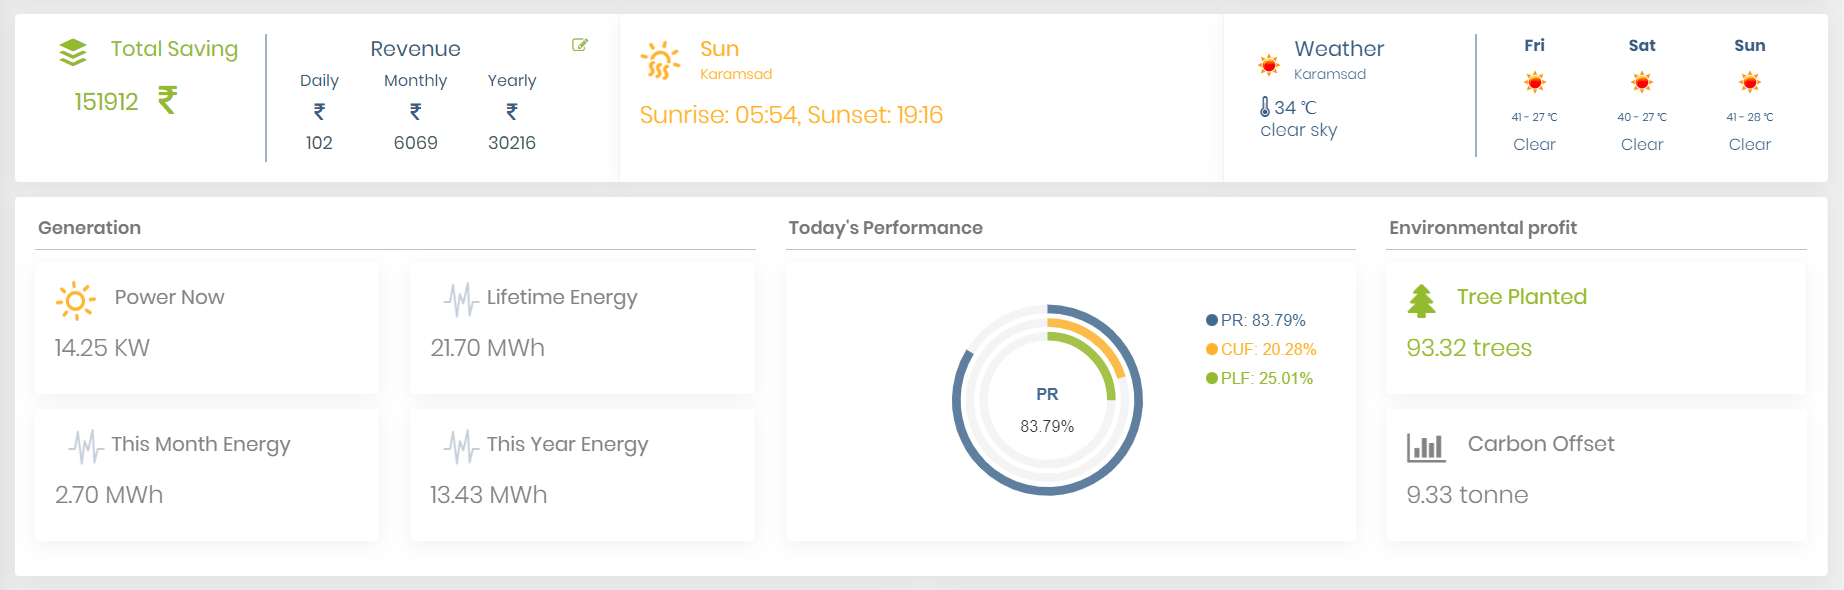
Dashboard Overview


Update Profile
- This functionality use for Update user profile so Login in the Site.
- If you want to get Messages and mails on your alternate contact number and email address like Data plan recharge expiration notification then you have to provide alternate details using this feature.
- Select "My Profile" from right hand side drop down menu.
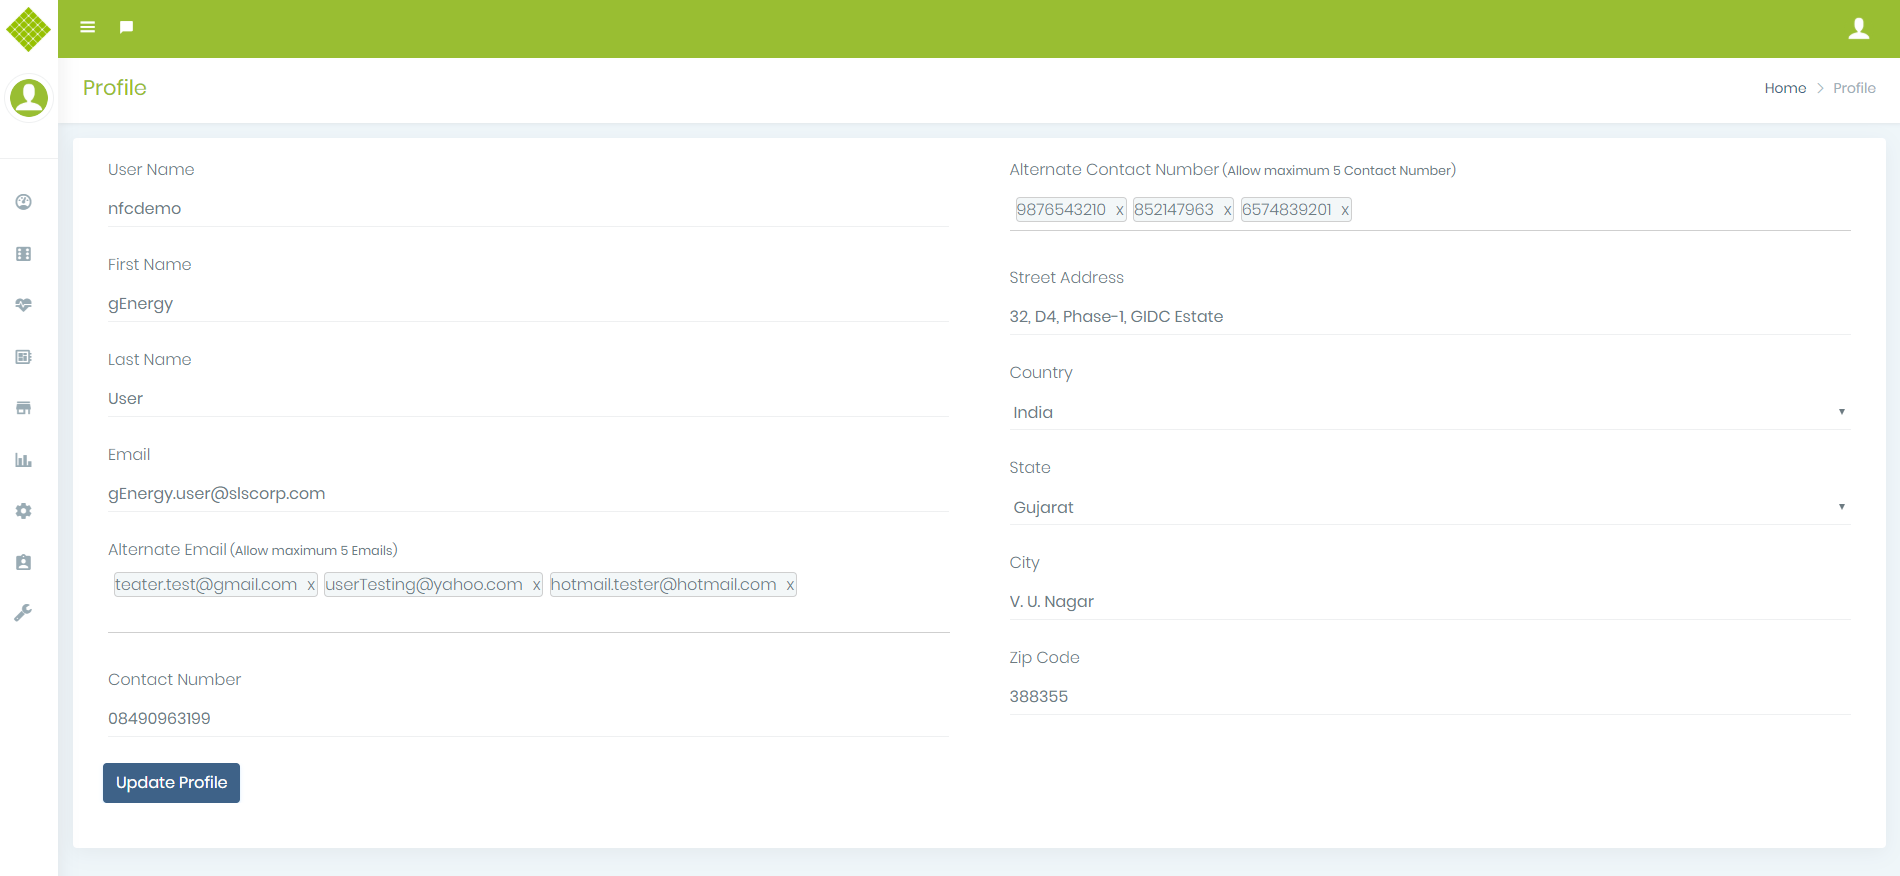
- You get following User Profile details form.
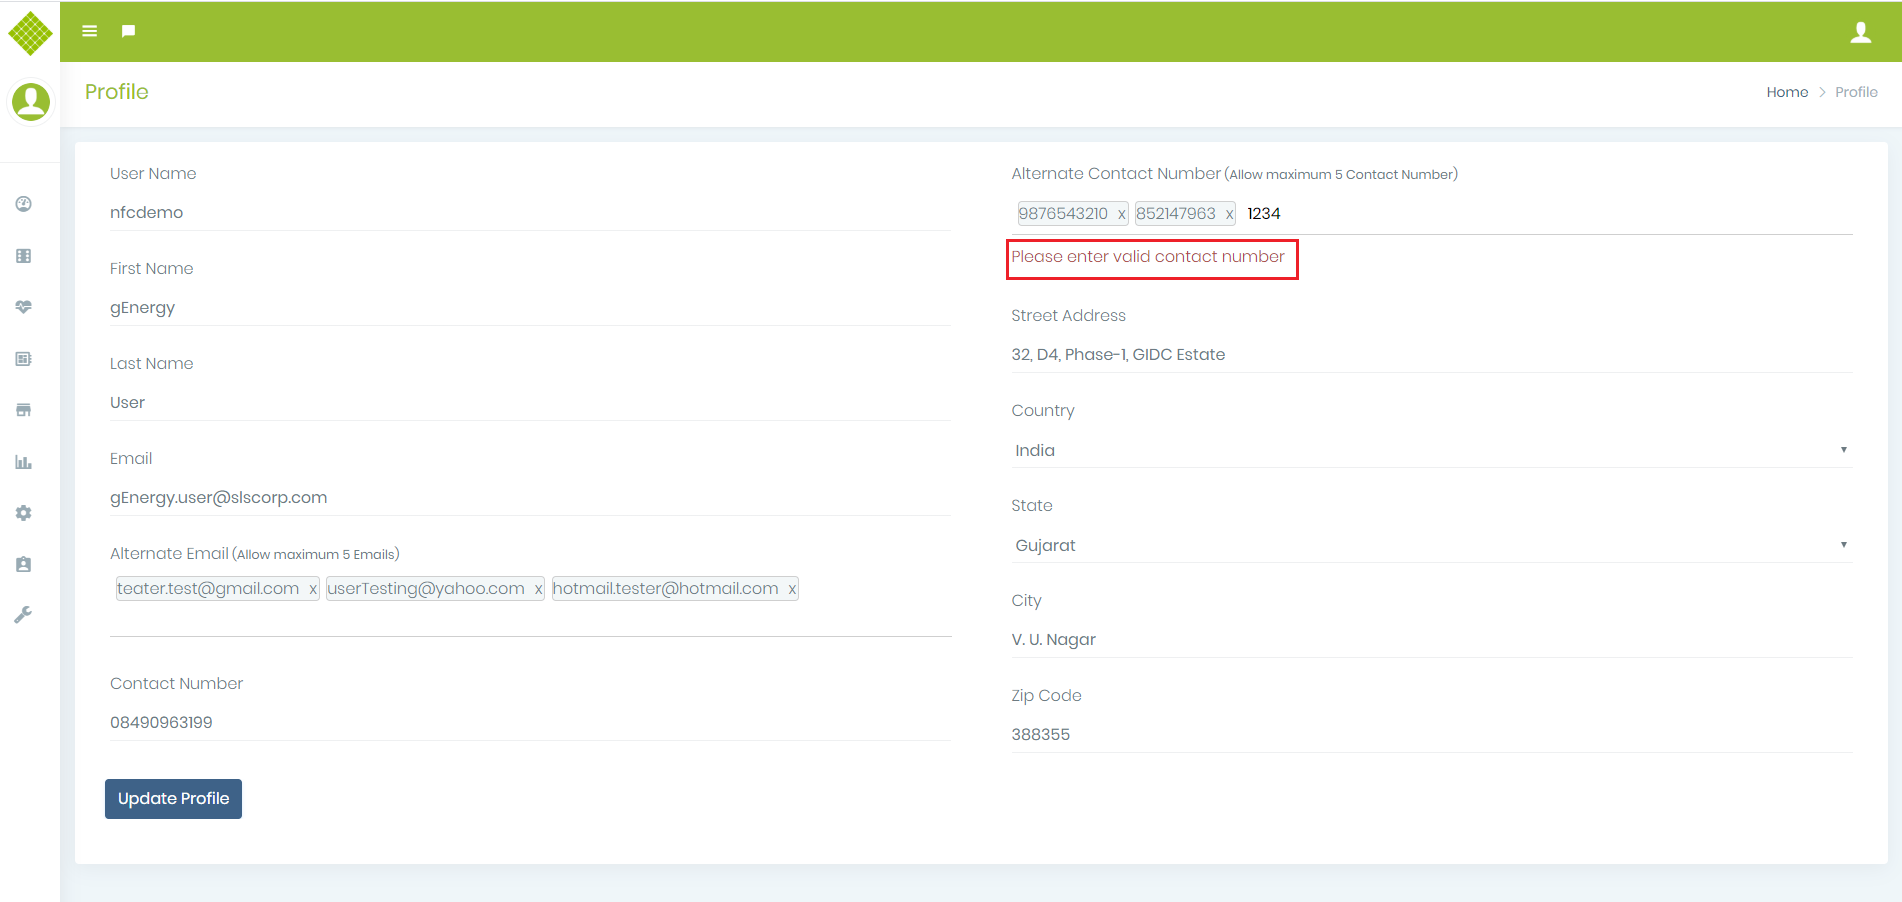
- You get extra 2 fields Alternate email and Alternate contact number which are not mandatory field.
- It allow maximum 5 Alternate Email and Contact number if you try to add more than 5 alternate email or contact no then GUI not add that details.
- If you add invalid data then GUI not added that data in list.
- You can remove enter data by clicking “x” of each entry.
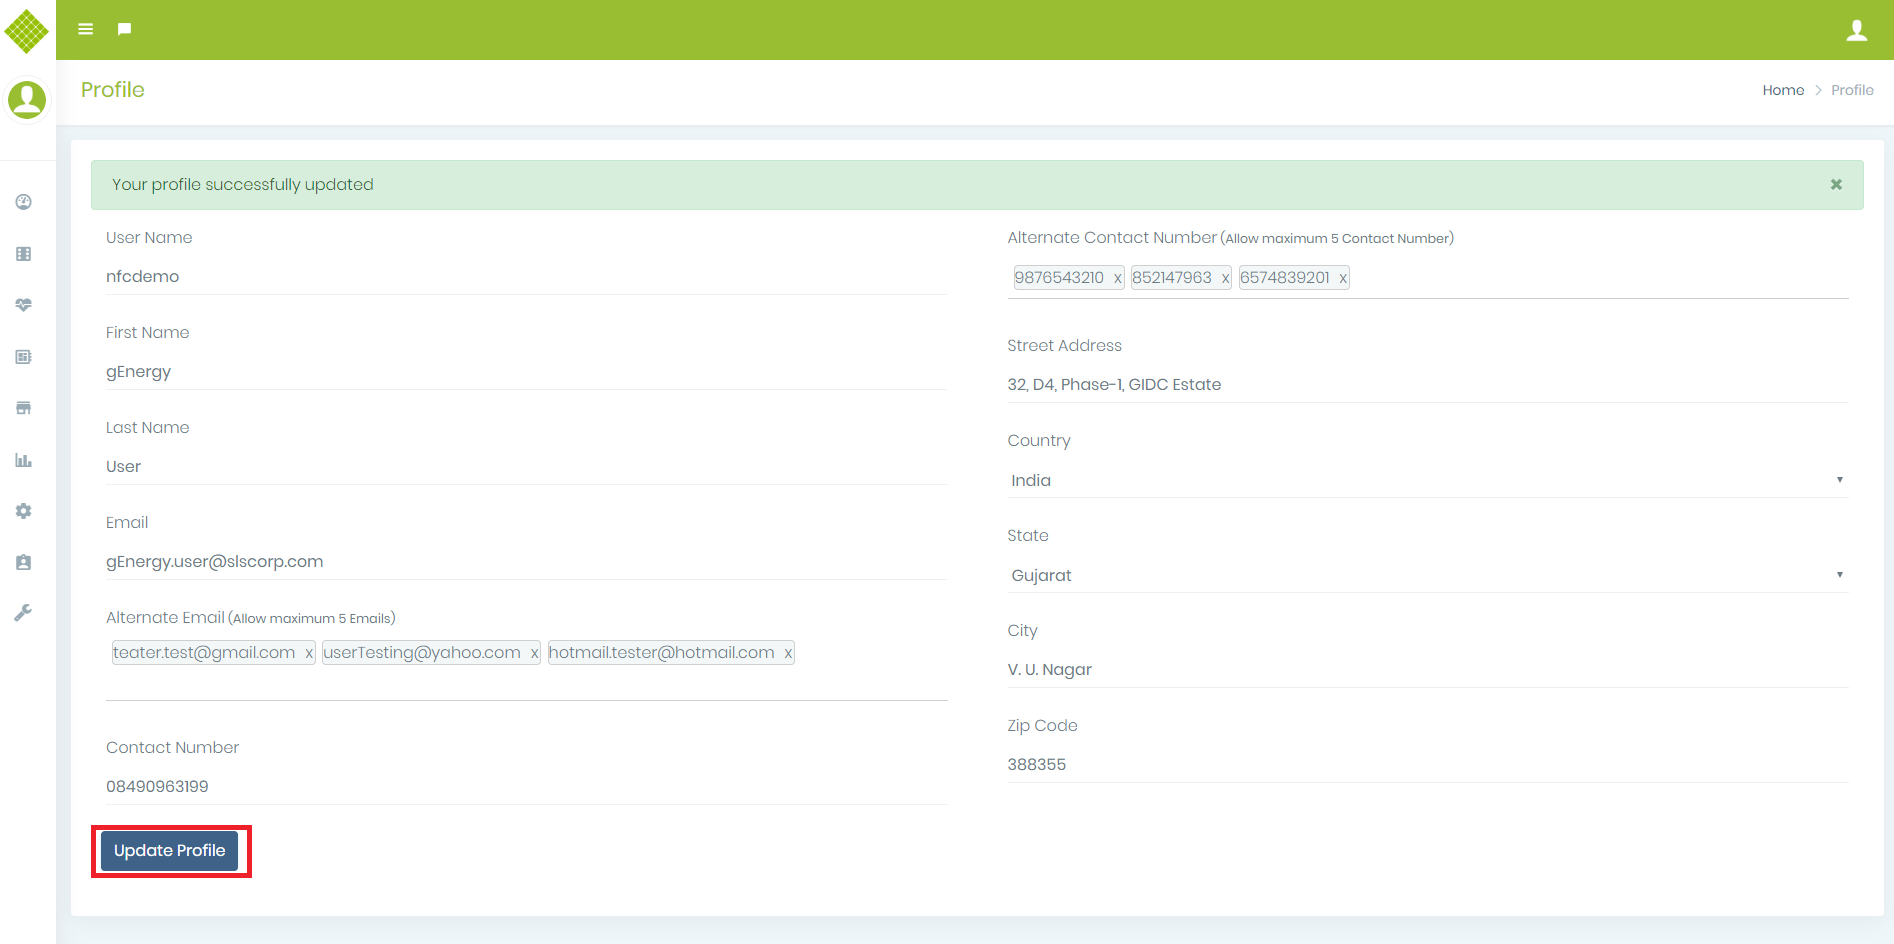
- Now Click on Update Profile Button to save details.
- You get the success message of update profile.
- Now whenever you open the page you will get updated information.
Change Password
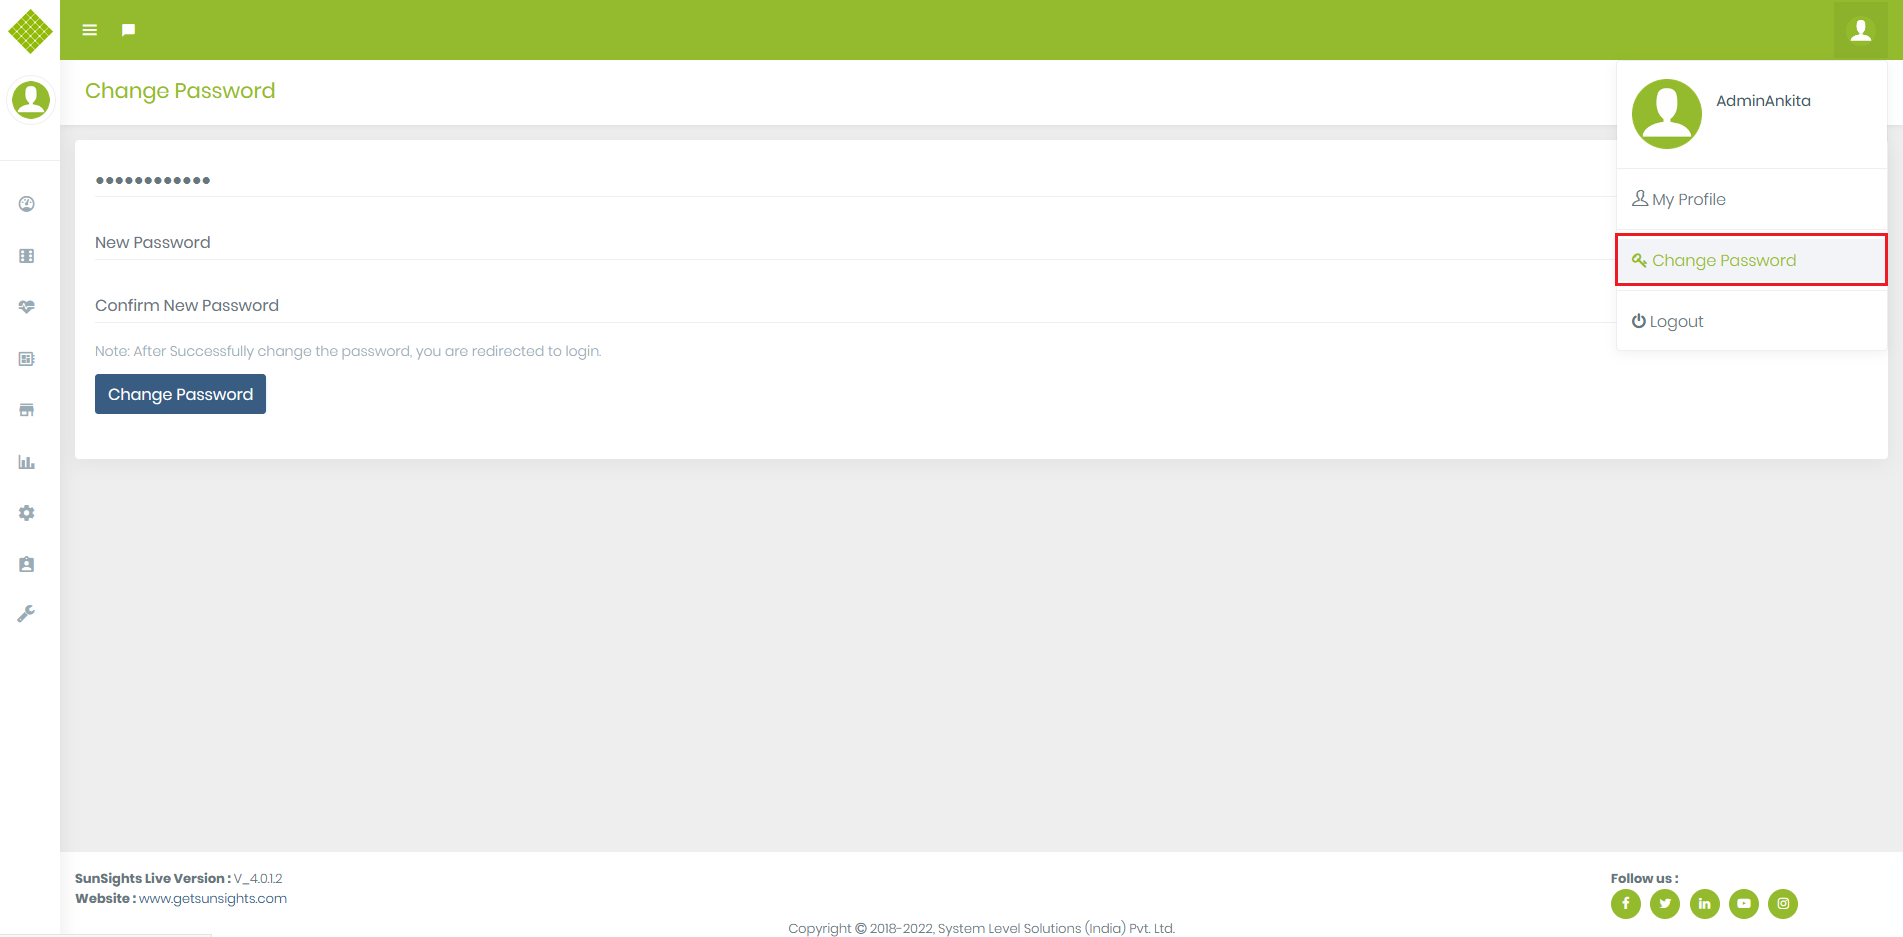
- If you want to change your current password than click on the change password option.
- All fields are mandatory in this form.
- In change password page user have define their New Password and Confirm New Password.
- Their current password is display on an Old Password text.
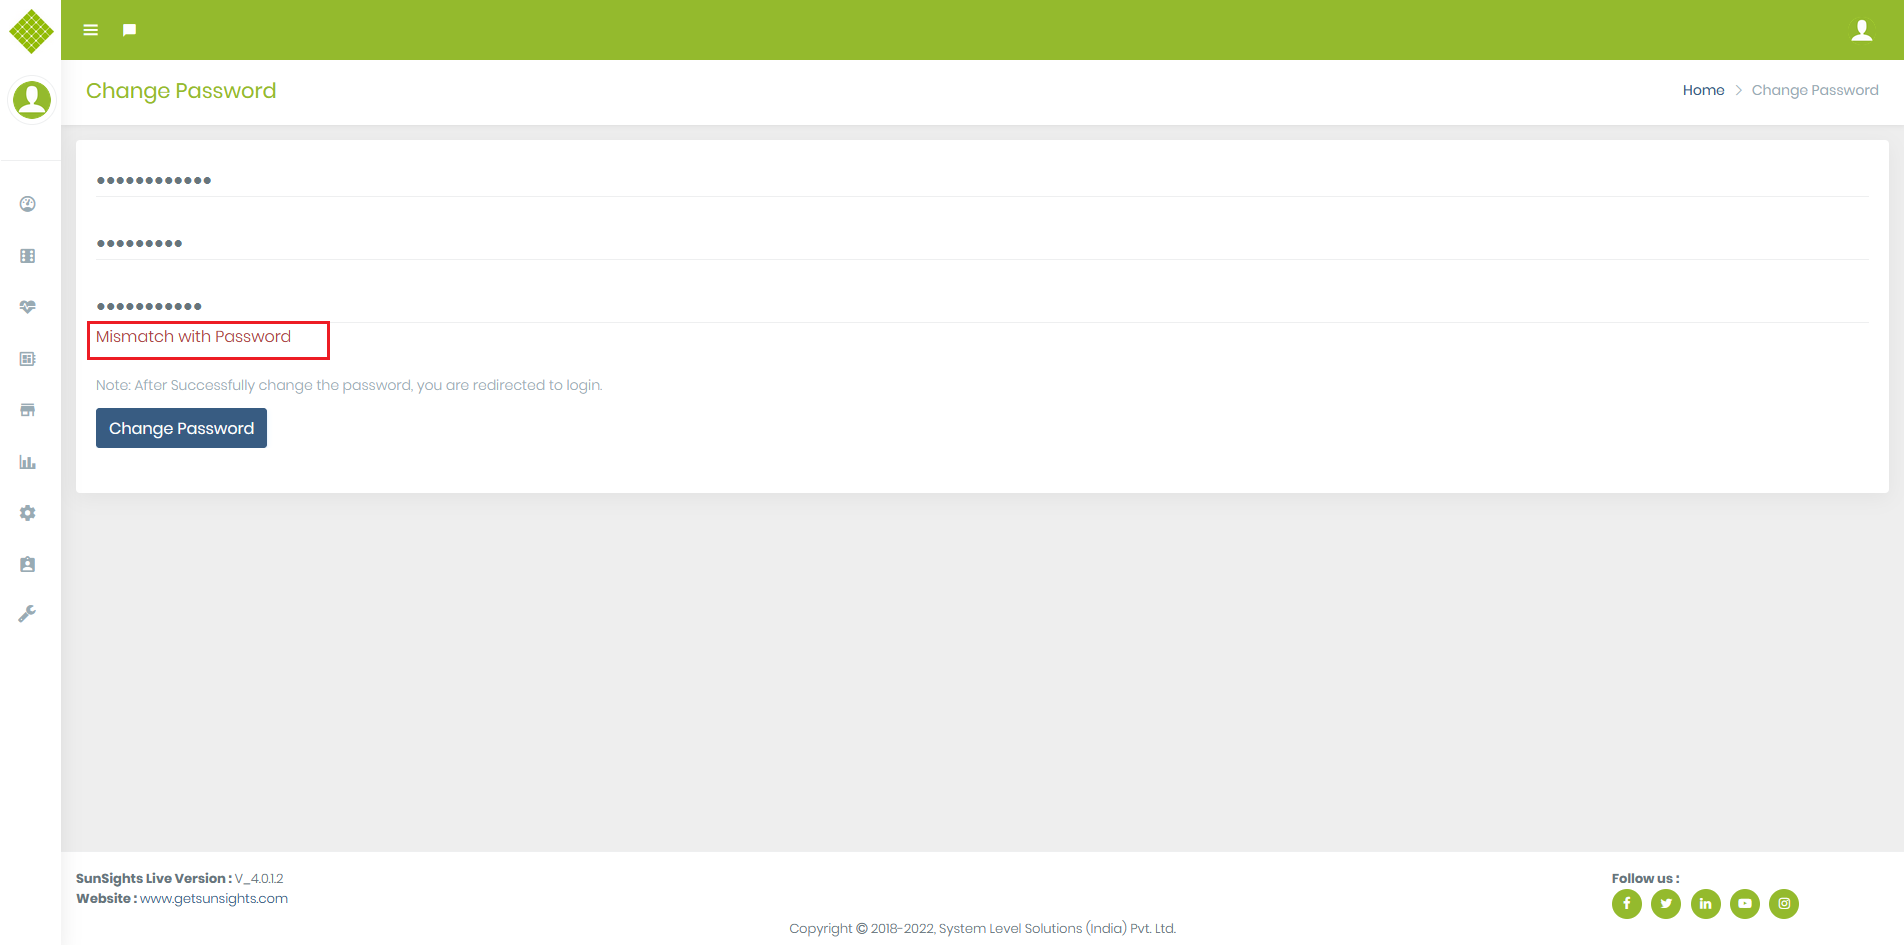
- Password must be 8 to 18 character long and contain at least one number, special character and an uppercase letter otherwise it will give error message.
- If you write different New Password and Confirm New Password than it will give password mismatch error, both should be same.
- If password is change successfully than it will directly redirect to login page and user have to login with that newly created password.
Site Management
Get Site List
- Open SunSights Live portal (https://live.getsunsights.com/) in the browser
- Login with Admin/Supplier/Customer (with multiple sites) Credentials. You get the dashboard with specific menu options
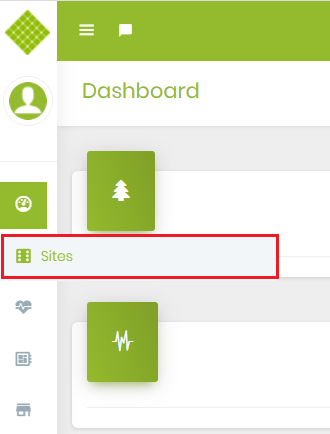
- Click on Site. It will open the Site list.
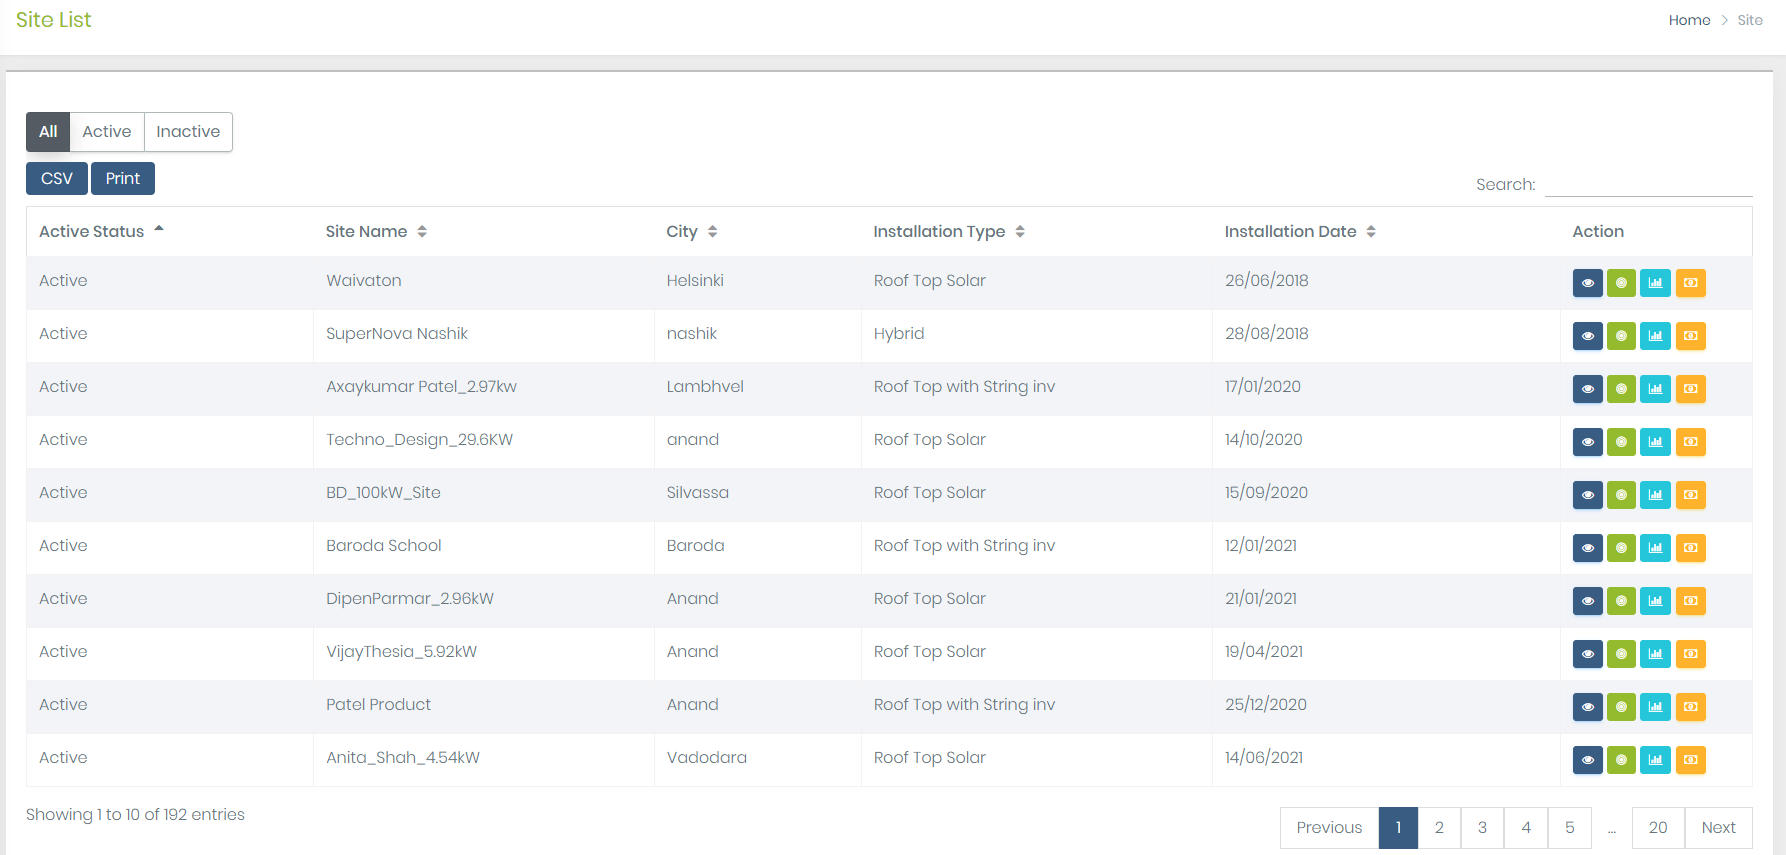
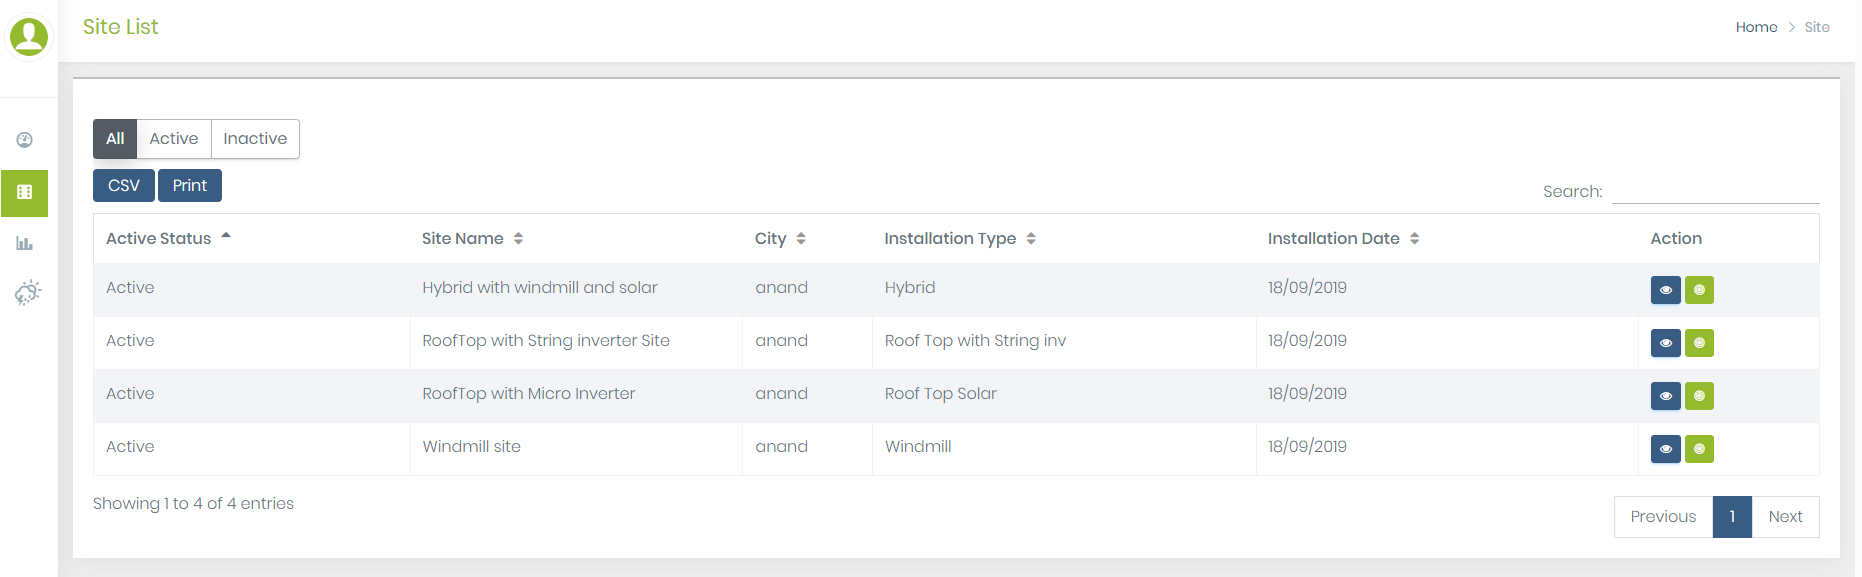
- You get a list of the site with the following options.
- Note: Guest User does not get all above option
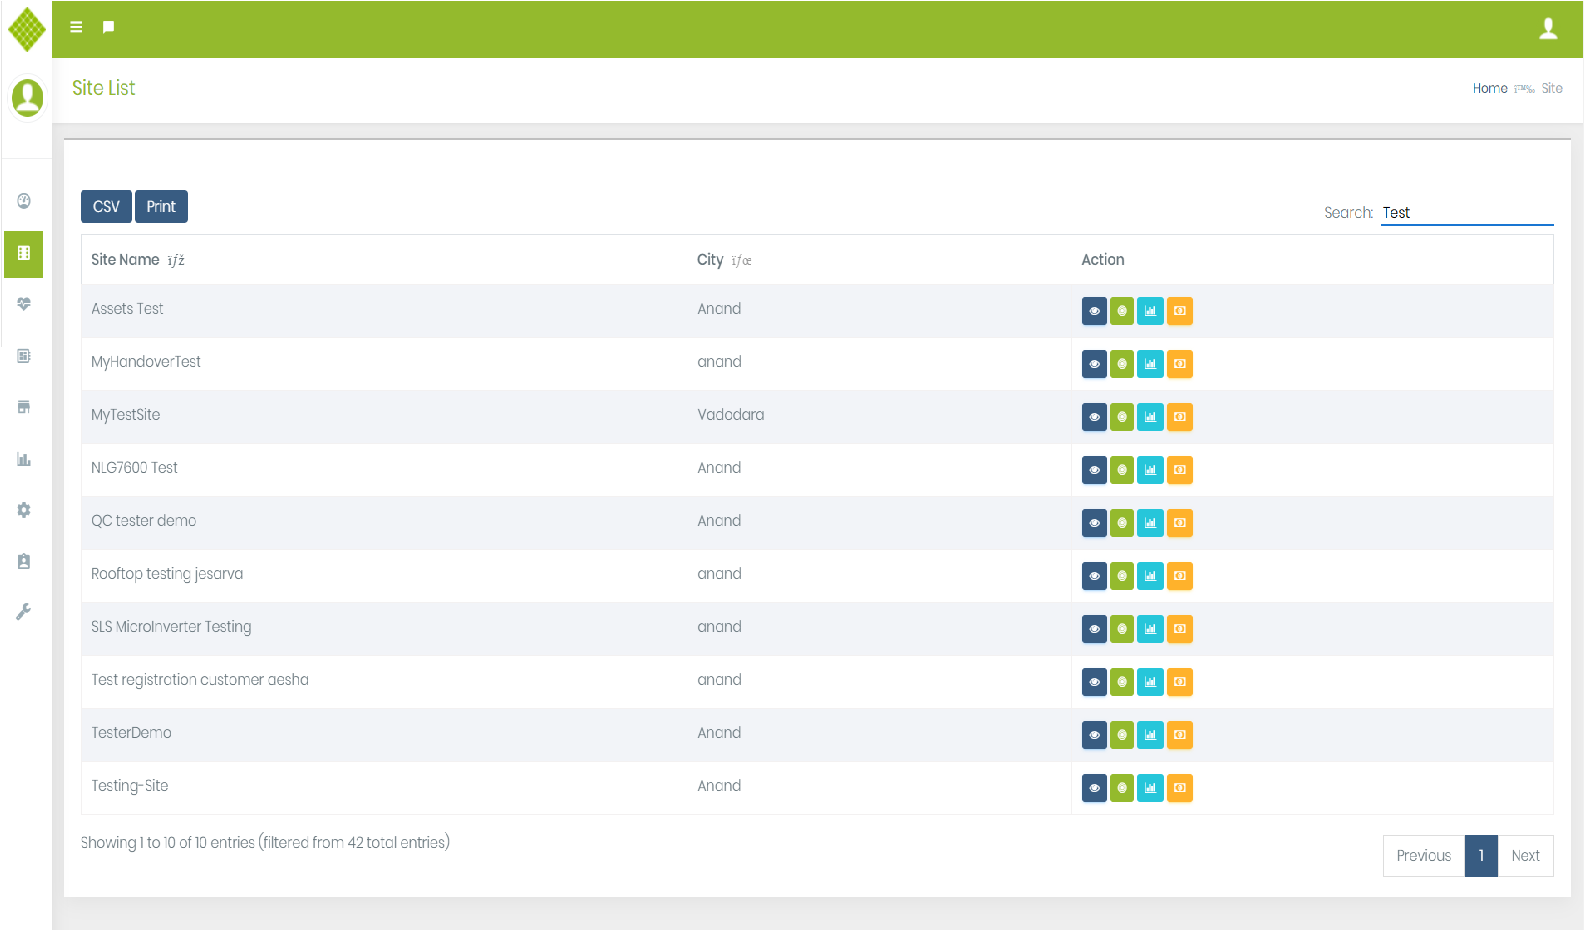
- The site list table provides a search feature using that you can reach fast to the particular site You can start type site name in search and you get the filter out the list of site.
- Also, you can copy site list content, download CSV file and directly print the site list from the portal
- Users get maximum of 10 Sites in the list for more sites they can navigate using pagination provided at bottom of the table.
 :
:
 :
:
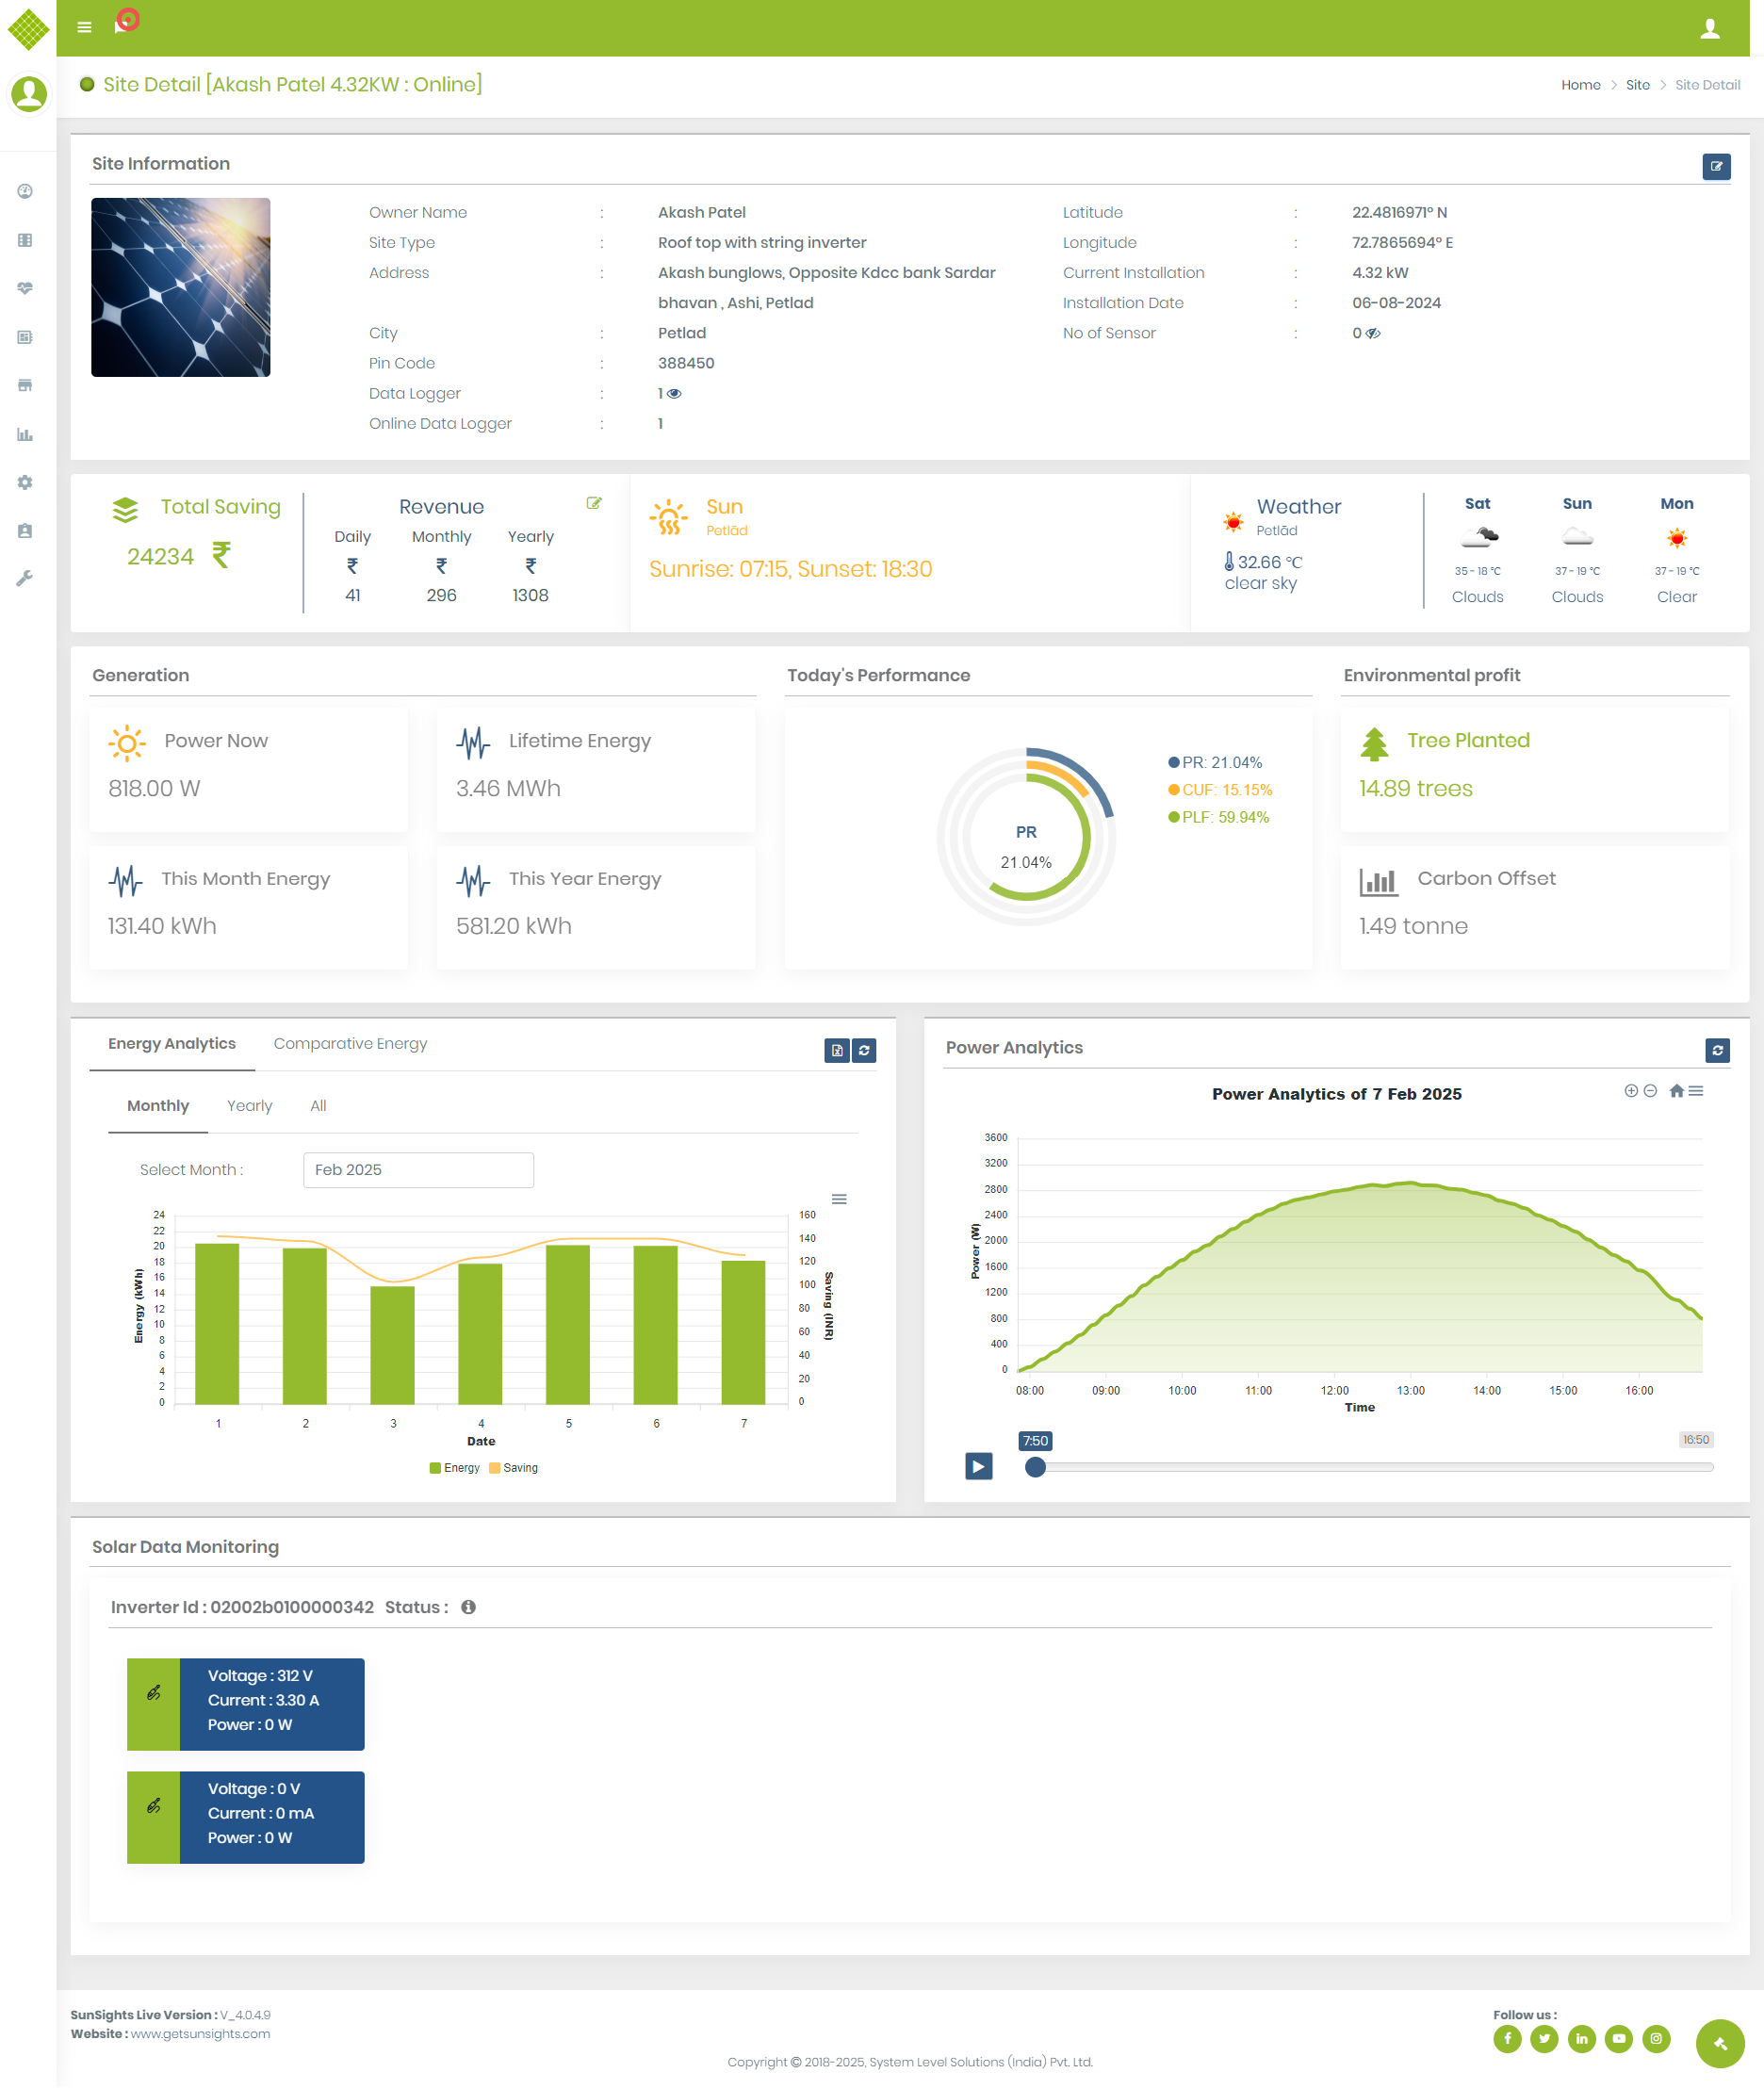
Get Site Detail Dashboard
There are total 5 types of the site available and based on thair type site dashboard contain different information. From this page, you can do your site analytics.
-
Click on
 from site list you get the sitedetails, dashboard should be differentiate as per type of site.
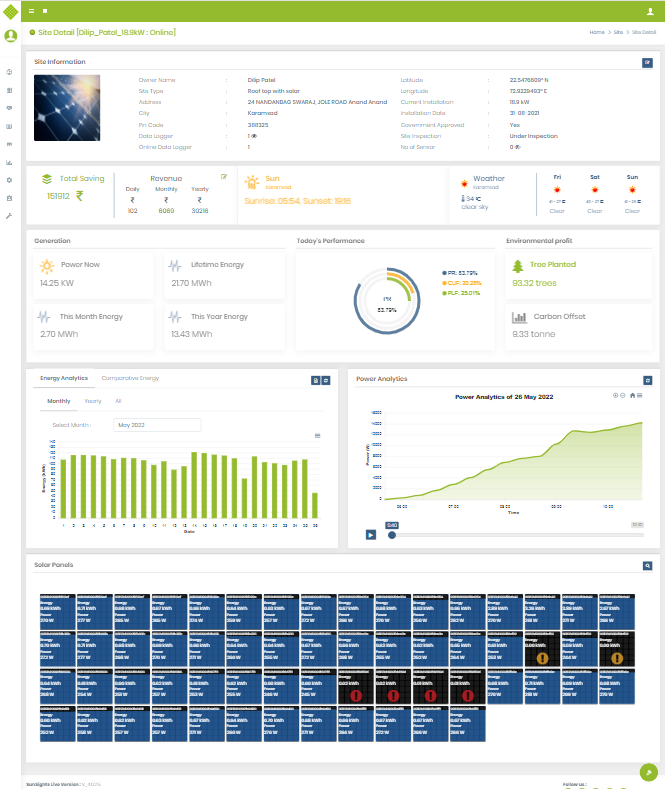
Rooftop Site Dashboard (Micro Inverter and String Inverter)
- The site dashboard contains information like:
- Site Infomration
- Widgets Data(Below to the site information site widgets details available like)
- Yearly saving: Display current year saving details graphically and in digits with View details and Save cost per unit rate feature.
- Tree Planted and Carbon off set data.
- Sunrise and Sunset details based on the location of the site.
- Weather and Humidity information.
- Power Now, Total energy, This month energy, This year energy of current selected site.
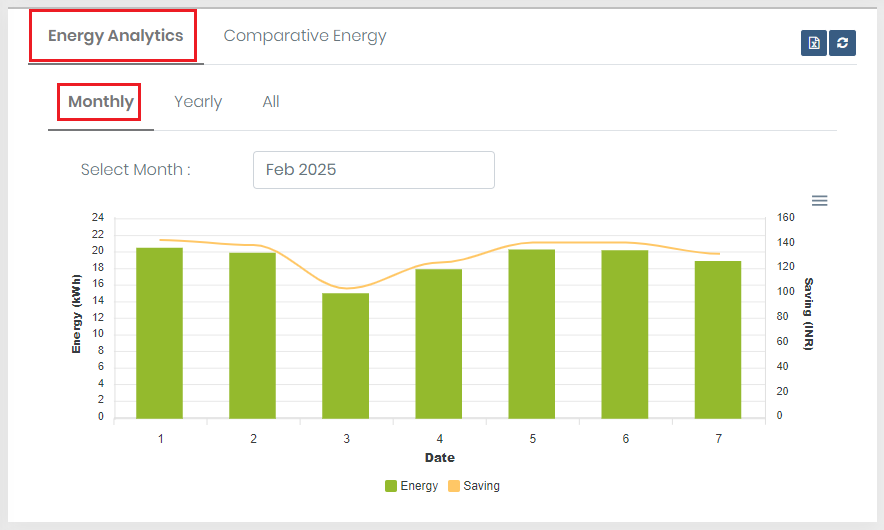
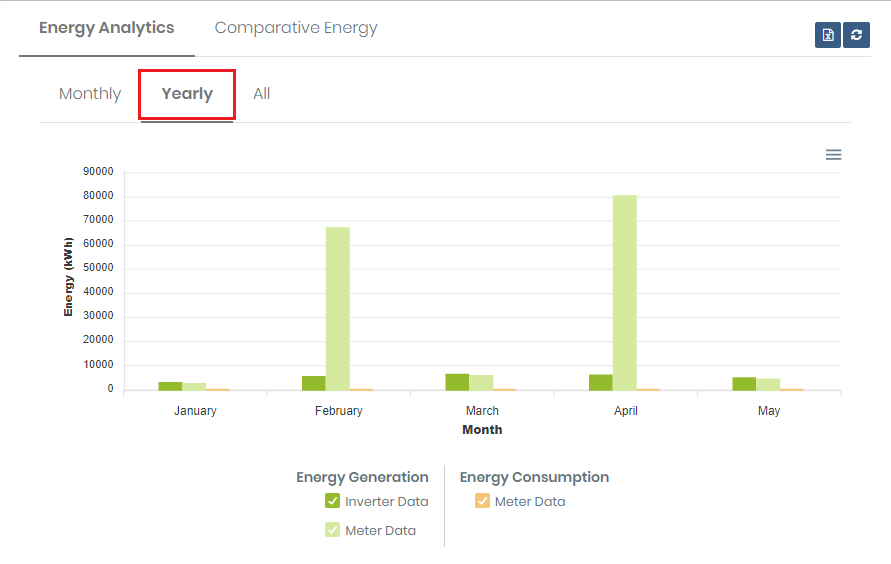
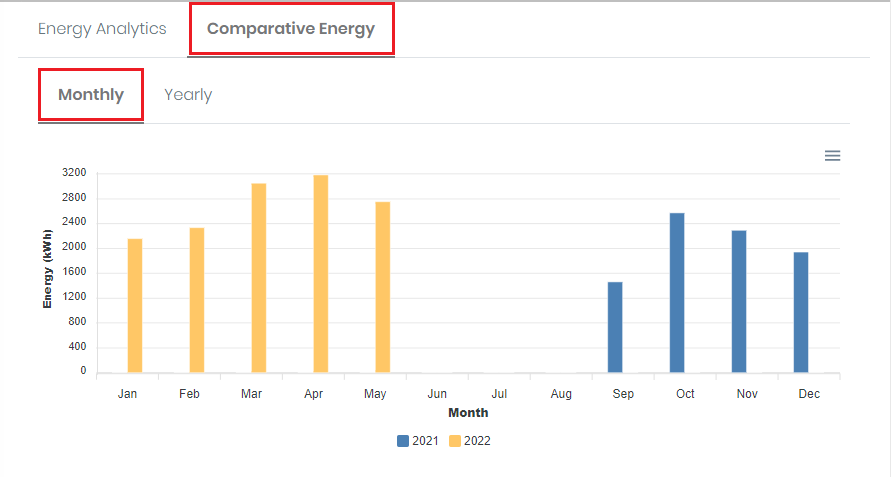
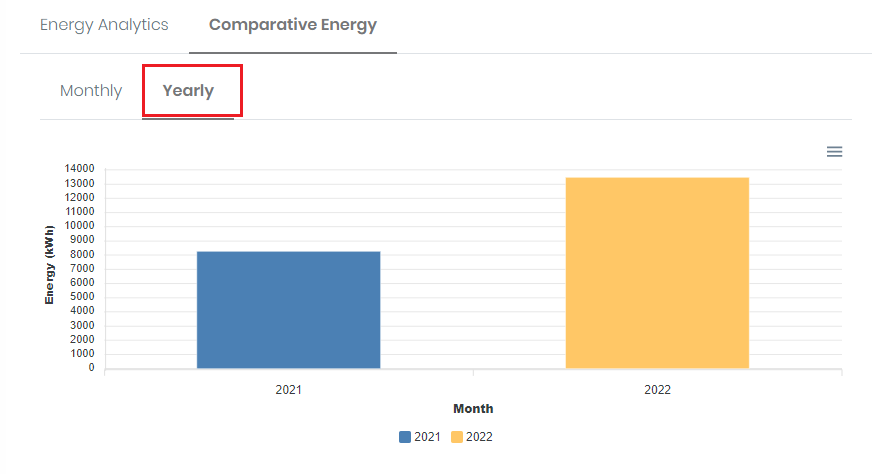
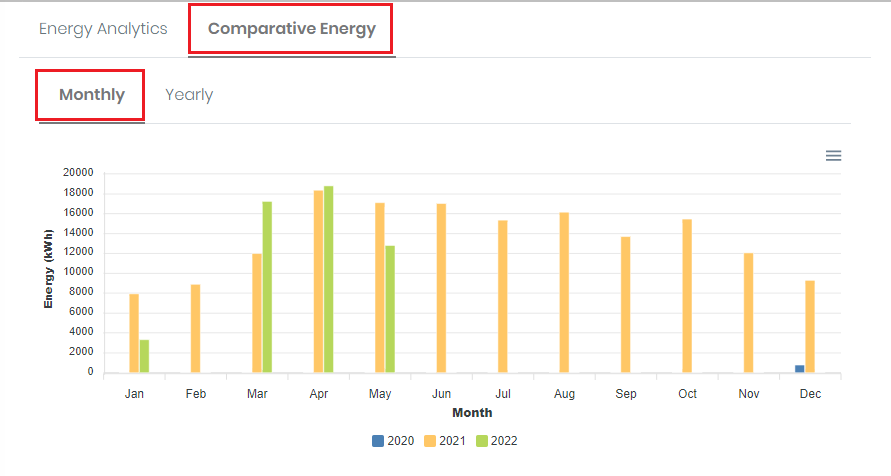
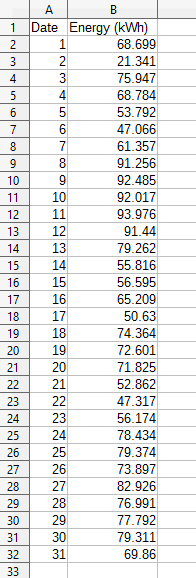
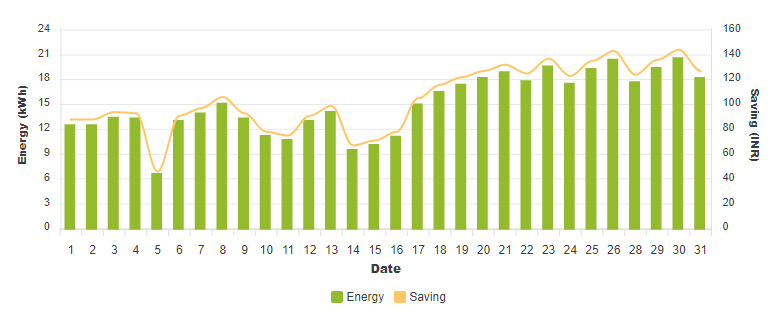
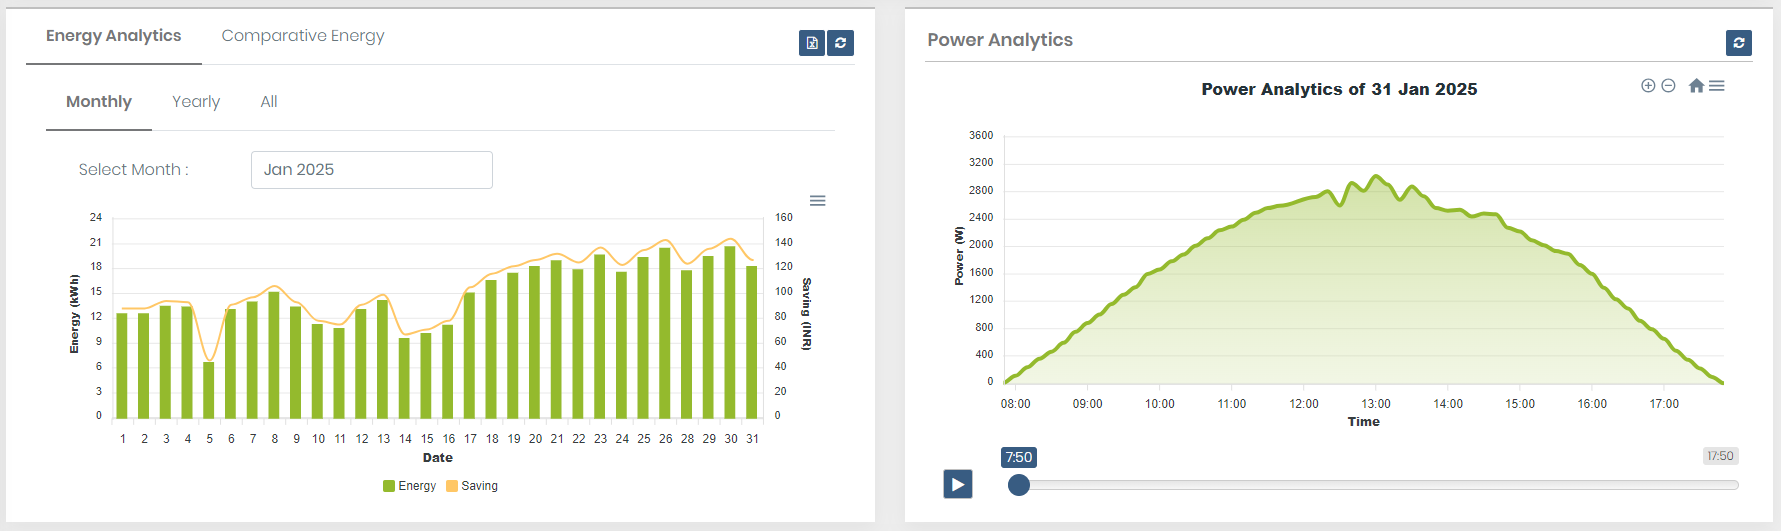
- Energy Graph (Below to the widgets data site contain Energy Analysis and comparative Energy graph.) 1.Energy Analytics for Site with no meter :
- Monthly report for current month:
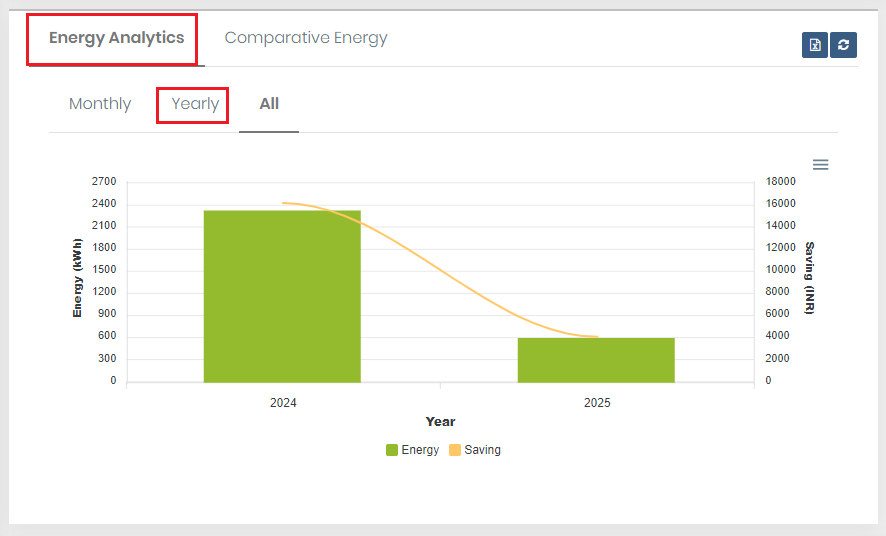
- Yearly report for current year :
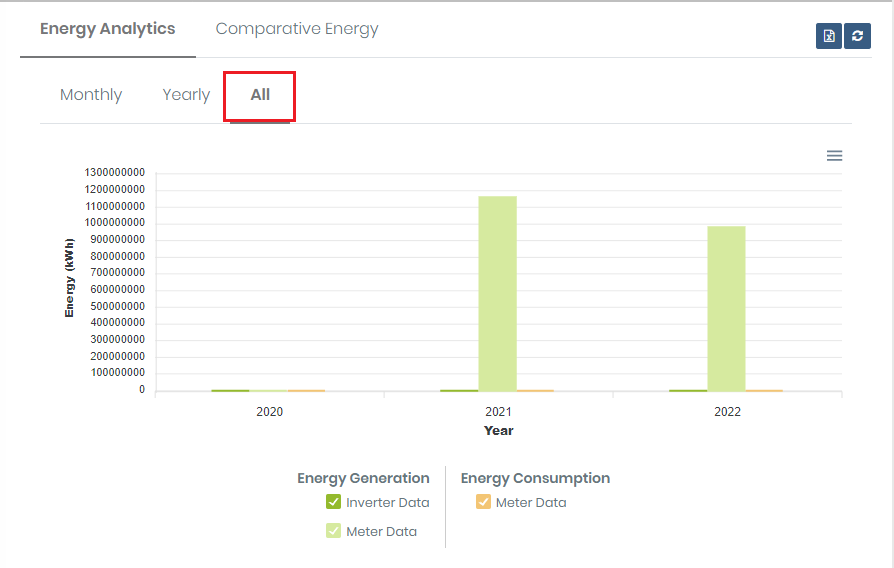
- All years report :
- Monthly report for current month:
- Yearly report for current year :
- All years report :
- Monthly report for current month:
- Yearly report for current year :
- Monthly report for current month:
- Yearly report for current year :
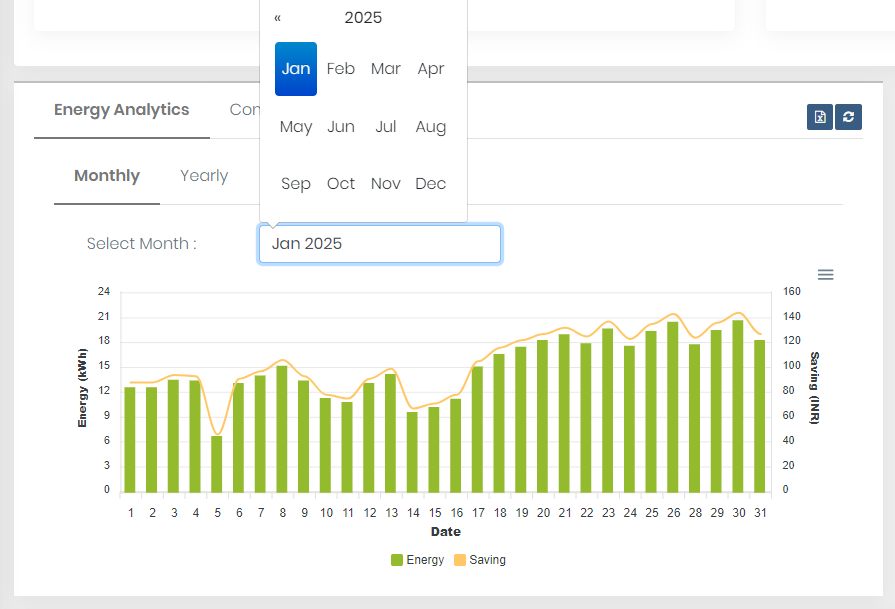
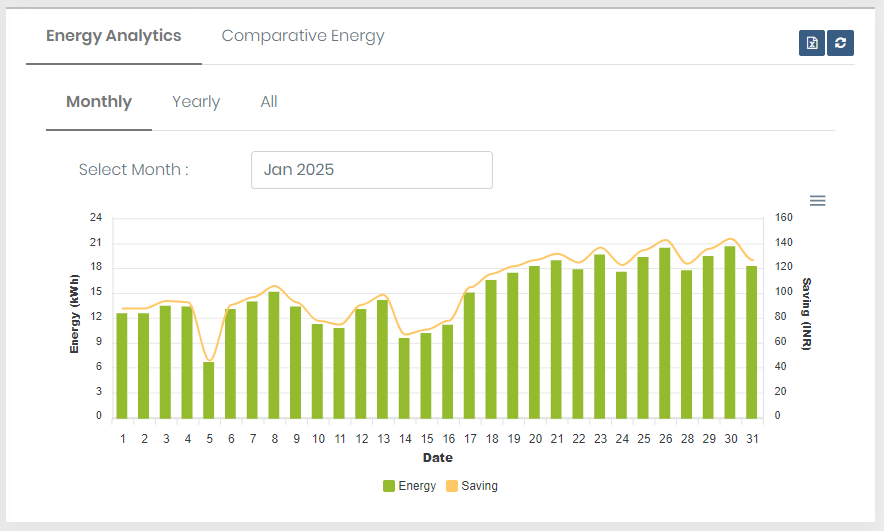
- By default when site details page open Energy generation graph display current month data (All days (up to current days) of current month). Month name is displayed in select month value.
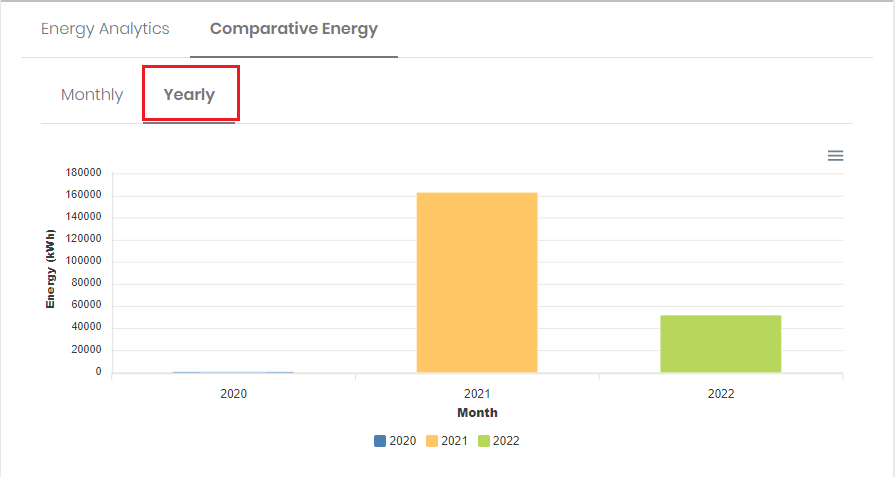
- Here users can Get Monthly(By default selected), Yearly and All year data graphs by selecting that options.
- Select any month, which month data you want to see:
- Here Jan 2022 selected so the graph display that month's data.
- If you click on Refresh Button visible at the top right corner

- It will refresh the current month's data. If other month data visible on the graph then also after clicking the refresh button get current month data.
- Now click on the Export button

- Click on the excel sheet to get energy data. (Get an Excel sheet of the selected option. If you had selected the Yearly option then get an excel sheet of yearly data. By default get monthly data)
- Click on
 to download the energy graph svg file, we can open that downloded file in browser.
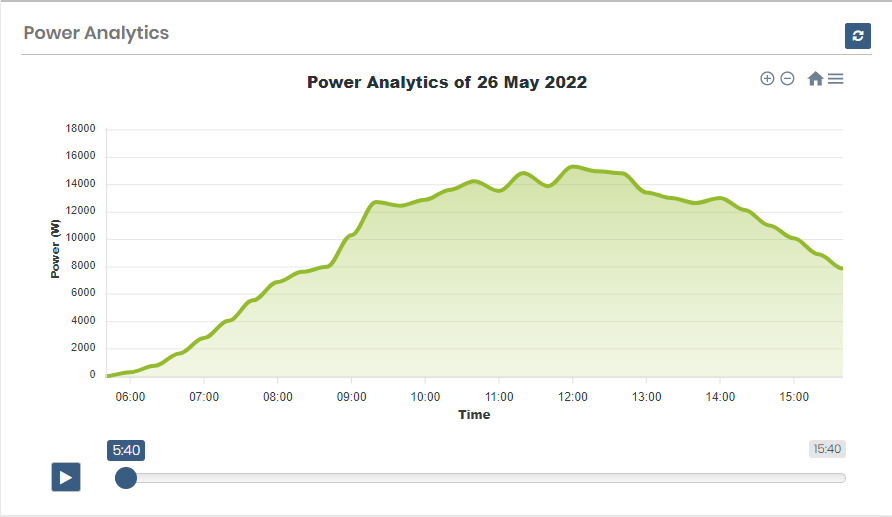
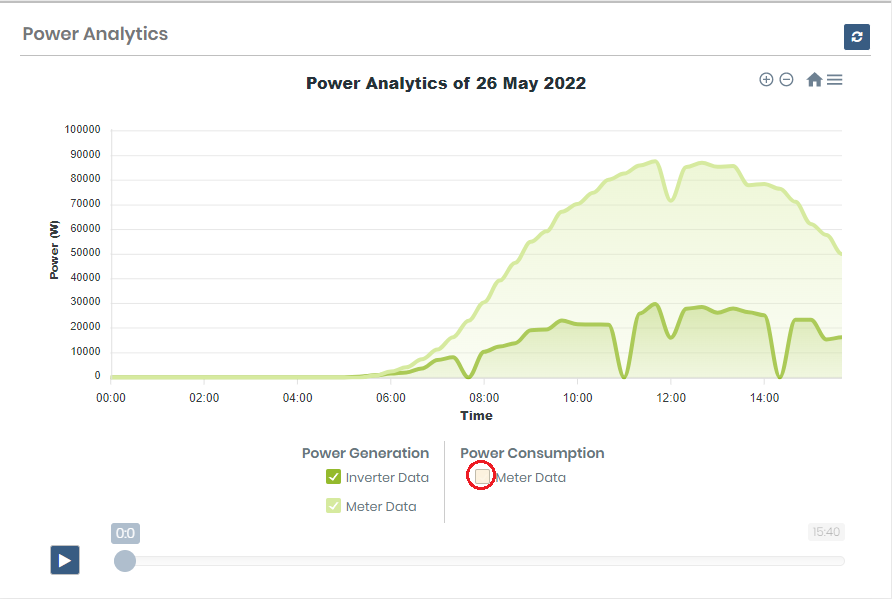
 - Power Graph: (Power graph of the current day. Get more details of Power Production) 1.Site with no meter
- By default, when the user request site details the power analytics graph displays current day data if current day data not available then displays the last received data. It displays heading with the date.
- In the graph x-axis display Time and Y-axis display Power.
- The graph provides zoom in/out and resets functionality. Also, provide download SVG file functionality.
- Click on to download the power graph svg file
- Also provide Power Graph play feature with forwarding, backward, and pause functionality
- If you click on Refresh Button visible at the top right corner it will refresh current displayed data.
- If you select another day's energy data from energy analytics...power analytics will be changed to selected date data. Here select 22nd day.
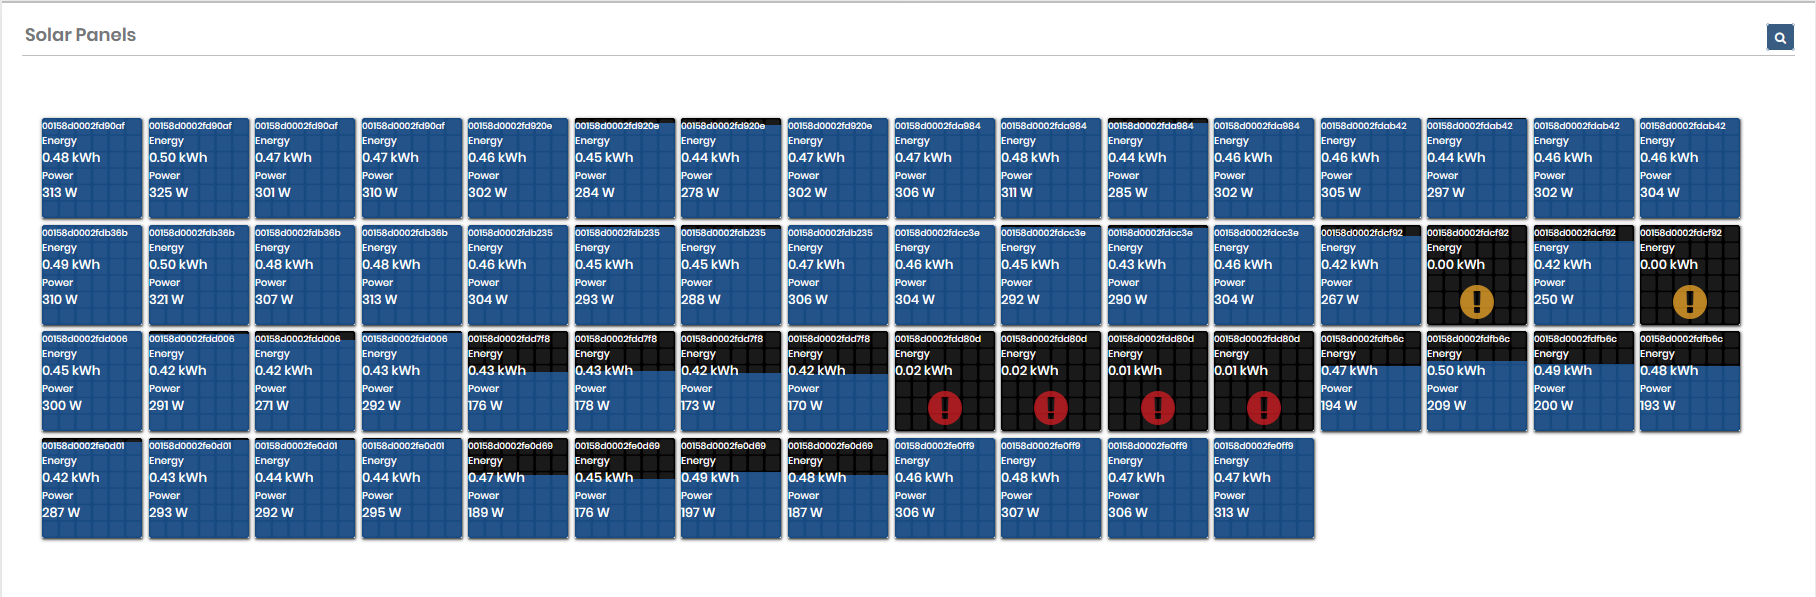
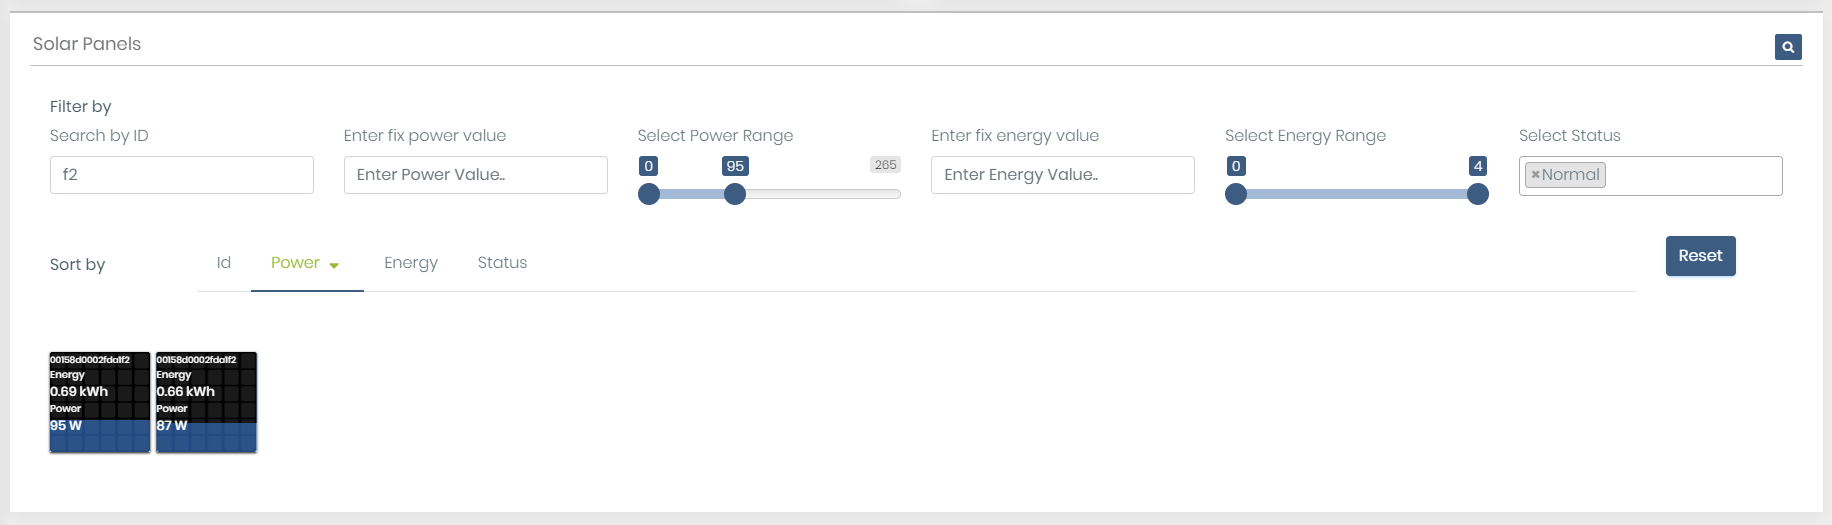
- Panel View (User gets Panel view in the site details page of a specific site.)
- Microinverter Panel view
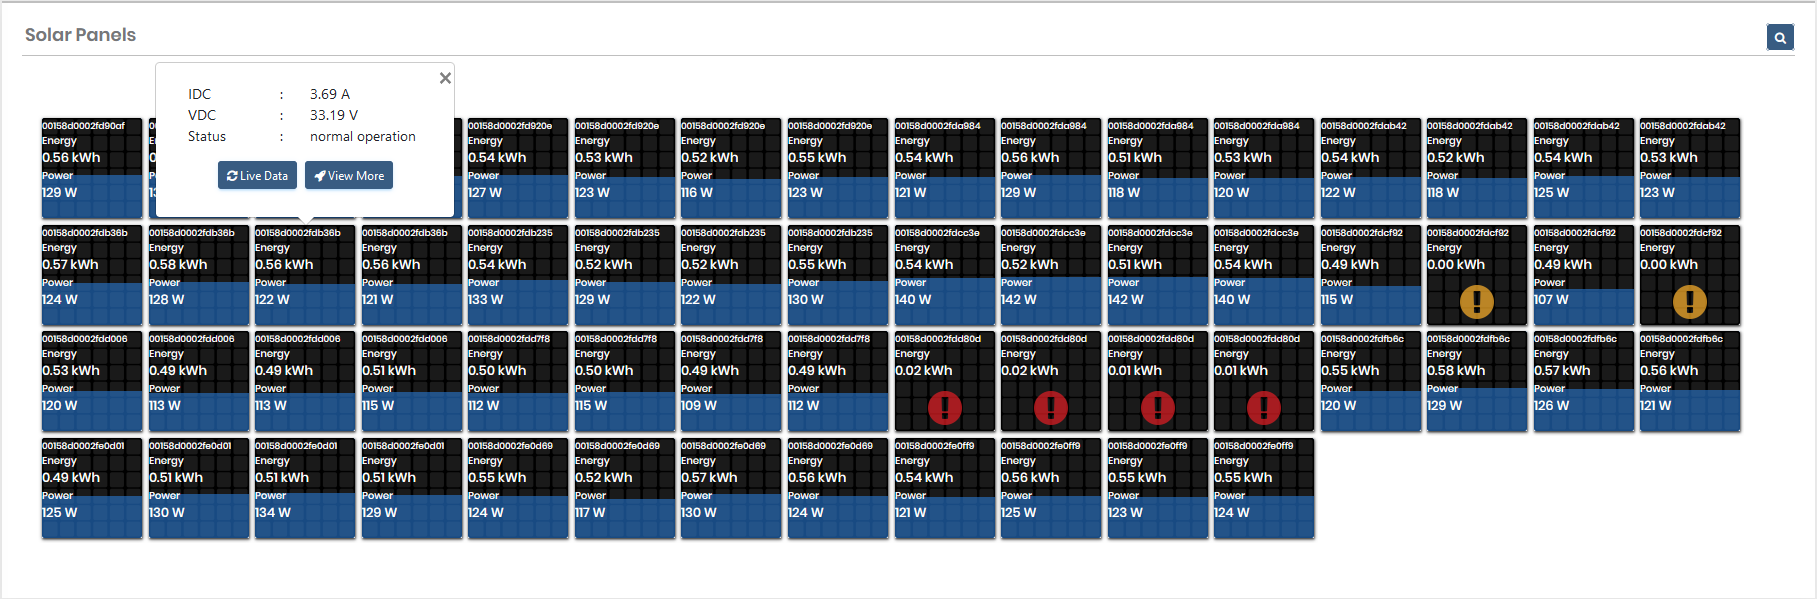
- Panel Over view
- Microinverter panel view provide panel filter and search feature
- Here get the panelist which inverter id contains "f2", power range should be 0-95, and panels should be Normal. Also, sort by power and arrange in descending order
- Click on any Panel
- You get pop up which display IDC, VDC and Status of a selected panel with “Live Data” and “View more” buttons only for Admin, supplier, and customer (Guest user does not get these button). Buttons only visible for the current day’s panel selection.
- Click on “Live Data”. It will refresh the requested live inverter data in the panel.
- Click on View More, It will display Inverter Details (Property and Data)
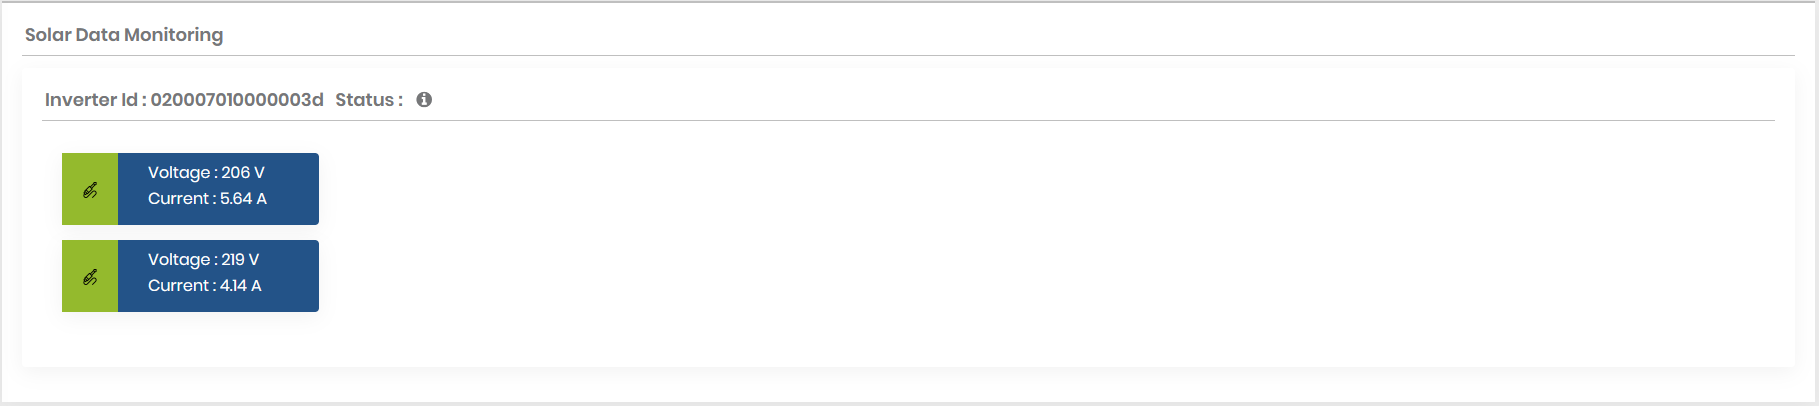
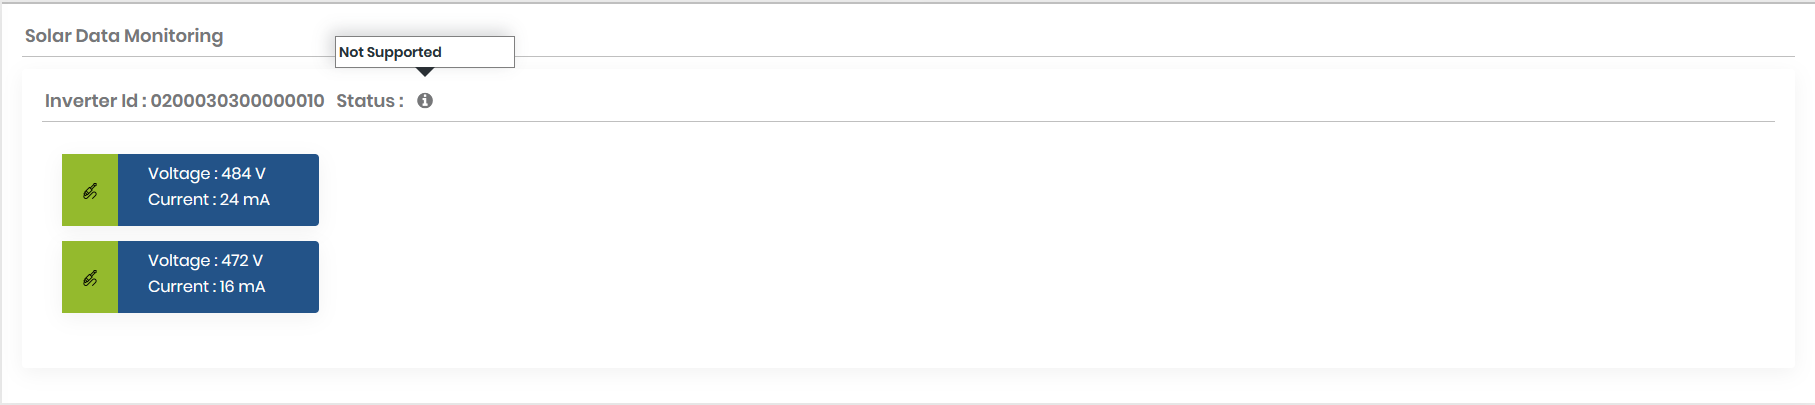
- String Inverter Panel view
- Following is the view of String inverter panel view if Assets management is done by Admin or supplier.
- In String inverter type site site contain Inverter wise MPPT Voltage and MPPT Current.
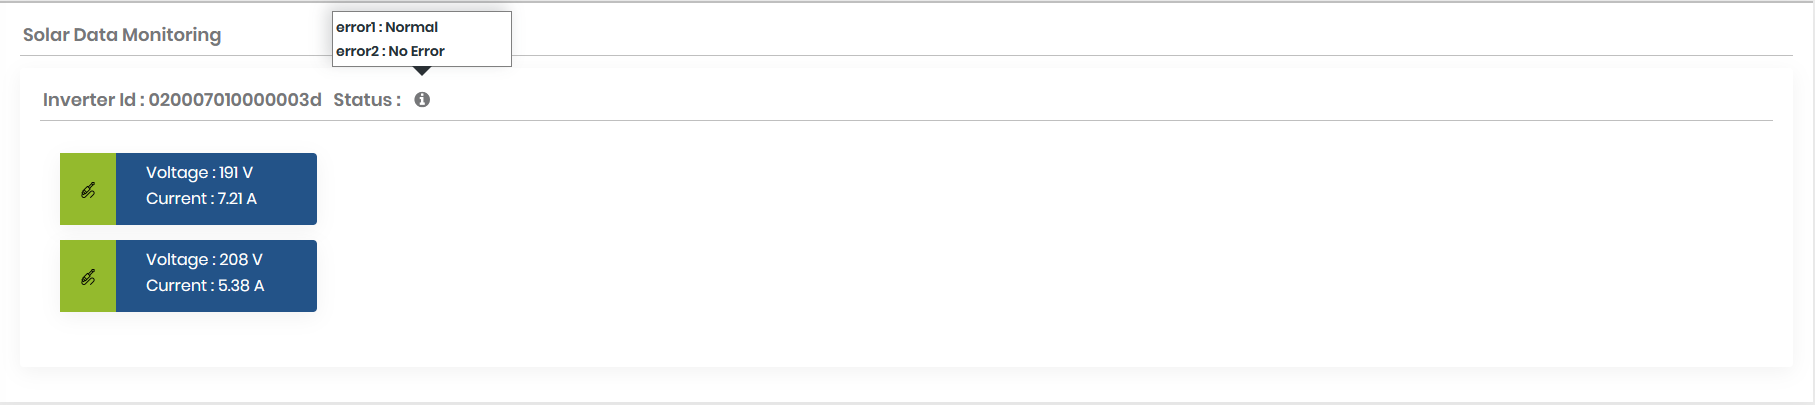
- Click on information icon of panel it will display type of error if its has error.
- If panel has no error than it will display Not Supported message.
- Communication Diagnostic:
- Click on the right side communication icon. Get More details Communication Diagnostic
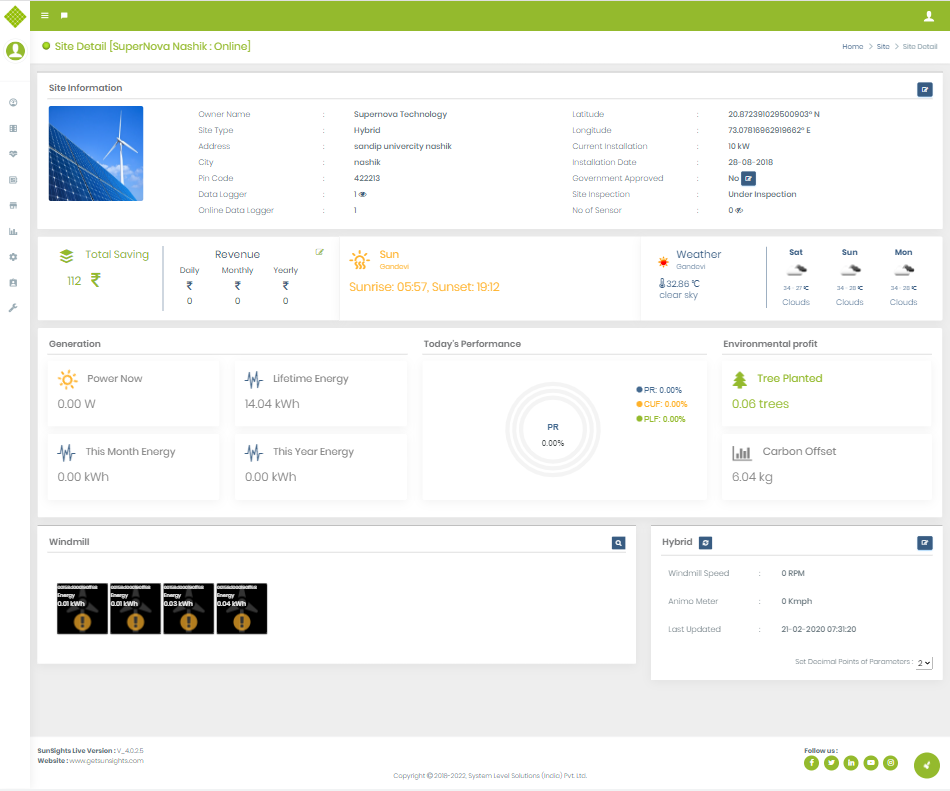
Hybrid Site Dashboard
- The site dashboard contains information like:
- Site Infomration
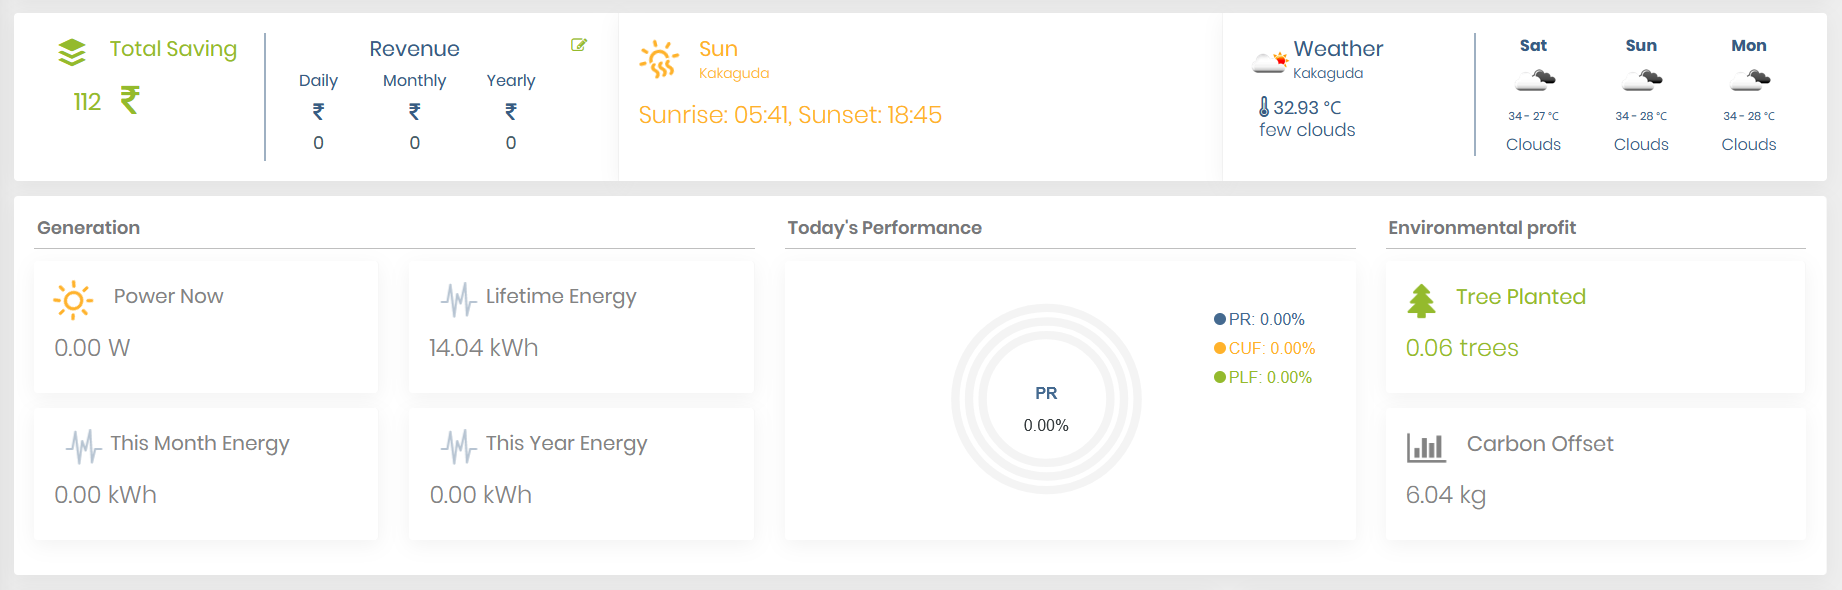
- Widgets Data(Below to the site information, widgets details available like)
- Yearly saving: Display current year saving details graphically and in digits with View details and Save cost per unit rate feature.
- Tree Planted and Carbon off set data.
- Sunrise and Sunset details based on the location of the site.
- Weather and Humidity information.
- Power Now, Total energy, This month energy, This year energy of the currently selected site.
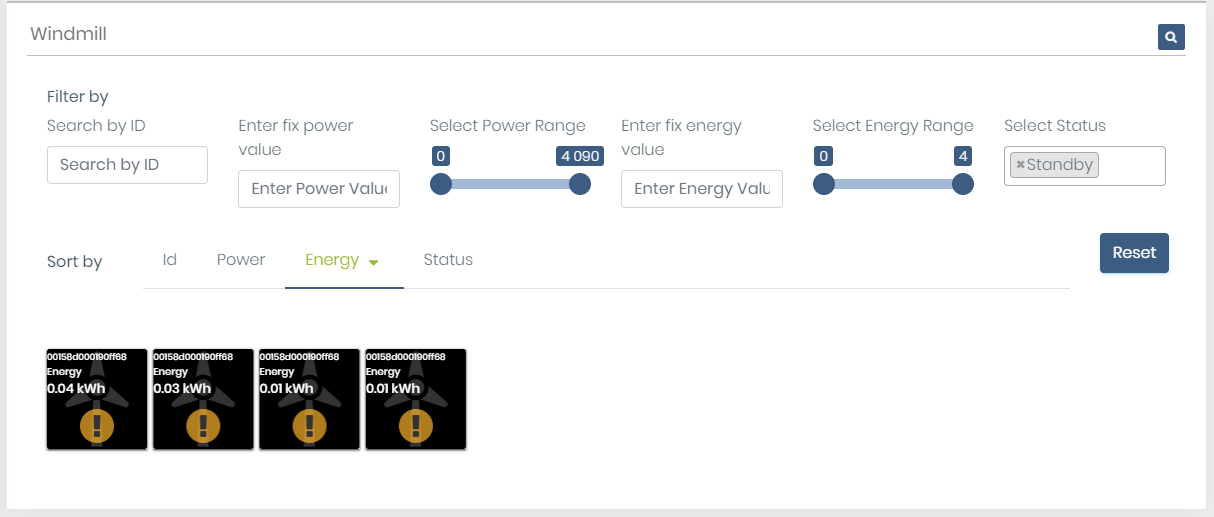
- Panel View (User get Panel view in site details page of specific site.)
- Panel Over view
- Panel view provide panel filter and search feature
- Here get the panelist which are on standby. Also, sort by energy and arrange in descending order
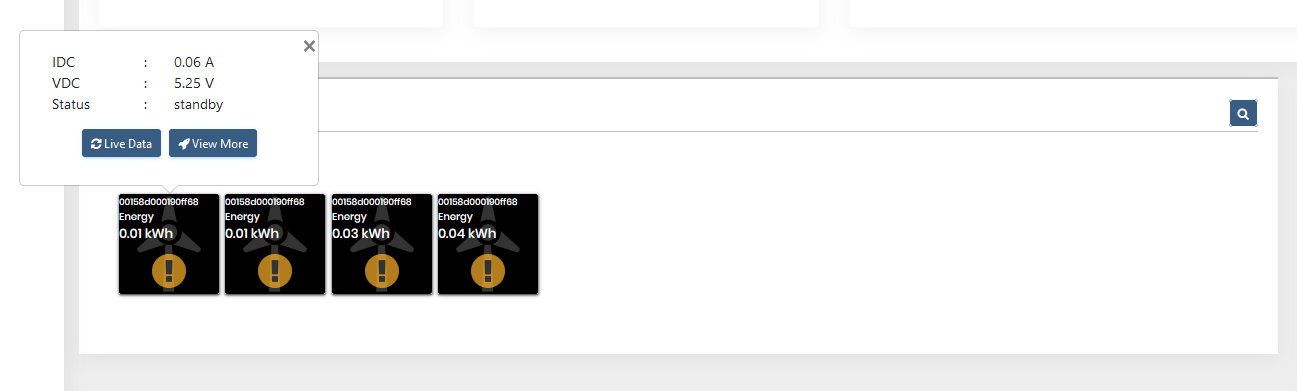
- Click on any Panel
- You get pop up which display IDC, VDC and Status of the selected panel with “Live Data” and “View more” buttons only for Admin, supplier, and customer (Guest user does not get these button). Buttons only visible for the current day’s panel selection.
- Click on “Live Data”. It will refresh the requested live inverter data in the panel.
- Click on View More, It will display Inverter Details (Property and Data)
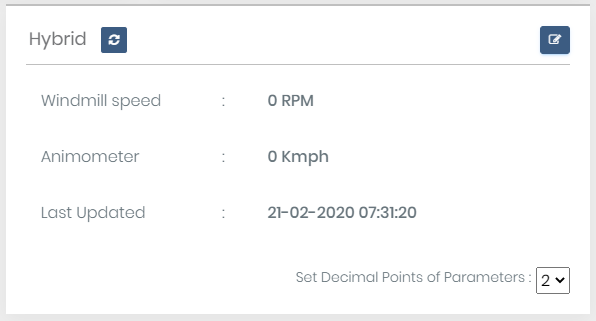
- Hybrid:
- Display windmill parameter details with Set Decimal Points of Parameters functionality to get a more accurate result (user can select from 2 to 6 decimal points).
- Using get refreshed data.
- By clicking
 button able to edit parameters but the only admin and supplier user can Set Windmill Parameter Click to get step for set parameter.
 - Communication Diagnostic:
- Click on the right side communication icon. Get More details Communication Diagnostic
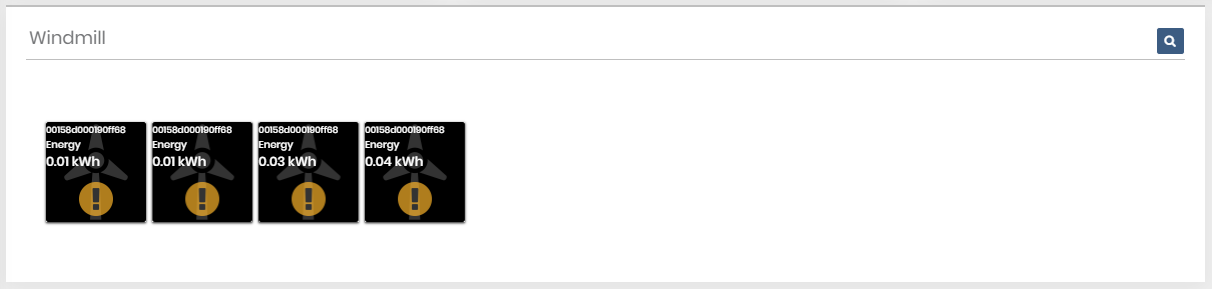
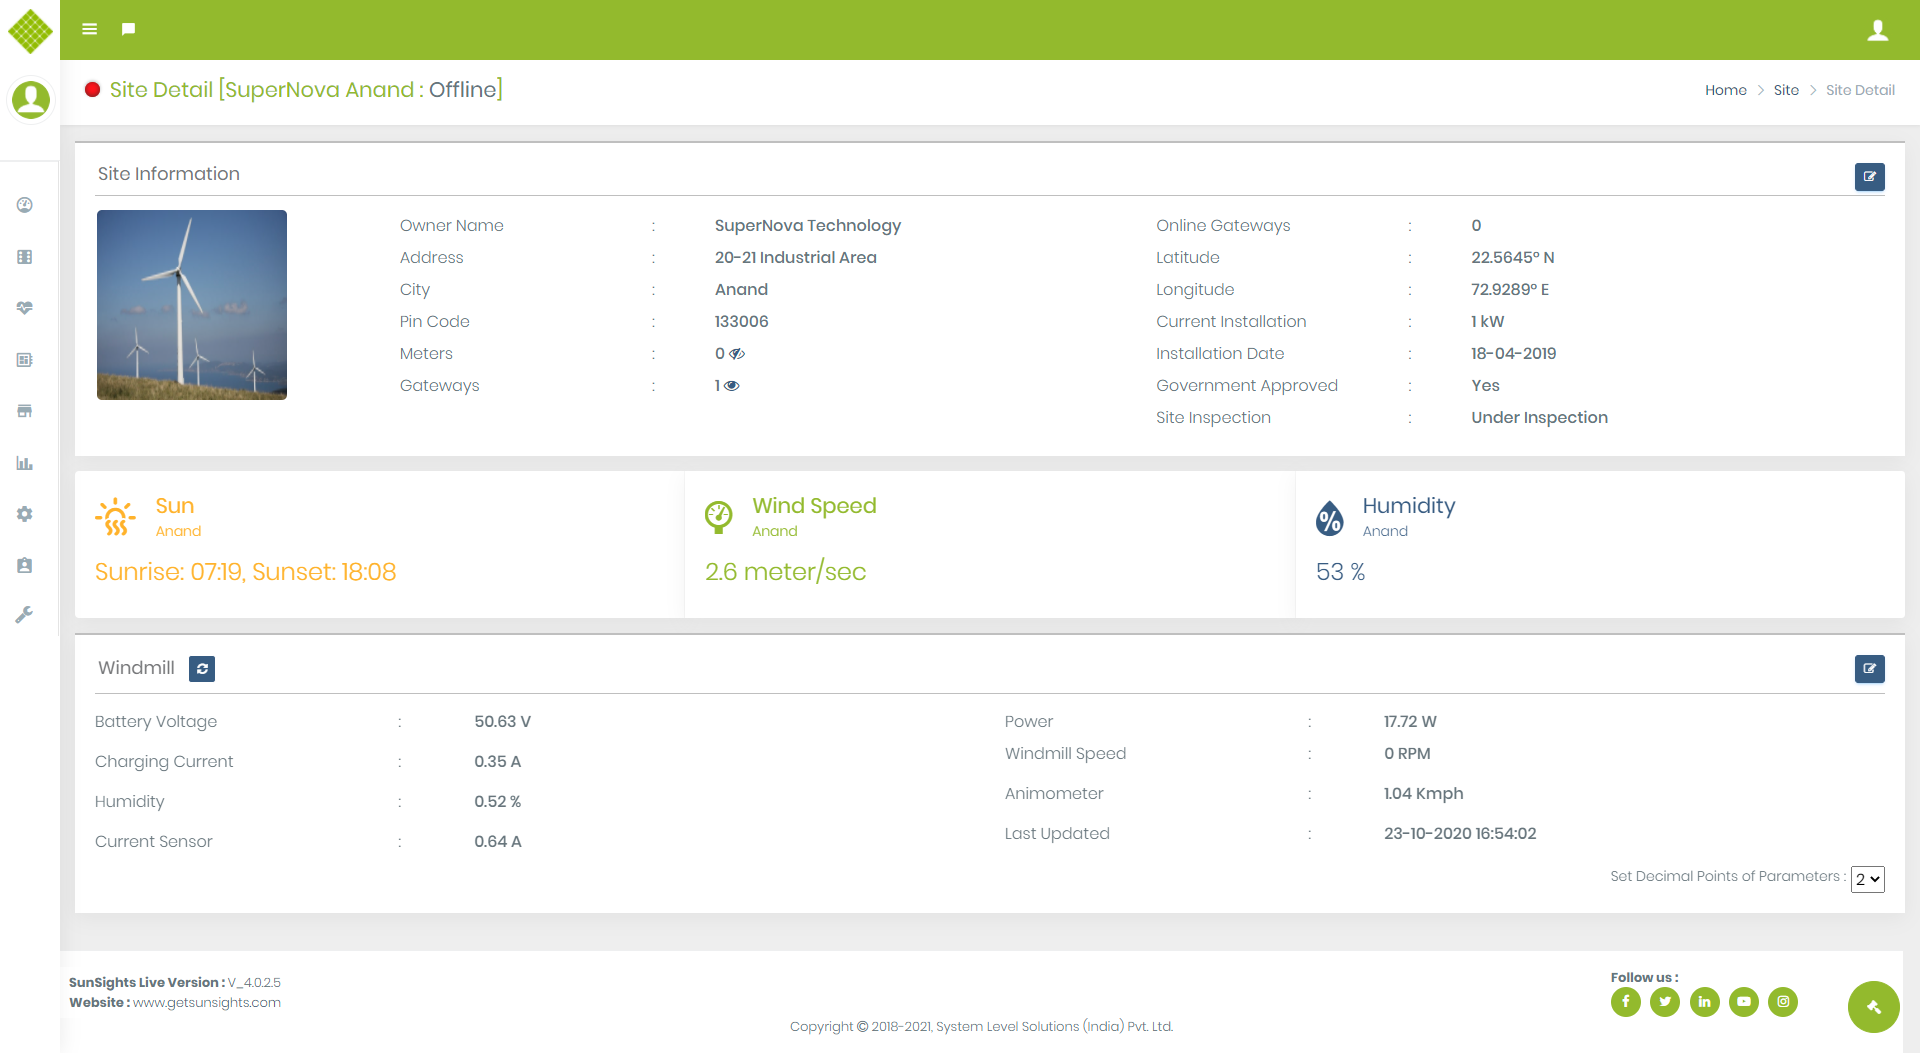
Windmill Site Dashboard
- Site dashboard contains information like:
- Site Infomration
- Widgets Data(Below to the site information site widgets details available like)
- Sunrise and Sunset details based on the location of the site.
- Weather and Humidity information.
- Windmill:
- Display windmill parameter details with Set Decimal Points of Parameters functionality to get a more accurate result (user can select from 2 to 6 decimal points).
- Using get refreshed data.
- By clicking button able to edit parameters but the only admin and supplier user can Set Windmill Parameter Click to get step for set parameter.
- Communication Diagnostic:
- Click on the right side communication icon. Get More details Communication Diagnostic
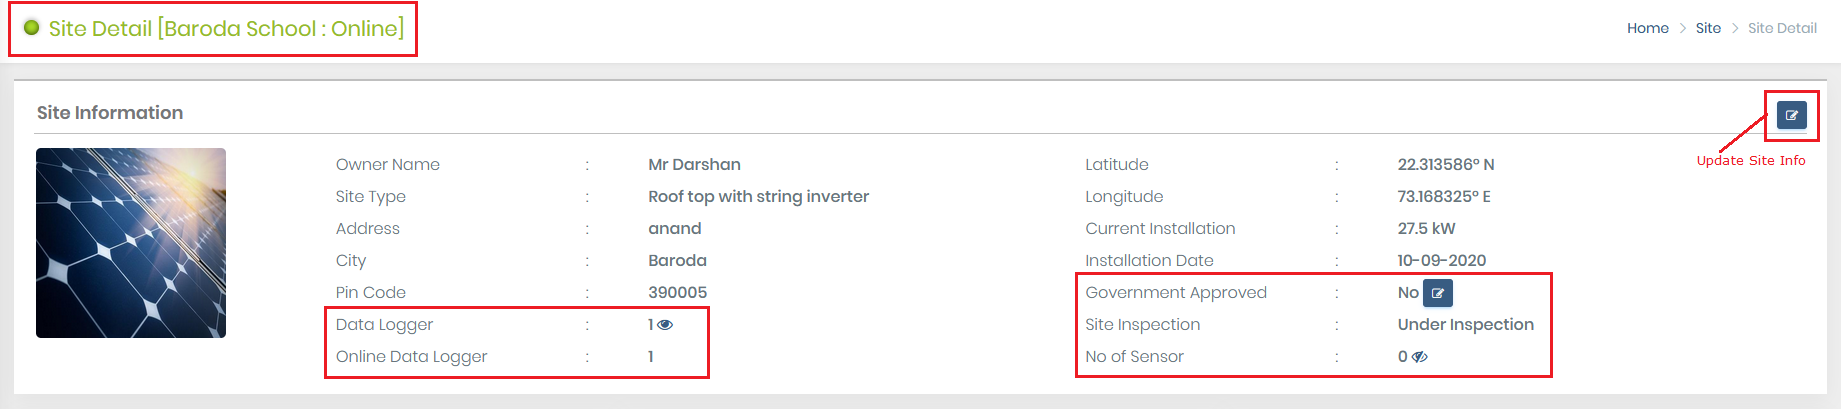
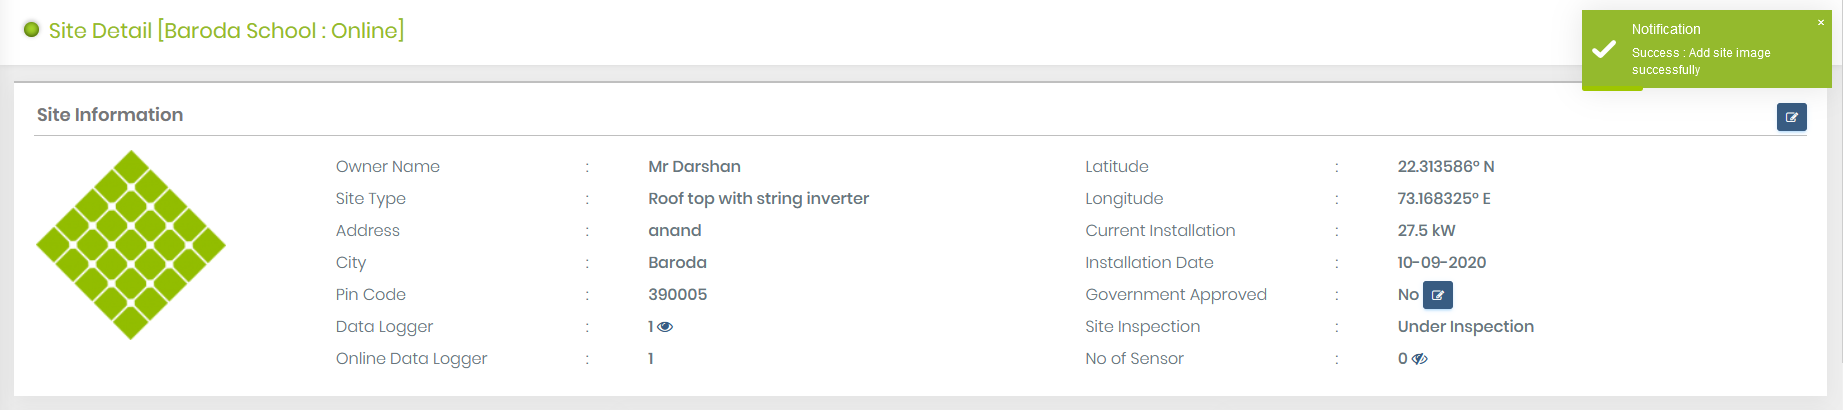
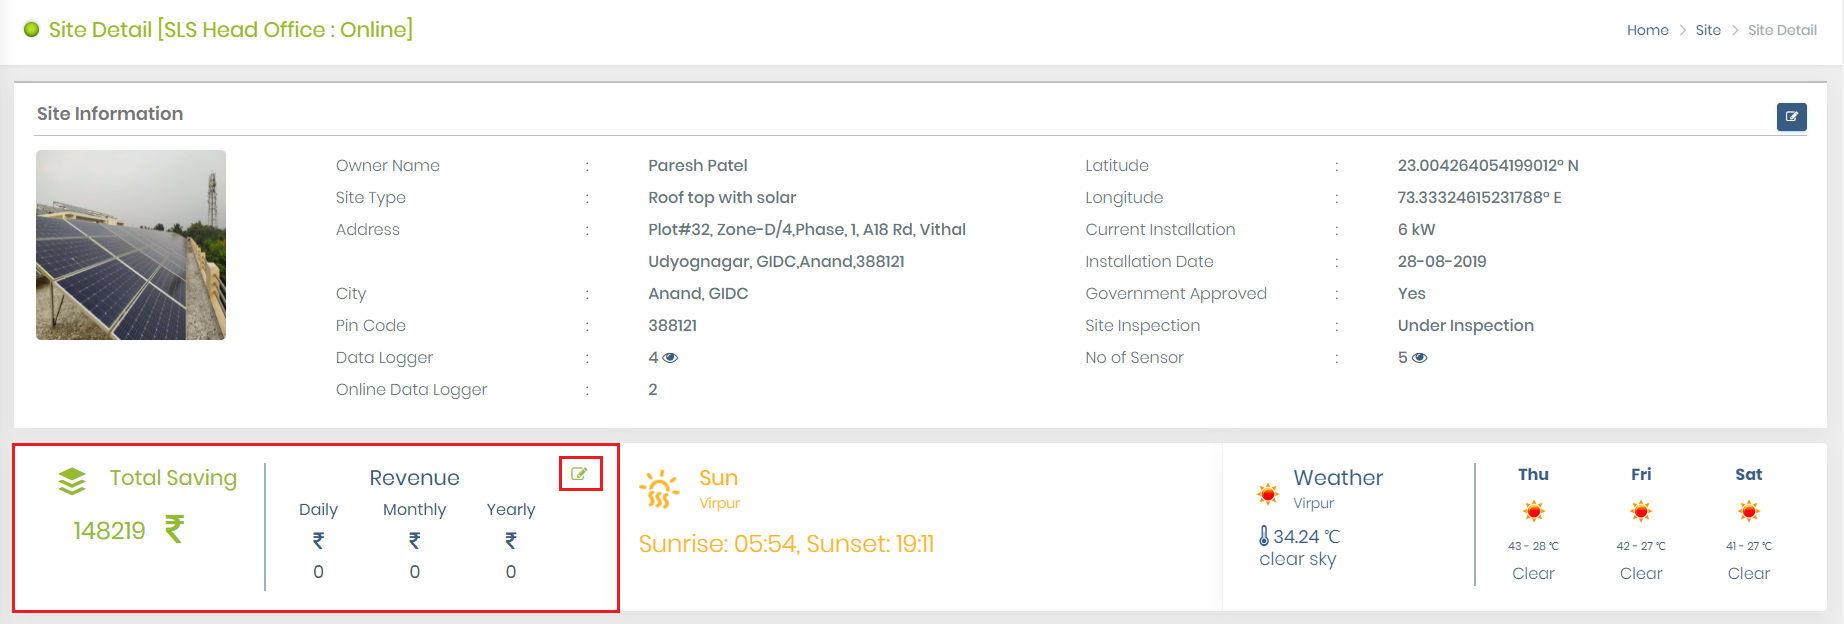
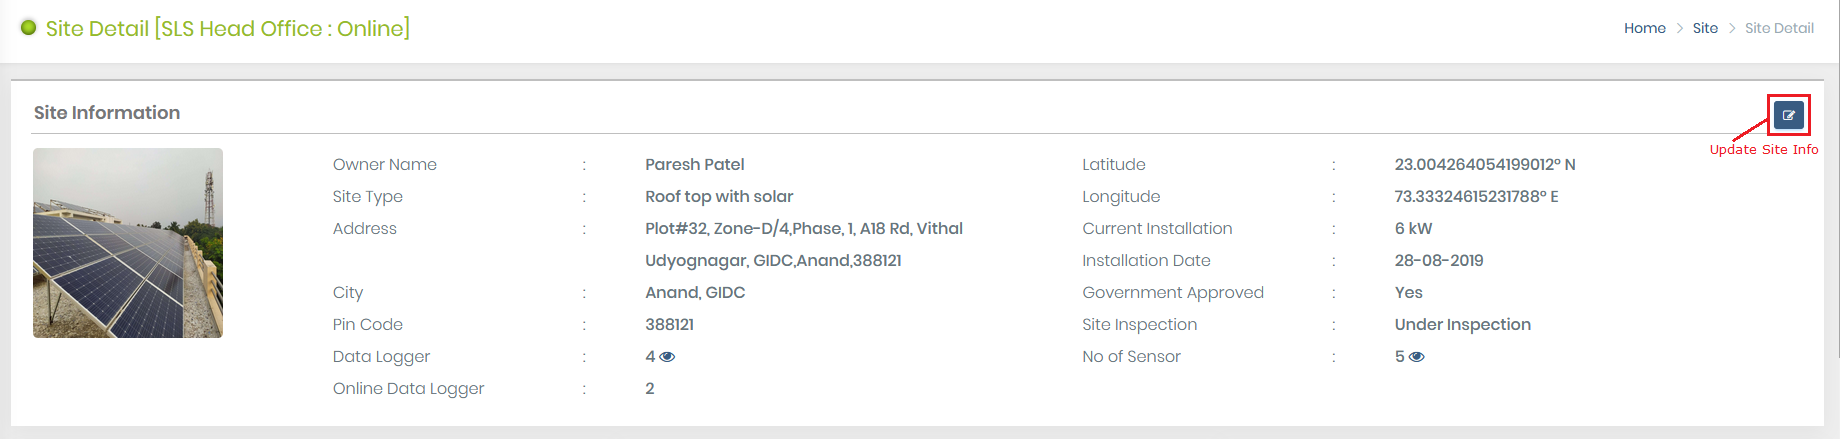
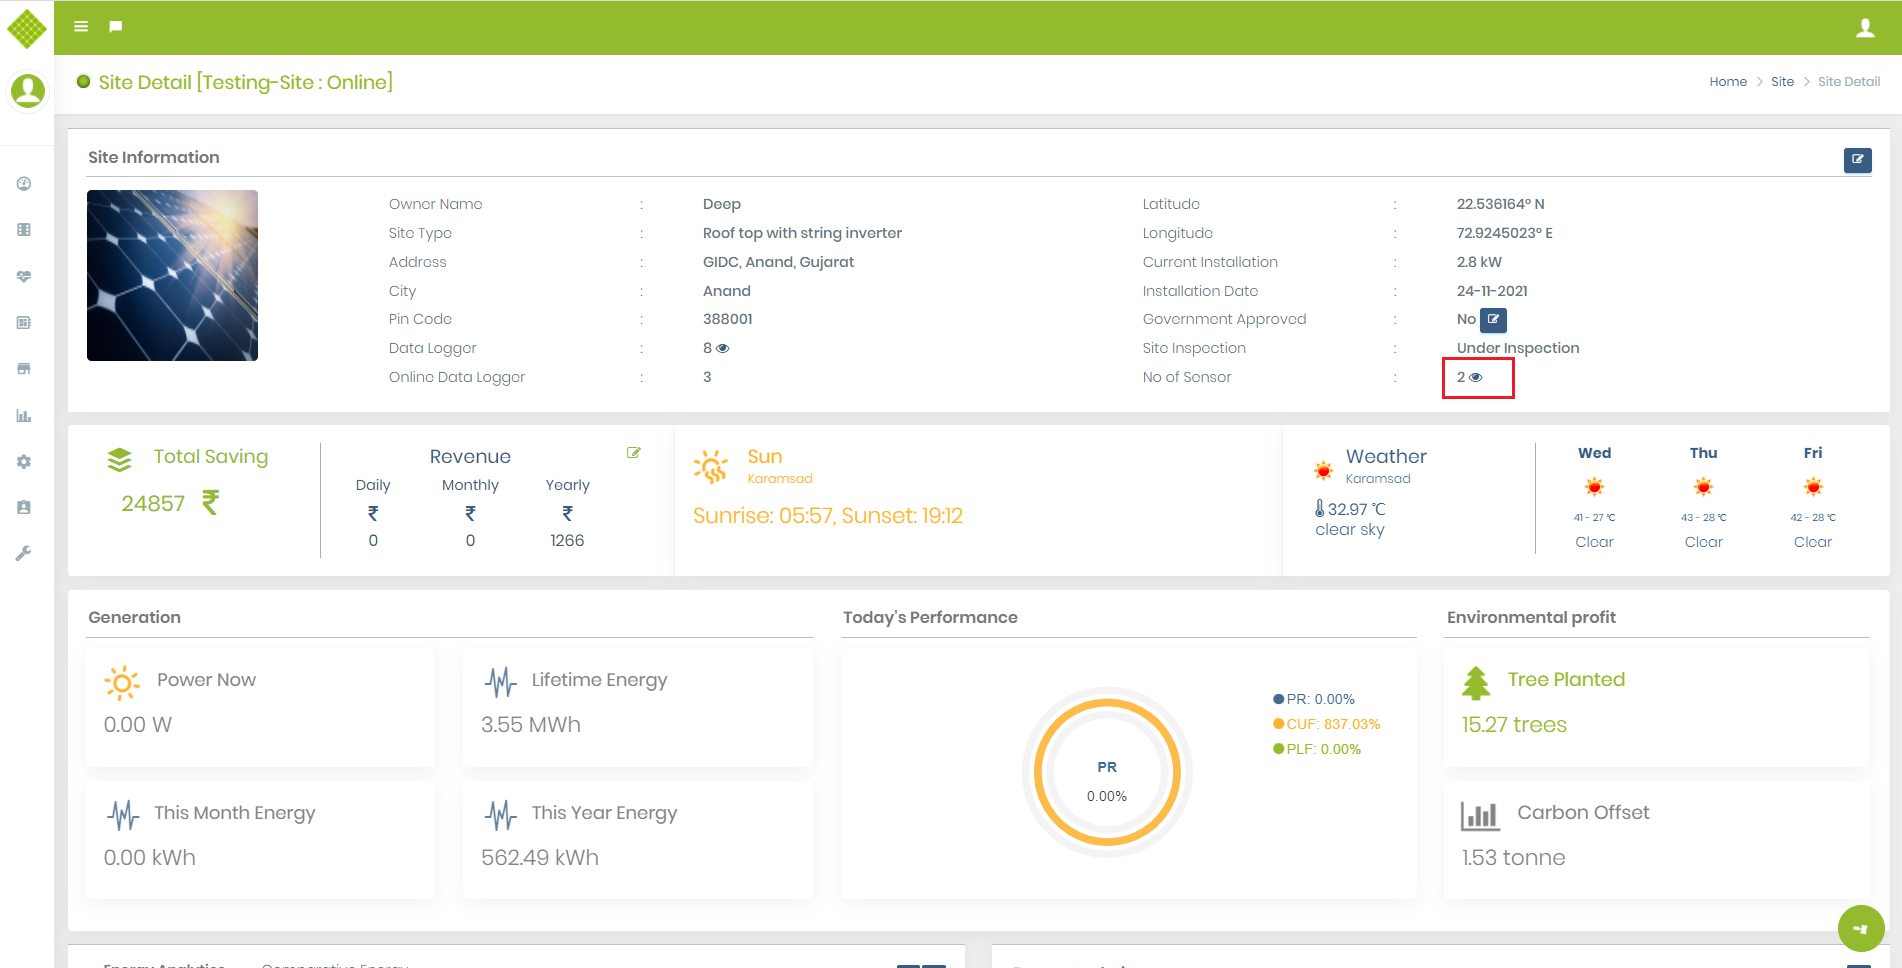
Site Information
- In the top header, we get Site name with Online/ Offline status
- At the Right top corner get the button to Update Site Information (Note: Only Admin and supplier user get access to this feature)
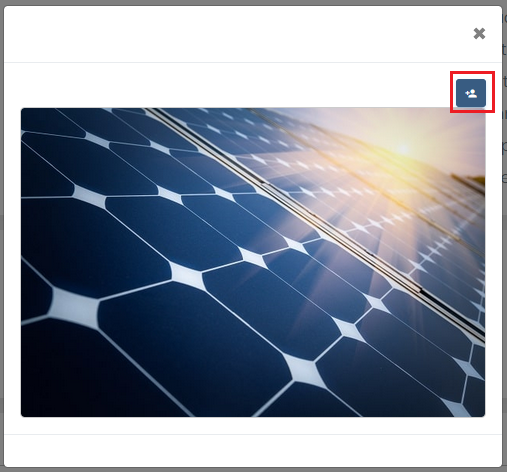
- Site contains default image when new site created. You can upload a new site image. Click on the site image.
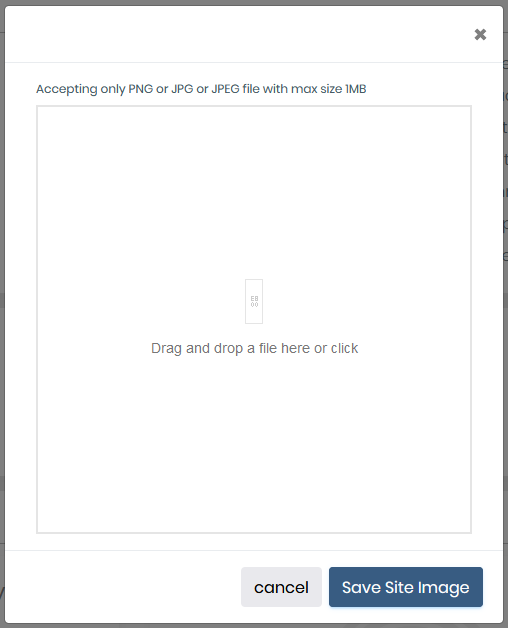
- Click on Add Site Image button
- You can upload a maximum of 1 MB image file with type PNG, JPG, and JPEG
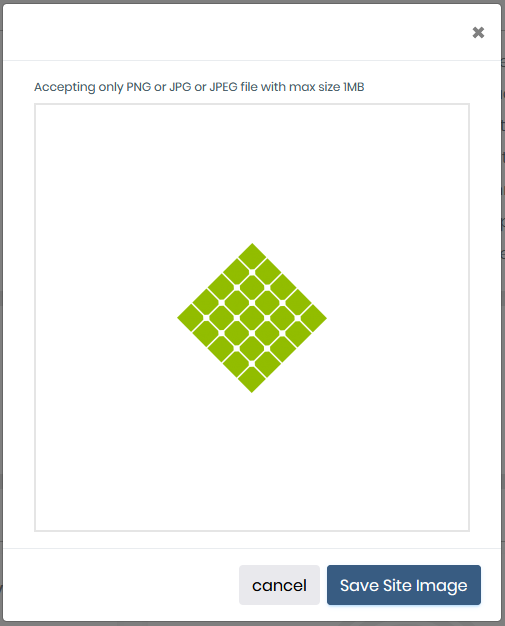
- Select or drag and drop the image file
- Click on Save image. You get the message if the image successfully uploaded and the site image now change with the newly uploaded image
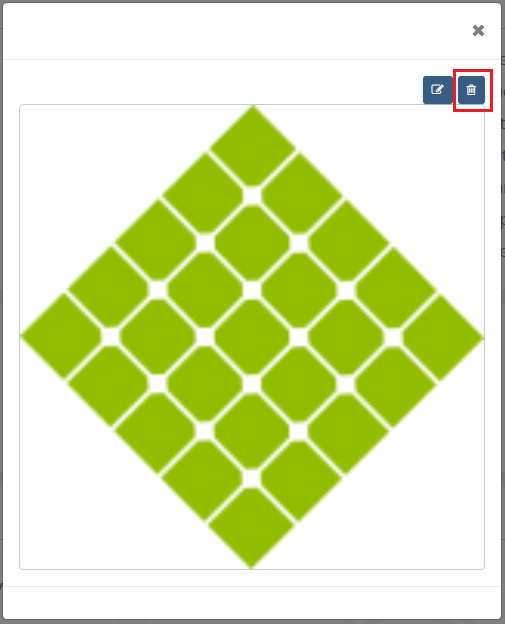
- You can also remove the current site image and update another image
- Click again on the site image
- Here you get the first button for update the site image and the second for the remove site image. Click on remove site image
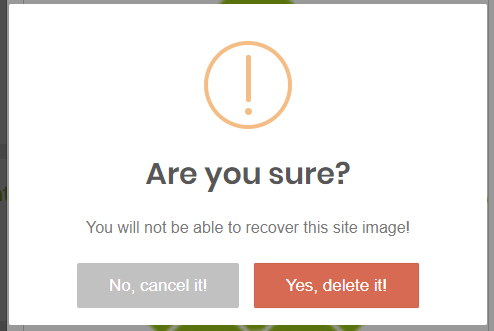
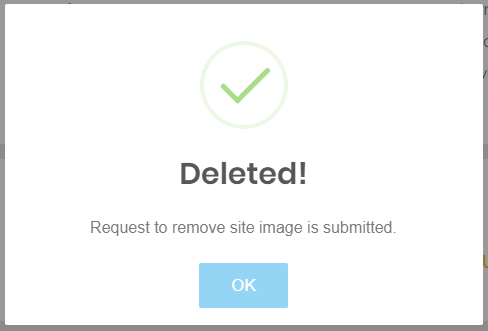
- Click on the "Yes Delete" option to remove the image. You get a message when the image successfully removes and the default image will be visible.
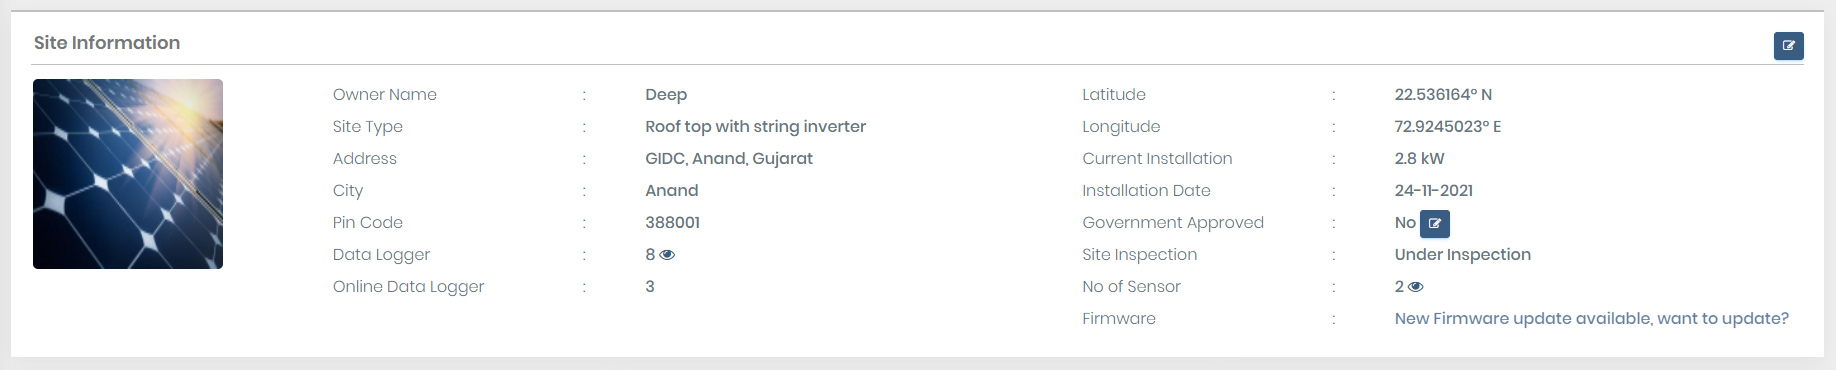
- Site information contains basic details about the site with no connected meter and gateway and online gateway.
- Click on the Open Eye icon to get List Of Gateway,if gateway is not there than disable eye icon will display.
- Click on the Open Eye icon to get List Of Sensor,if sensor is not there than disable eye icon will display.
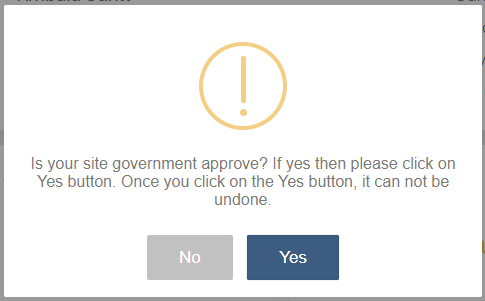
- Also, Get Government Approved field with value yes/no. If the site is not approved, the user is Admin/Supplier and the site is under production then get the button to approve the site.
- Click on the “Update Government approval status of site” button you get:
- If you don't want to proceed further then click on "No" otherwise Click on Yes for Approval
- After approve successfully you get a message
- Now Government Approved Should be "Yes"
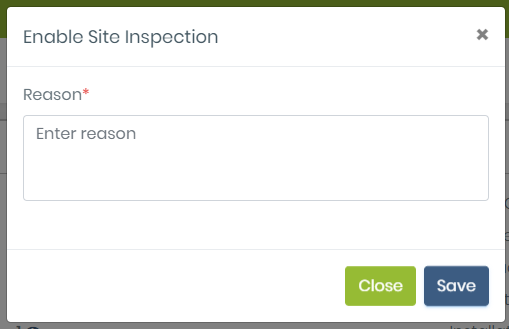
- You get one more field “Site inspection” which is used to check whether site inspection is done or not. Also if the site inspection is completed and the user want to do it again due to some reason then using this feature they can able to do re-inspection.
- Note: If a user is admin/Supplier then get the option “Re-Enable site inspection”
- Click on re-enable button you get the following screen
- Here reason is mandatory to add a reason for re-enable inspection and then click on save.
- After successfully enable site inspection value should be “Under Inspection”.
Save Cost Per Unit Rate
- If site is of type Rooftop, Rooftop with string inverter or hybrid the you get following screen with Total Saving and Revenue :
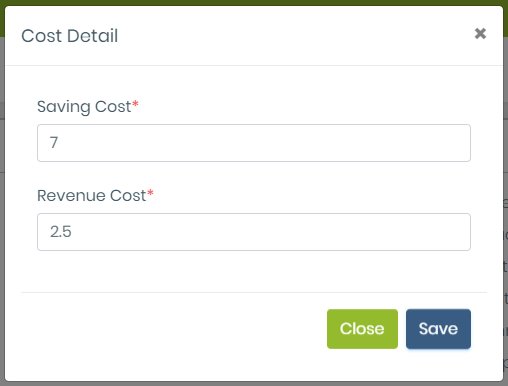
- Click on Edit option on right side of that section you get the form to update the rate. The default saving cost rate is "7 Rs.", revunue cost rate is "2.5 Rs." and default calculation will be display based on that.
- You can enter number or decimal value only like : 8, 8.5, 9.5.
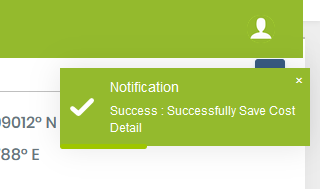
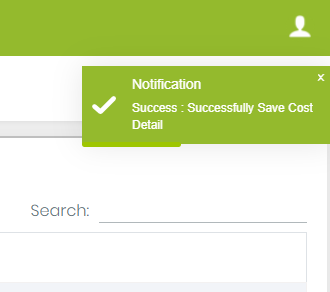
- Enter a valid rate and save it. After successfully save you get a message like:
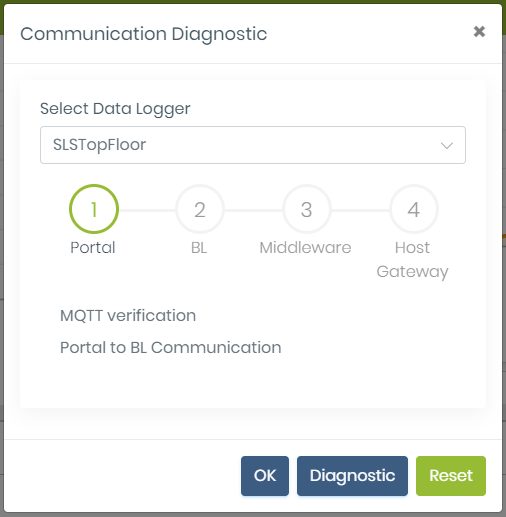
Communication Diagnostic
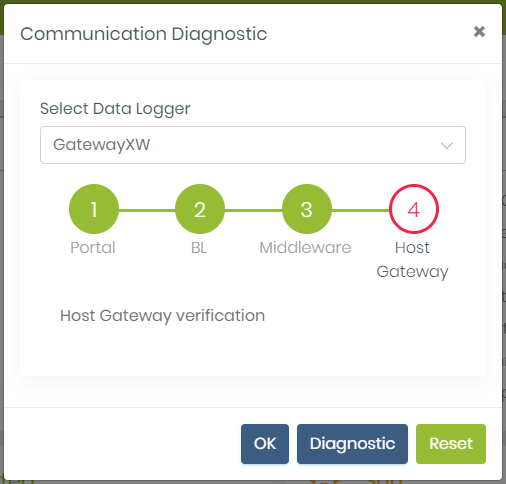
- This functionality is used to verify communication between Portal -> BL, BL -> Middleware, and middleware -> Host gateway.
- In the above modal, by default first data logger of that site will be selected. If the site does not contain a Data logger then noting is selected.
- Graphic view representation of working modules. Start from Portal -> Bl -> Middleware -> Host Gateway.
- Below to graphic view Message will be display based on response.
- Contain following buttons:
- OK: It will close the pop-up modal.
- Reset: It will reset the Graphic view for the next process.
- Diagnostic: Start the diagnostic process.
- Click on the diagnostic button
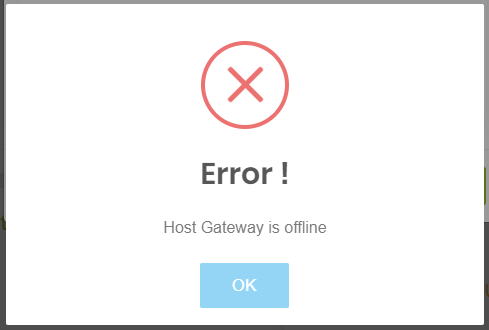
- Get Error and get the following graphical view:
- This indicates that the portal to bl connection is working, bl to middleware communication is working file but Host gateway is not working.
- Also, get the message “Host Gateway verification”
- Now click on reset will reset form.
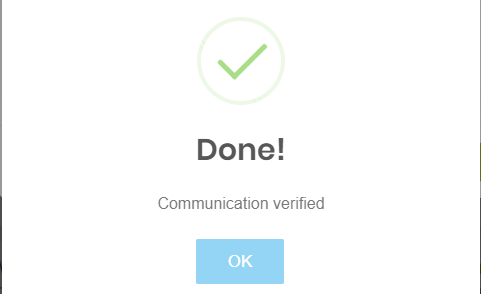
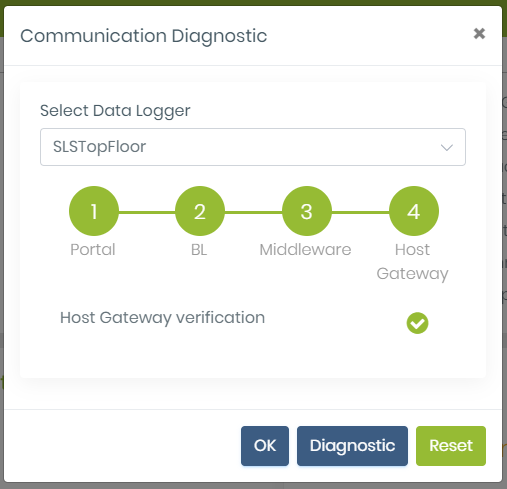
- And try again when the gateway is working:
- Click on OK to will display a graphical view
- We get Host gateway verification done.
- Click on OK to close the form.

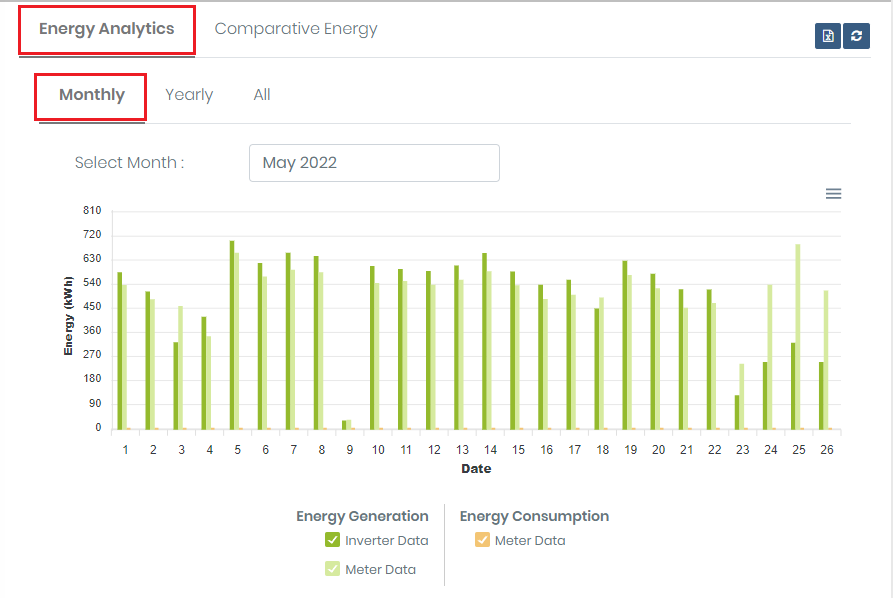
 2.Site with meter
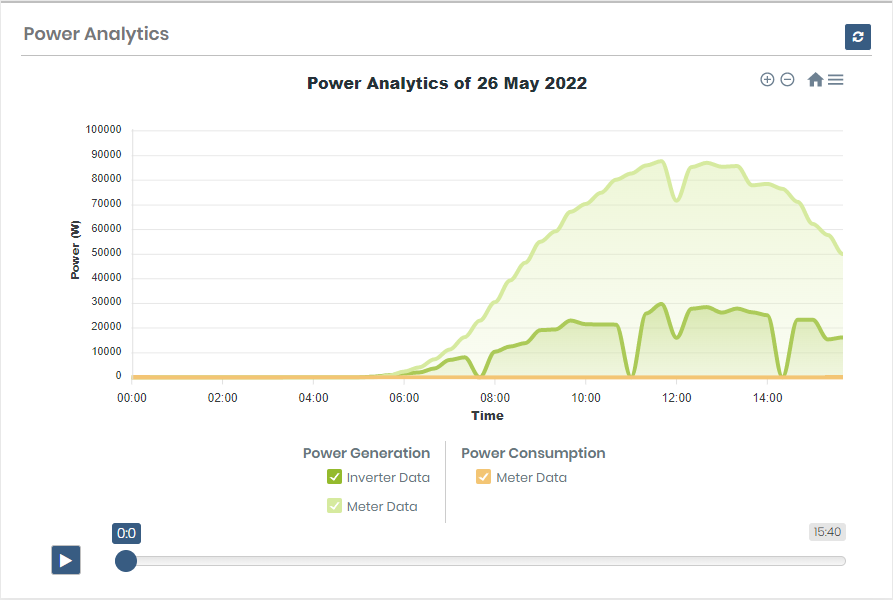 3.Here if the user want to view specific power data then use the check/uncheck feature
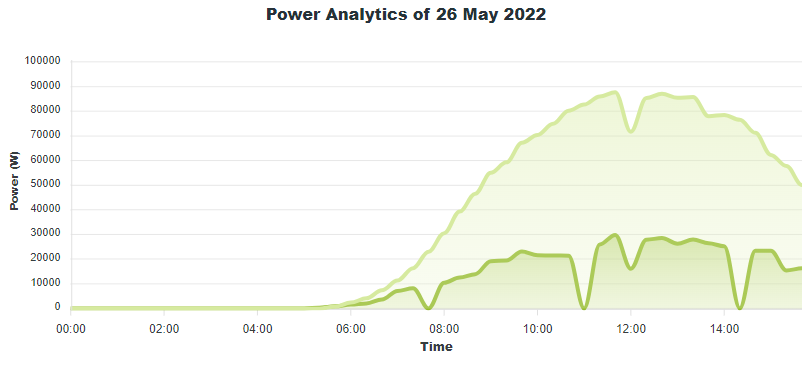
 4.Here Consumption meter data not visible.
 This indicate normal state of panel This indicate normal state of panel |
 This is stand By panel. This is stand By panel. |
 This is Start Up Panel. This is Start Up Panel. |
 This is Panel which has some error This is Panel which has some error |
| The current day panel selection |
 |

 This indicate normal state of panel This indicate normal state of panel |
 This is stand By panel. This is stand By panel. |
 This is Start Up Panel. This is Start Up Panel. |
 This is Panel which has some error This is Panel which has some error |
| The current day panel selection |
|


Update Site Details
- Open SunSights Live portal (https://live.getsunsights.com/) in the browser
- Login with Admin/Supplier (Note only Admin and supplier can update site details)
- Go to the Site details. (Select any site)
- You Get Site information at top of the page.
- Click on right corner button "Update Site Info"
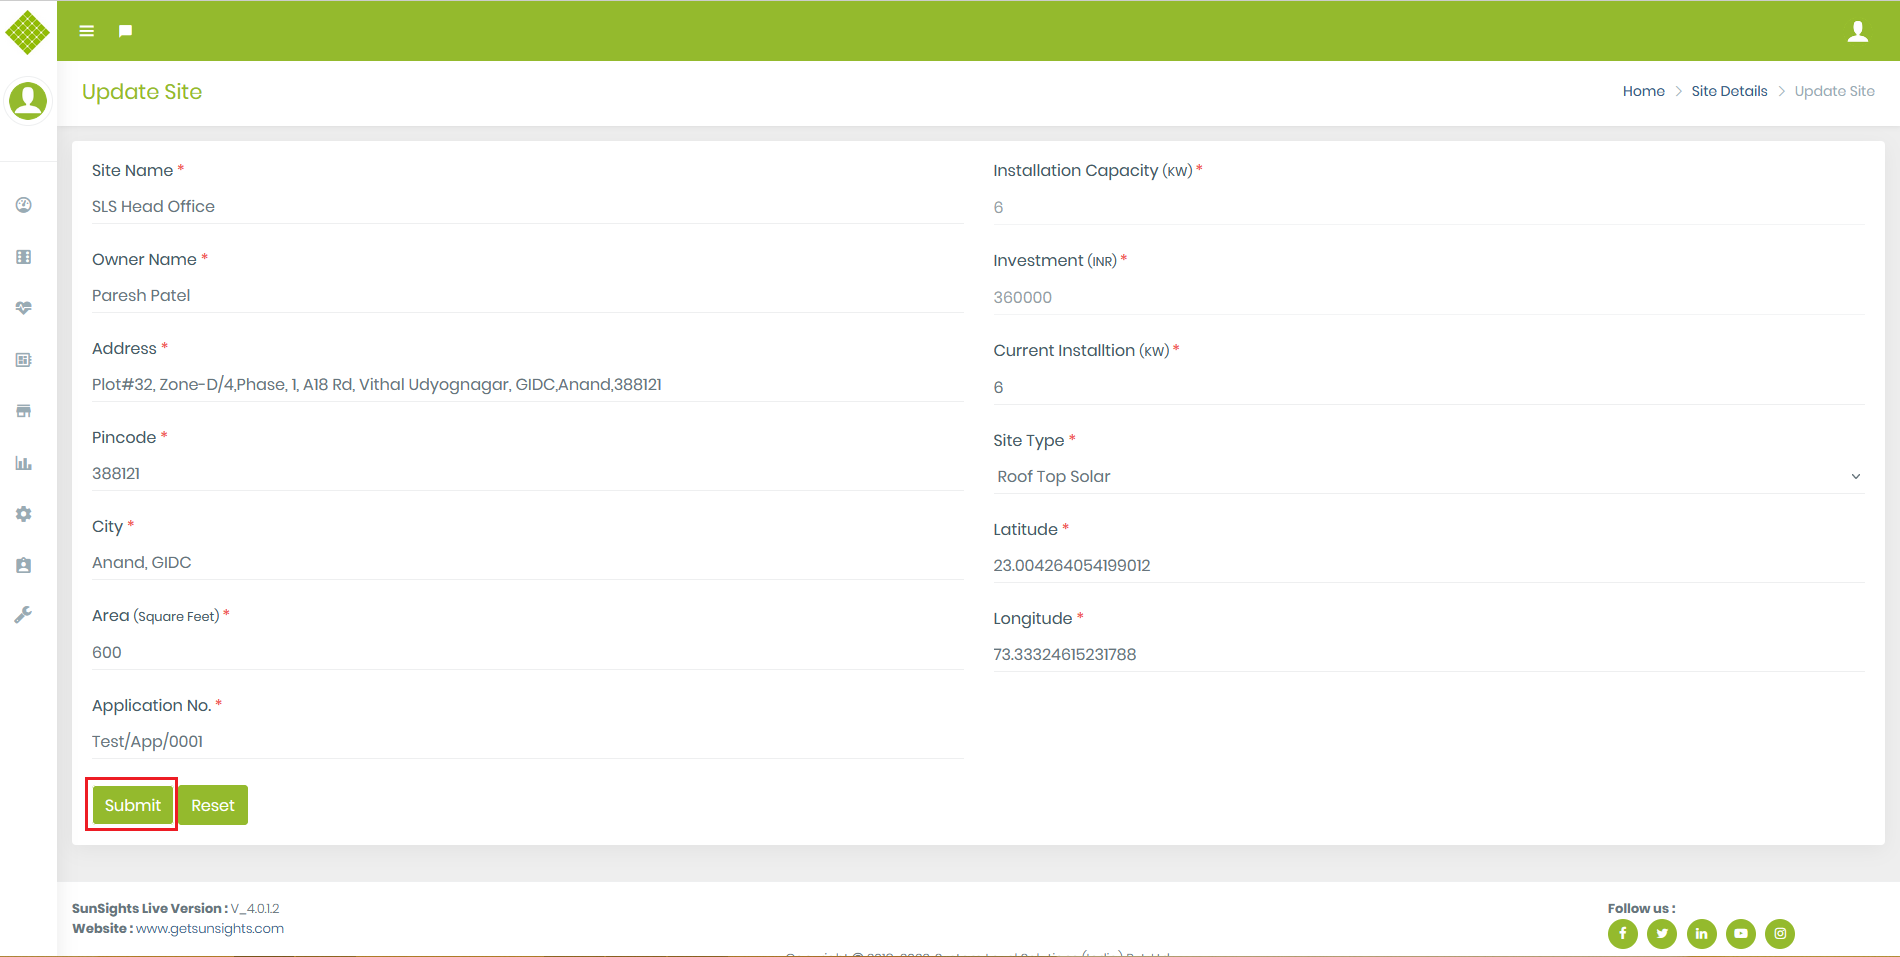
- You can get Update site form with existing details of selected site.
- Form contain many fields and all are mandatory following are brief description of fields.
- Site Name: Must required to enter site name not allowed only blank space. If you update site name then make suer it is unique for each site of single customer.
- Owner Name: Must required to enter Owner name not allowed only blank space.
- Address: Can not leave blank Address during update.
- Pin code: Can not leave blank Pin code must enter.
- City: Can not leave blank city name or leave it as existing.
- Area (Square Feet): you may update new Area if required then with numeric value
- Application No.: you may update Application no...but not leave it empty must enter data or leave it as existing.
- Installation Capacity: This is read-only field. Once you update area, installation capacity count automatically update.
- Investment: This is read-only field. Once you update area, Investment will be calculated automatically update.
- Current Installation: Can not leave empty Current installation must enter numeric value or leave existing value.
- Site Type: You can update site type.
- Latitude: If you want to update then update with valid Latitude in numerical value between range [-90,90] and not exist in any other site.
- Longitude: If you want to update then update with valid Latitude in numerical value between range [-180,180] and not exist in any other site.
- Update required data and click on submit.
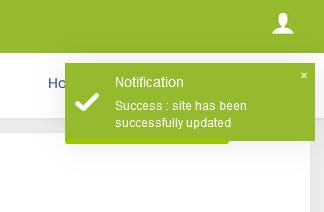
- If data submitted successfully then get a success message like below:
- If you update site name which is already given to another site of the same user also update the location which is already assigned to another site then get the following error:

Set cost per unit rate
- This functionality is used to get money-saving information about sit. For that using this feature user (Admin, Supplier and Customer) can set cost per unit rate on yearly basis.
- You get Set cost per unit button for save cost per unit only for Rooftop, Rooftop with string inverter and hybrid site.
-
Click on
 from site list you get pop up which save Save Cost per Unit.
- In which default cost will be display of current year.
- Both Saving Cost and Revenue cost are mandatory field and only number and decimal are allow otherwise get error.
- Enter valid cost and “Save” data.
- You get message like:

Site Diagnostic
This feature allows the user (Admin, supplier, and customer) to some level of online diagnose the site using provided command without going to the site installation place.
- Open SunSights Live portal (https://live.getsunsights.com/) in the browser
- Login with valid Admin/Supplier/Customer credential.
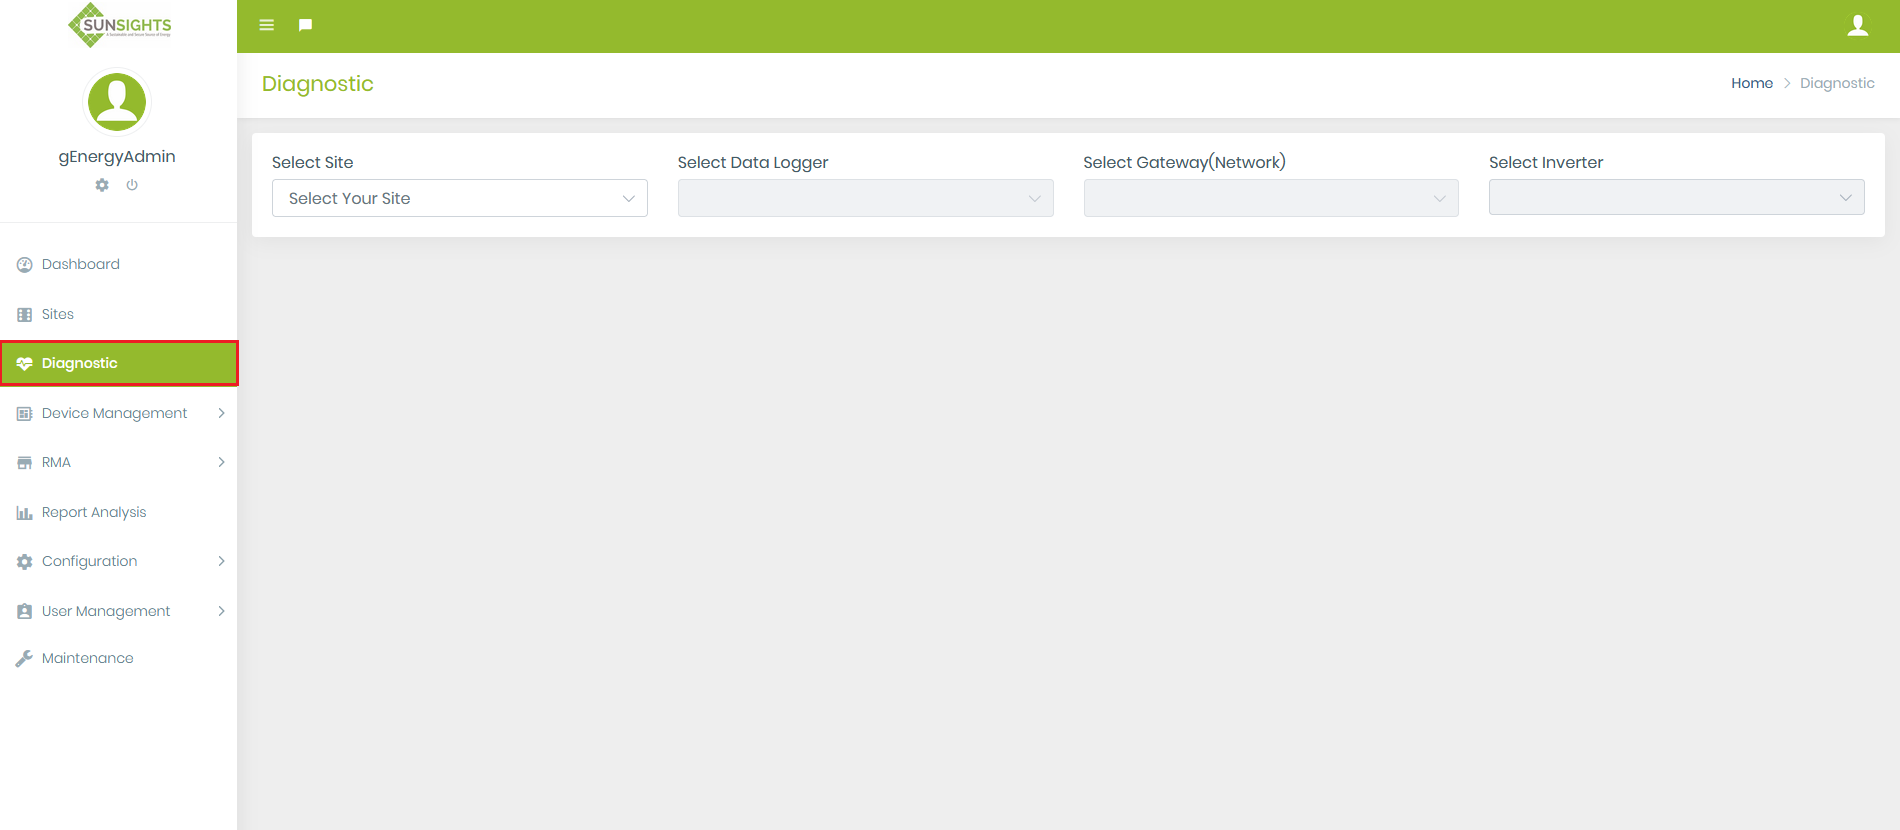
- Go to the Diagnostic Menu
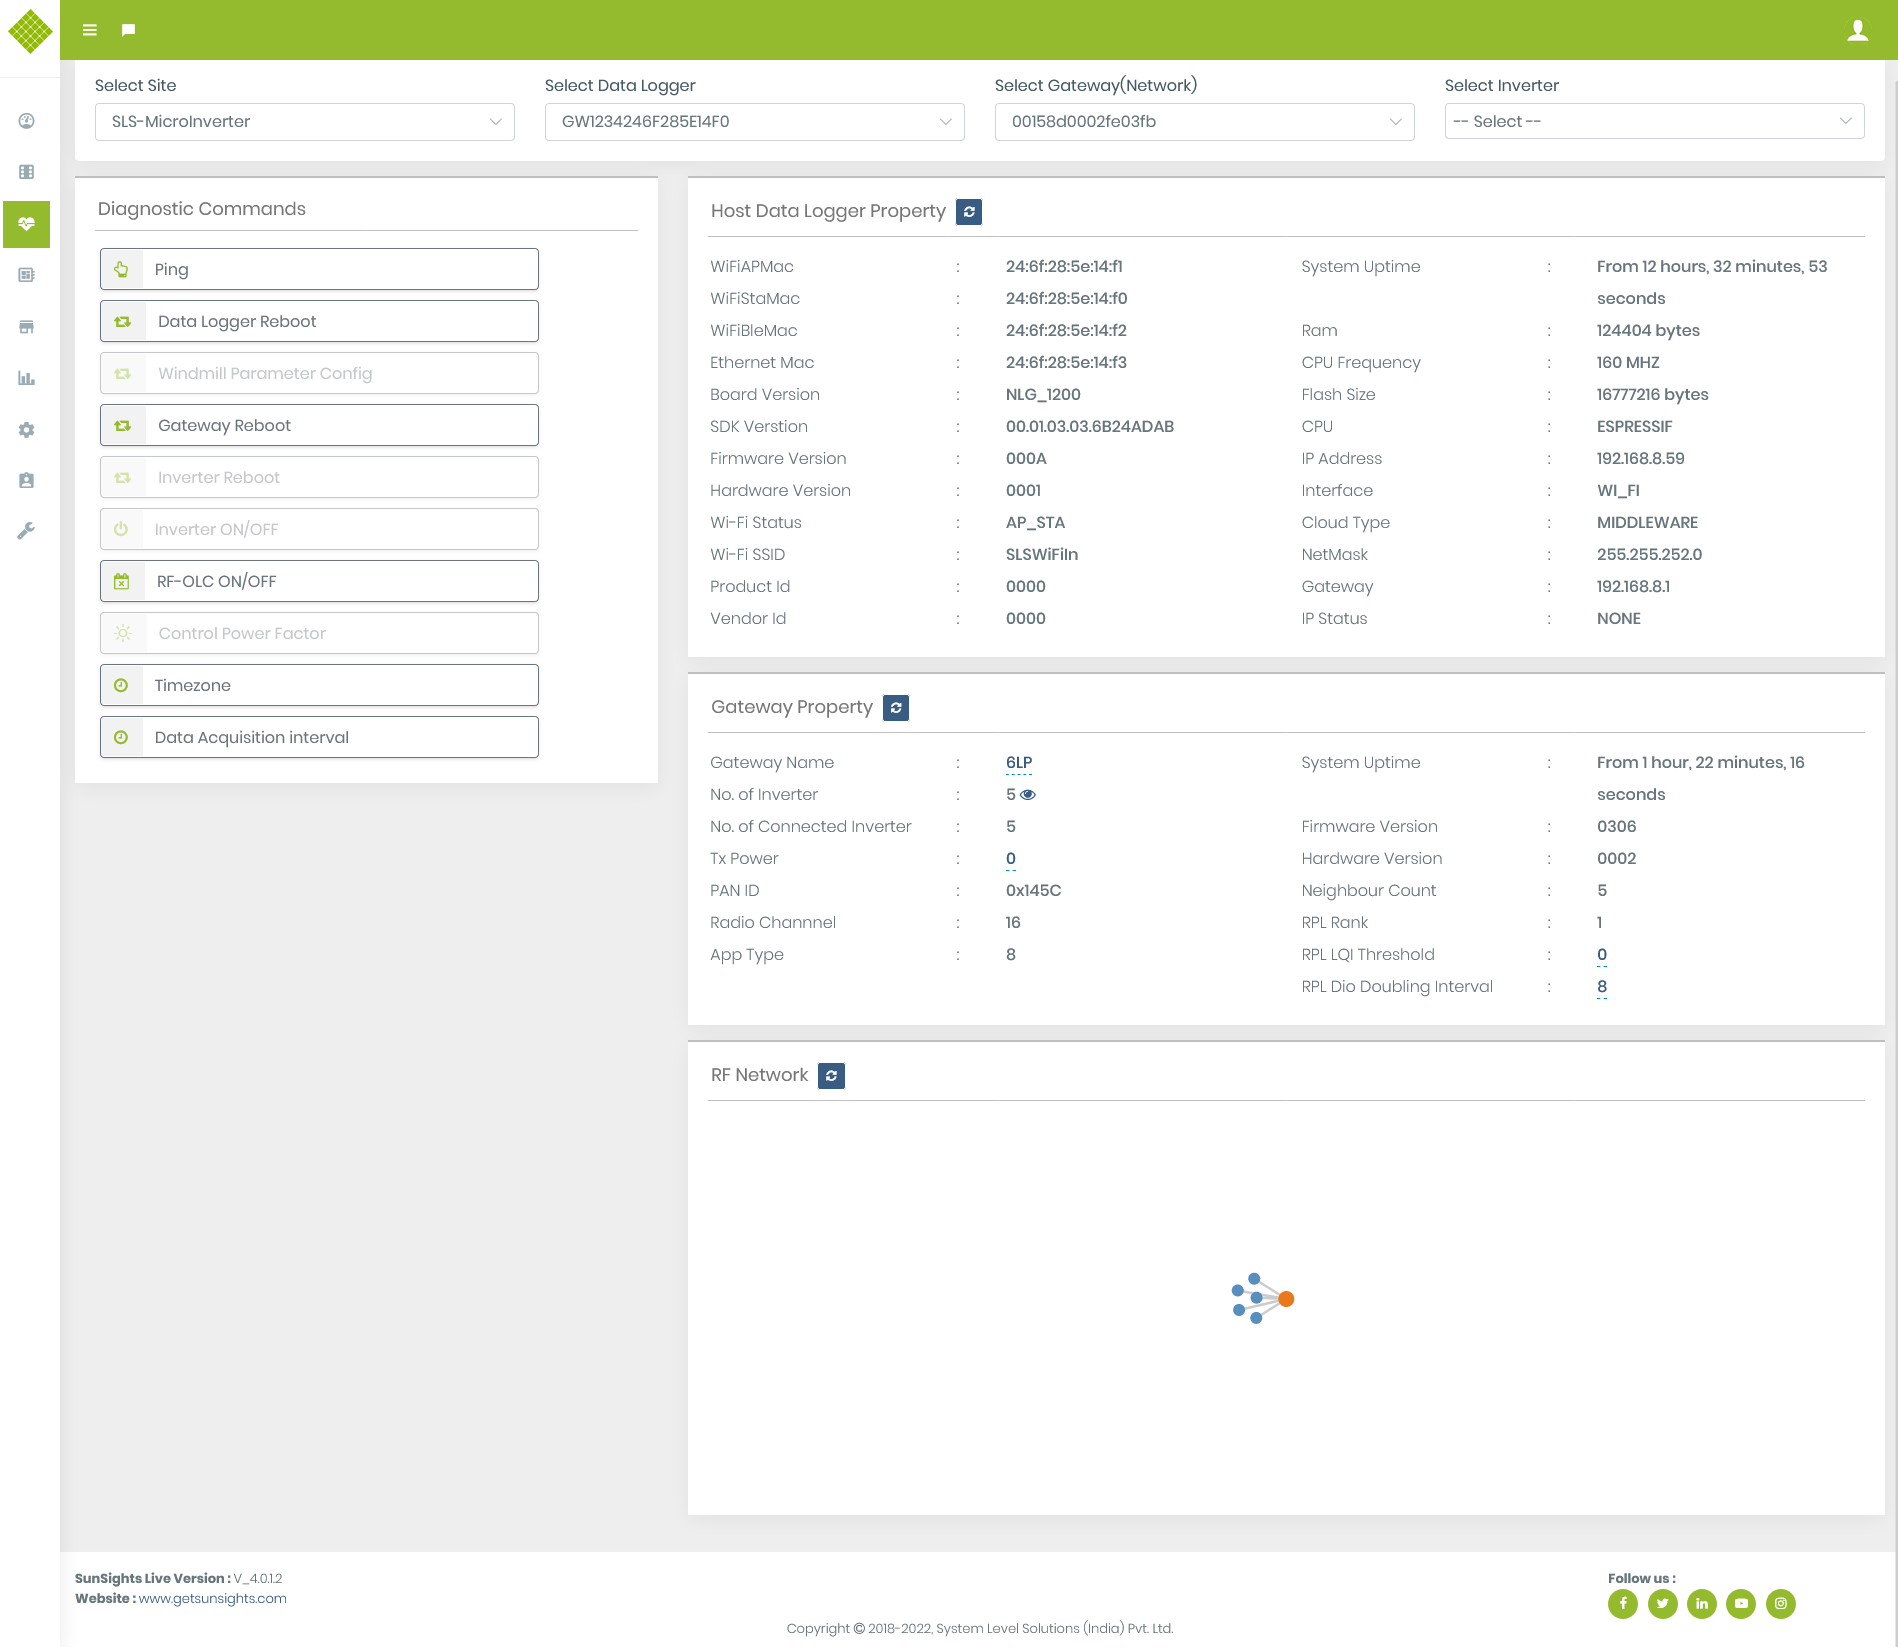
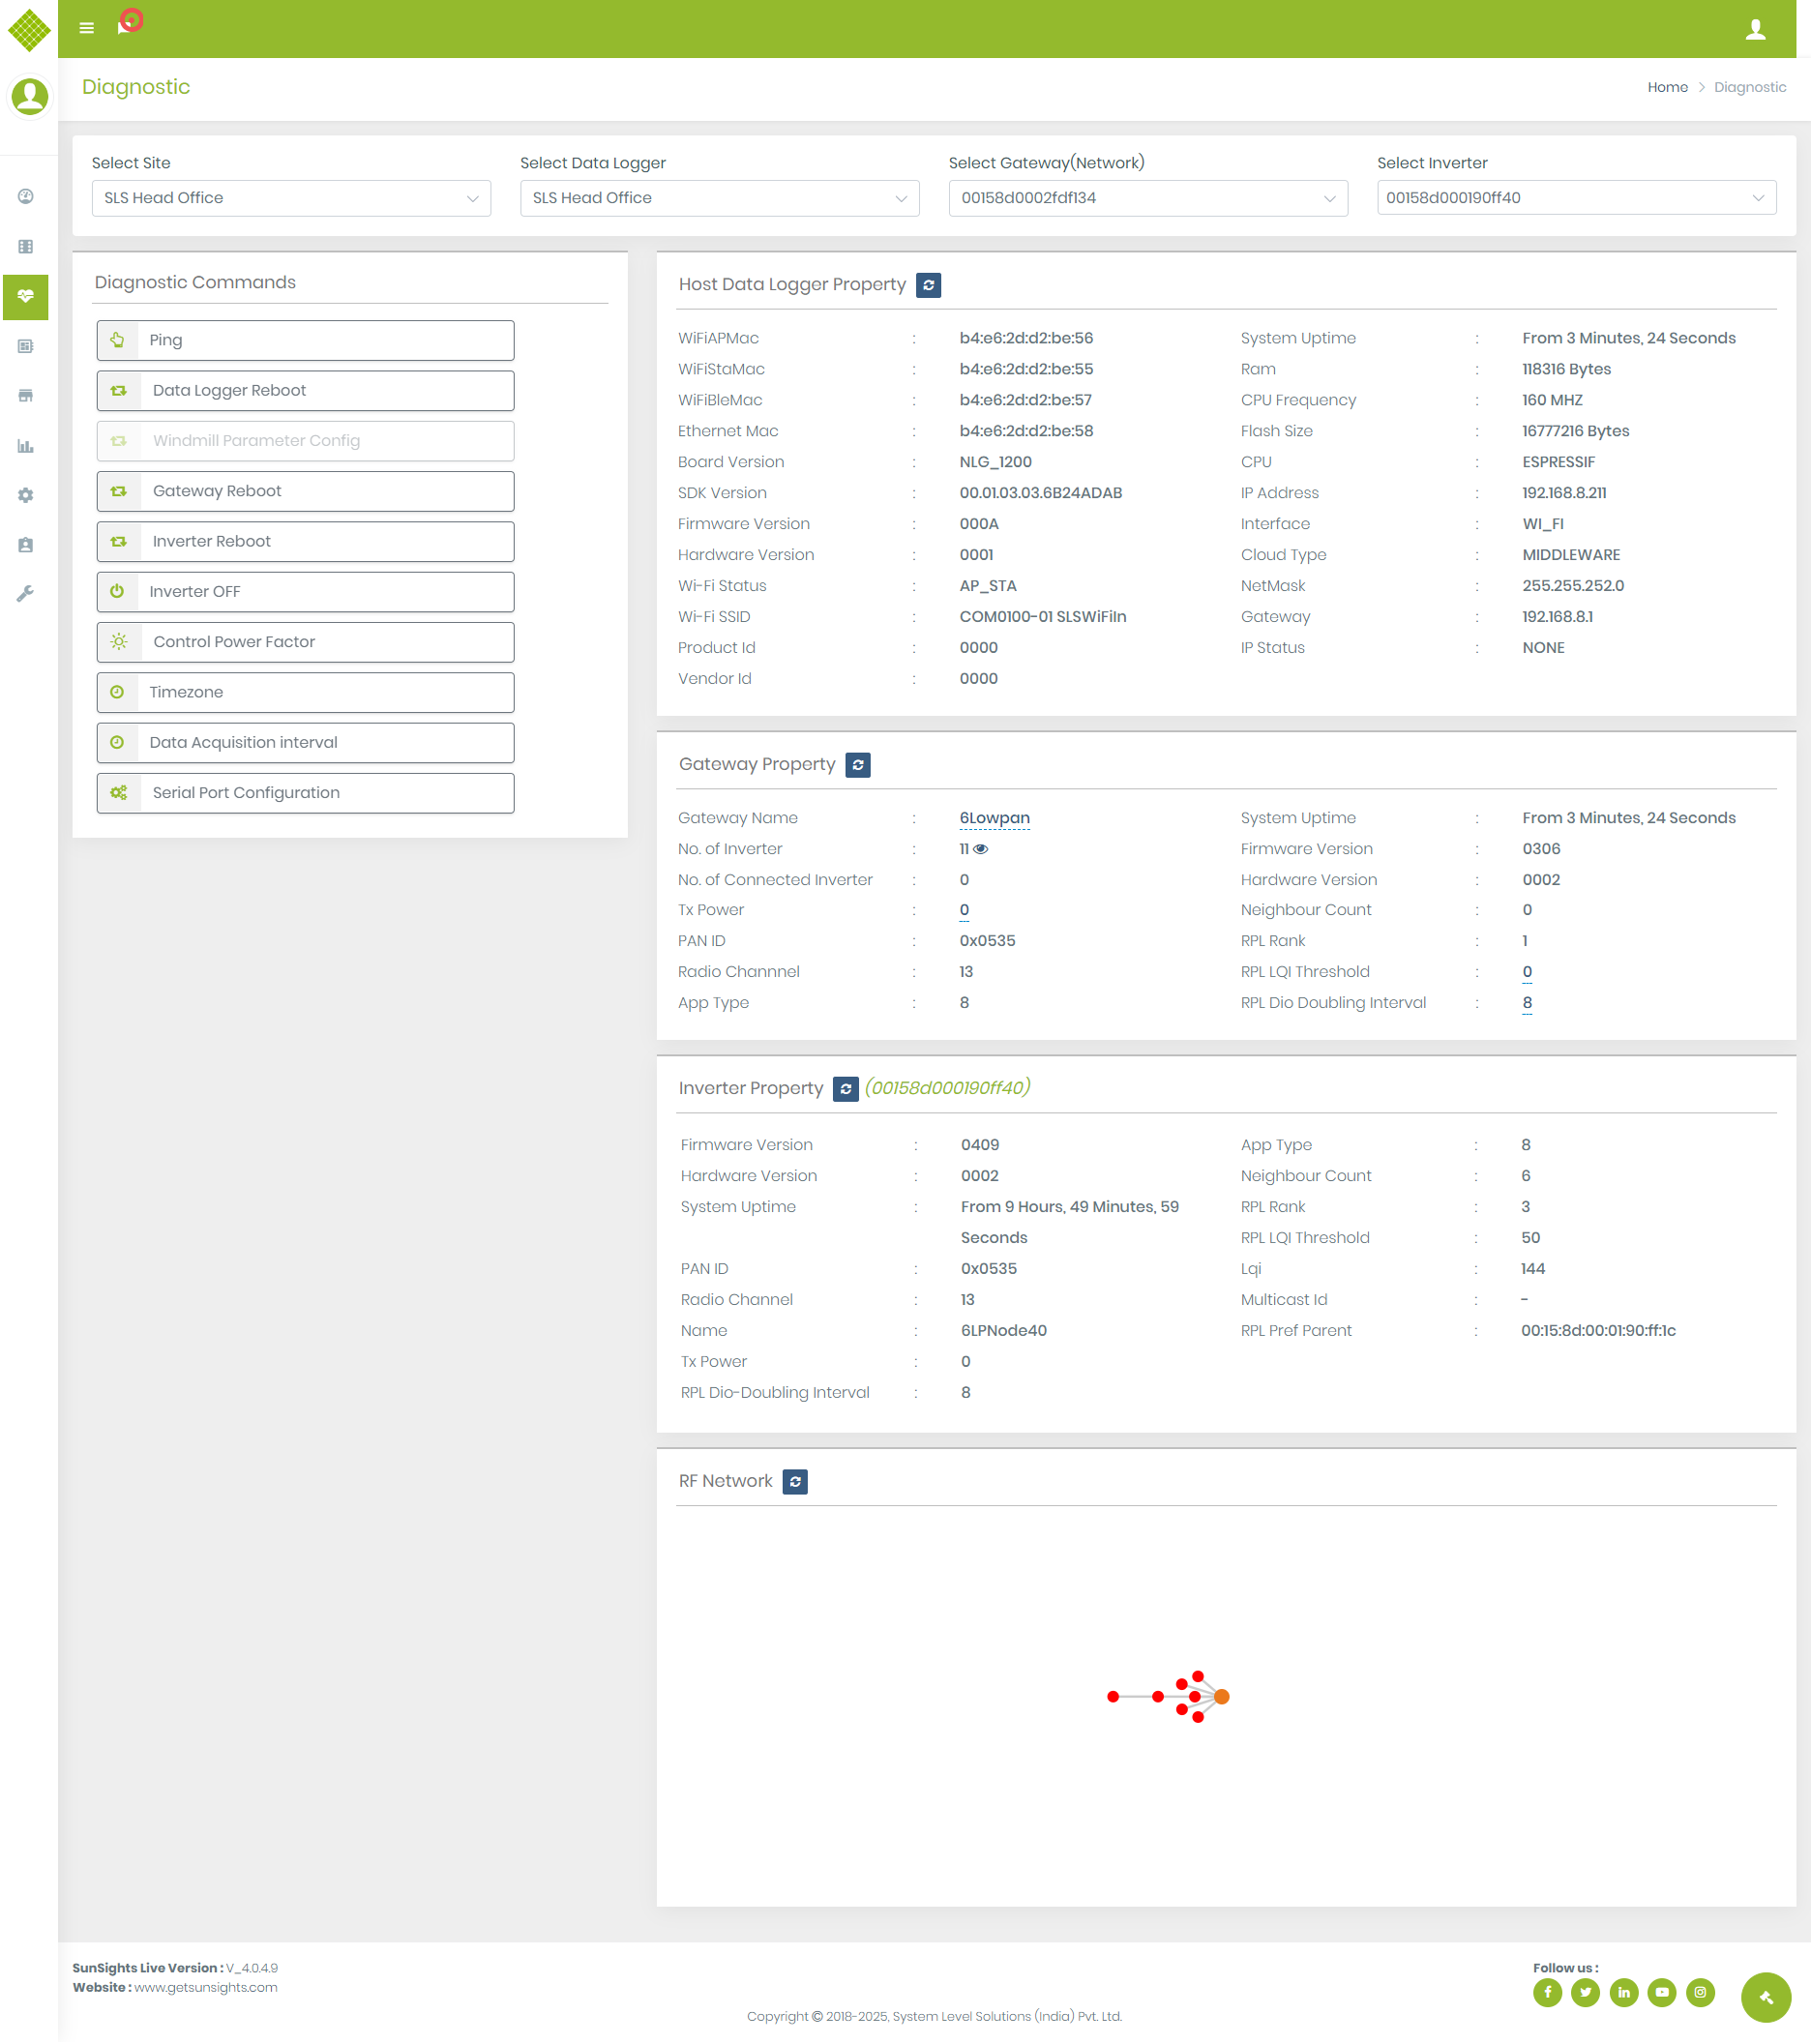
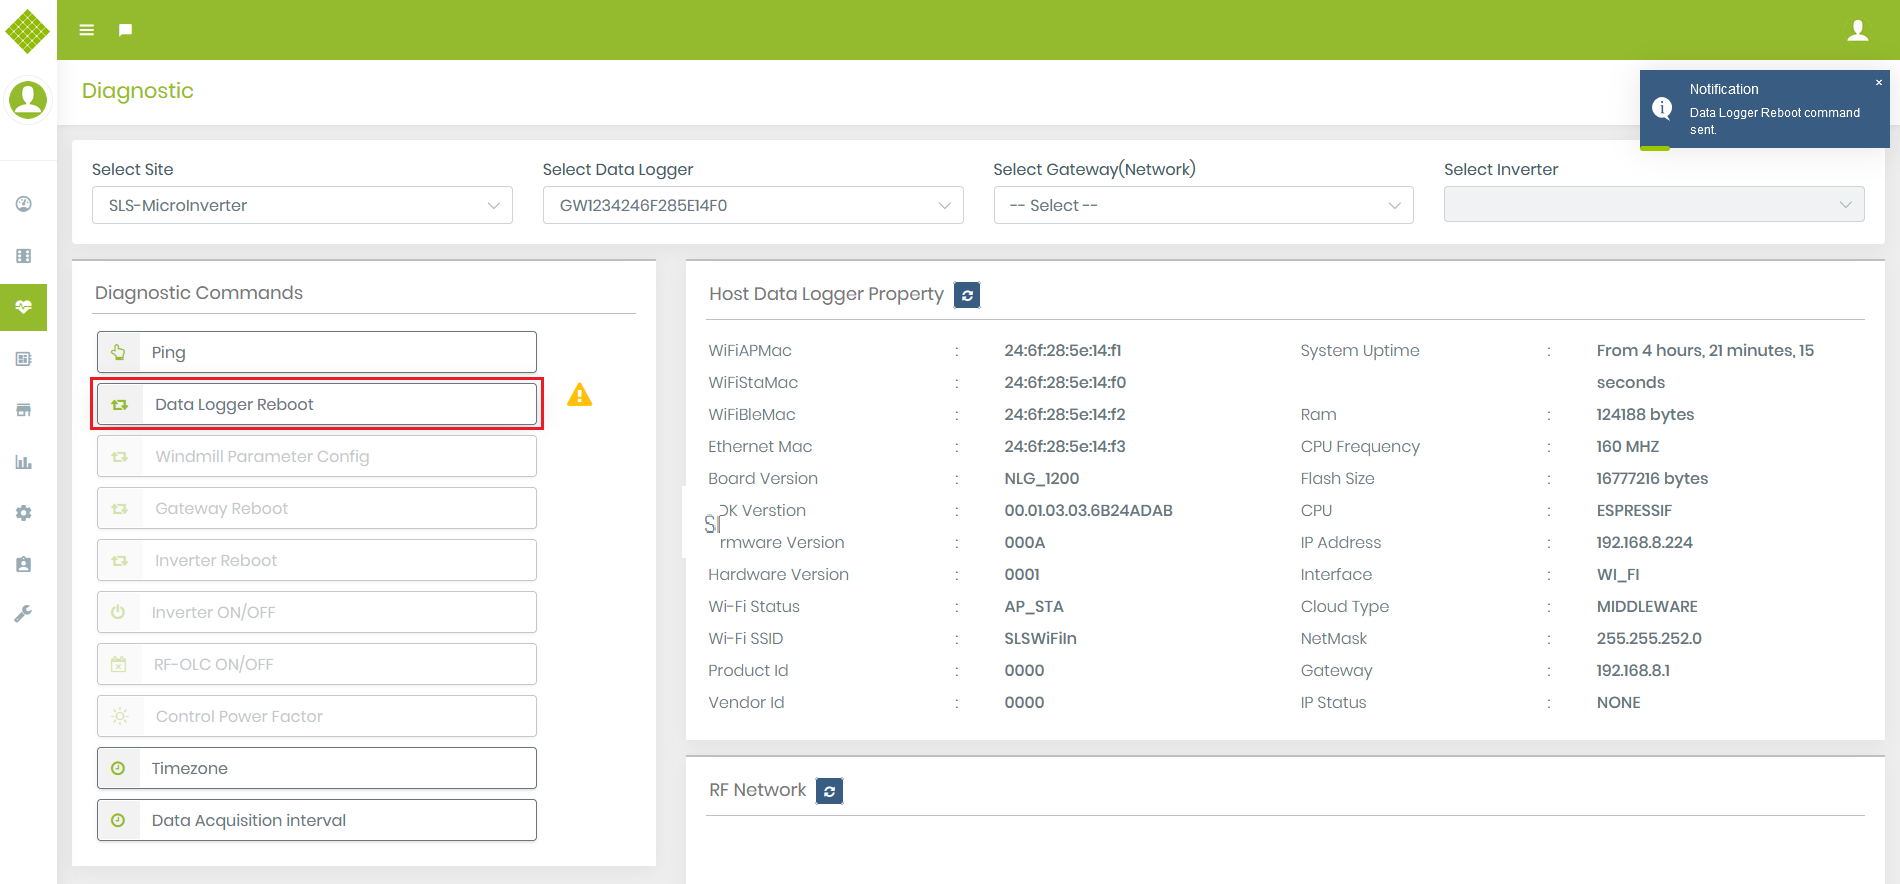
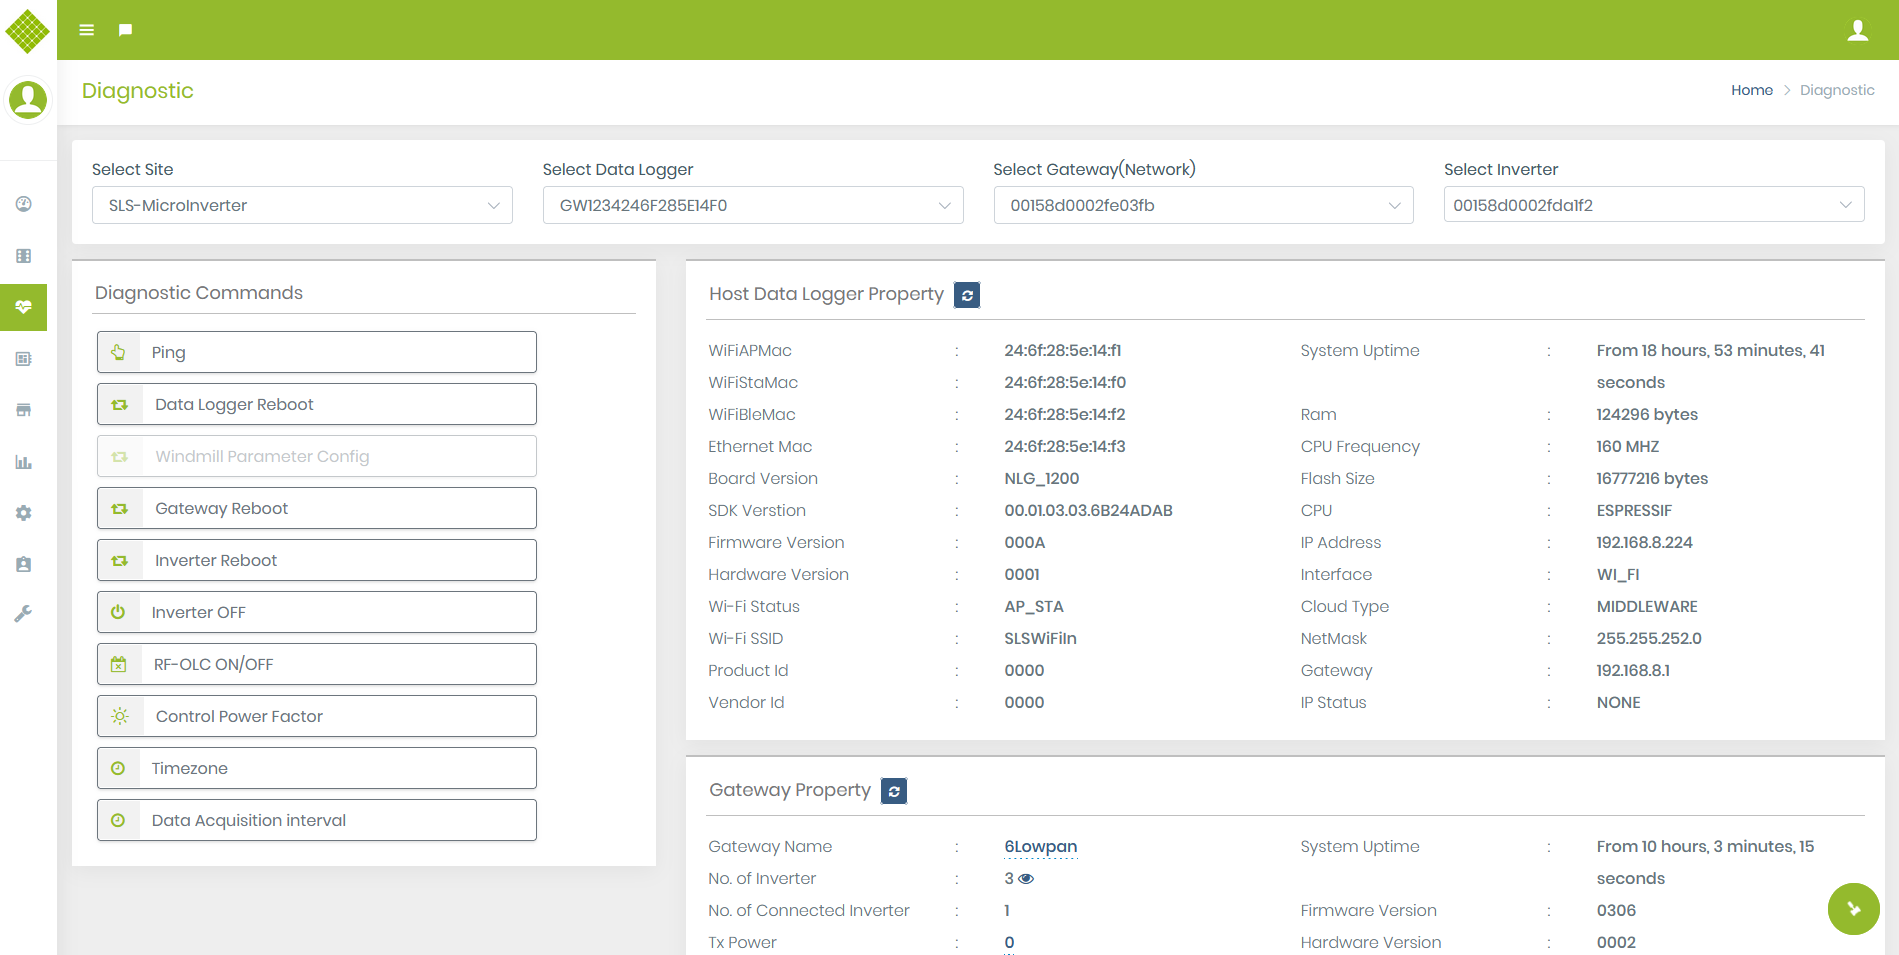
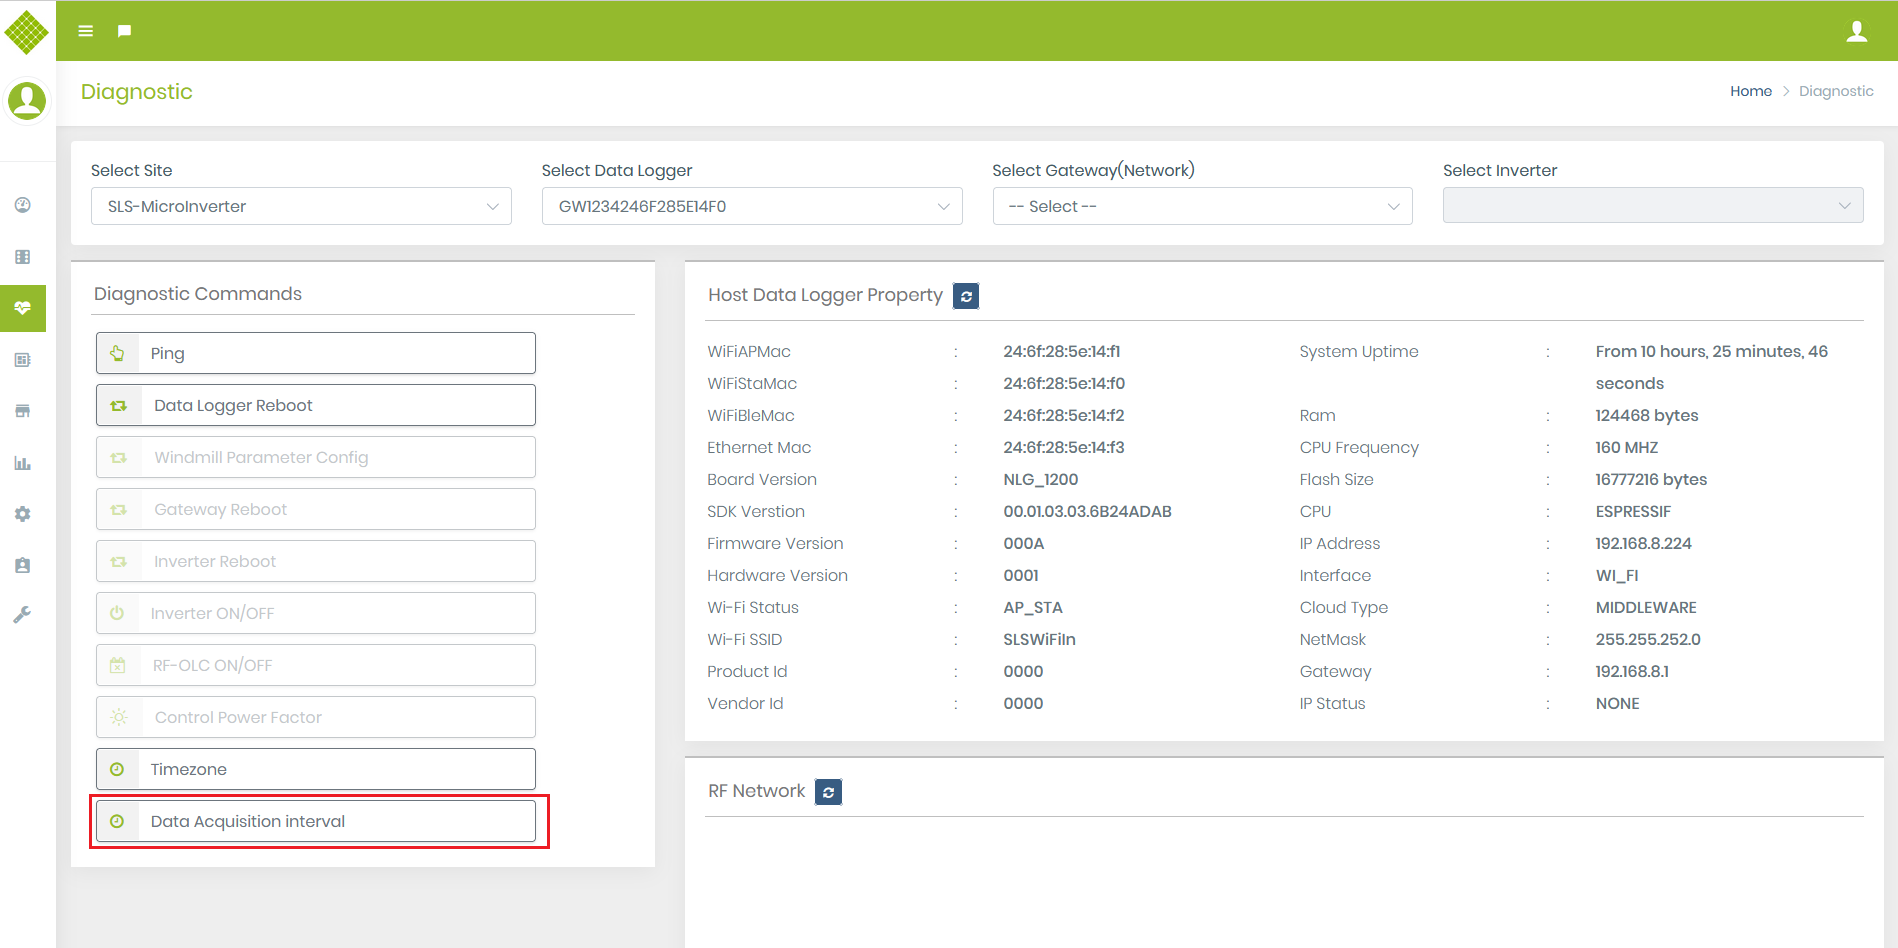
- You get a diagnostic page as below:
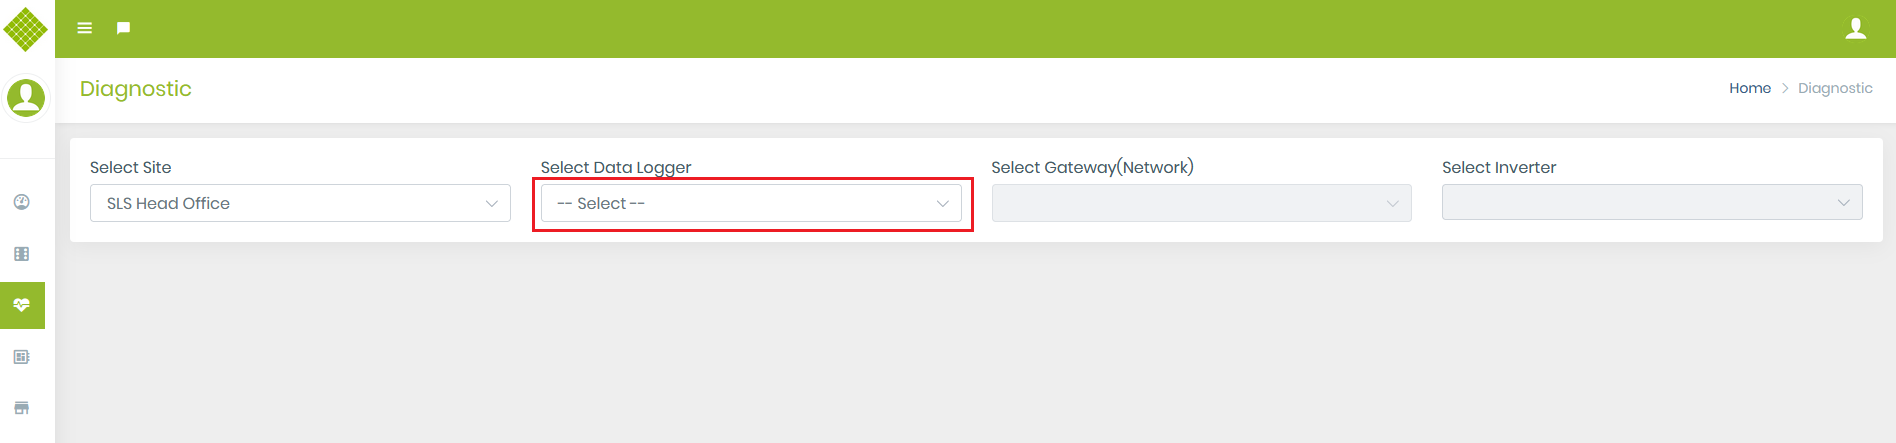
- Now select the site for which you want to do site diagnostic. (Note: commands are different based on different site type)
- You get enable "Data Logger" selection
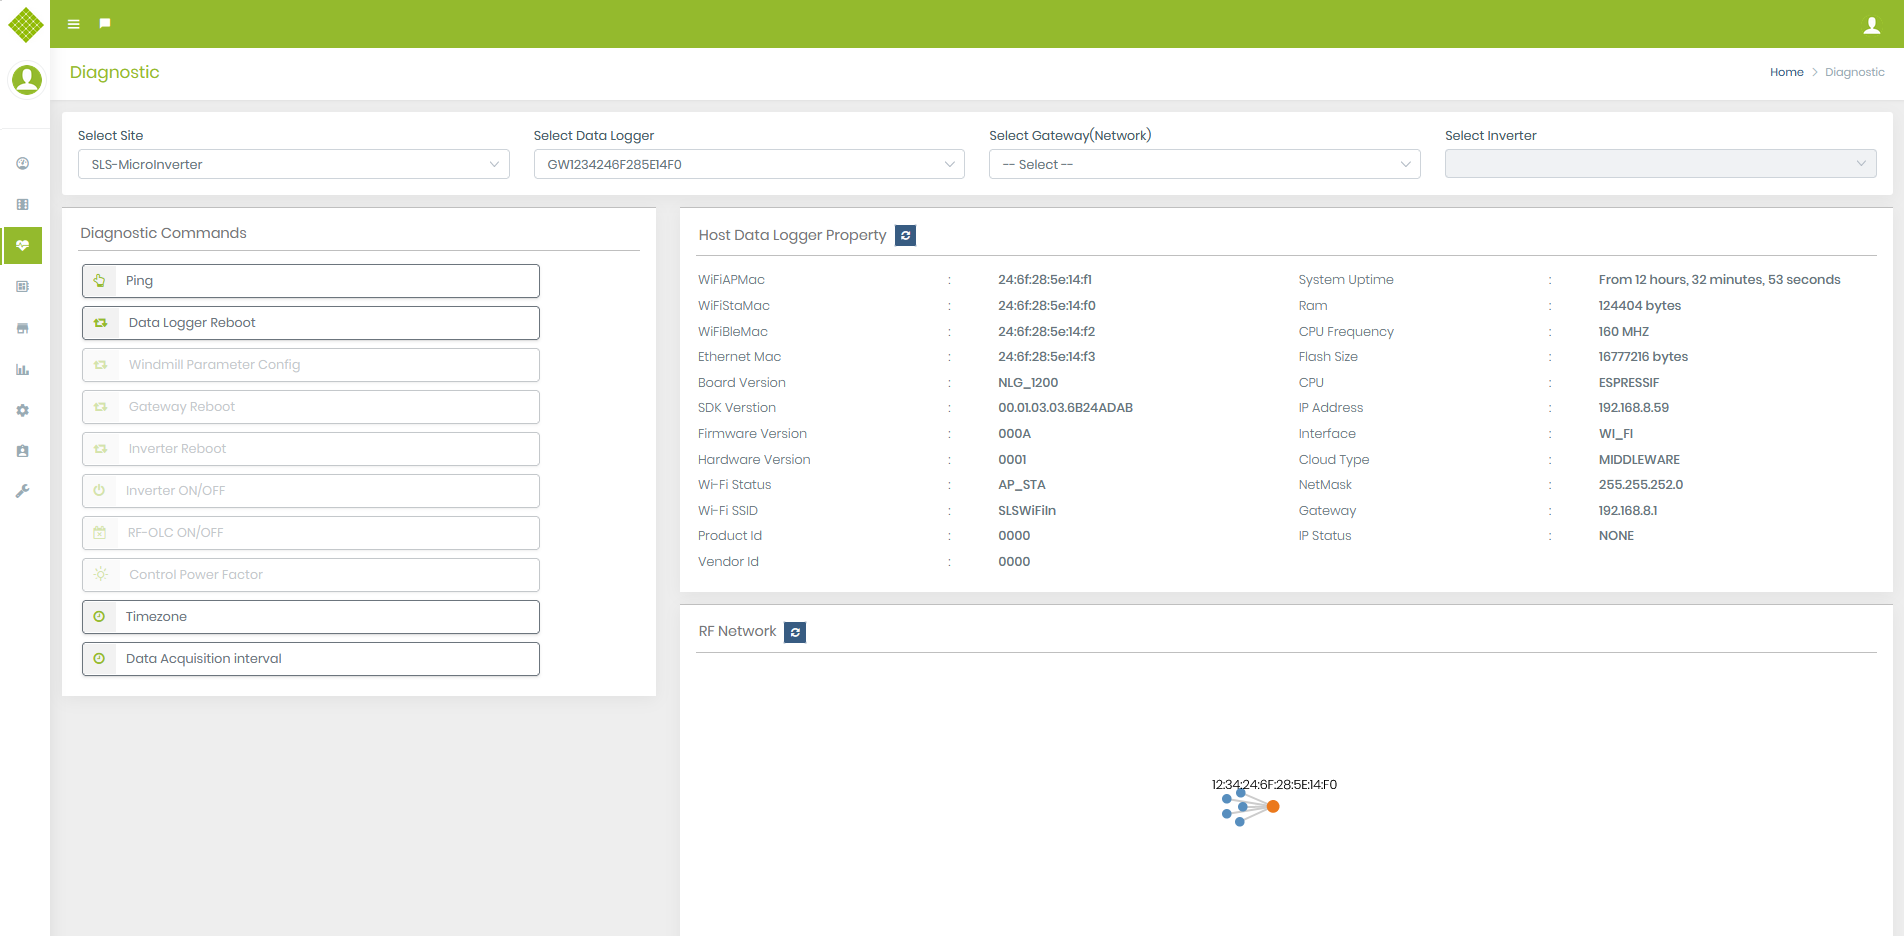
- Now Select Data Logger. It will enable the following functionality:
-
- Network Gateway selection (Support site: Roof top,Hybrid)
- Diagnostic Commands
- Host Gateway Property
- RF Network (Not supported in Windmill and Rooftop with string inverter type site)
- If the gateway is “Online” then you get the “Ping” and “Data Logger Reboot” command enable.
- For offline gateway you get commands but all are disabled also, you get disable live “Host gateway property” option.
- For example here selected site in which gateway is offline then:
- Get description about Ping command
- Get description about Data Logger Command
- Get description about Windmill Parameter Config (Only for Hybrid and windmill type site)
- Get description about Timezone Command
- Get description about Data Acquisition Interval Command
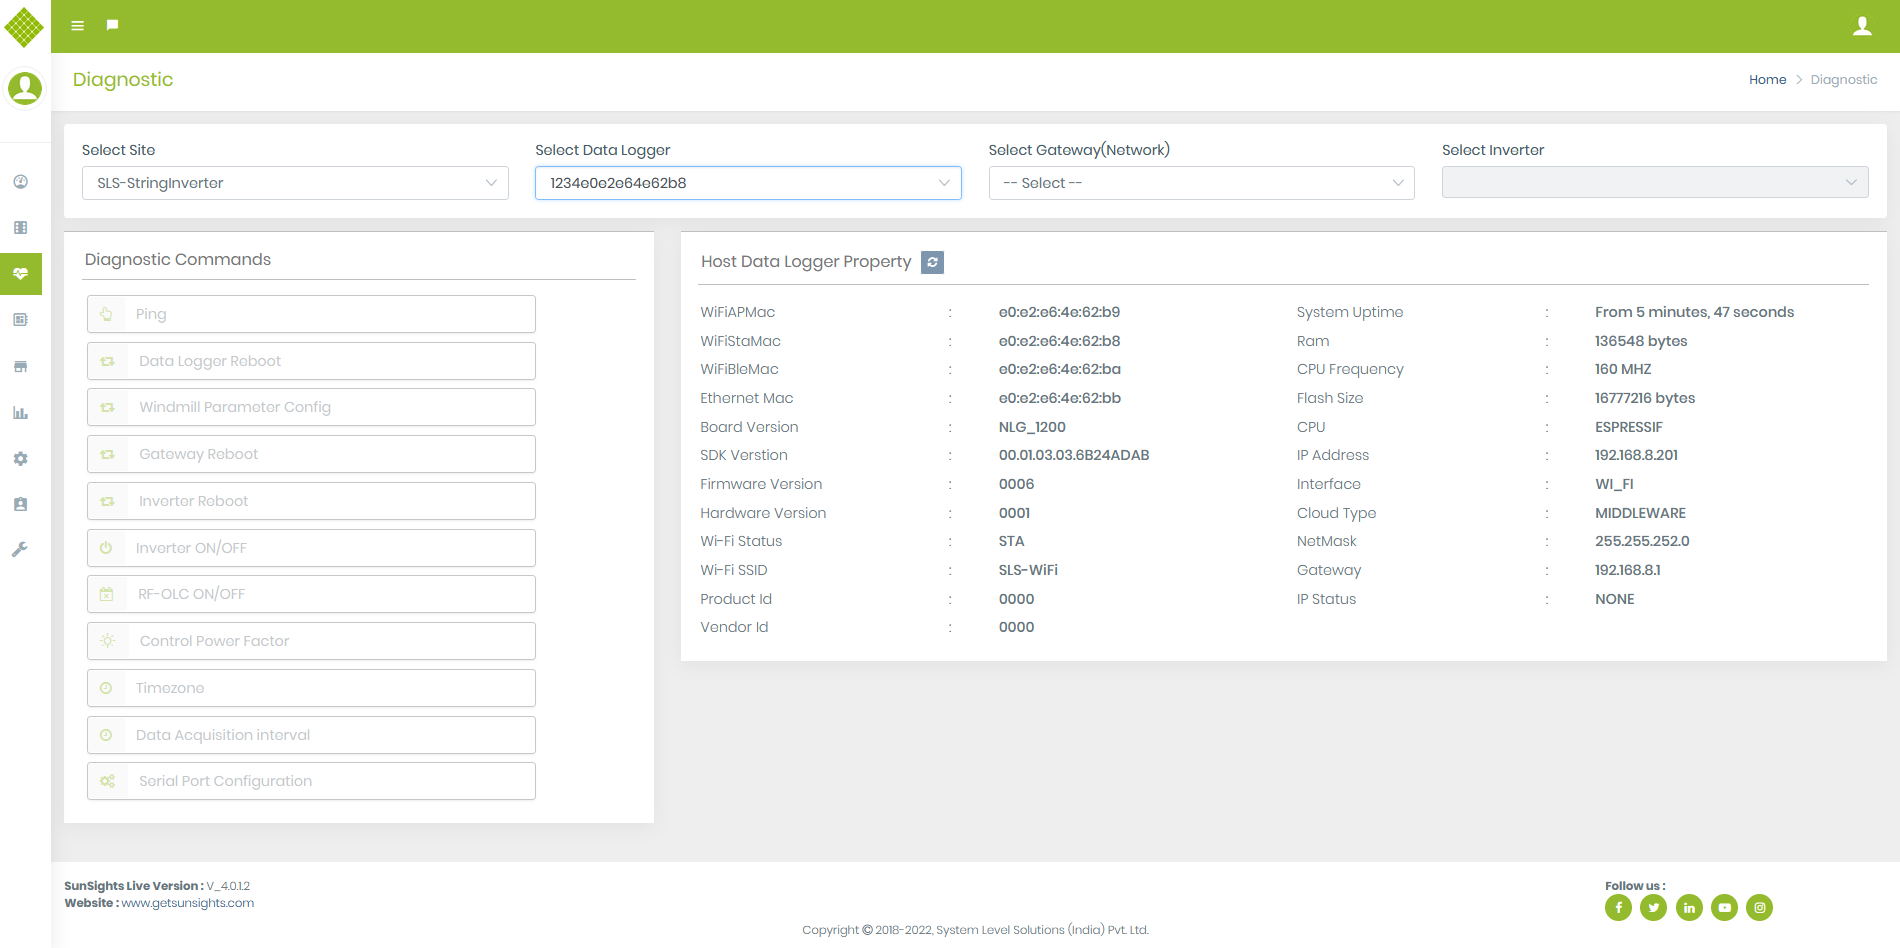
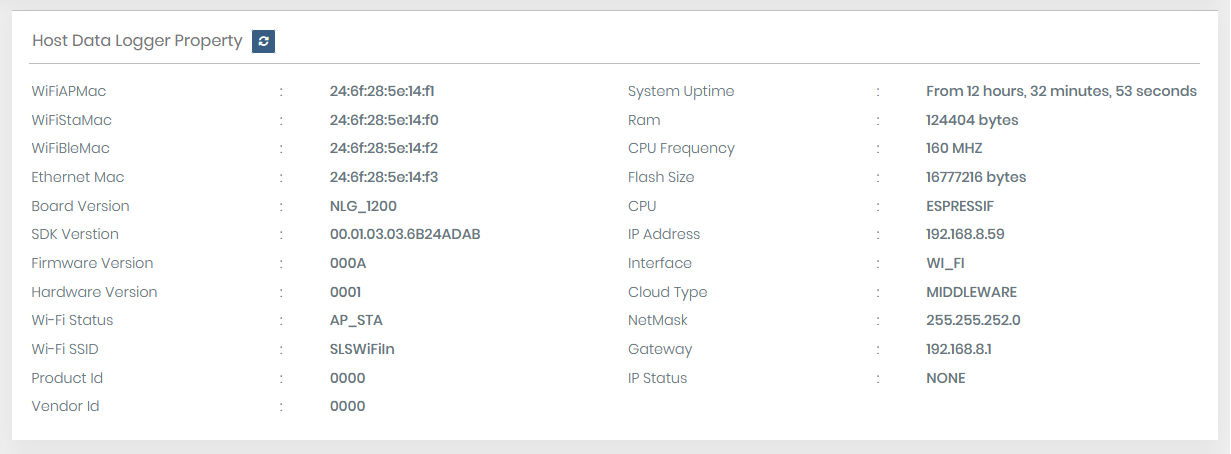
- Host gateway property: display selected data logger property from which we can identify many things like its type, versions, mac, cloud status, etc.
- Also, you can get live data logger property by clicking on Refresh Button
- When click on the refresh button UI will be blocked for while and once data get it will update data and unblock UI.
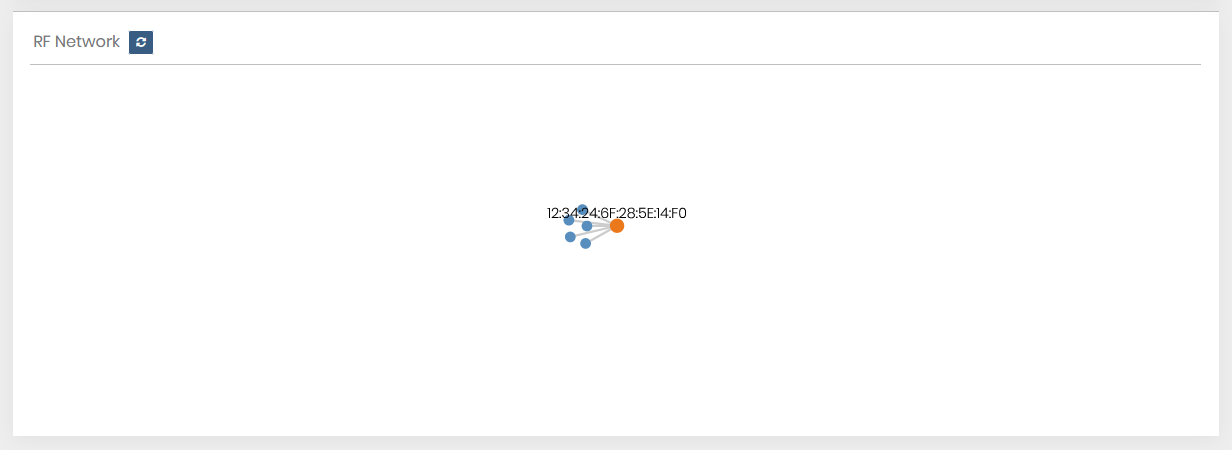
- RF Network: Get a graphical view of connected online and offline nodes. Also, get the refresh button to get the latest RF- Connection of nodes.
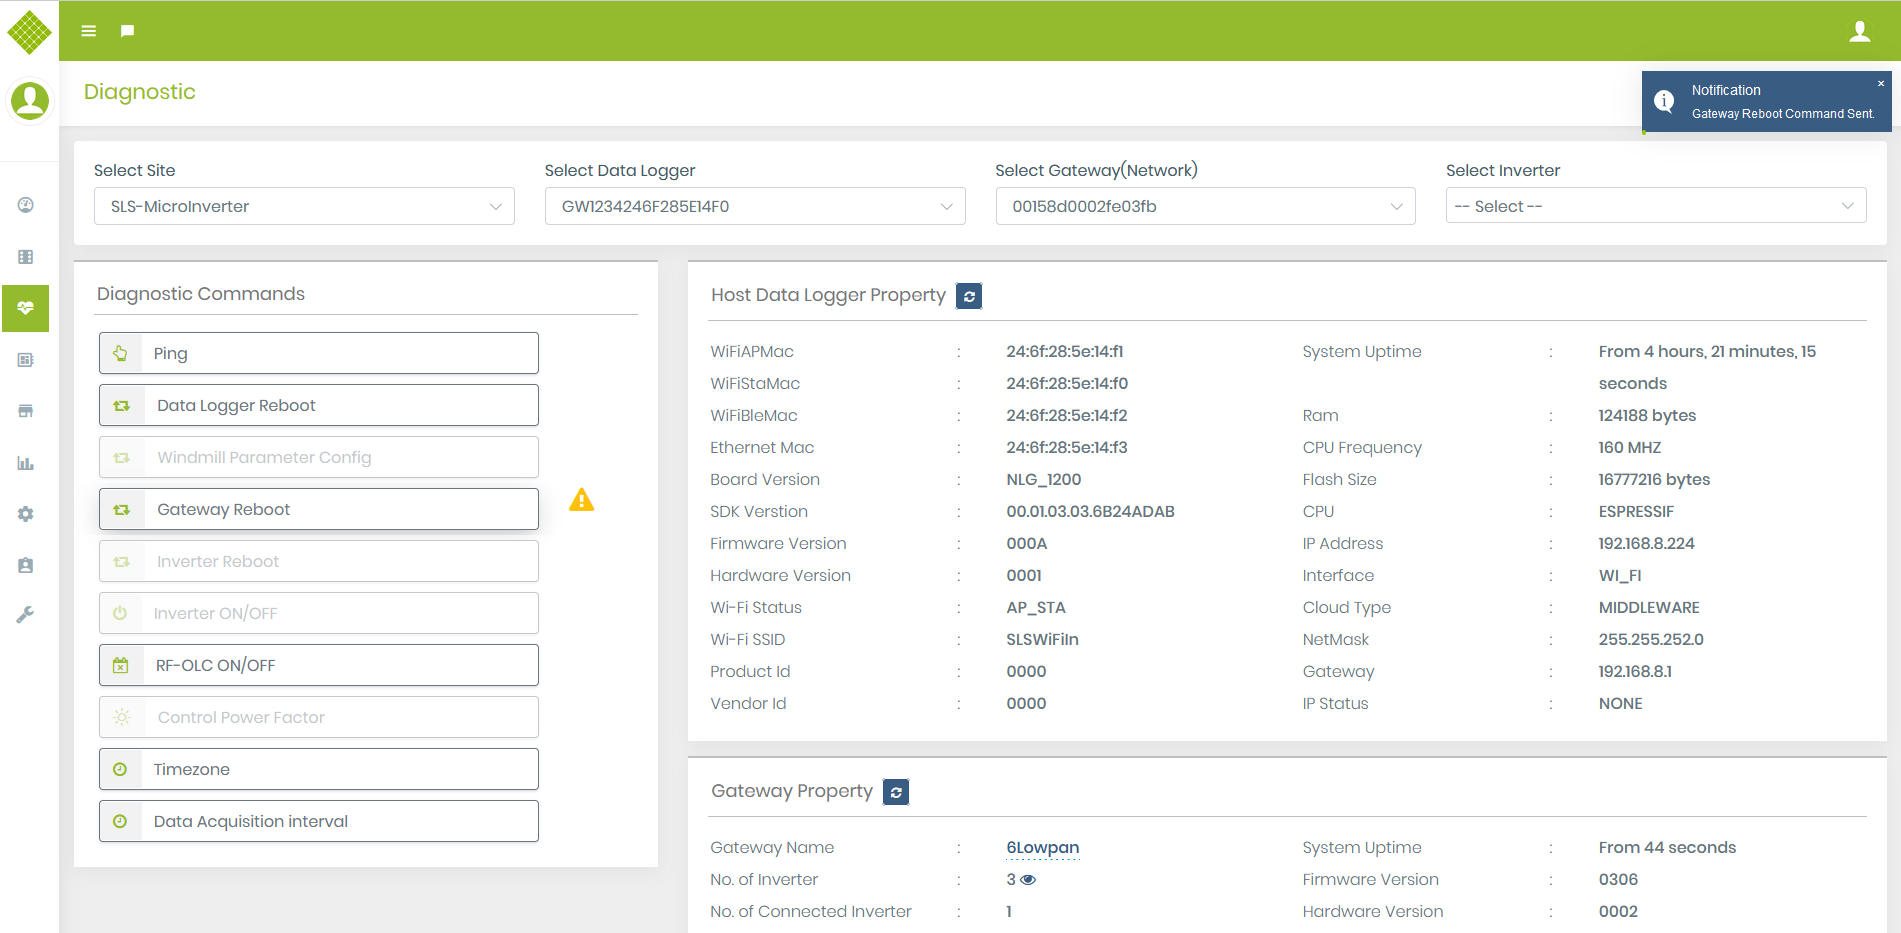
- Now select Gateway (Network) it will enable Inverter Selection. And Some command based on Site Type
- Get description about Gateway Reboot Command
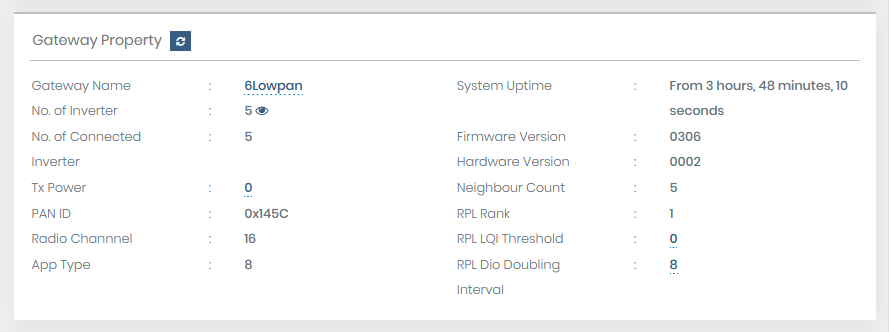
- Here you get Gateway property from where you get information like gateway name, no. Of inverter, connected inverter, Uptime, and other information regarding that gateway.
- Also, get Refresh gateway property to get live property of selected gateway.
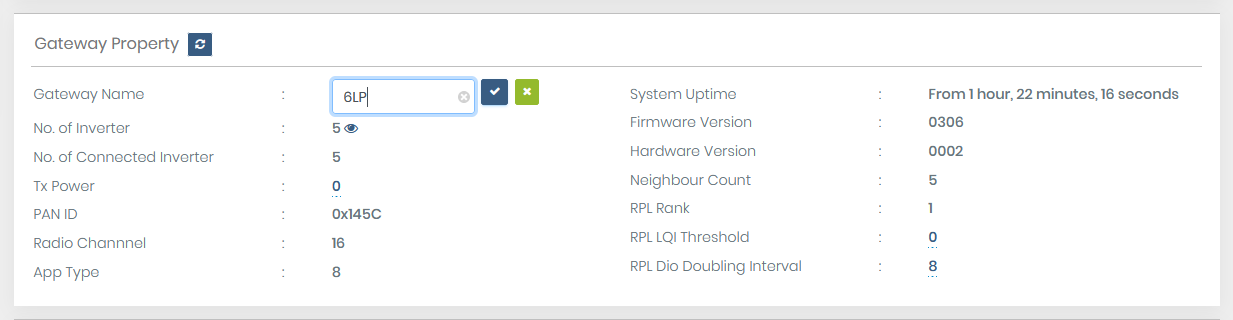
- Here you get the dotted line under Gateway Name, Tx Power, RPL LQI Threshold, and RPL Dio Doubling Interval. It indicates that these fields are editable and the user can update them.
- Gateway name: Must enter a value.
- Tx Power: Must contain numeric data only between range [-32 to 10]
- RPL LQI Threshold: Must contain numeric data only between range [0 to 255]
- RPL Dio Doubling Interval: Must contain numeric data only between range [4 to 8]
- For example: Click on Gateway Name
- You get an editable text box with
 save button and
  cancel button to close textbox.
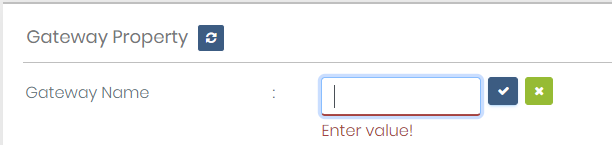
 - If you enter blank and try to save data, you get an error like below.
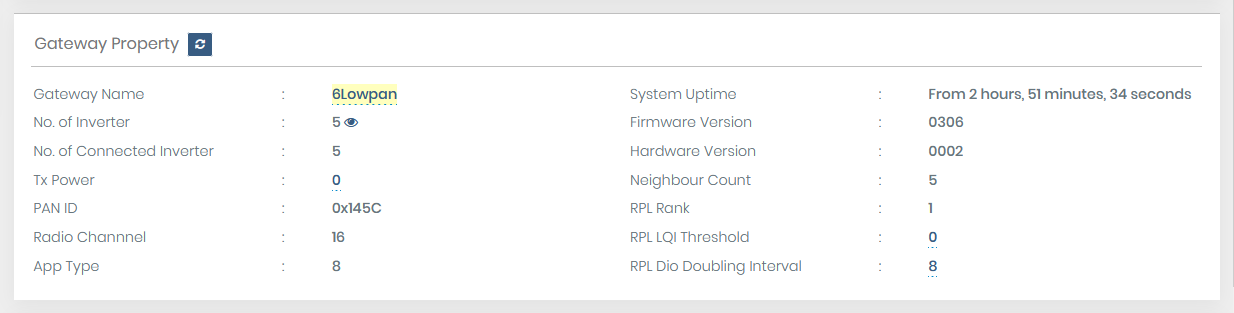
- Enter valid data and try to save it, it will update with a new entry value.
- This is the same for all editable fields.
- You also get the show list option with no. Of inverter.
- Click on the eye option to get Inverter list
- Suppose you are in this stage and somehow gateway goes offline then same all command from command list are disable and all refresh button except RF- network is also disabled.
- And you are in the same situation on this page and get gateway online then commands which previously enable those are again enabled and all refresh buttons are enabled.
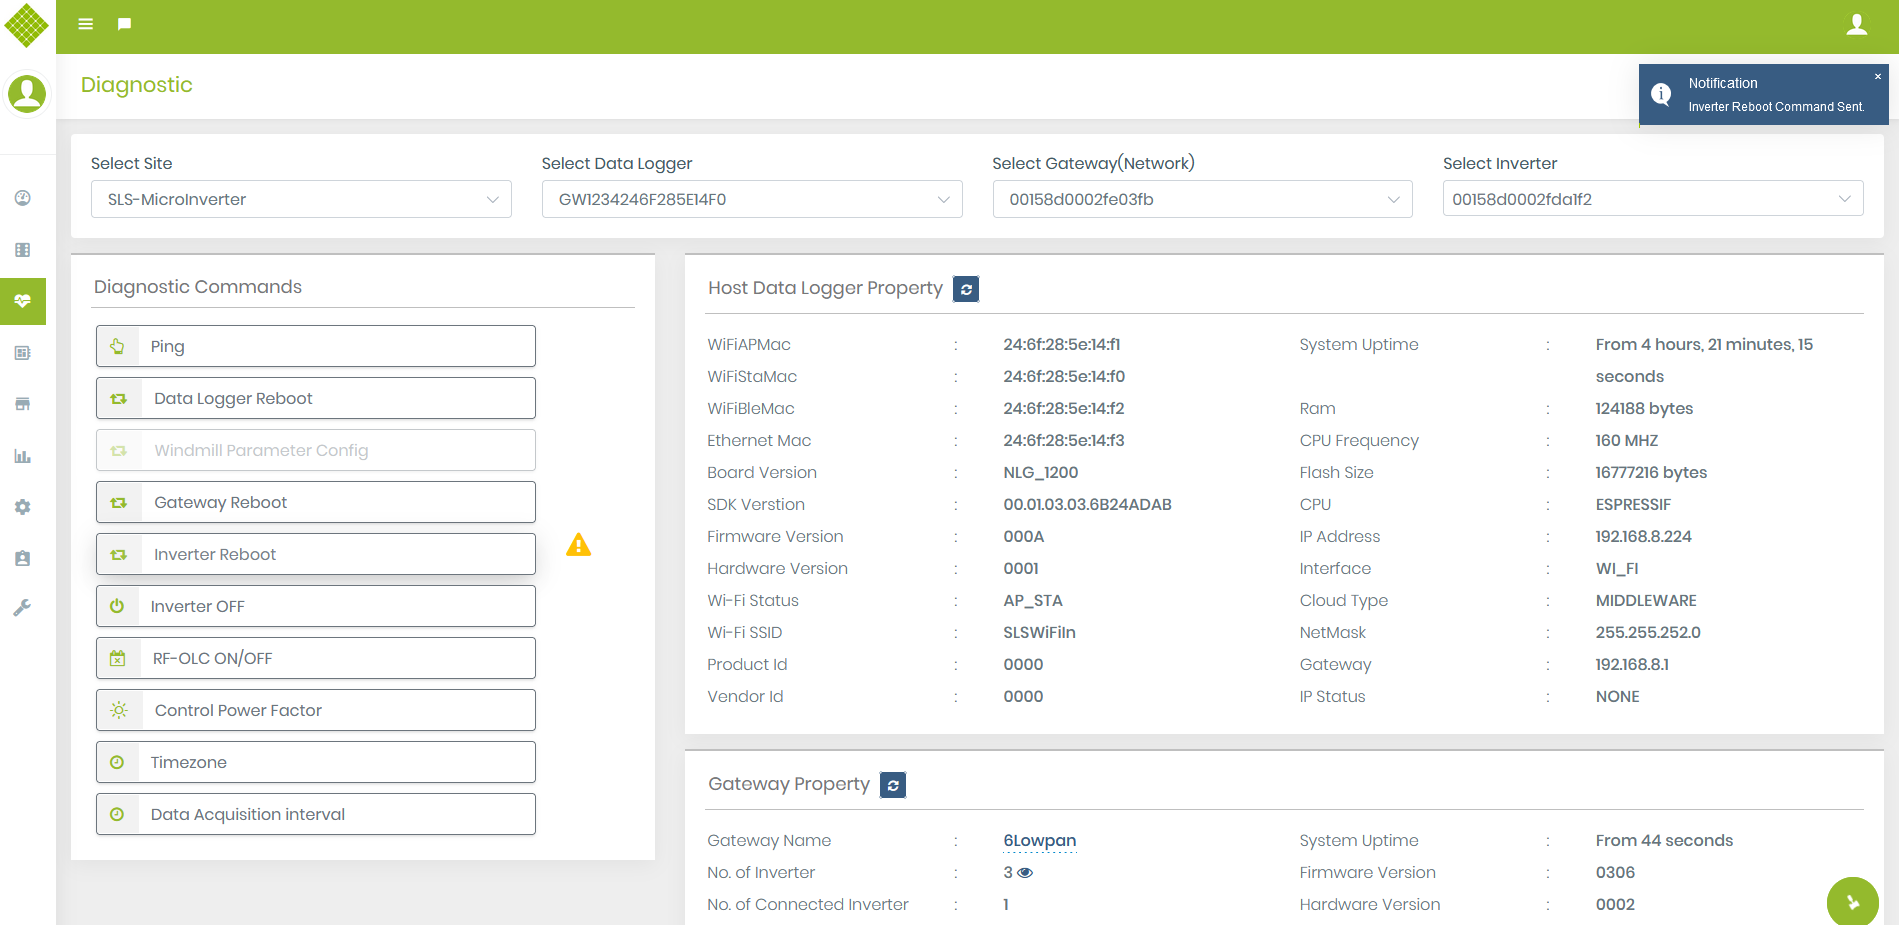
- Now select any Inverter.
- It will enable “Inverter Reboot”(not supported for a rooftop with string inverter) and the “Inverter Off” command also display inverter property
- Get description about Inverter Reboot Command
- Get description about Inverter On/OFF Command
- Get description about Control Power Factor Command
- Here you get Inverter property from where you get information about selected the selected Inverter. Also, get Refresh inverter property to get live property of selected inverter.
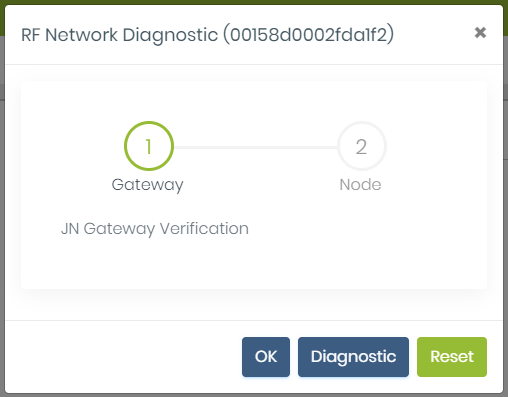
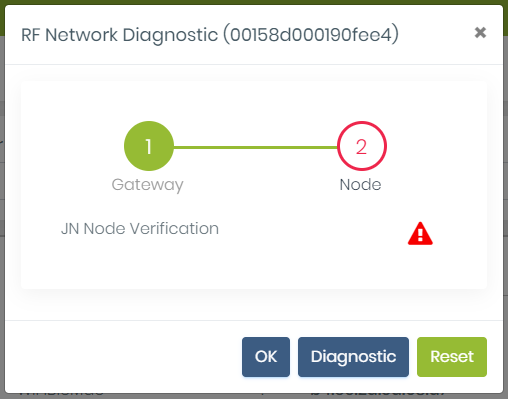
- After selecting the inverter you get the RF Network Diagnostic option of a particular inverter. (Not applicable for string inverter)
- Click on that option, you get:
- RF Network Diagnostic modal pop up with selected inverter mac display.
- Also, display wizard for connection between gateway and node.
- OK: It will close the pop-up modal.
- Reset: It will reset the Graphic view for the next process.
- Diagnostic: Start the diagnostic process.
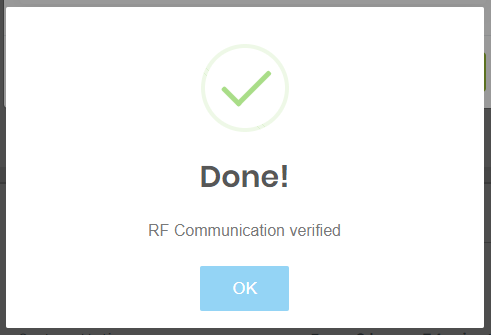
- Click on the diagnostic button, it will start the process, during that UI blocked
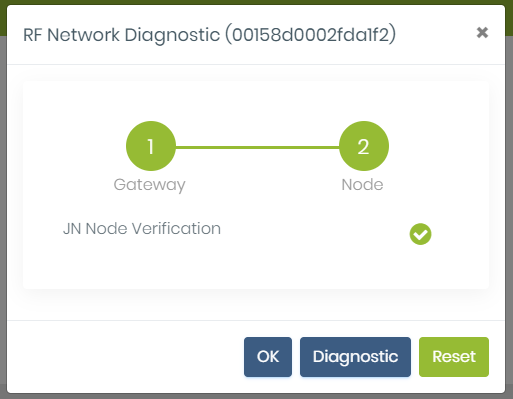
- Once the process complete and get success then
- Success message with RF Communication Verified. Click on OK, you get a Graphic view like below:
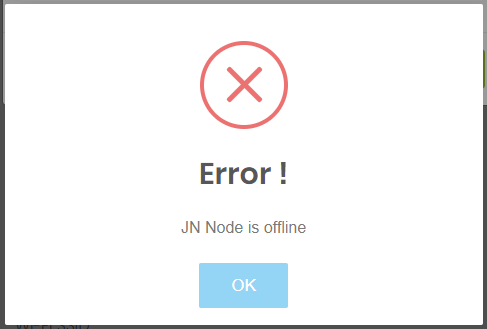
- If you select an inverter that is not connected to RF- Network and try to diagnose it.
- It will display JN Node is offline. Click on OK
- Click on OK to close the Pop-up.

All Diagnostic Commands
Note:
 Indicate waiting for MQTT response.
 Indicate get response successful.
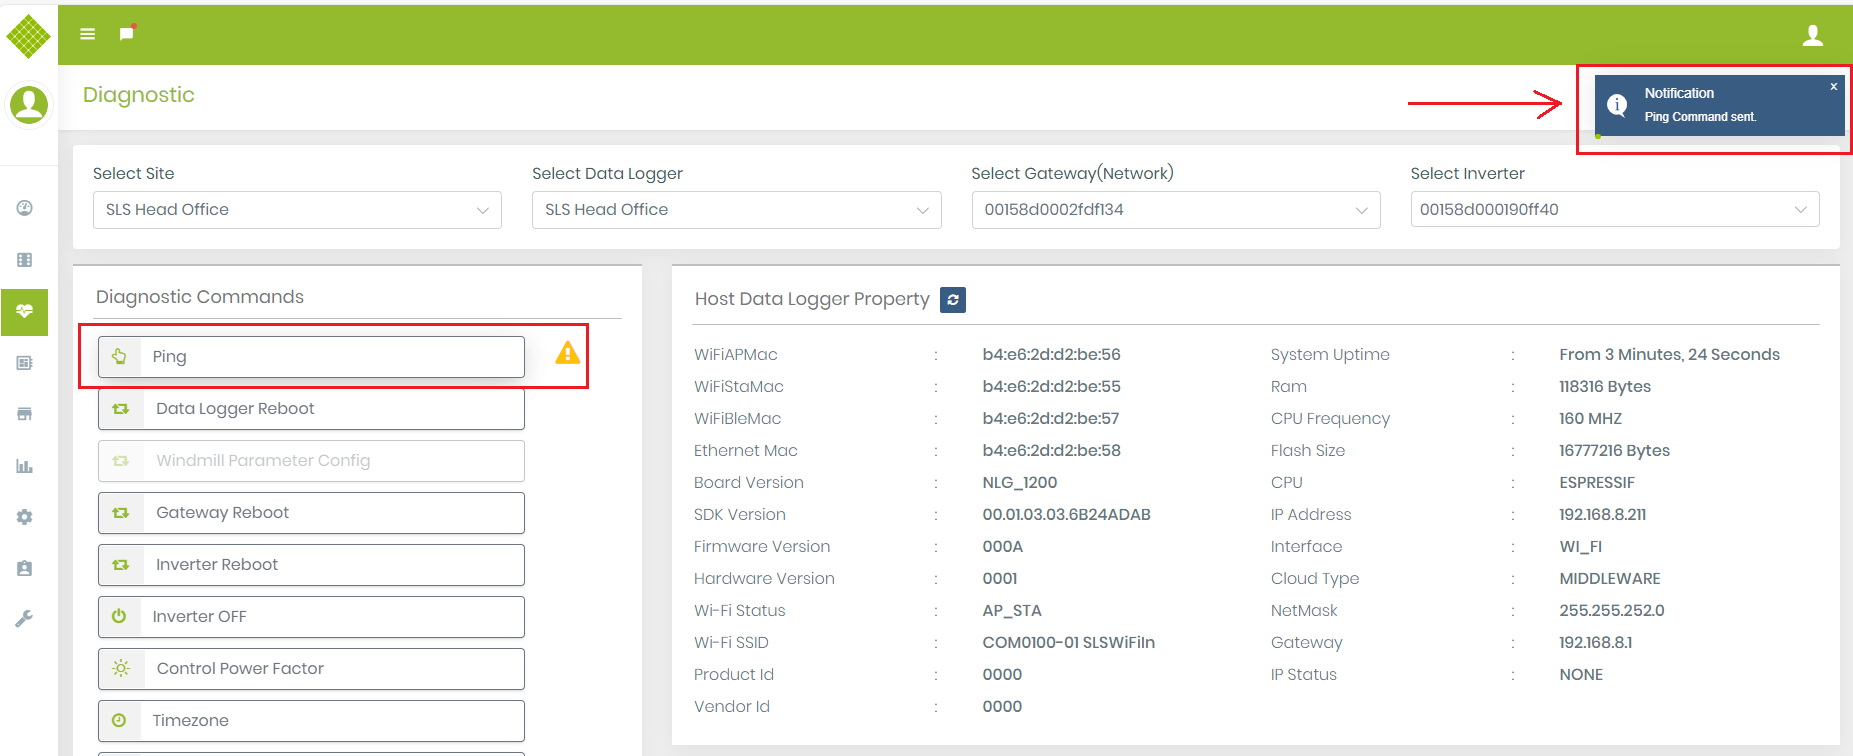
Ping
- This command is used to check Gateway is working properly or not.
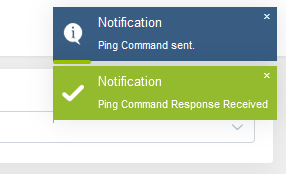
- Once you click on the Ping command it will display a message like below
- If Gateway is working properly then get a response like below:
- You get a message with success “Ping command received successfully” and Icon will change with
- Also, get updated Host Gateway Property as per ping response.
Data Logger Reboot
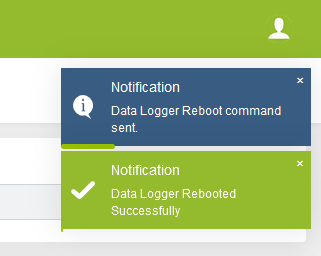
- This command is used to reboot the host gateway. Users can reboot it directly from the portal. Click on Command you get.
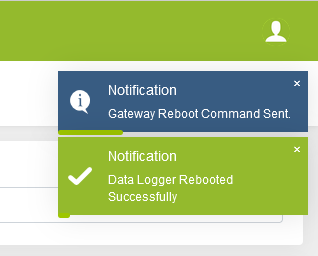
- You get a message at the right top corner for the command sent. Once Data Logger reboot you following:
Windmill Parameter Configuration
- Select any windmill site,we get Windmill Parameter Config option enable.
-
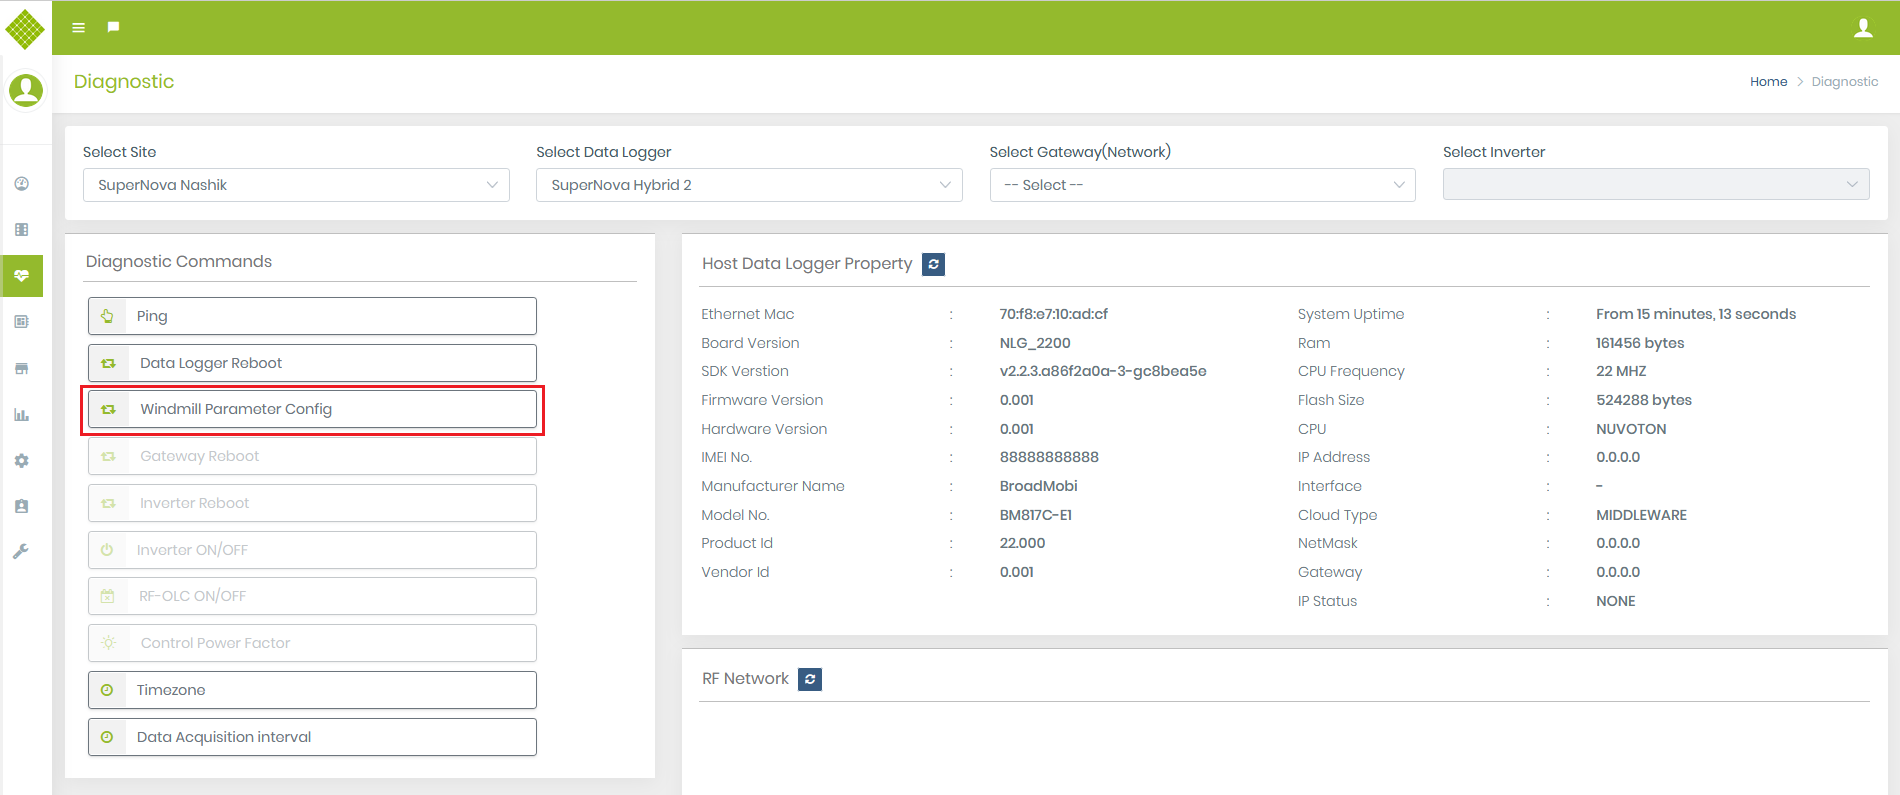
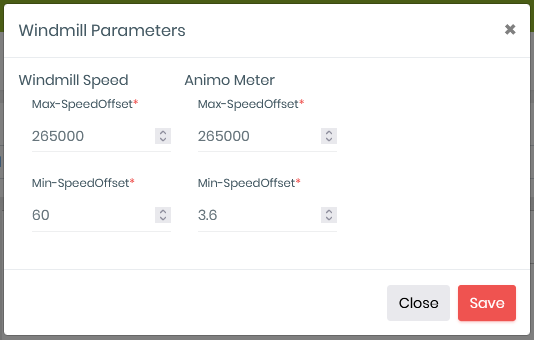
- This command is used to set the Windmill parameter configuration. Click on the command, you get the pop-up form as below:
- Form Contain windmill parameter for Windmill site you may get more parameter to set.
- All Parameter is mandatory and all have a default value "0”.
- Change value per requirement and click on Save.
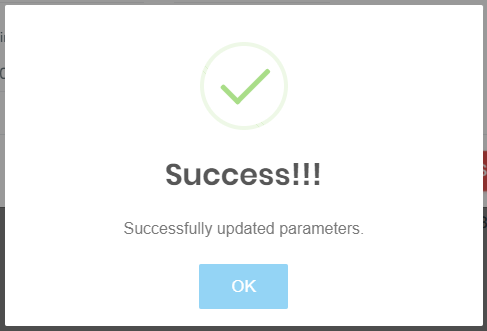
- If data successfully save then get the following message:
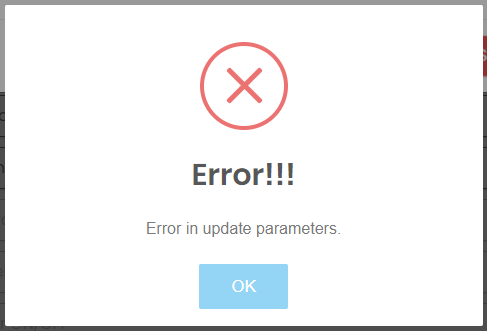
- If Data are not set successfully then:
Gateway Reboot
- This command is used to reboot the selected Gateway. Click on the command you get a message for sent request:
- Once the request sent successfully then get:
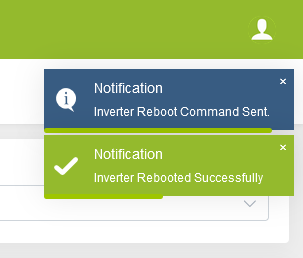
Inverter Reboot
- This command is used to reboot the selected inverter... Click on the command you get a message for sent request:
- Once the request sent successfully then get:
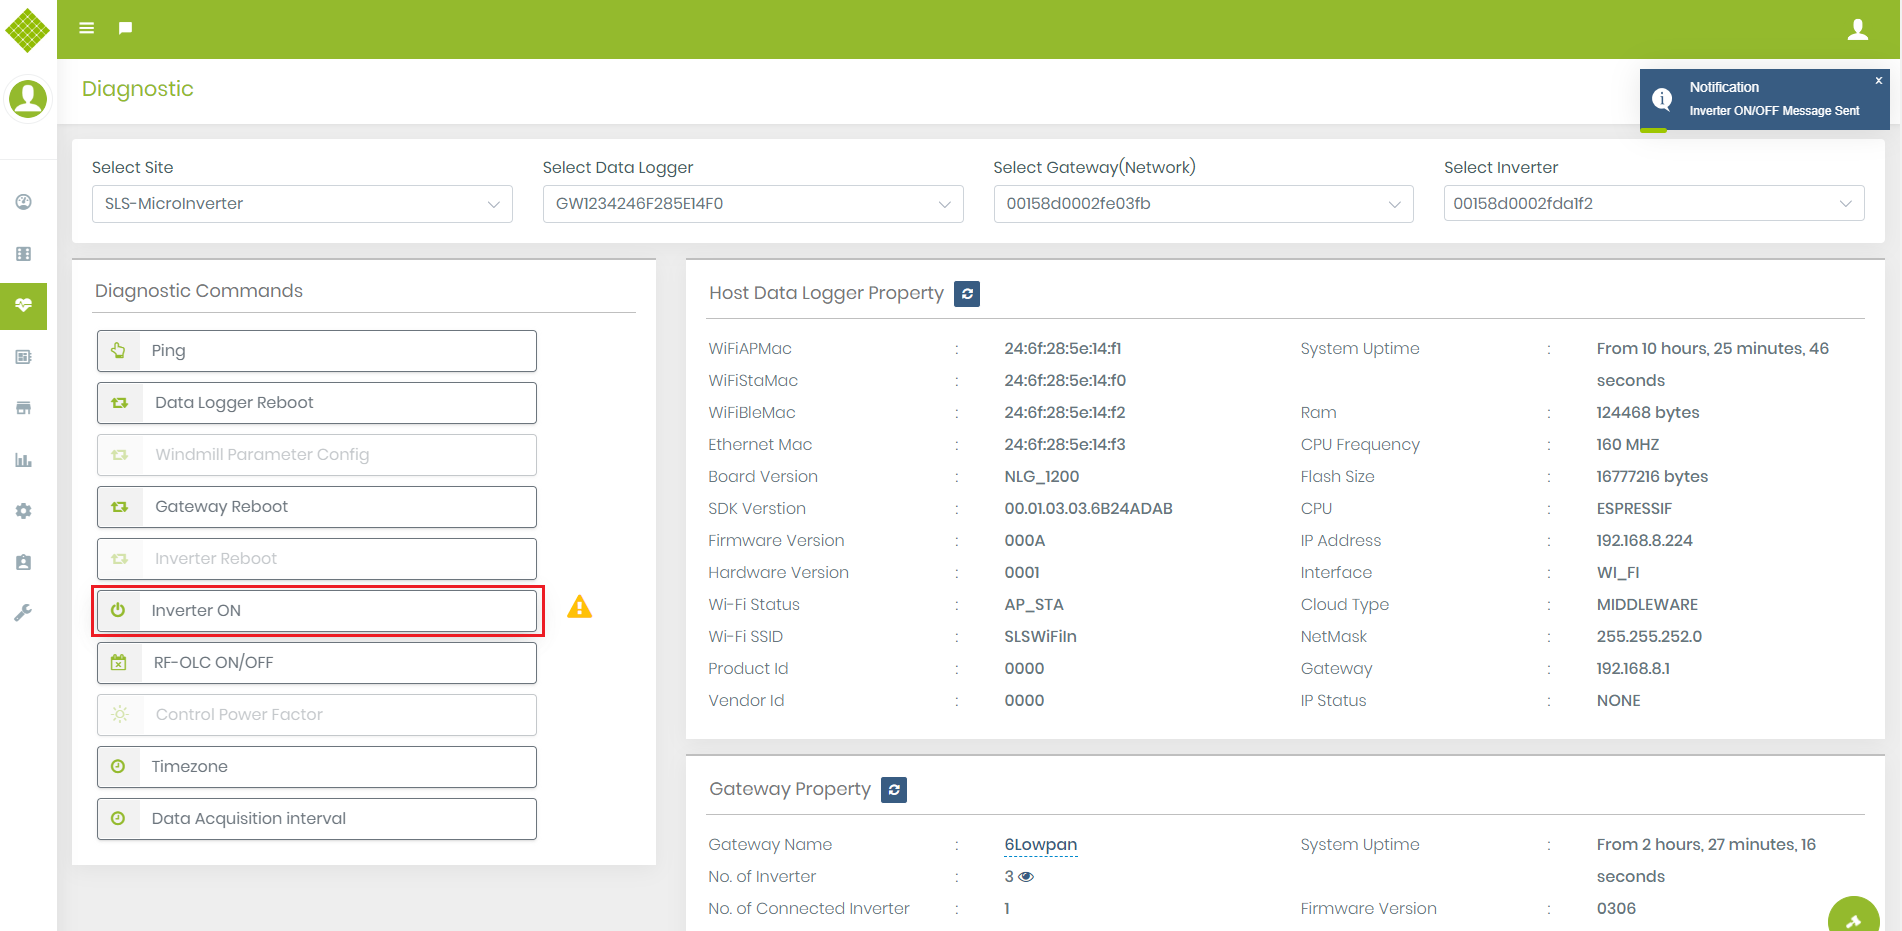
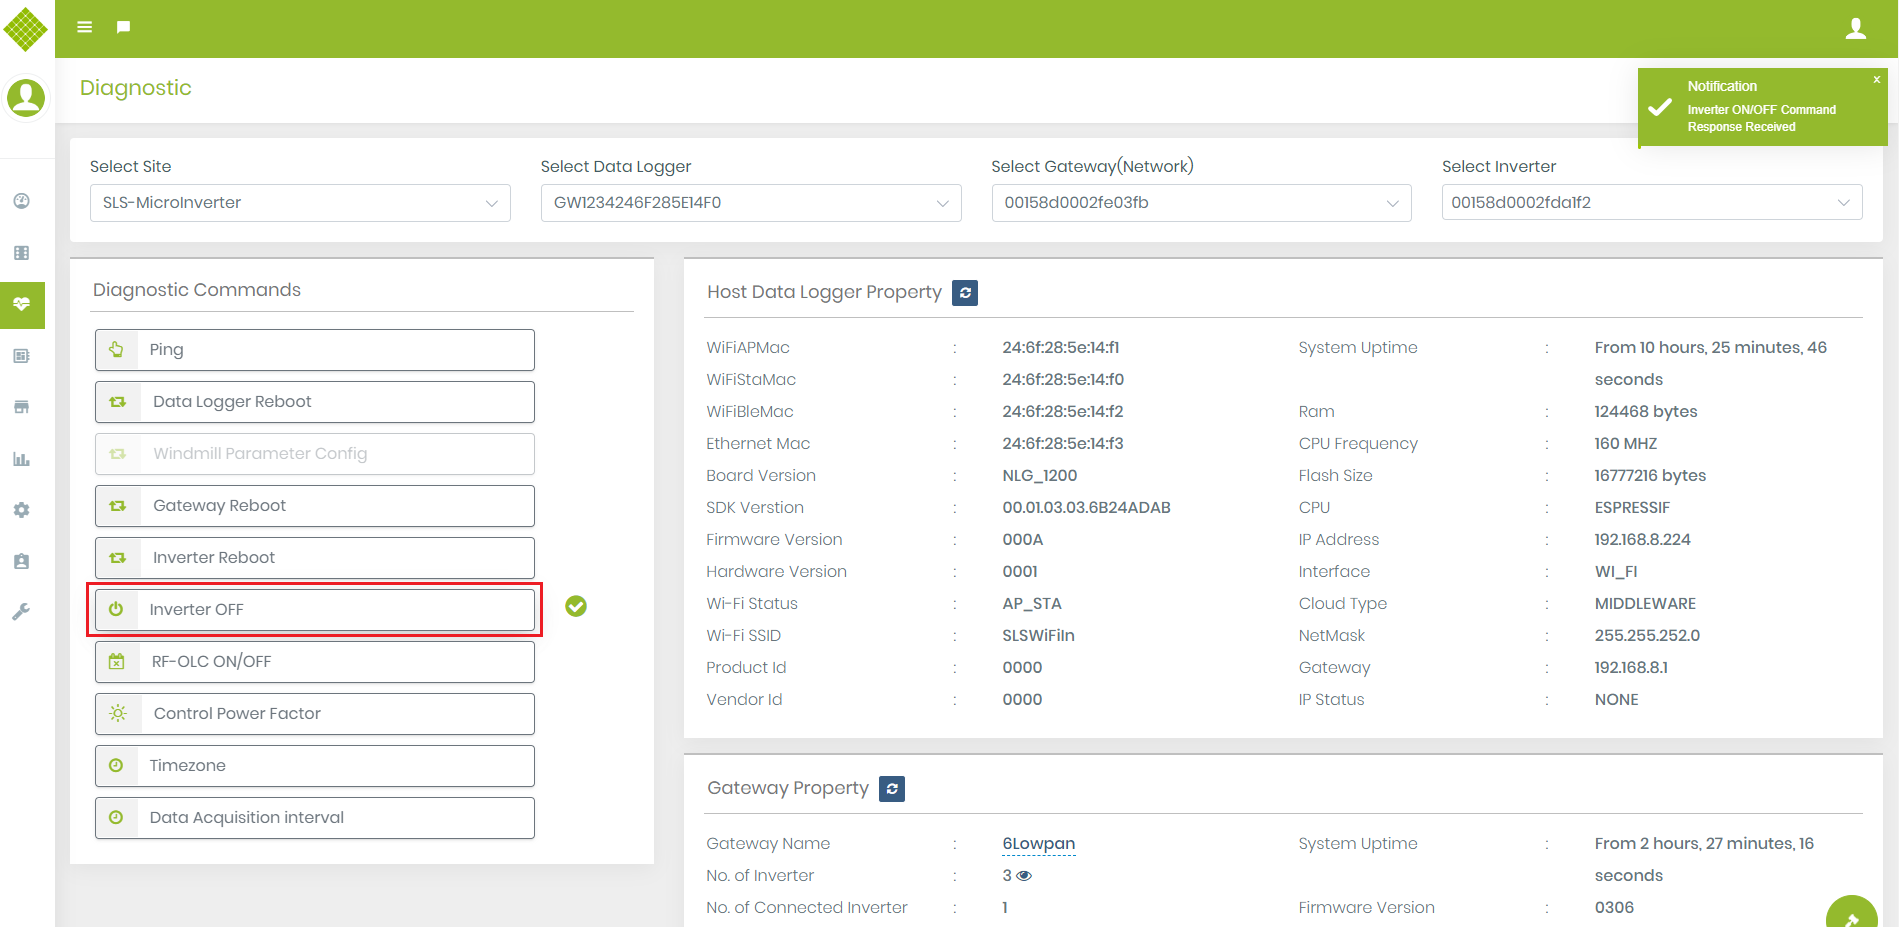
Inverter ON/OFF
- This command is used to on/off inverters.
- If an inverter is On then get the text “Inverter OFF” and the inverter is off then get the text “Inverter ON”.
- Click on a command to on/off the inverter.
- Once the request sent successfully then get:
- Also, command text change from “Inverter OFF” -> “Inverter On” and “Inverter On”->“Inverter OFF”.
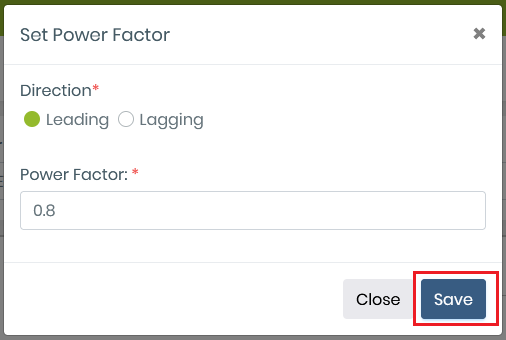
Control Power Factor
- This command is used control the Power Factor parameter of the inverter.
- Click on Command you get following popup.
- It will contain Leading and Lagging option.
- If you select Leading than it will increase the value of Power Factor with the given defined value and if you select Lagging than it will decrese it.
- Select Leading or Lagging option, define how much value you want to increase on Power Factor Textbox and Click on Save for final submit.
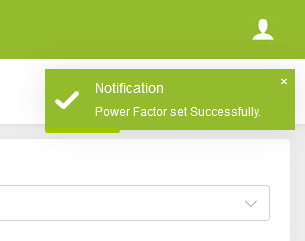
- It will display sent request notification after save.
- On success it will display success message.
- After than in each trap of inverter you get Power Factor value increase with 0.8
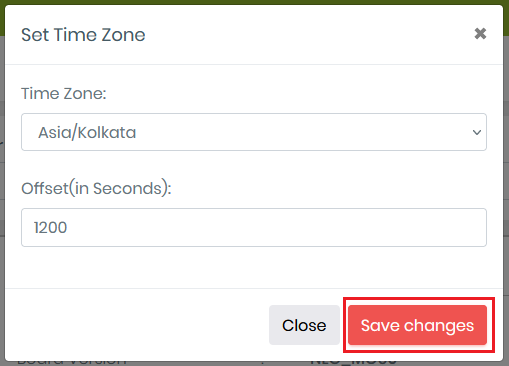
Timezone
- This command is use to set the time zone of the gateway, we get timestamp from gateway based on set time zone.
- Click on the command you get the popup window.
- You can set timezone of gateway.
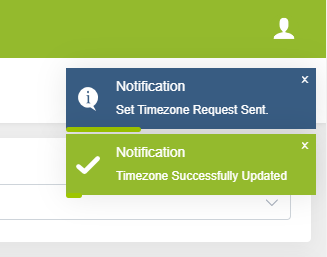
- Select the timezone from dropdown it will display its offset in seconds, on clicking on the Save changes it will set the timezone of for that gateway.
- After Success you will get this type of notification.
Data Acquisition Interval
- This command is use to set trap interval duration from gateway.
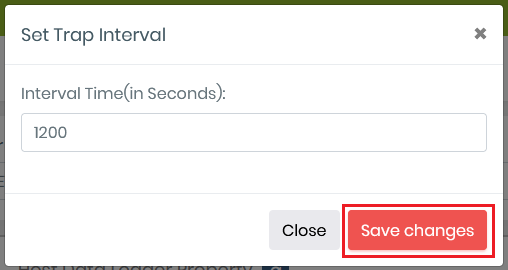
- Click on the command you get the popup window.
- Set Interval duration in seconds. For eg. if we want set trap interval of 20 minutes than assign 1200 seconds
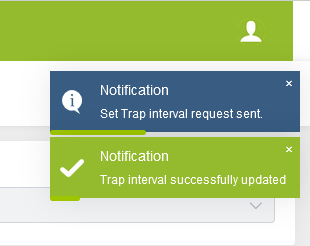
- Click on the save changes button you will to set Interval.
- After Success you will get this type of notification.
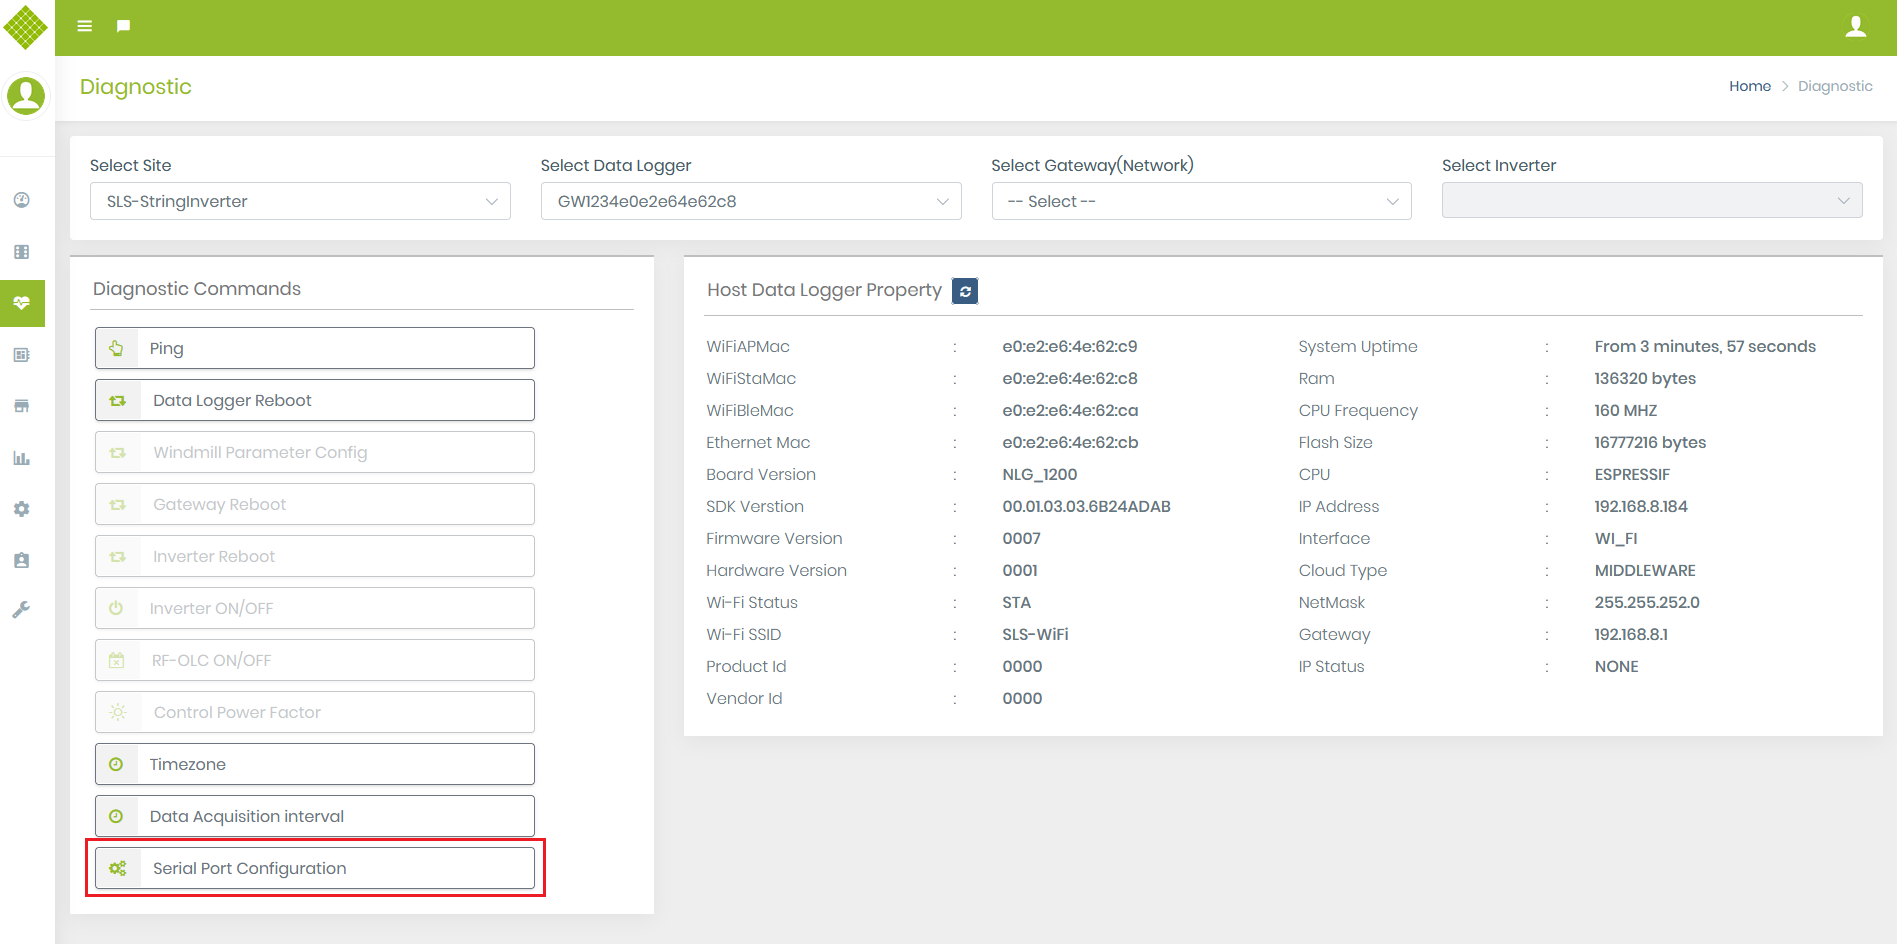
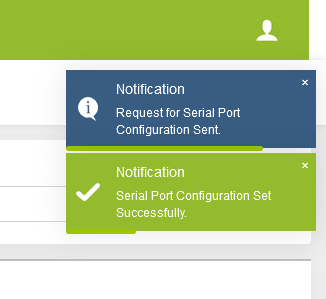
Serail Port Configuration
- This command is use to configure transfer of serial port per second.
- This command is use in String Inverter only.
- Click on the command you get the popup window.
- Set its Baud Rate, Data Bits, Parity and Stop Bits value you want to configure from given dropdowns and click on save for final submit.
- On Request send and success you will get following notification.


Device Management
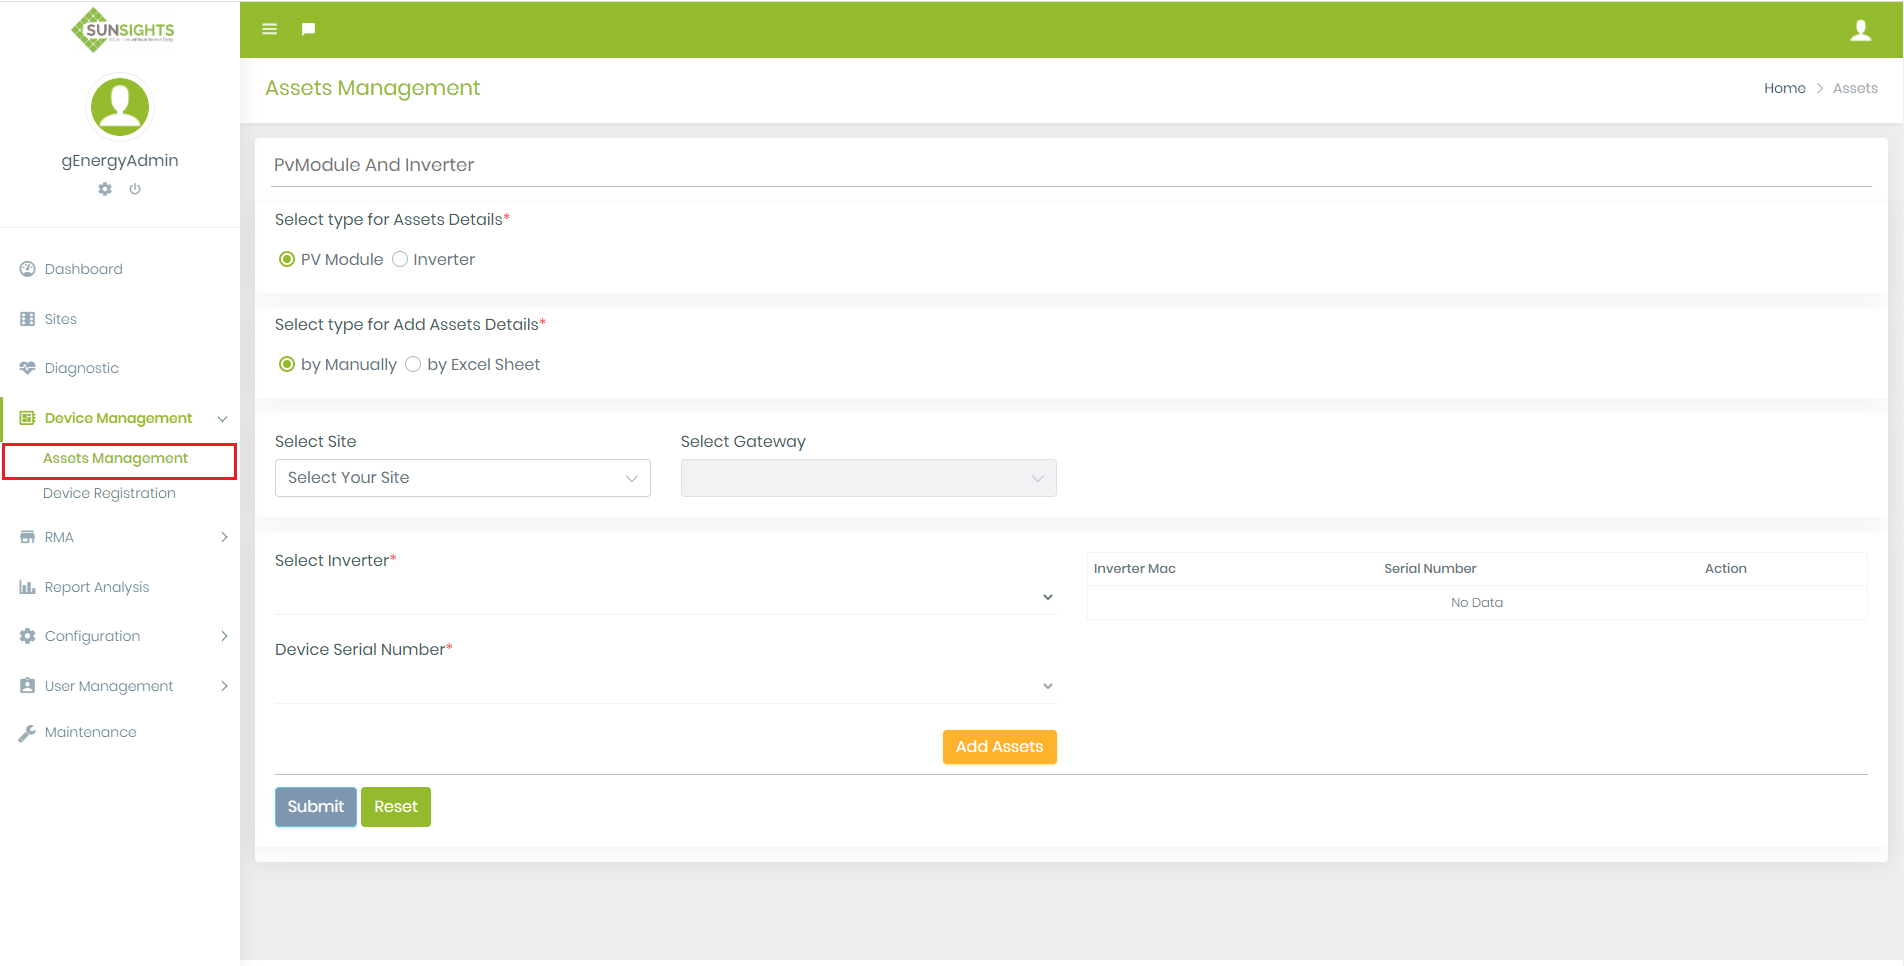
Assets Management
- Login in Portal with Admin or Supplier Credential to ADD/Update Assets Details.
- Click on Device Management → find and click on Assets Management option.
- You get Following Screen:
Add/Update PV Module and Inverter Assets Details
1. Add PV Module detail
- Select type for Assets Details : PV Module
- Select type for Add Assets Details : By Manually
- Select Site → Select Gateway → Select Inverter → Device Serial Number
- Click on Add Assets to add multiple assets detail.
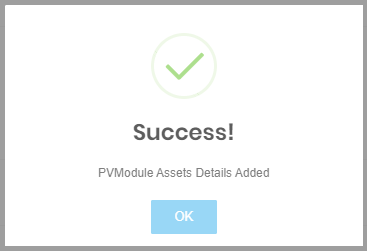
- Click on final submit to submit all details.
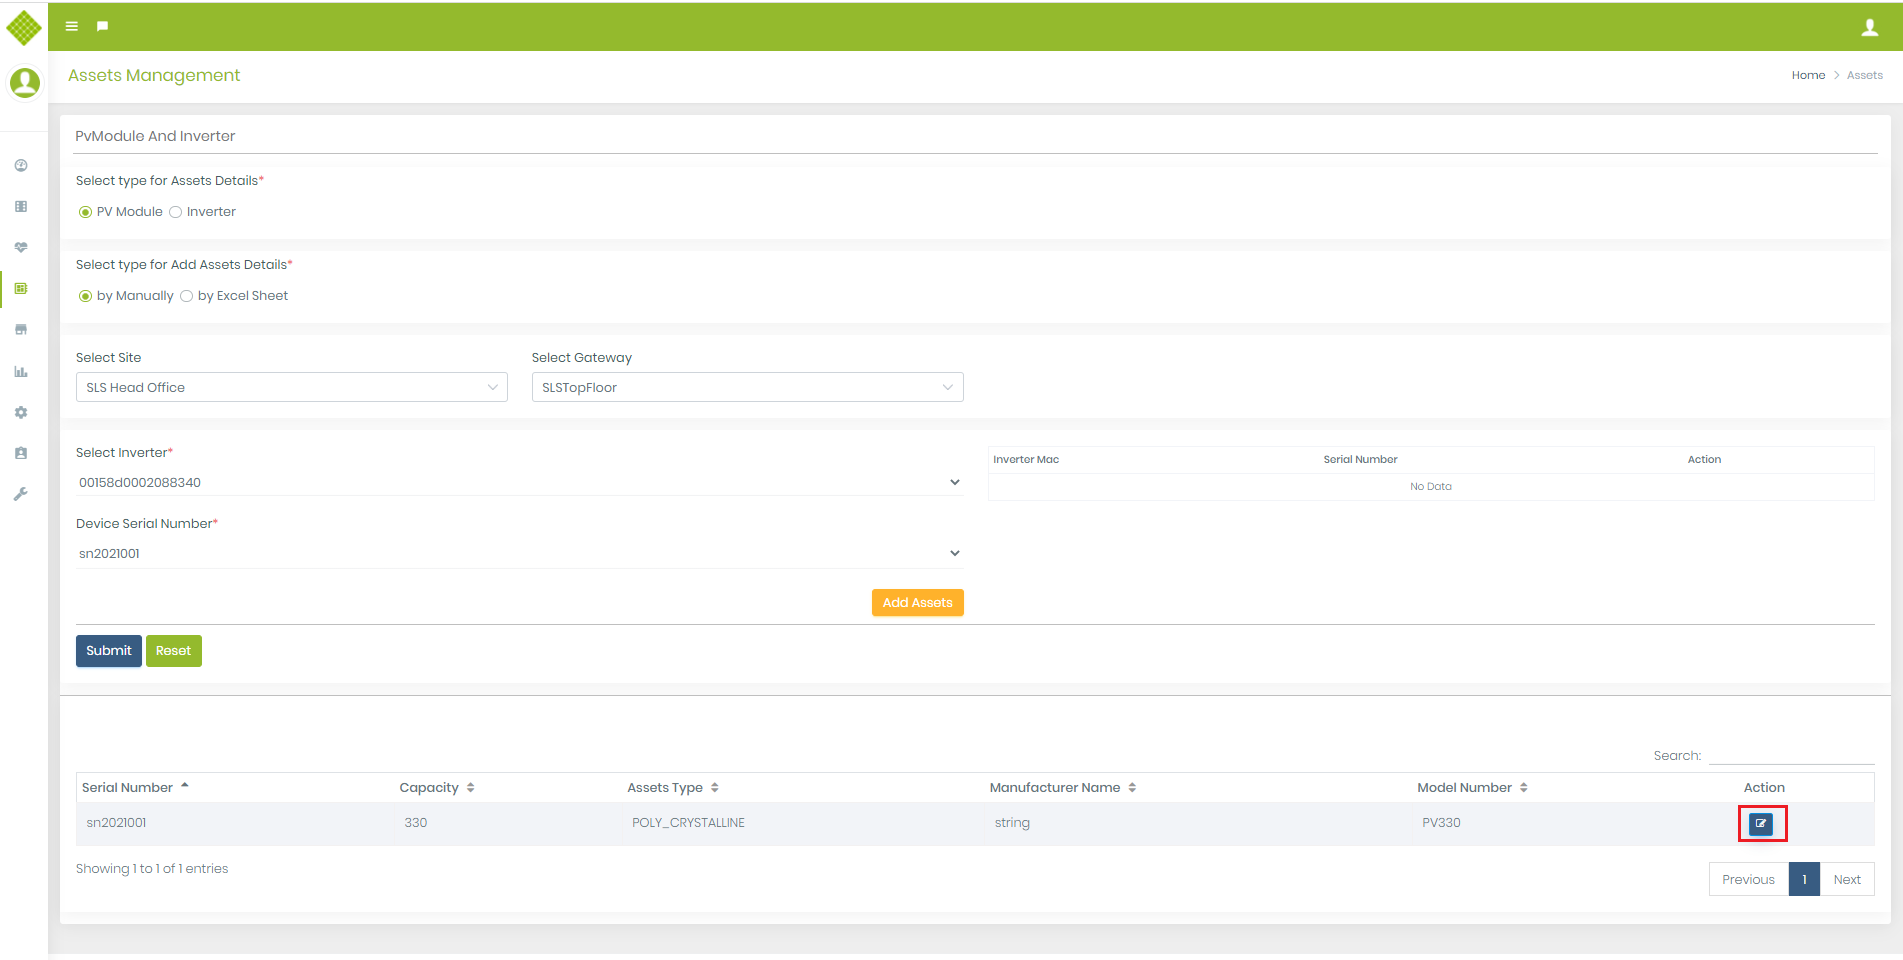
- When Click on “OK” PV Module details will display in data table:
- Click on “Edit” button to update PV Module details (when you click all fields are fill with selected pv module in form to edit)
- Edit Pv module details as per required with valid data and submit form:


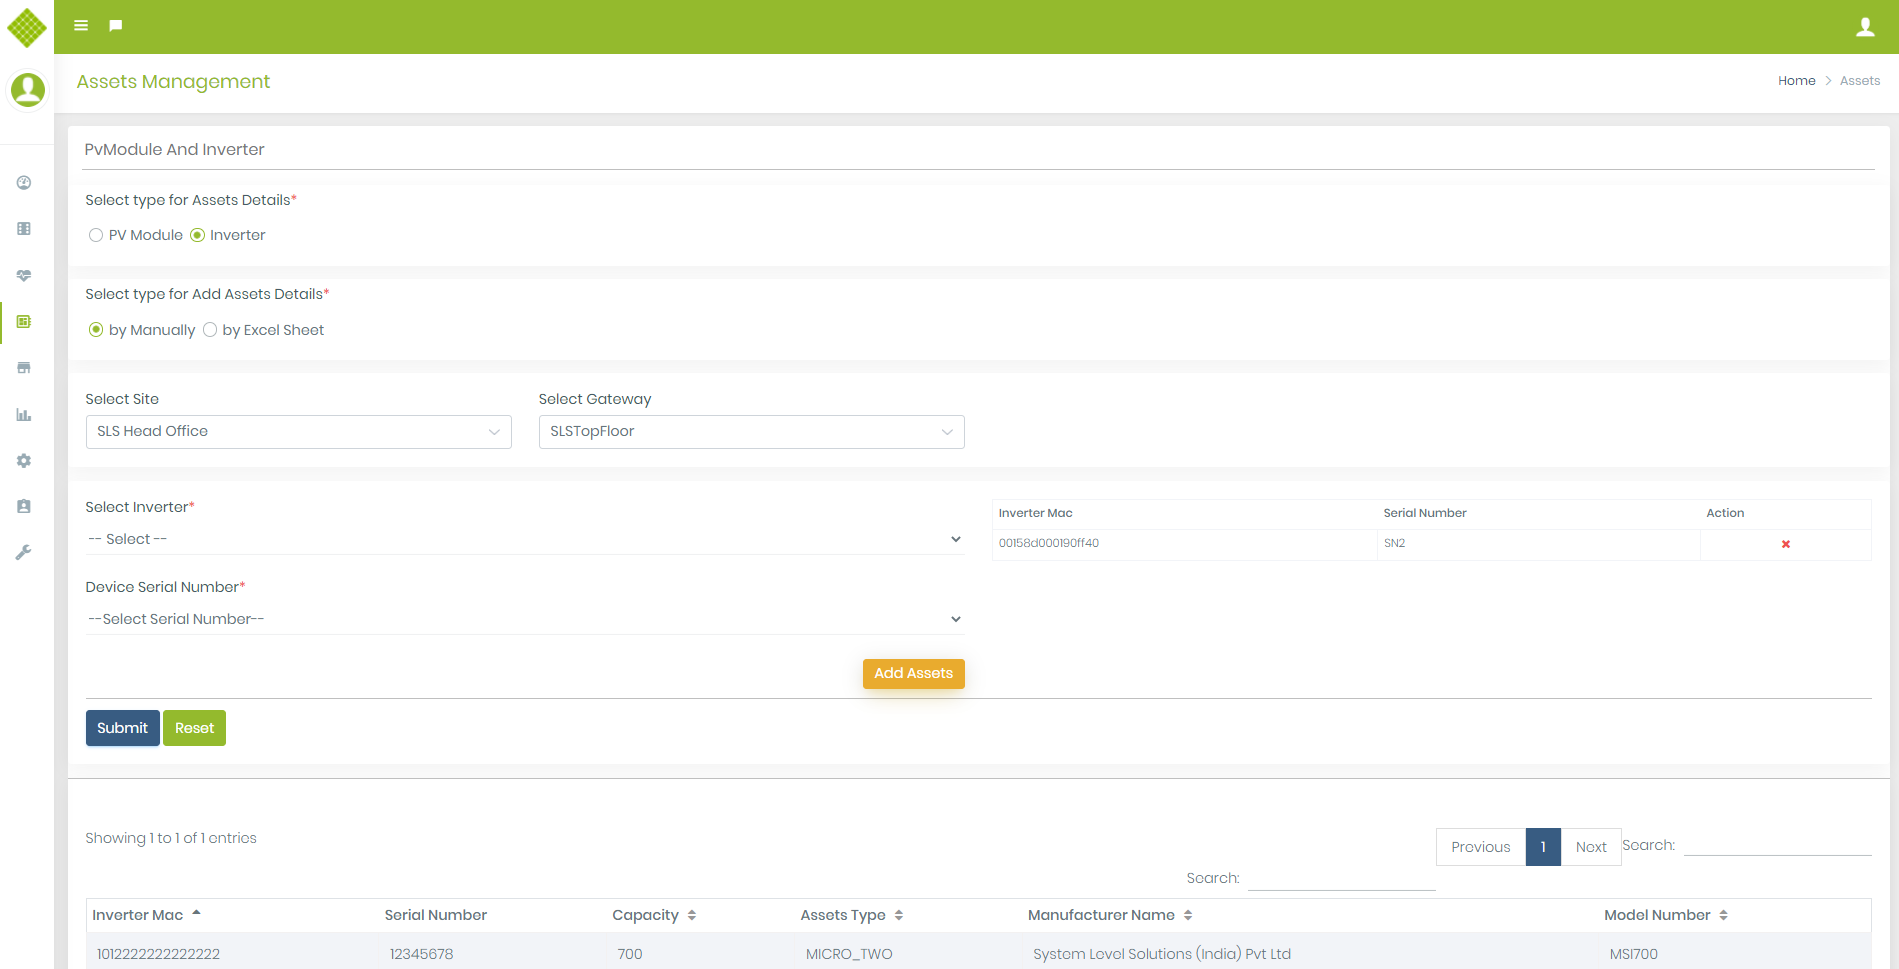
2. Add Inverter detail
- Select type for Assets Details : Inverter
- Select type for Add Assets Details : By Manually
- Select Site → Select Gateway → Select Inverter → Device Serial Number
- Add assets detail and click on submit button as same like pv module.
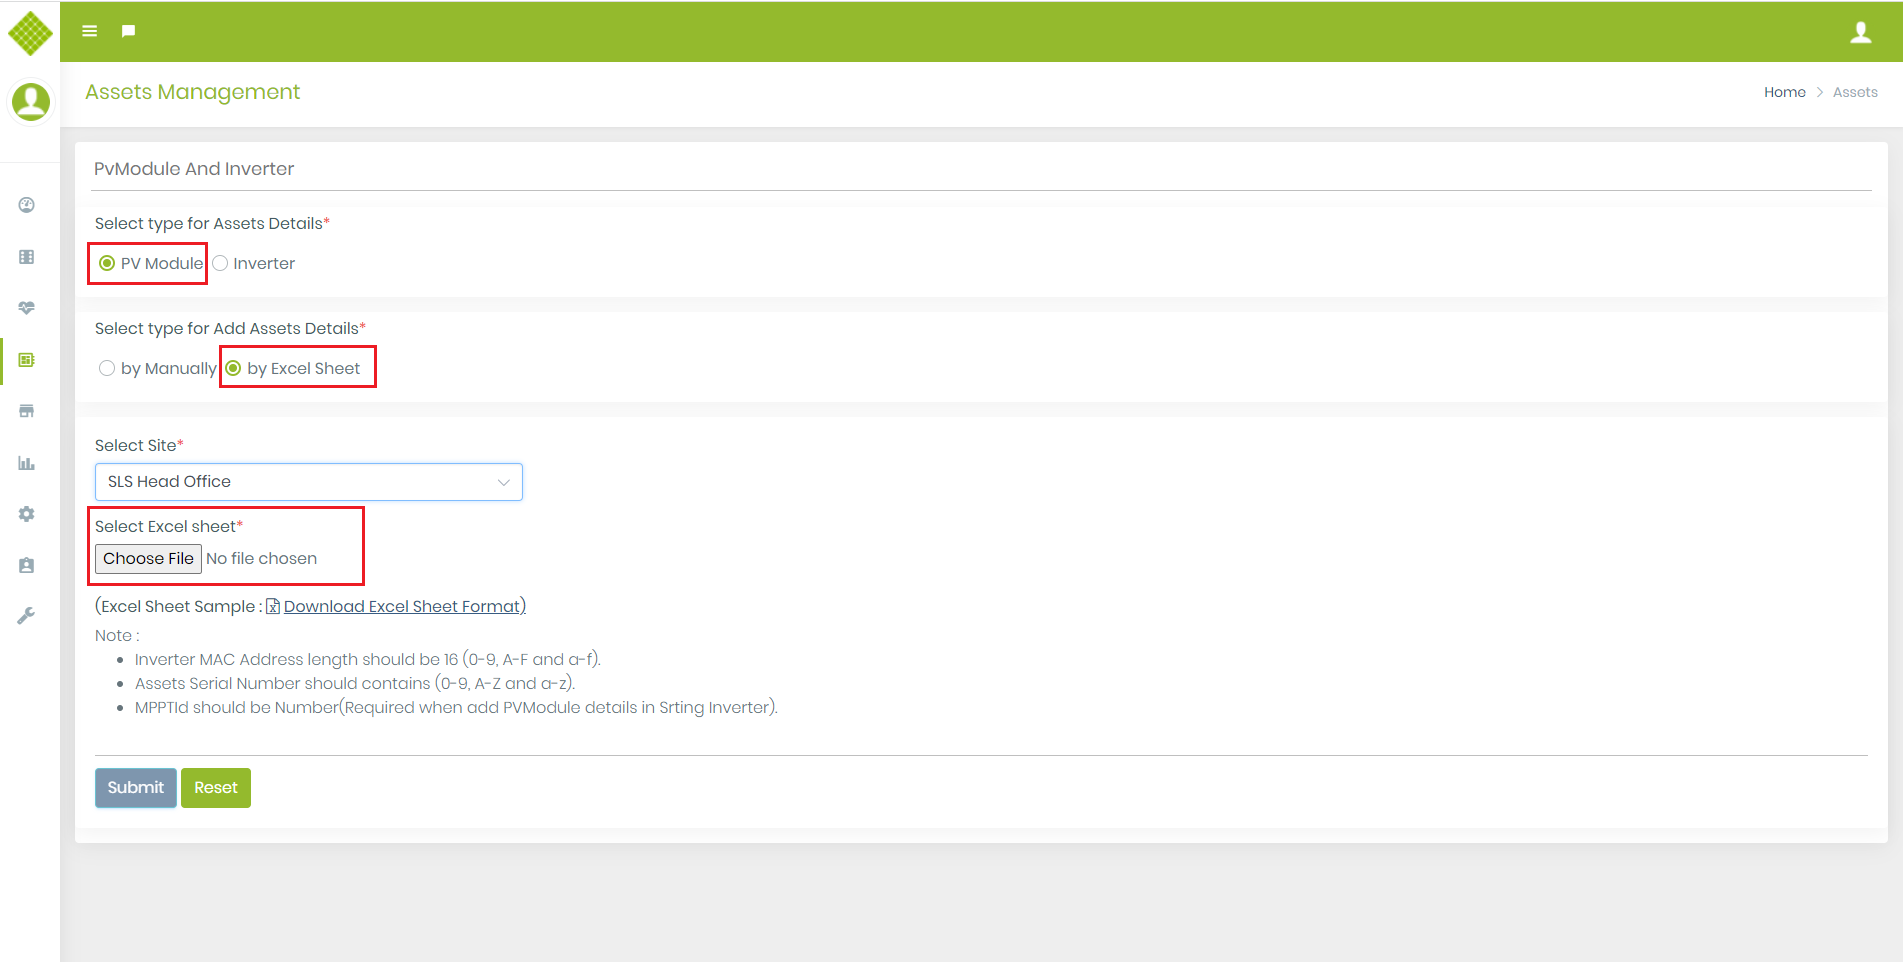
3. Add assets detail by Excel
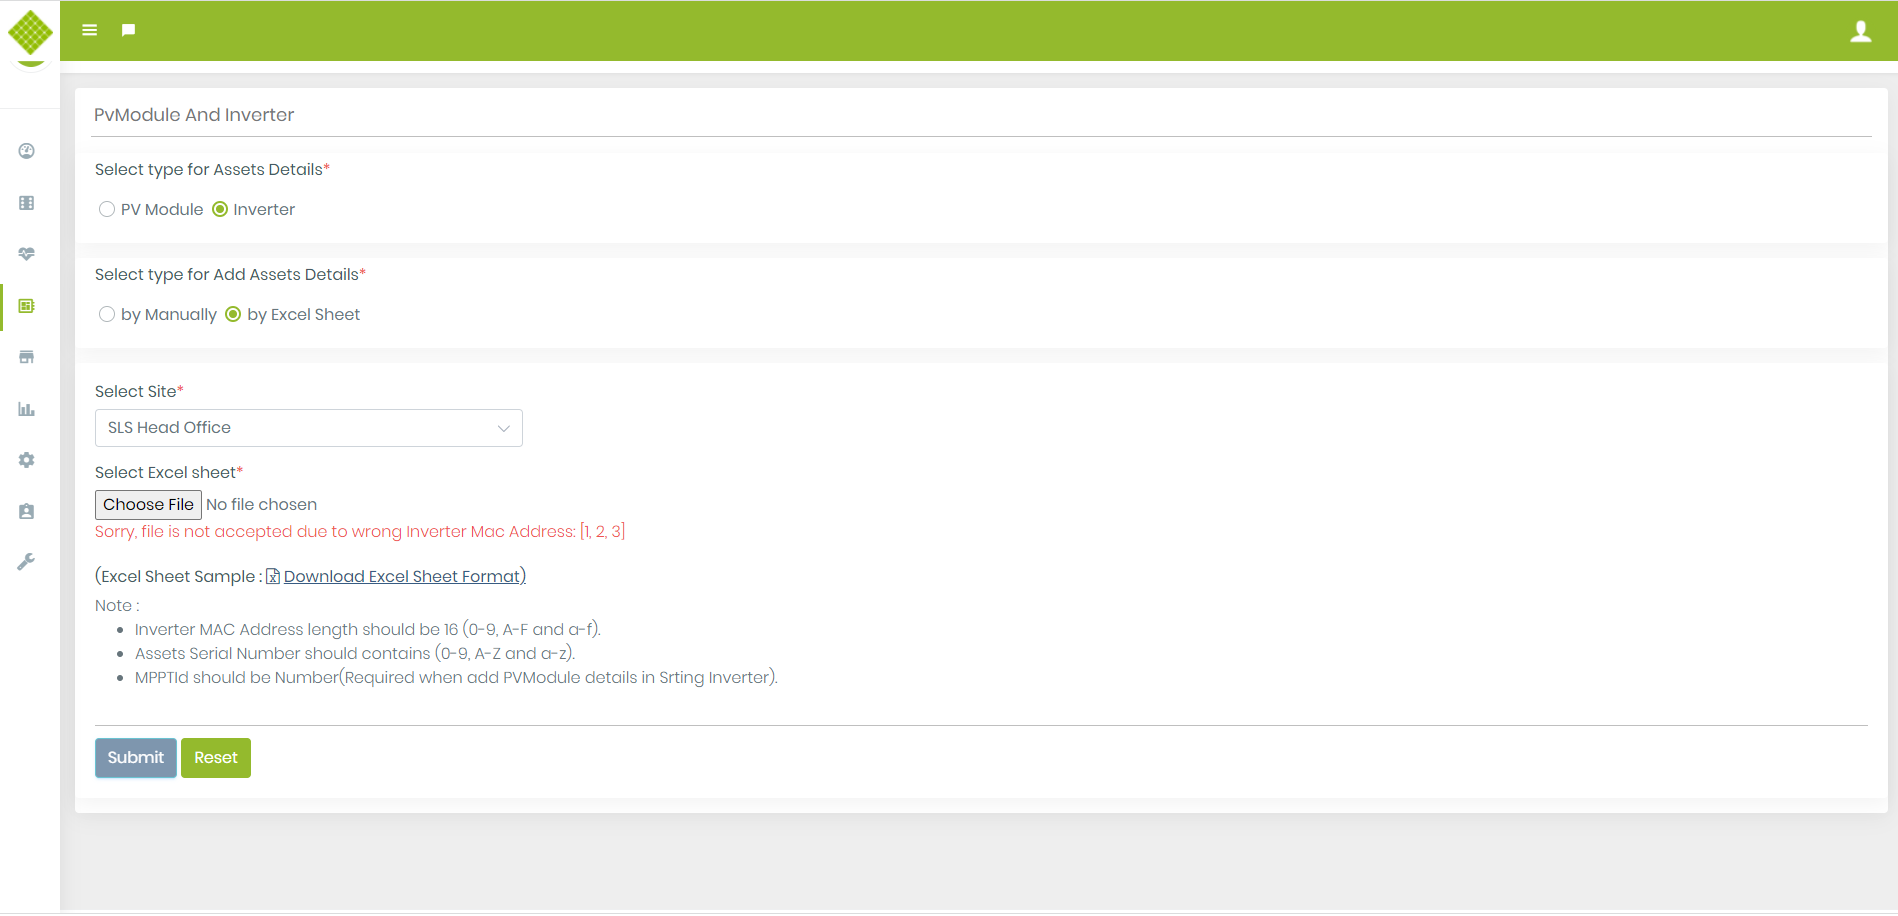
- Select type for Assets Details: PV Module
- Select type for Add Assets Details: By Excel Sheet
- You get Following Form:
- You can get sample Excel Sheet by clicking on “Download Excel Sheet Format”.
- If File not contain any data or contain wrong data then it will not accept.
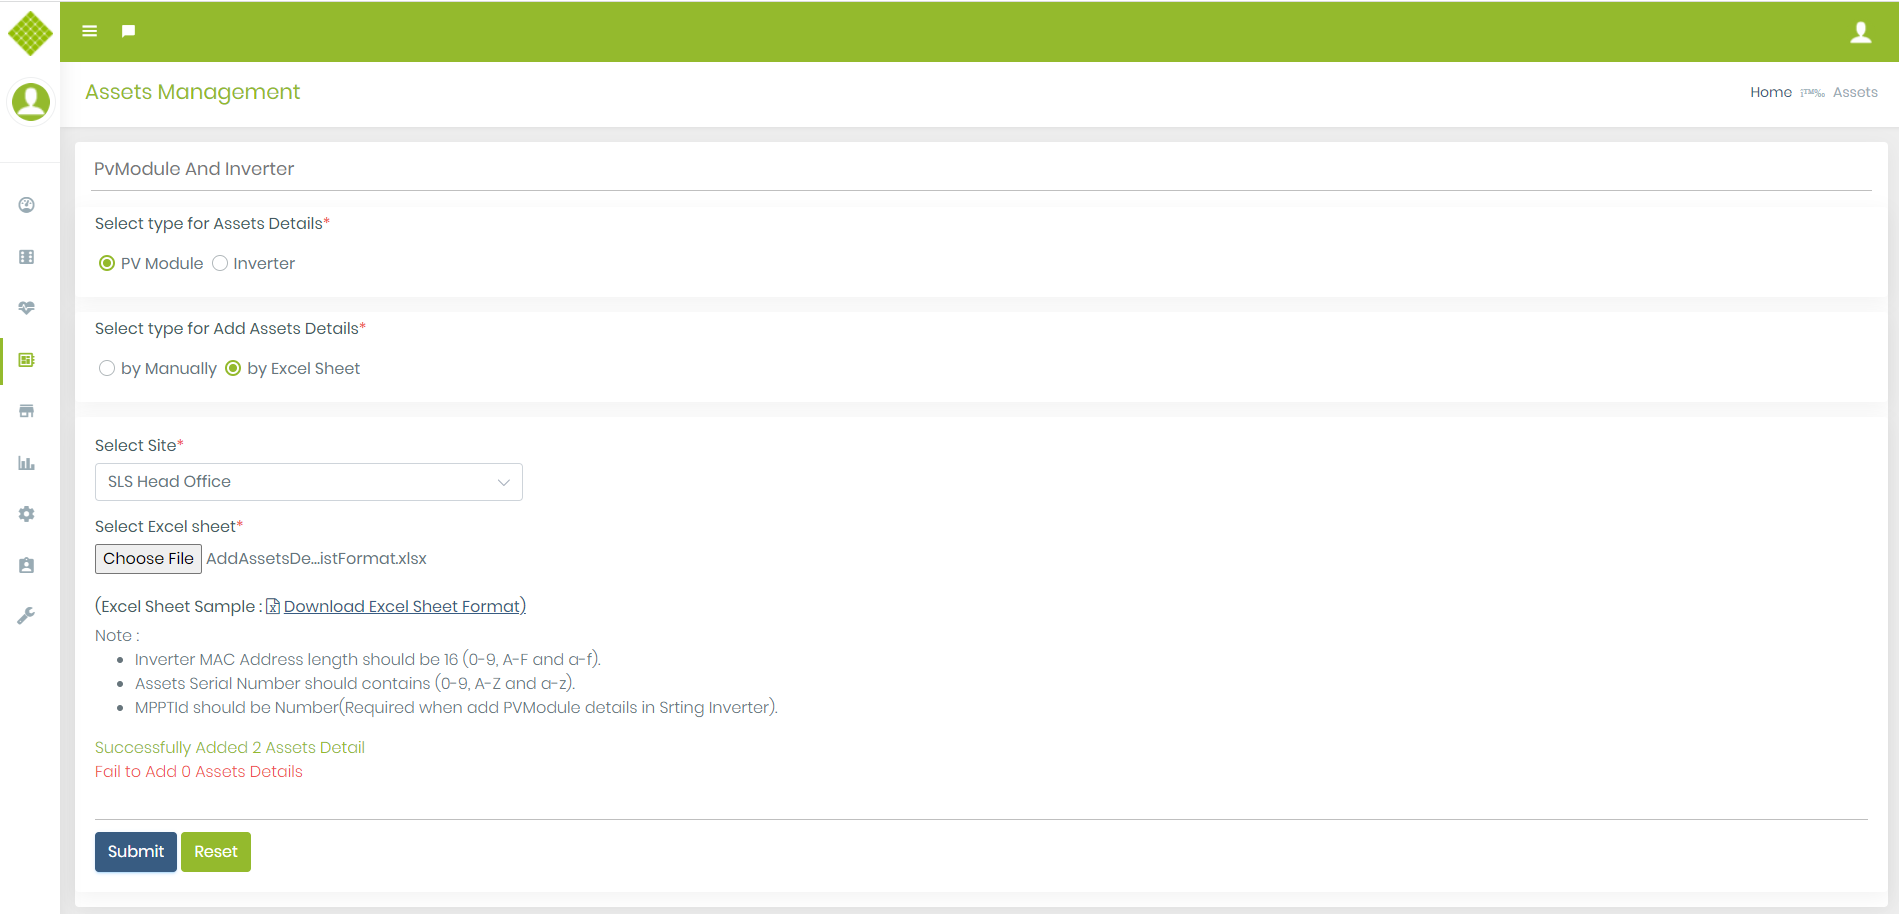
- If you select valid excel file with valid data and submit it, it will display Success and Failure data report :
Device Registration
1.Gateway
Before the use of any gateway in the Sunsights project first need to whitelist gateway on the Sunsights portal with the gateway STA MAC address. After whitelist gateway on the Sunsights portal user will get a cloud key file from the portal. Please save the cloud key file at any known location it required to upload on the gateway.Gateway Whitelist
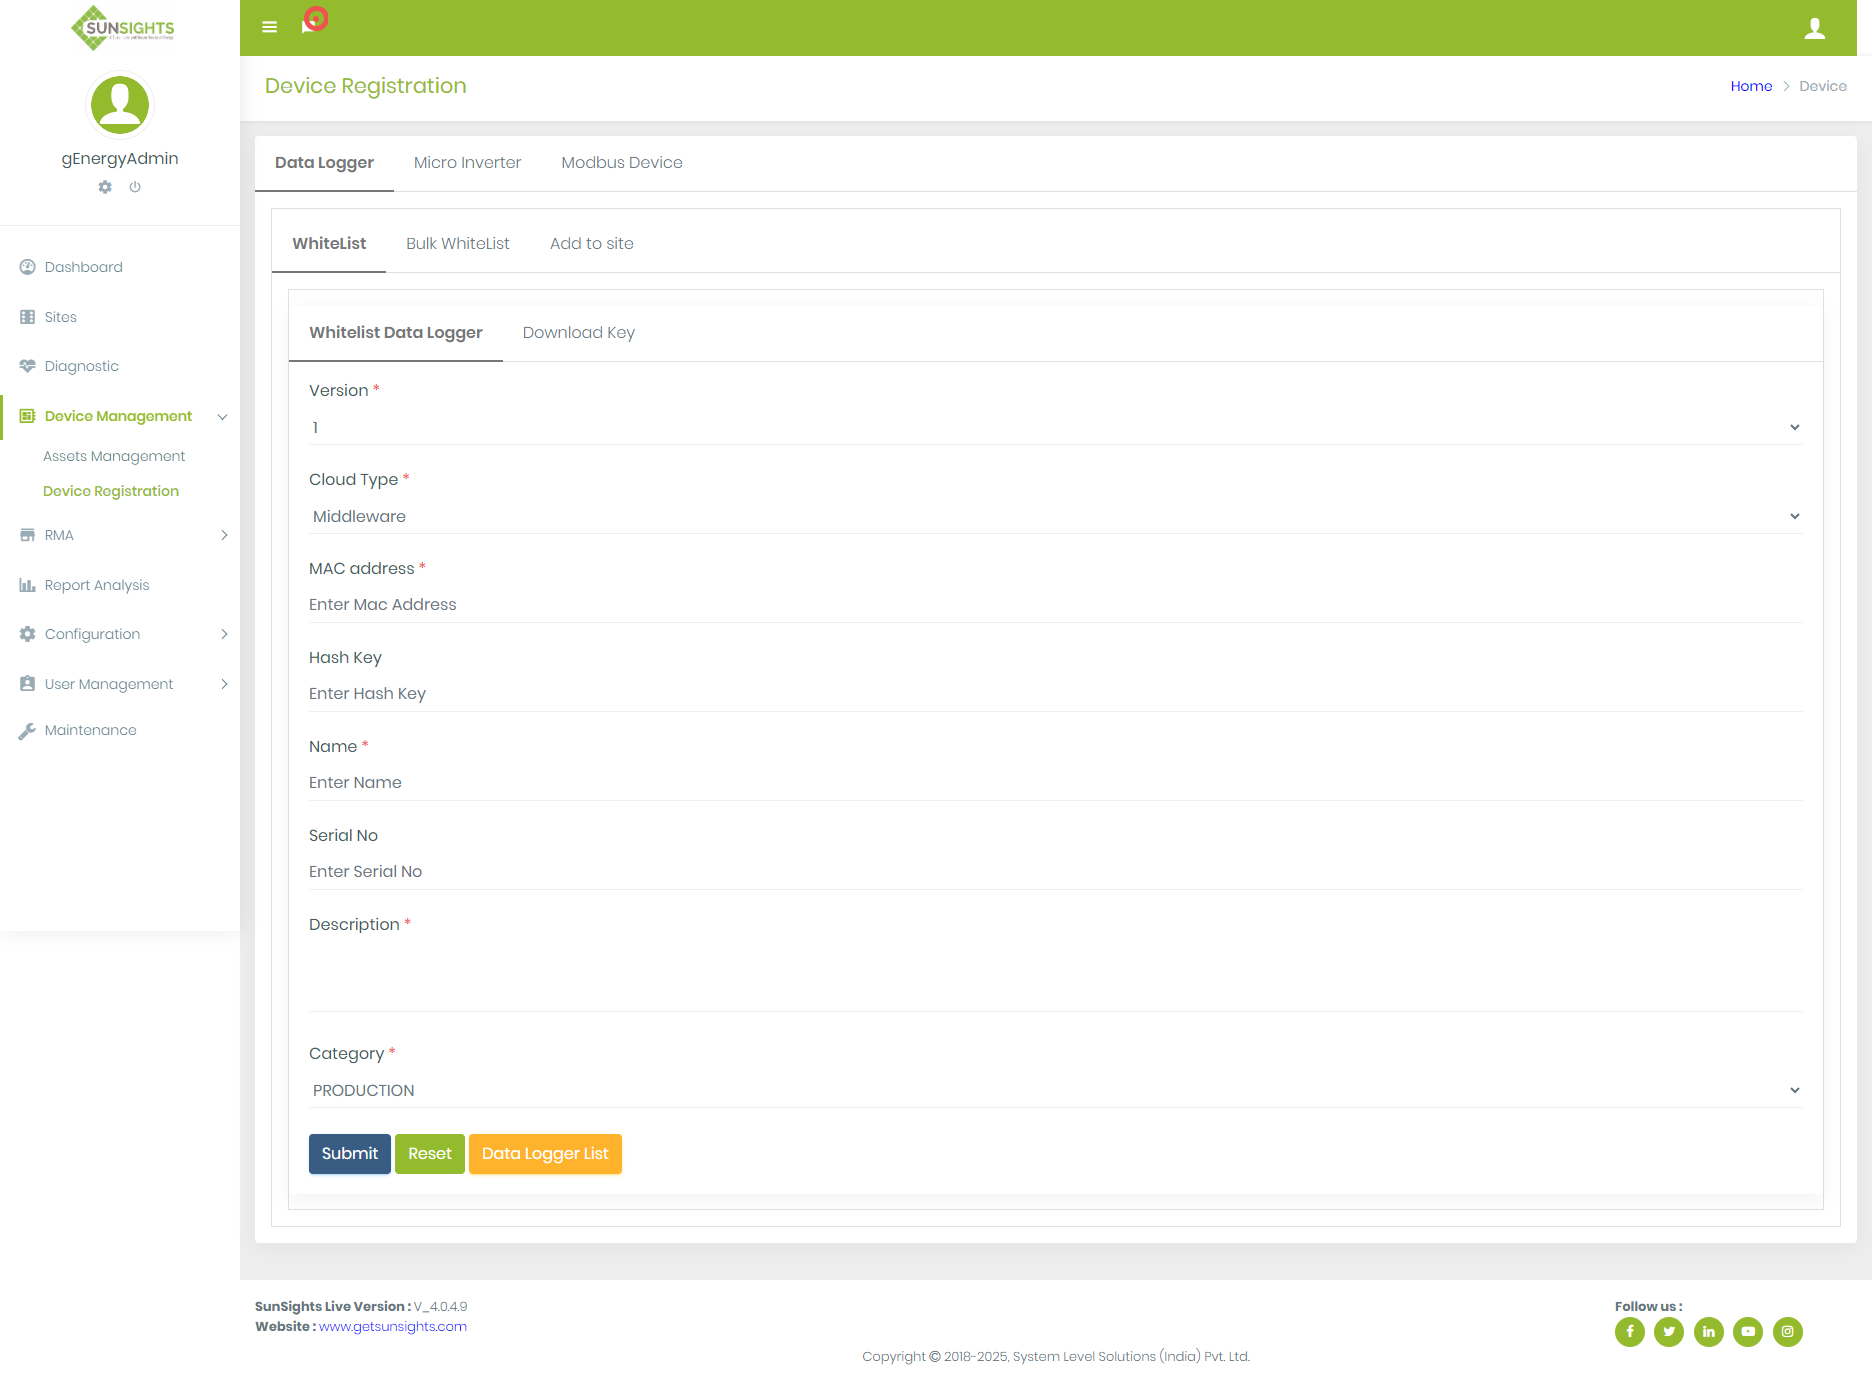
Whitelist gateway on the Sunsights portal
- To Whitelist gateway on the Sunsights portal require to login with the Admin.
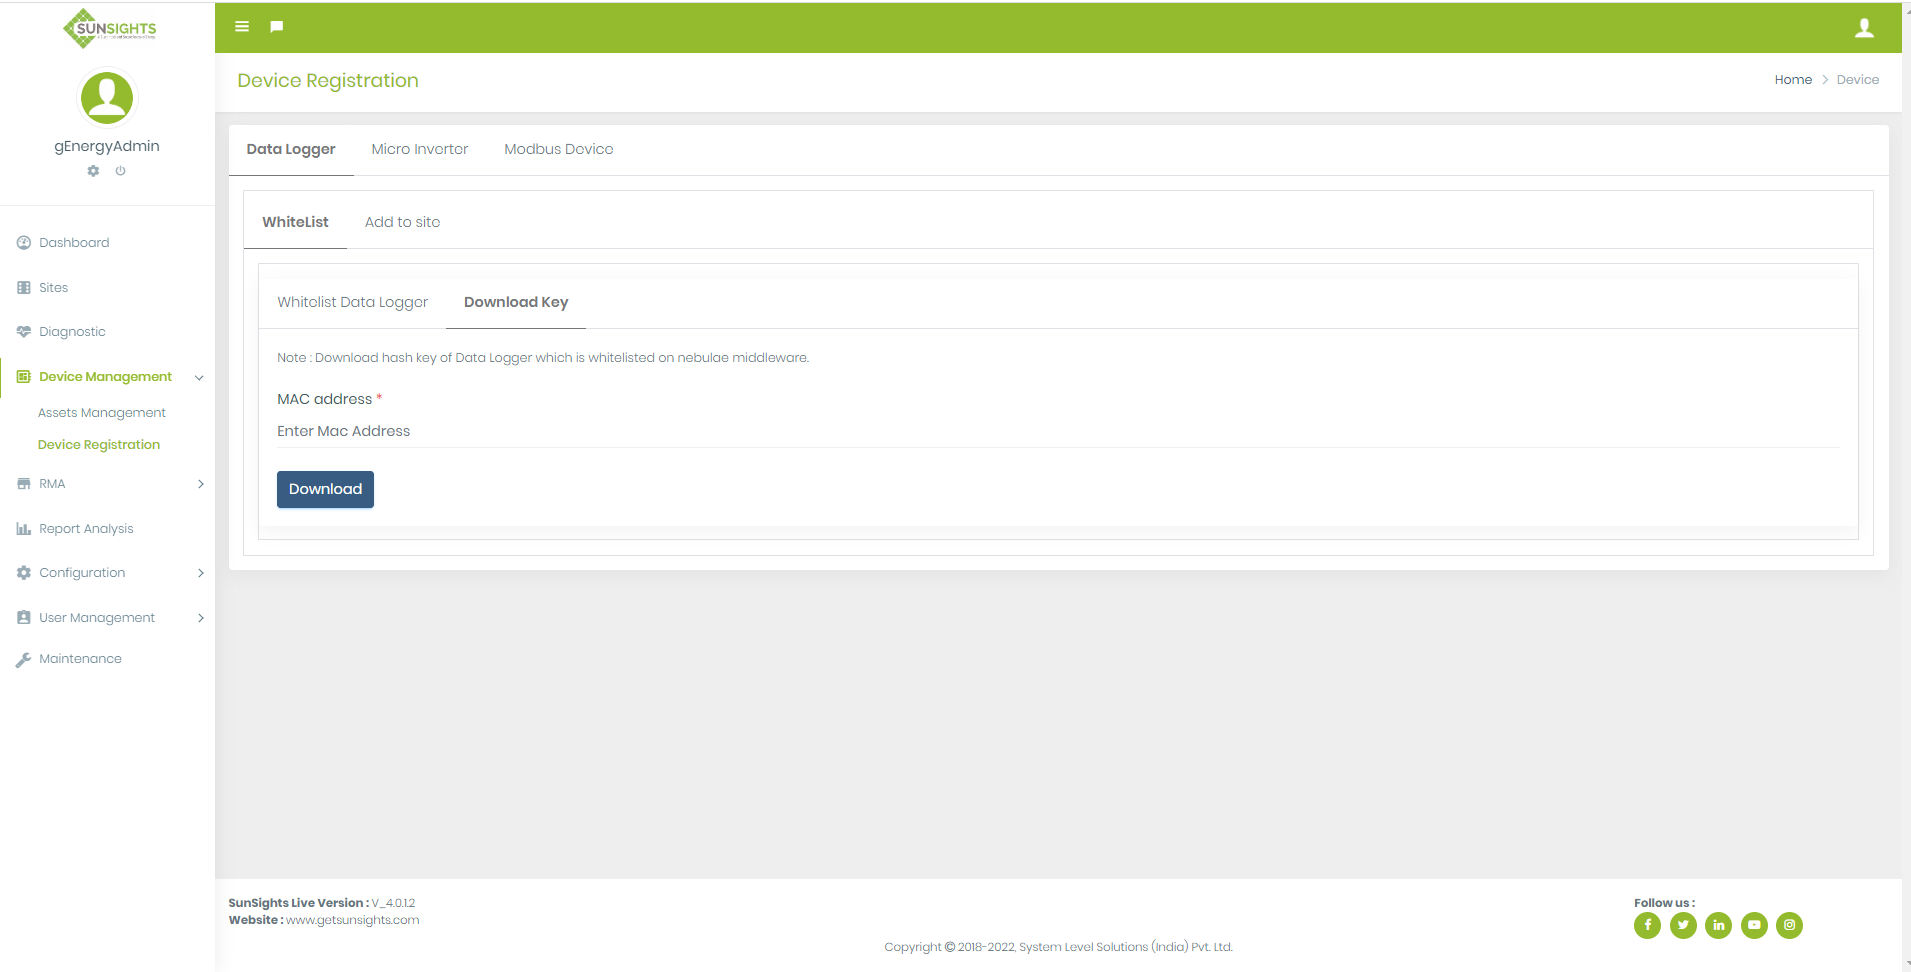
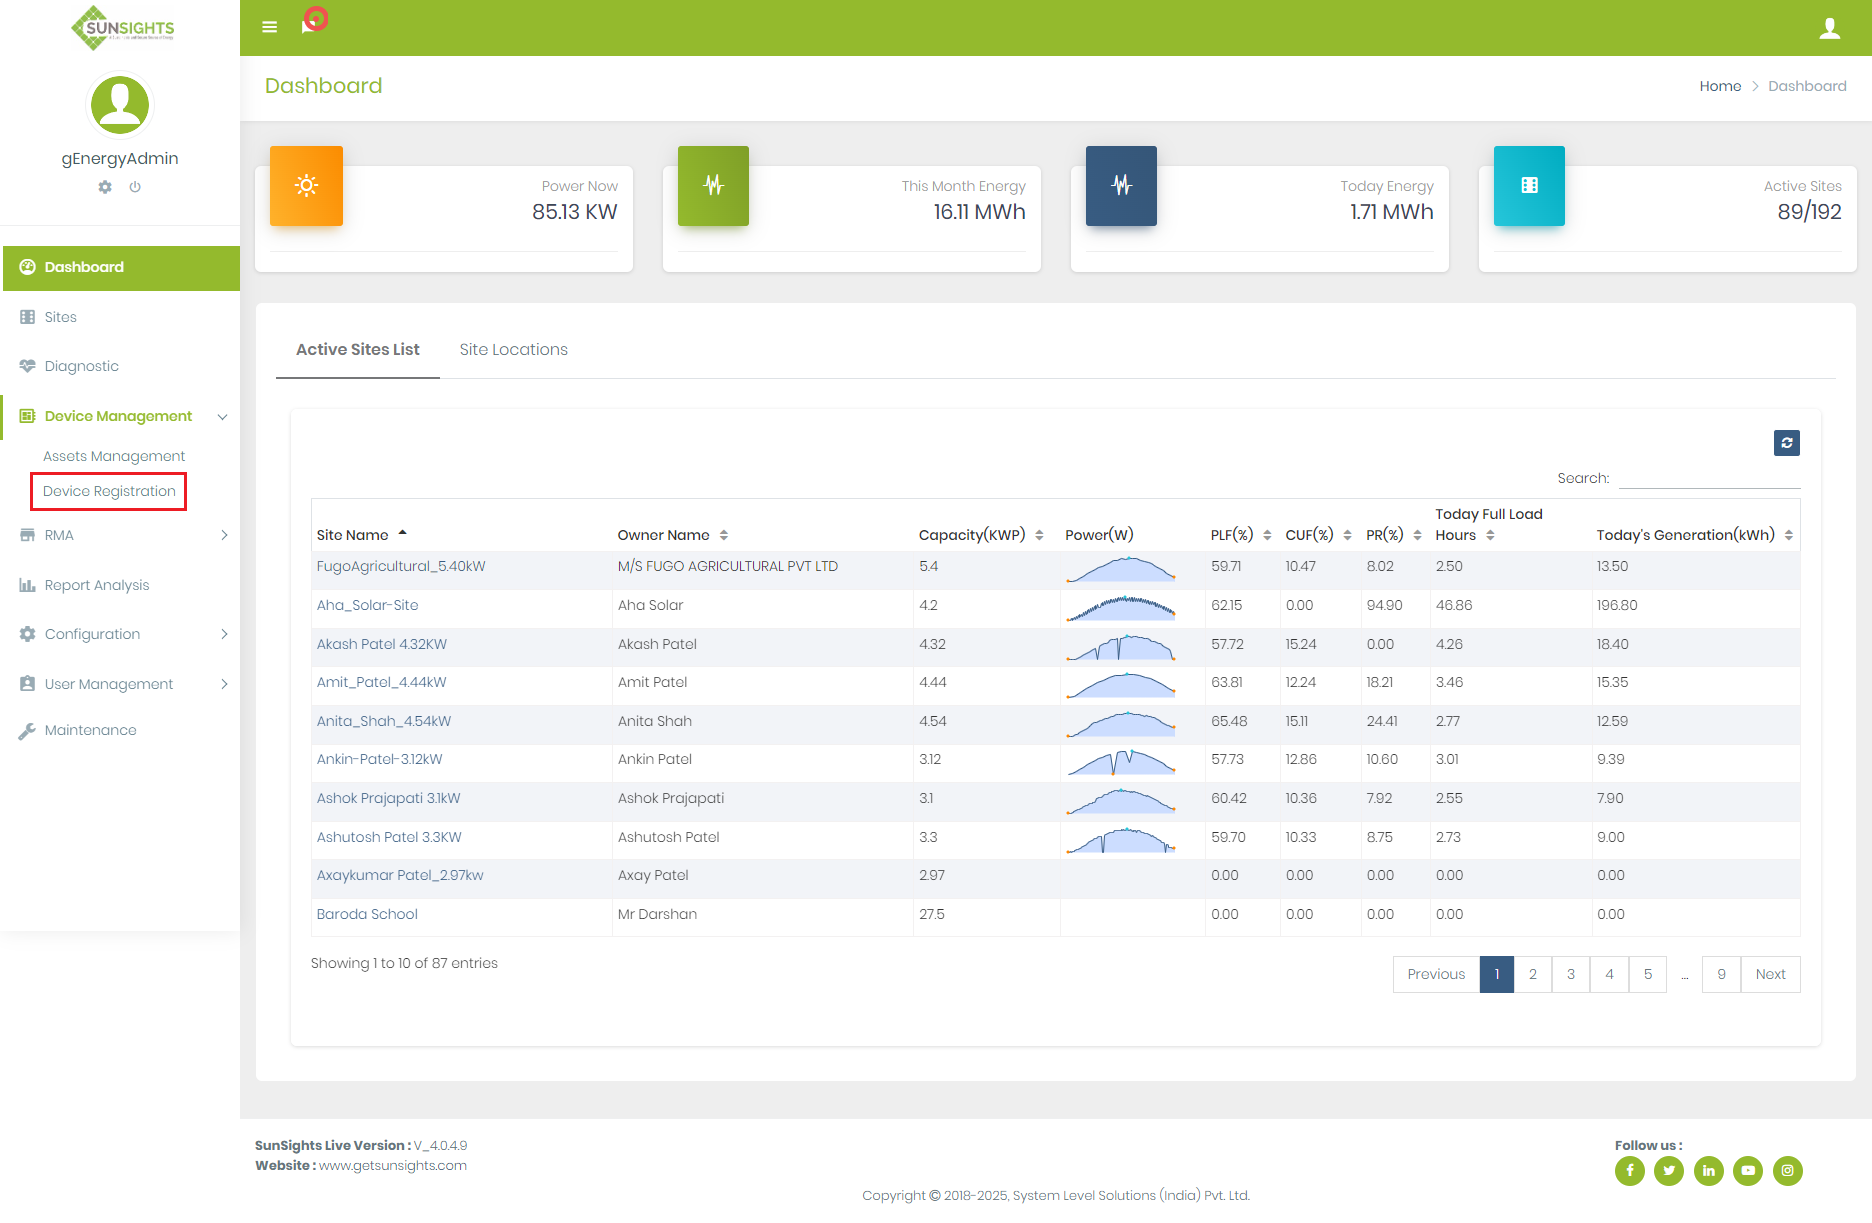
- Click on the Device Registration from Device Management menu.
- Below Steps require to whitelist gateway on the portal.
- Here in the above image there is eight field.
-
Gateway Version
→ For the OLD MIB use version 1 and new MIB use version 2. -
Device Model
→ This field has two options UISLW (Wifi) and UISLG (GSM). -
Cloud Type
→ Select type of cloud, it's Middleware(Nebulae) or Yalgaar for old MIB or version 1 and only Yalgar for new MIB or version 2. -
IMEI Number
→ Required 15 characters length in IMEI number and based on IMEI number Mac address will be generate.
ex. If IMEI number is 12345678912334 then MAC address will be last 8 characters of IMEI number and prepend 0 with each character → 0708090102030304 -
MAC address
→ Insert gateway STA MAC address added with first four byte as “1234”. ex. If STA MAC address “XXXXXXXXXXXX” use 1234XXXXXXXXXXXX. -
Hash Key
→ it is optional. If middleware nebulae than require to enter hash key of that gateway otherwise it is not required. -
Gateway Name
→ Enter gateway name or type. -
Serial No
→ Enter Serial no of gateway. -
Gateway Descriptions
→ Describe gateway detail for what you are using that gateway. -
Gateway category
→ For the testing gateway select DEVELOPMENT. If provide gateway to the Client select PRODUCTION. -
Submit
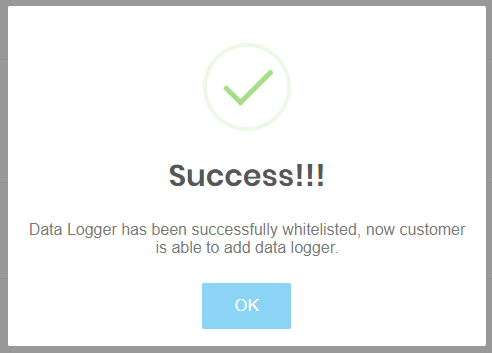
→ From the Submit button download the cloud key or hash key on success.
Download cloud key (Hash key)
- User can download the cloud key (Hash key) of the already whitelisted gateway using the download key button of the portal as shown in below image.
- You have to add mac address of gateway and click on submit button
- You get above success message and one zip file is downloaded from which you get cloud key.
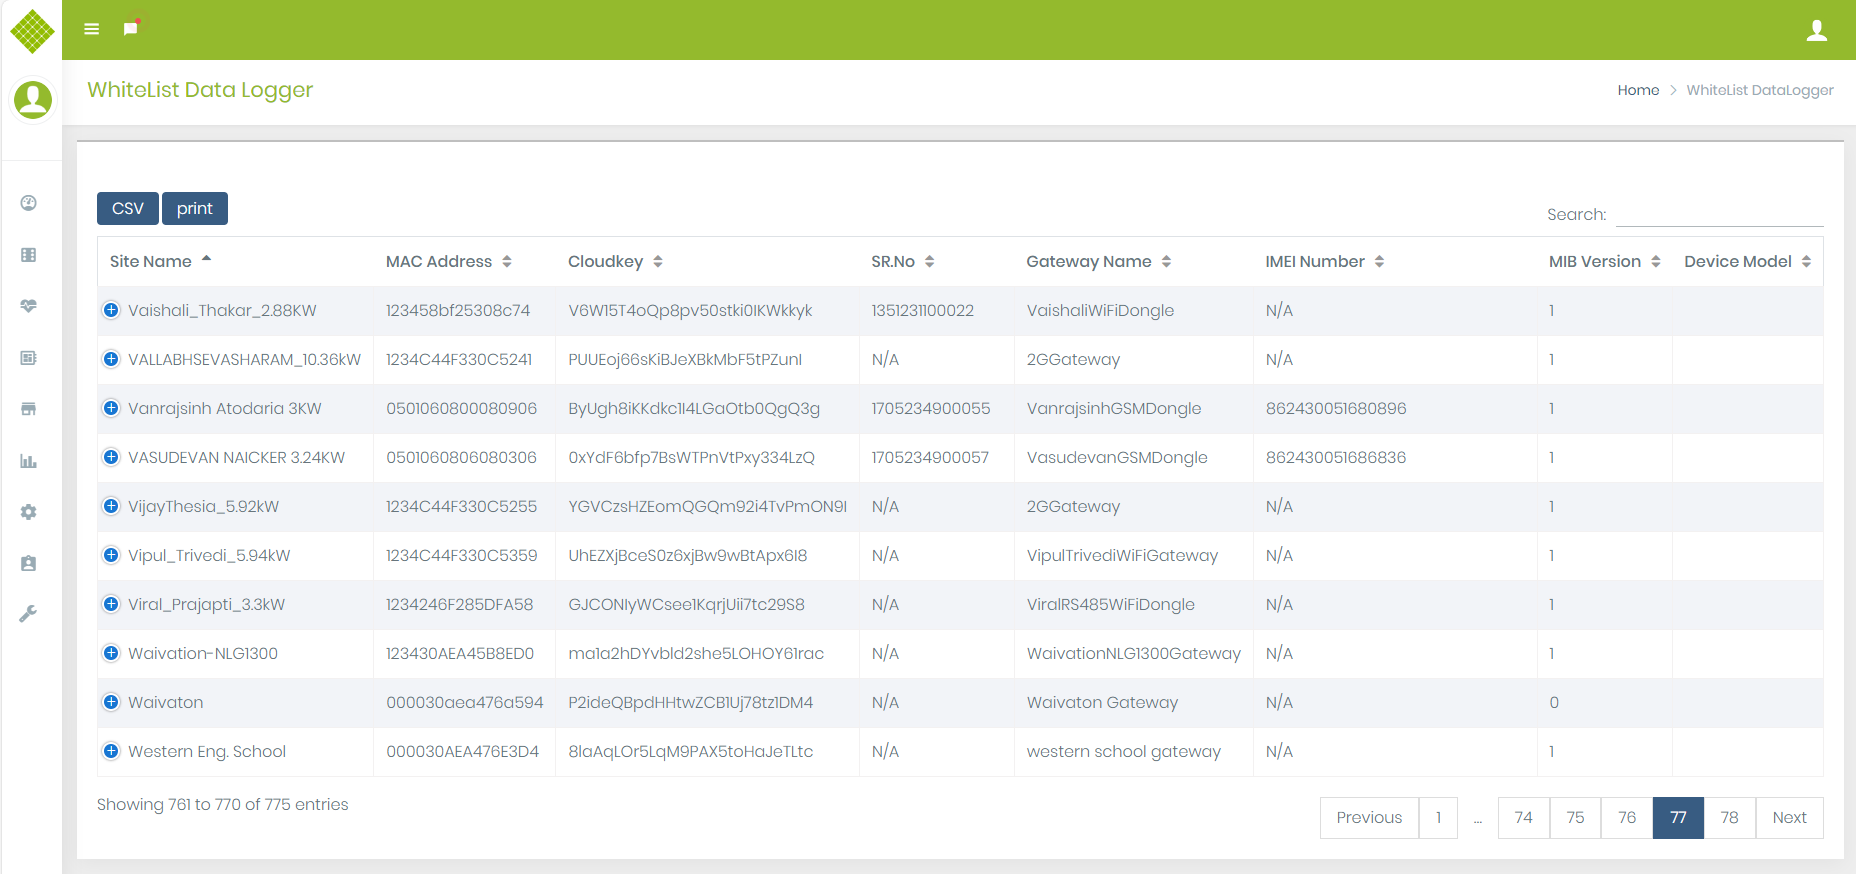
View Whitelist Gateway List
-
click on
 to get list of whitelisted gateway for sunsight.
- You get list of whitelist gateway and export in csv or print it for reference.
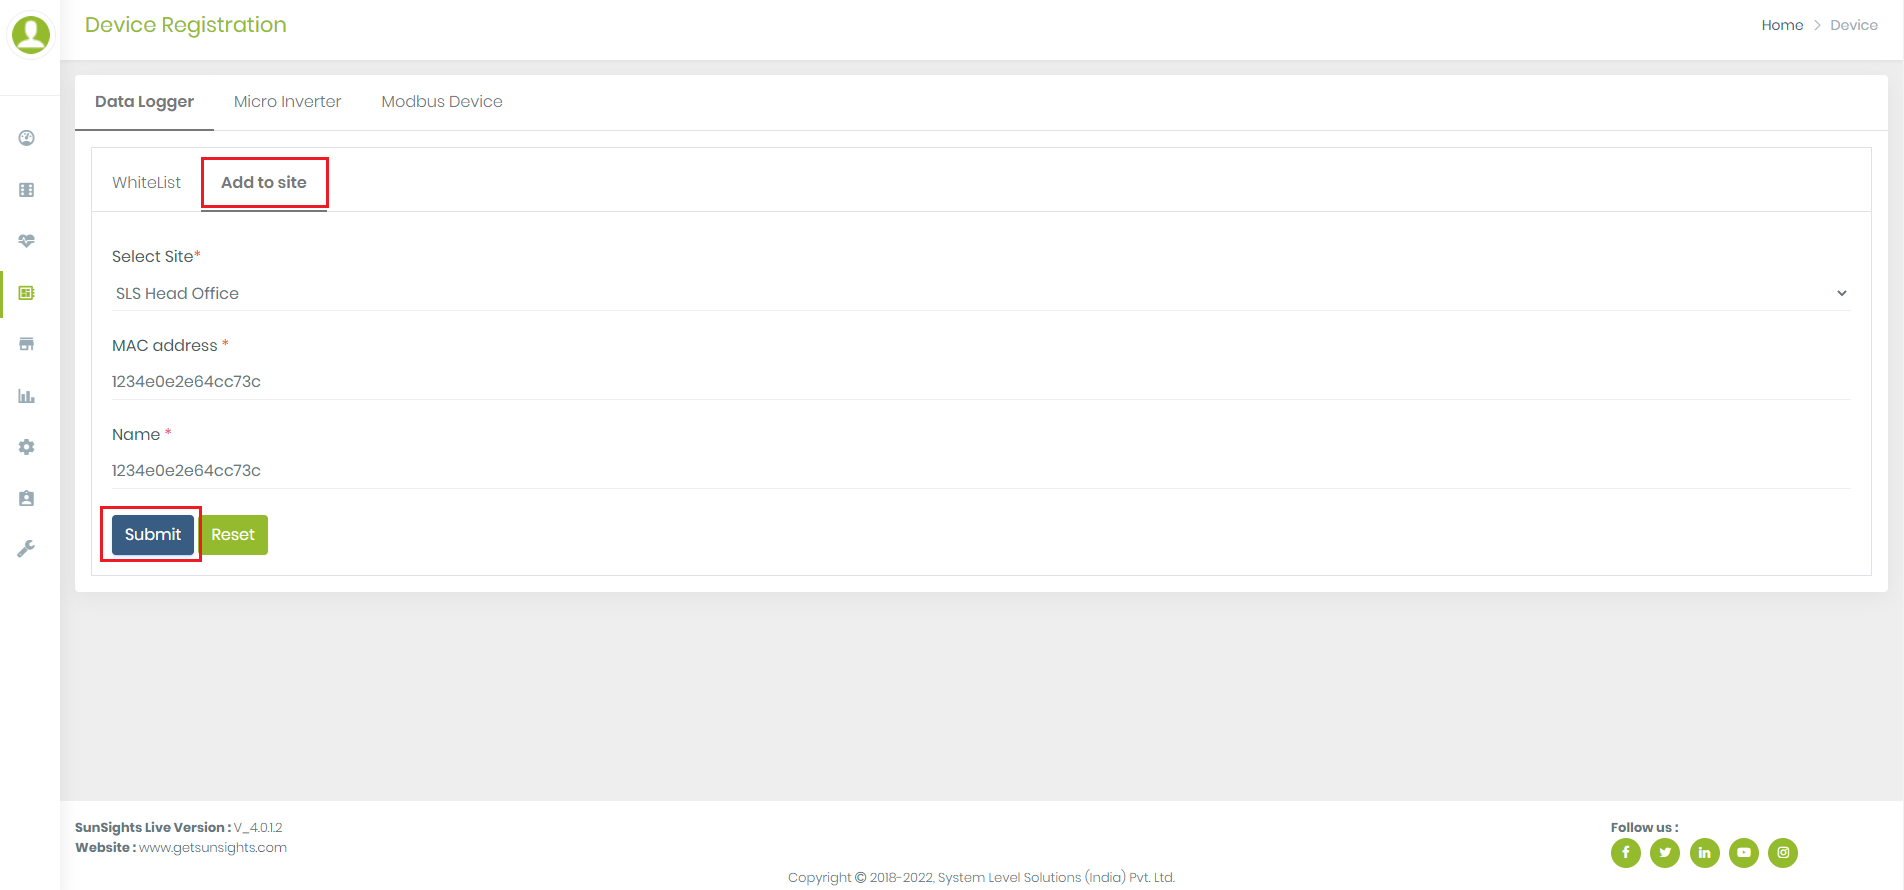
Register Gateway
- After whitelisting the gateway you can register it in site.
- Select the site in which you want to register that gateway.
- Fill up all required field and submit the data.
- On success you get success message.
- If gateway is already register and you try to register that gateway again than you get the error message.
View Gateway List
-
Go to the sites module by click on link in left side bar.
It display list of sites of login user.If it is admin login than it will display all site list. -
Click on
 button of selected site. It will give you gateway list.

 This is use for update gateway category.
 This is use for take gateway backup.
 This is use for gateway replacement.
 This is use for go to inverter list.
 This is use for go to meter list.
Gateway Backup
Following steps require to take Gateway Backup
-
Go to the sites module by click on link in left side bar.
It display list of sites of login user. -
Click on
button of selected site. It will give you gateway list.
-
Click on the Gateway Backup
button in the Action column. It redirect you on gateway backup module.
Here, you can see site name and gateway name that you want to take backup.
-
If you want to take backup then click on
 backup button
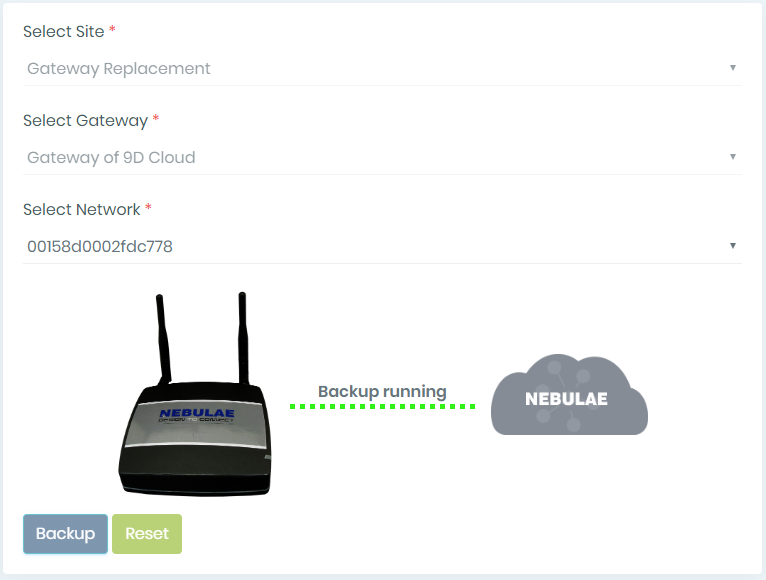
Here, need to select Network.
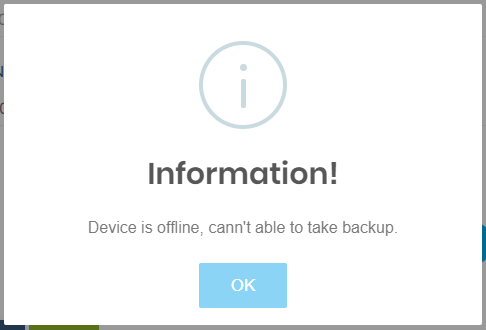
- If Gateway is offline then give message like,
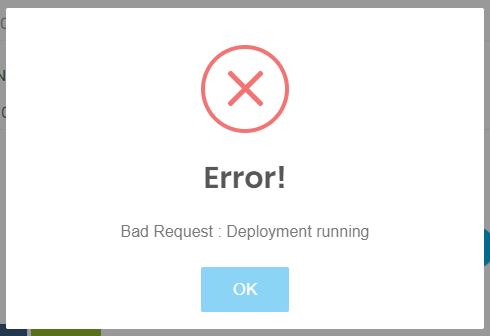
- If Backup is running and again calling for backup of same gateway then facing error.
- Backup is running then display GUI like,
- After successfully backup have taken then get message like,
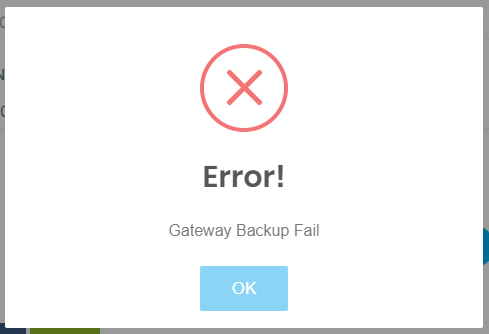
- Facing any error in taking backup then display message like,
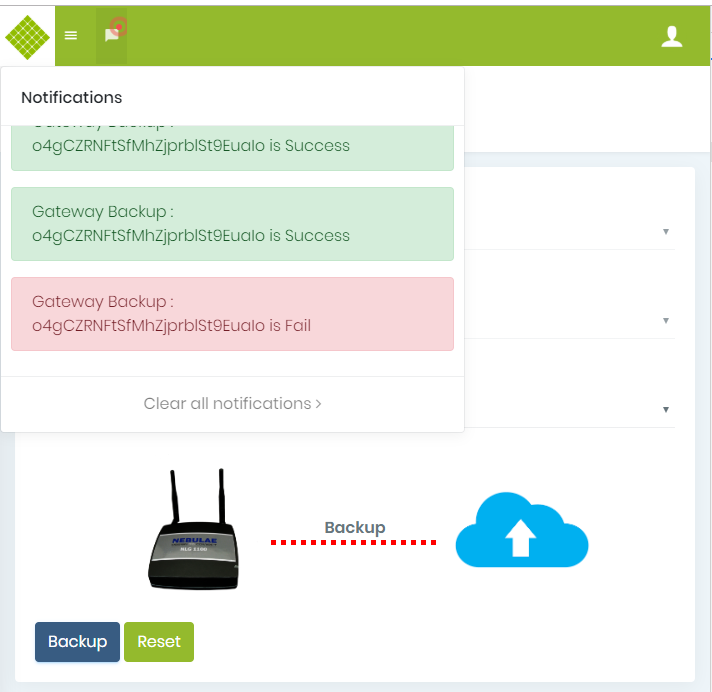
- Display notification message after backup success or fail.
- You can move to another module in between running backup process and get status of backup in notification.


Gateway Replacement
Admin and supplier can do gateway replacement.Steps to do Gateway Replacement
-
Go to the sites module by click on link in left side bar.
It display list of sites of login user. -
Click on
button of selected site. It will give you gateway list.
-
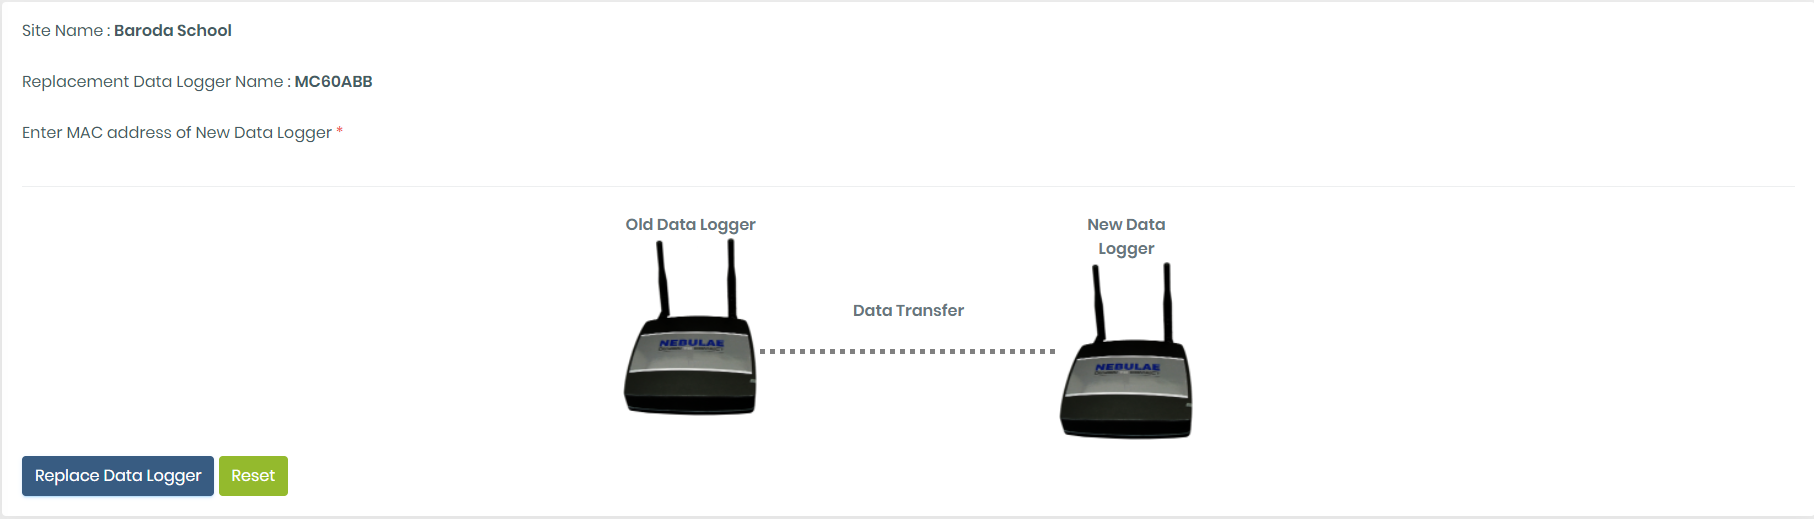
Click on the Gateway replacement button in the Action column. It redirect you on gateway replacement module.
-
Click on gateway replacement button.
Here, MAC Address of new gateway is required.
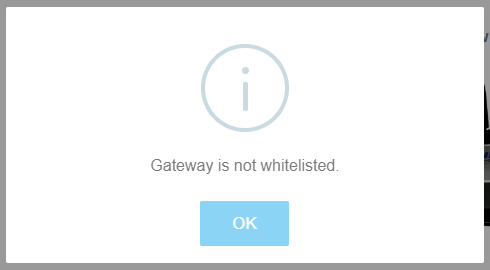
Before gateway replace, checked d different cases that you can face during gateway replacement.- New gateway is not whitelisted then you can see message like below image.
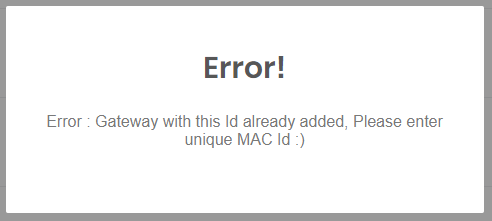
- New gateway is registered in any site then get message like,
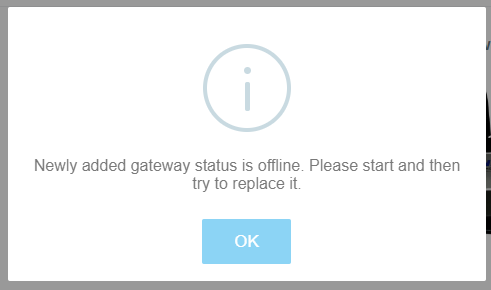
- New Gateway is offline then get message like
- Have not old gateway backup or not latest backup and old gateway is online then get message for take backup.
-
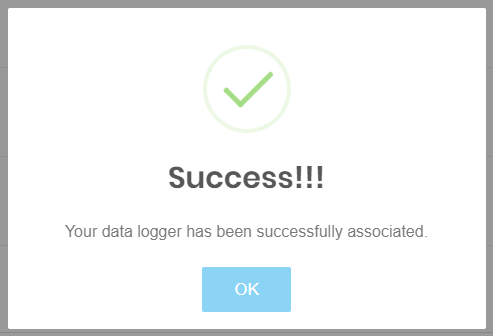
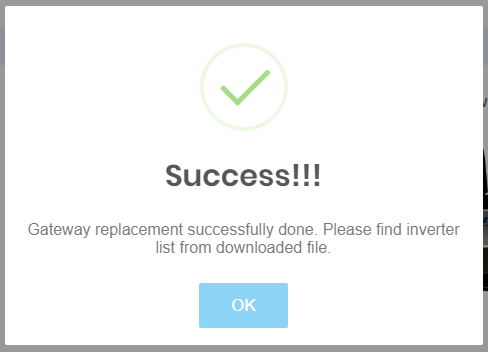
successfully replaced
If gateway successfully replaced then you can get message like, -
not successfully replace
If gateway is not successfully replaced then get message of retry gateway replacement.
You can retry gateway replacement by click on retry button. It start again gateway replacement process. - Have not old gateway backup or not latest backup and old gateway is offline then give message with forcefully gateway replacement.
Note :- First, you have to white list gateway in sunsights system and then you can use it for gateway replacement.
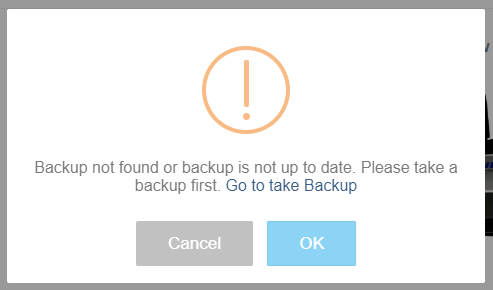
From this message, you can go to gateway backup module and take backup.
After take successfully backup of gateway then you can replace gateway.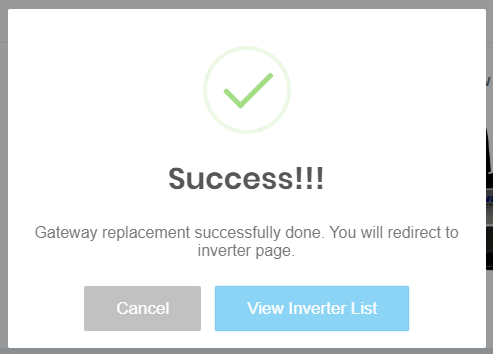
From Here, you can go inverter list page by click of view inverter list button and check inverter is responding to new gateway or not.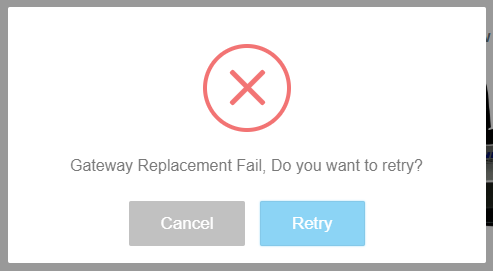
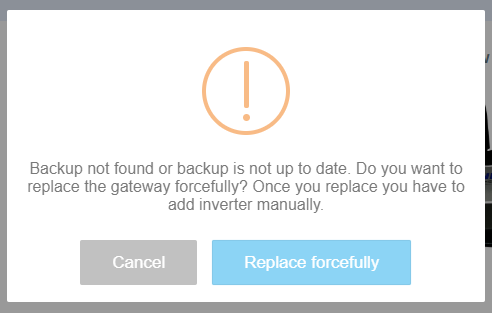
If you give forcefully gateway replacement then it will replace the gateway and give message of success with list of inverters in downloaded file that is already added in old gateway.
Your new gateway is successfully replaced with old gateway and have to add all inverter manually.
- After successfully gateway replaced, you can check gateway is working or not by it’s property from diagnostic module.
- You can move to another module in between running gateway replacement process and get status of replacement in notification.
- If your inverter or gateway is not responding after gateway replacement then you have to reboot gateway and inverter manually.
 Here, you can see site and gateway name.
Save GSM gateway Recharge Information
Save/Edit GSM gateway Recharge Information
- Login with Supplier or customer credential.
- Select Site Menu.
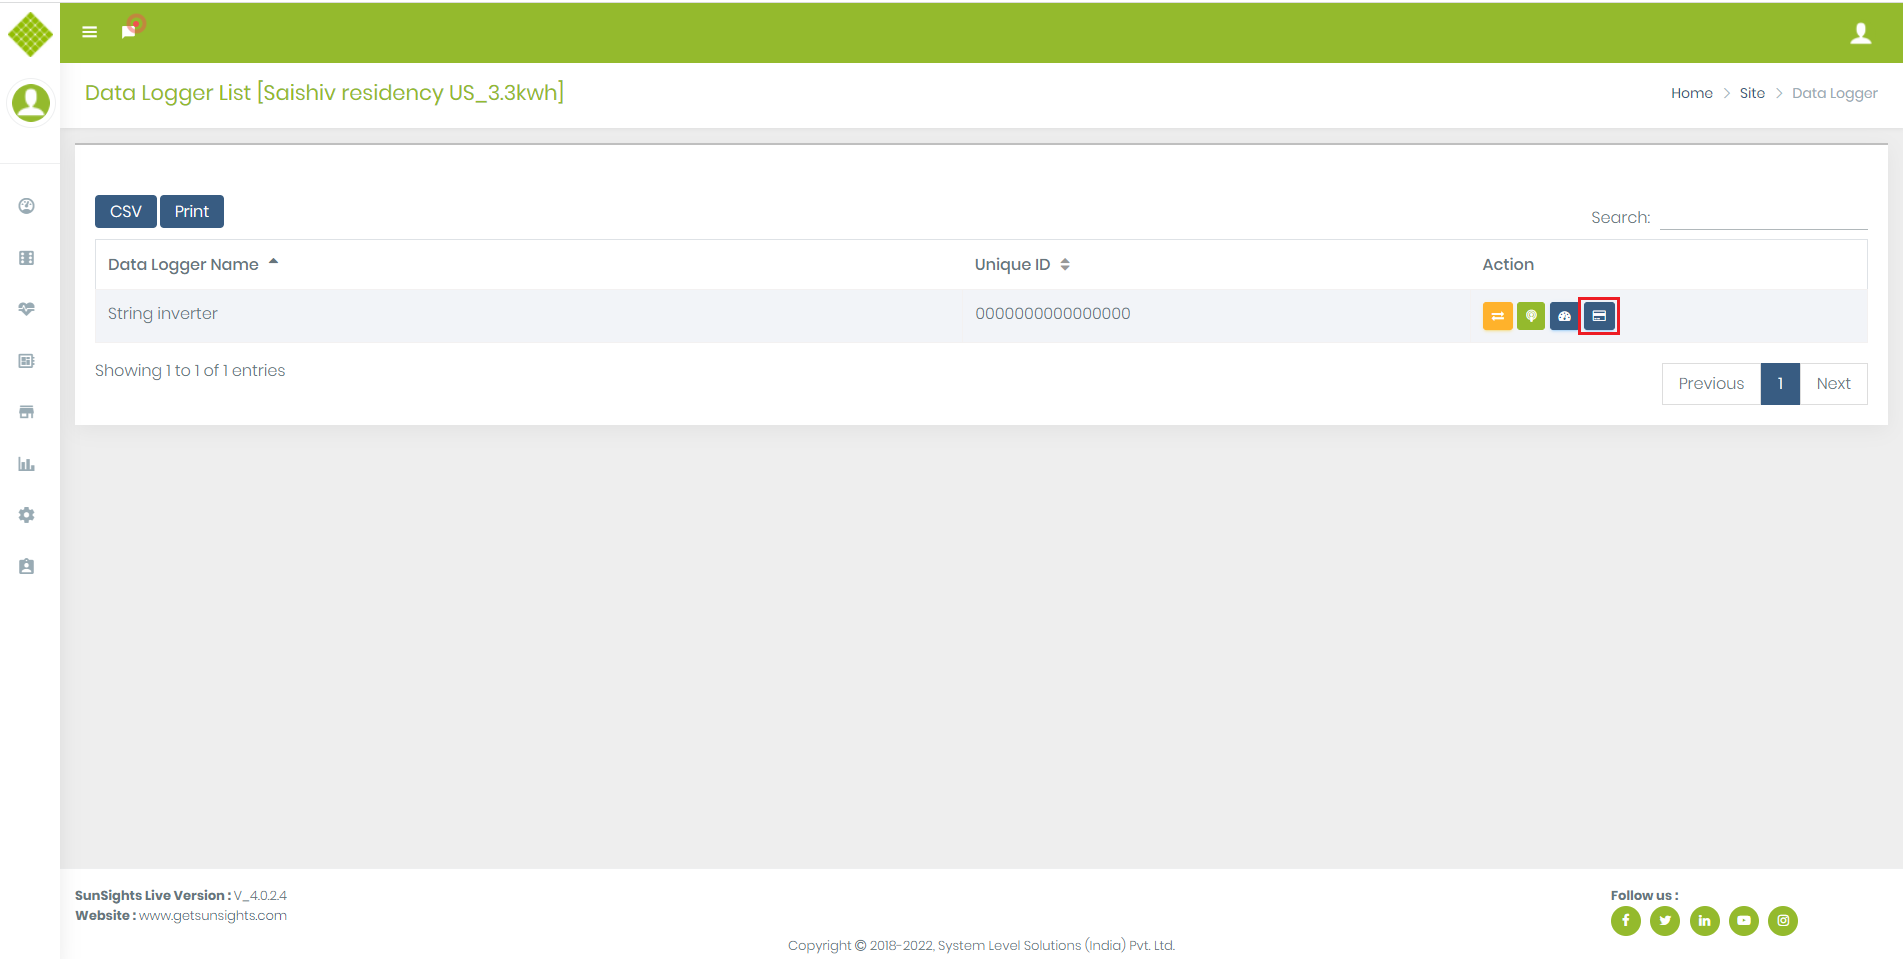
- Click On Gateway List.
- If gateway is type of GSM then you get Option for “Edit Recharge Information”.
- Click On Edit Recharge Information button.
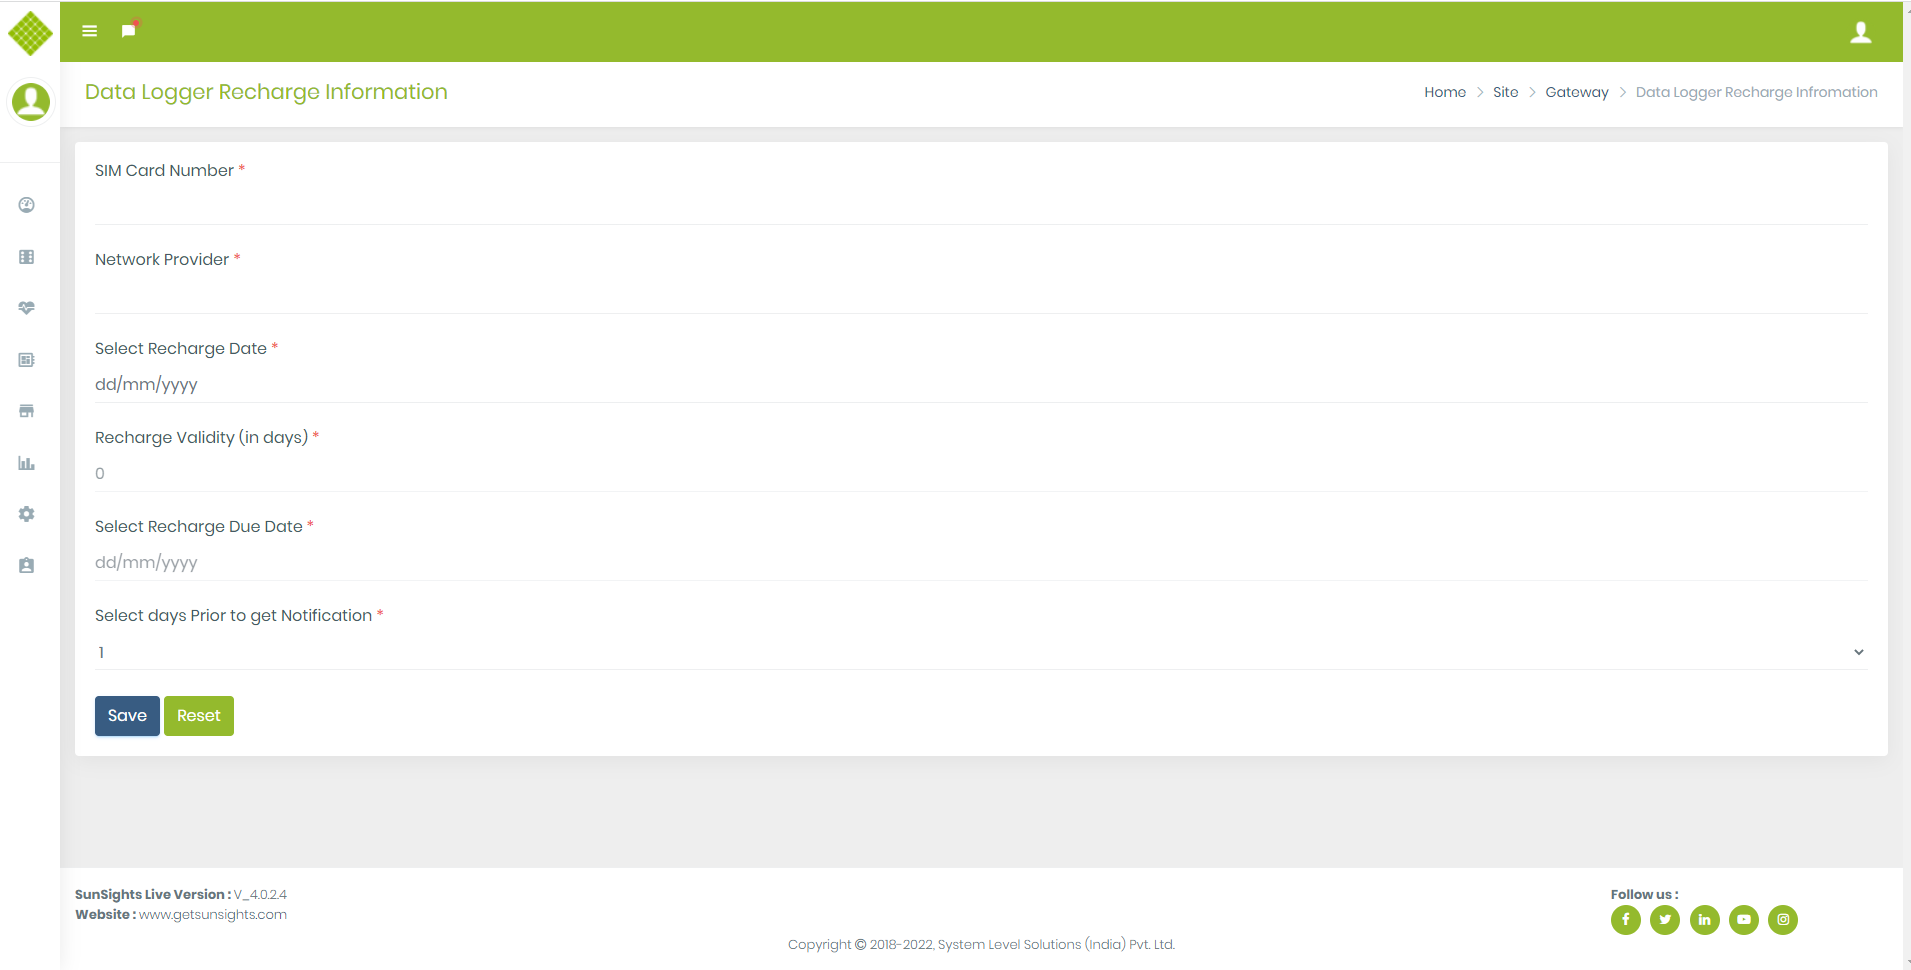
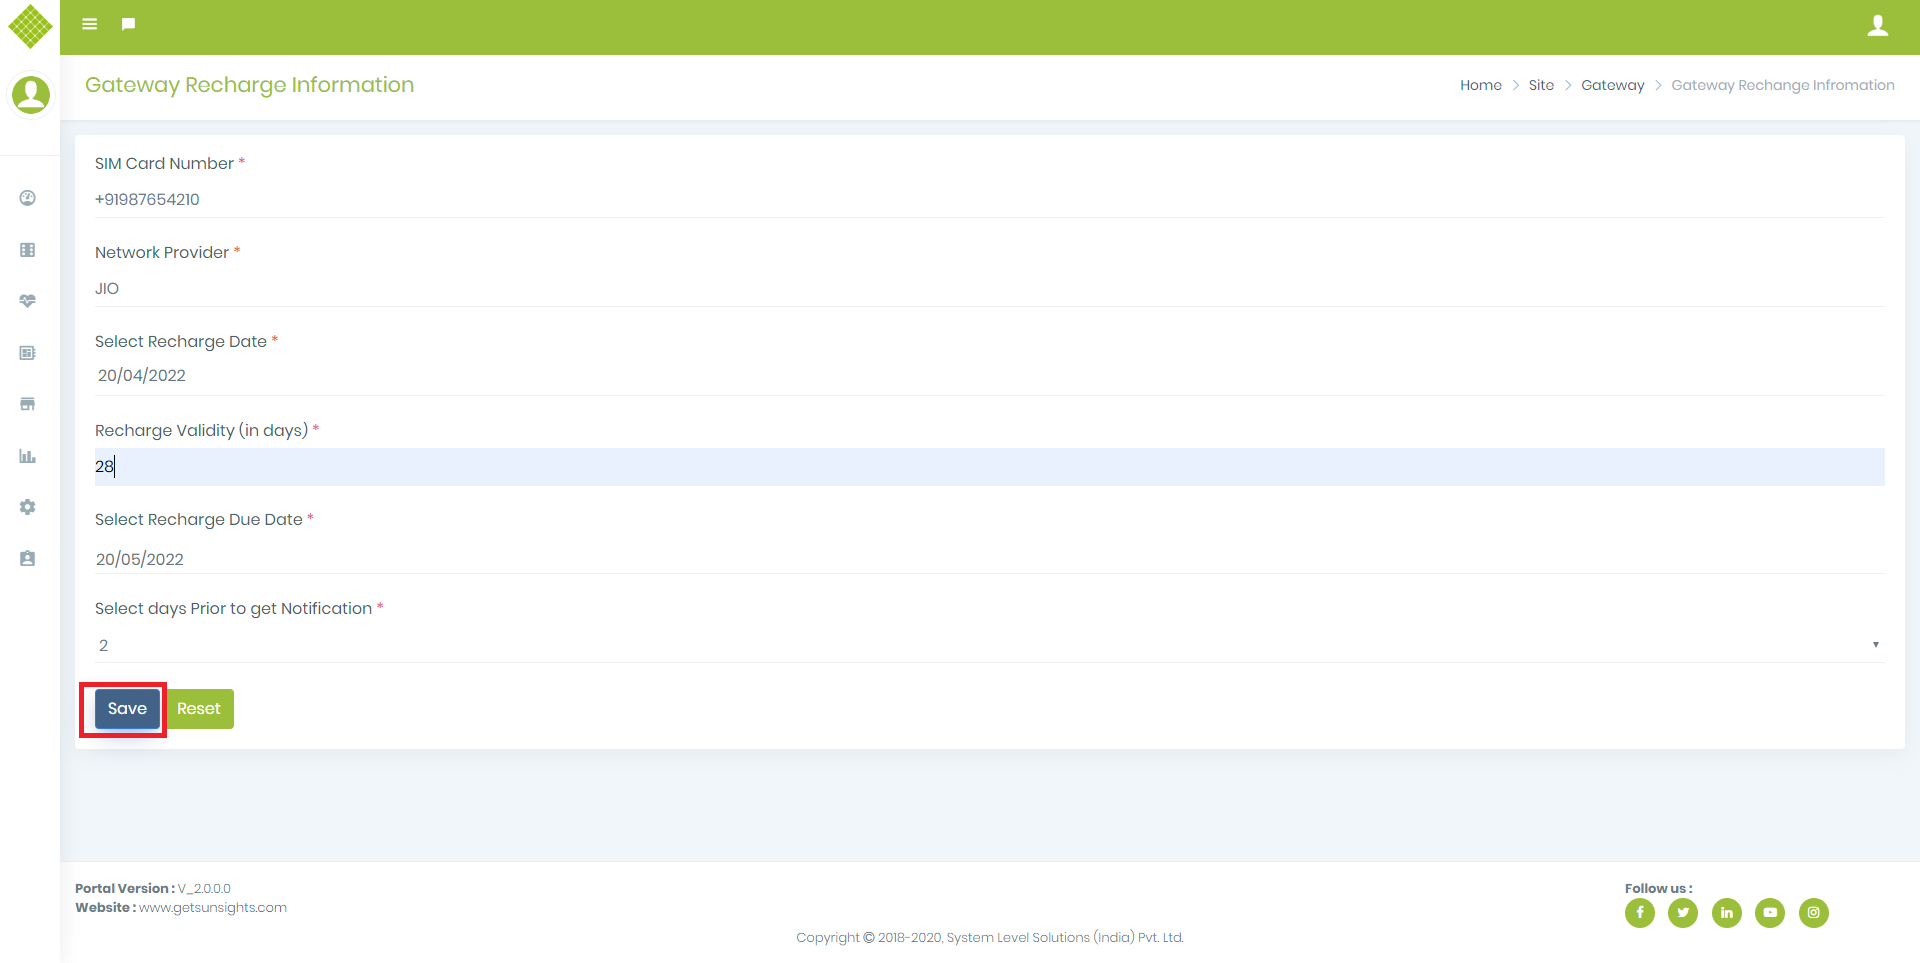
- If you save recharge information for first time then get following form:
-
You have to enter recharge information:
- Add valid SIM Card number of gateway.
- Add Network Provider of SIM Card.
- Select Recharge date on which you had recharged for data plan.
- When you select Recharge date then after Recharge Validity(in days) and Recharge Due Date selection will be enable.
- Either you can add Recharge Validity (enter number) or Select Recharge Due date.
- If you have added recharge validity days then Recharge Due Date will be automatically set. And if you have selected Recharge Due Date then Recharge validity days will be set automatically.
-
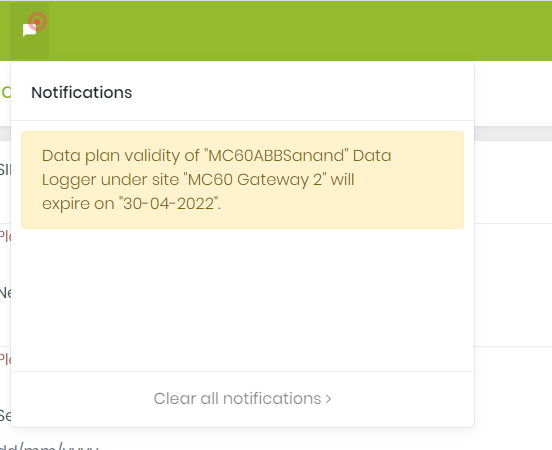
By default days for prior to get notification is set to 1 day.
- Prior get a notification is used to get recharge expiry notification based on selected days. For example, the recharge due date is “30-04-2022” and you have set prior to getting notification days to “3”, Now when you log in to the portal you will start receiving notification from date “27-04-2022” as below. Also, user will get this notification on their alternate emails (if alternate emails not available then get mail on default provided email address.):
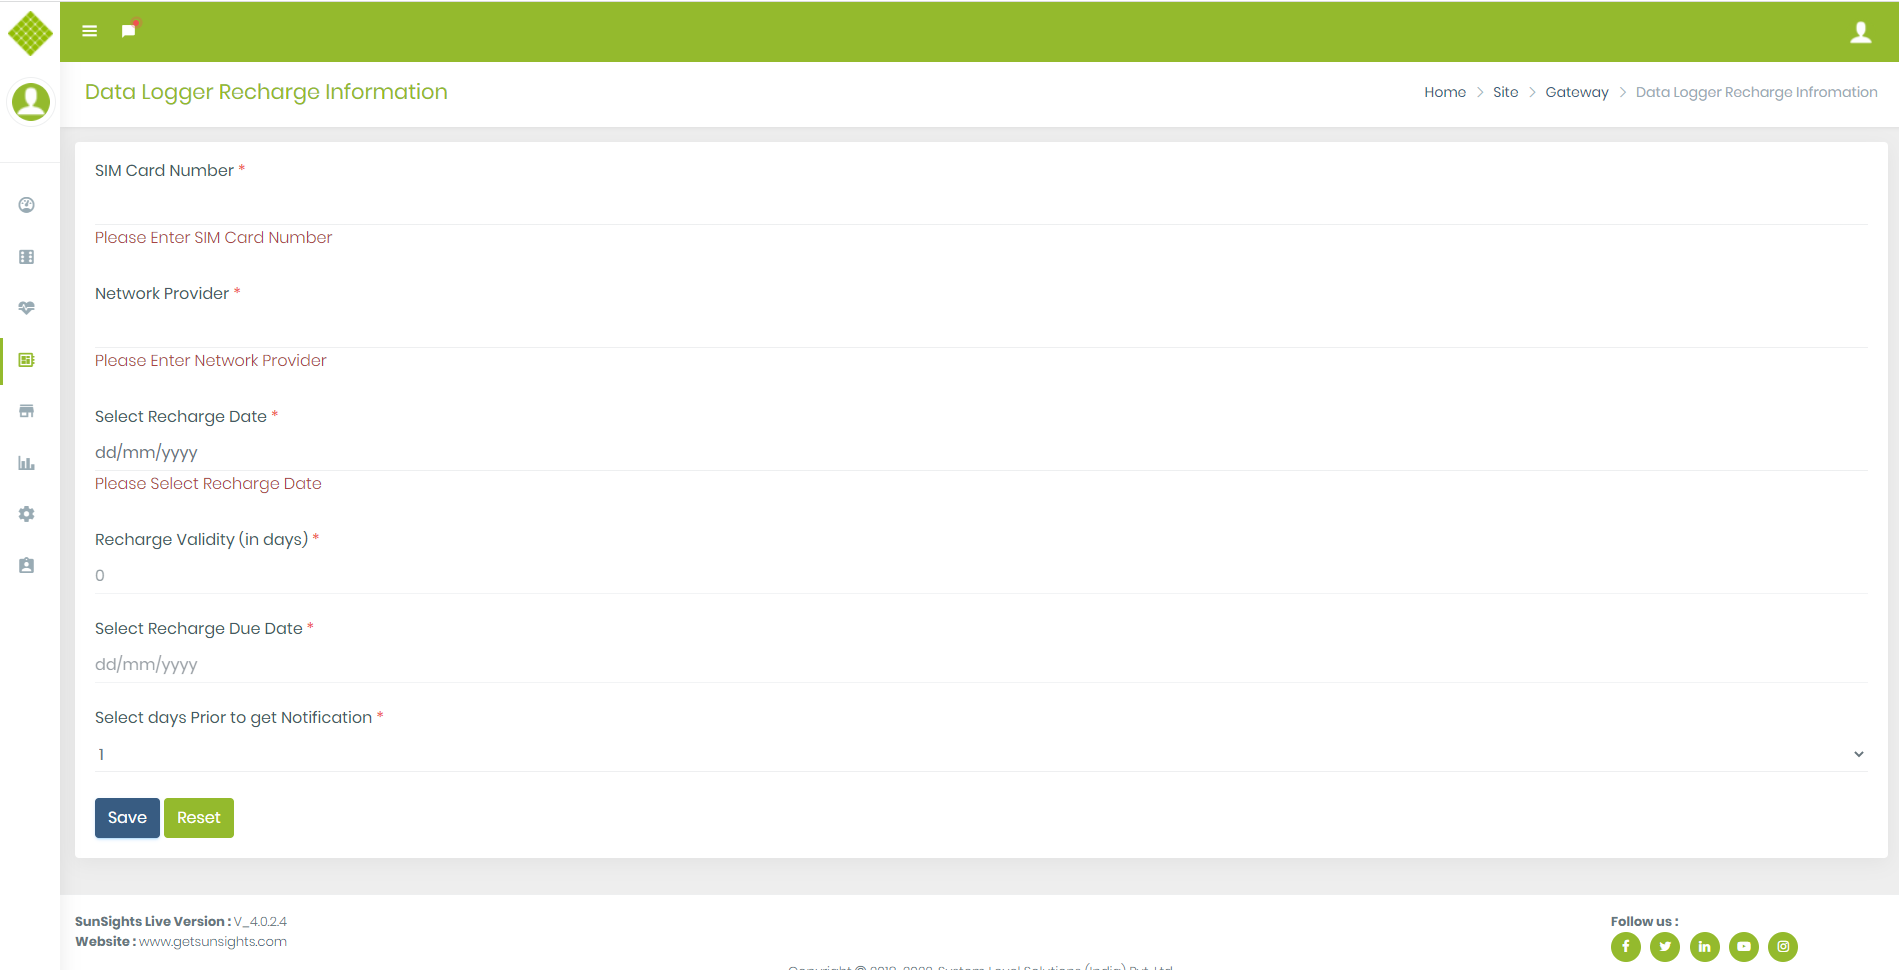
- If you click without filling form then get following screen:
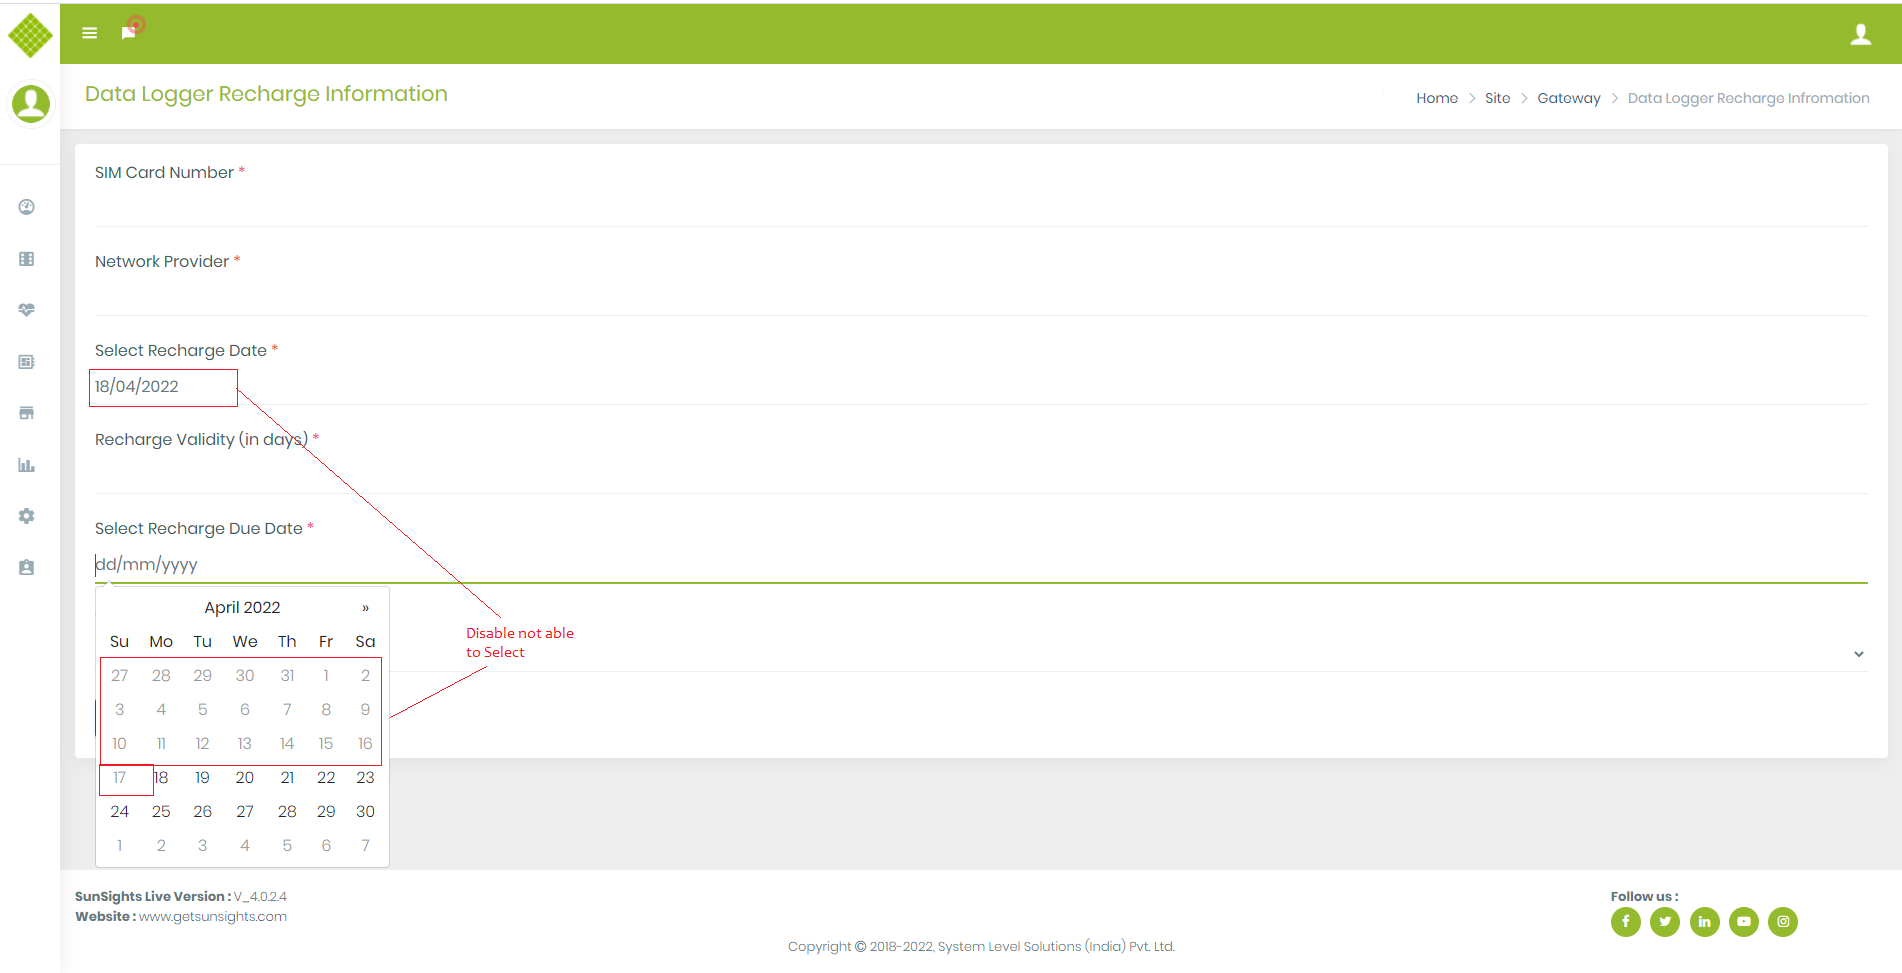
- Select Recharge Date, based on that Recharge Due date will be enable.
- For example, if you select Recharge date to “18-04-2022” then in Recharge due date smaller date than “18-04-2022” will be disable for selection.
- After filling all valid data click on Save.
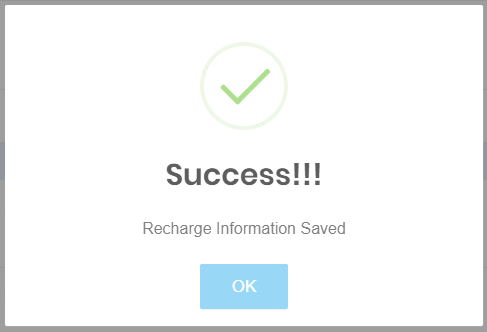
- Get message based on response.
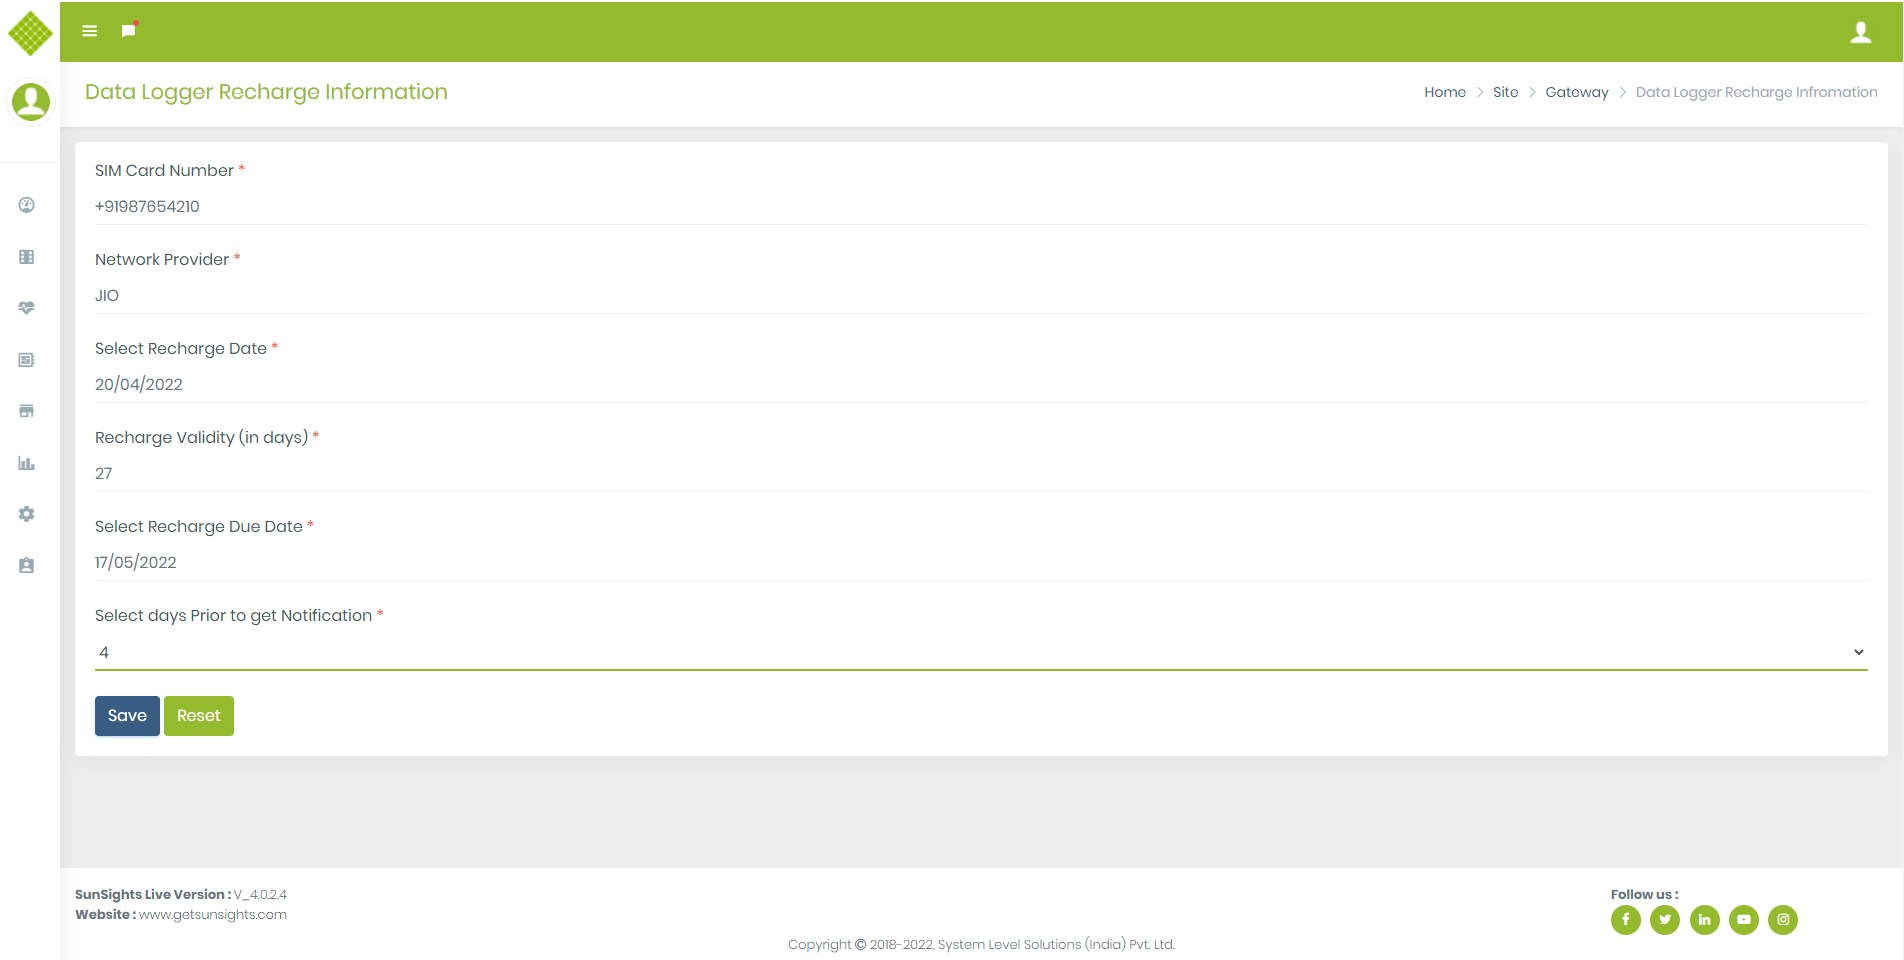
- Now if you want to edit recharge information then:
- Follow the path: Select site Menu -> Click on specific Site -> Gateway List -> Click on “Edit Recharge Information” option.
- You get following form with last recharge information (also update information and save latest Data.):
2.Inverter
Micro Inverter
Add MicroInverter
- Login with Admin or Supplier
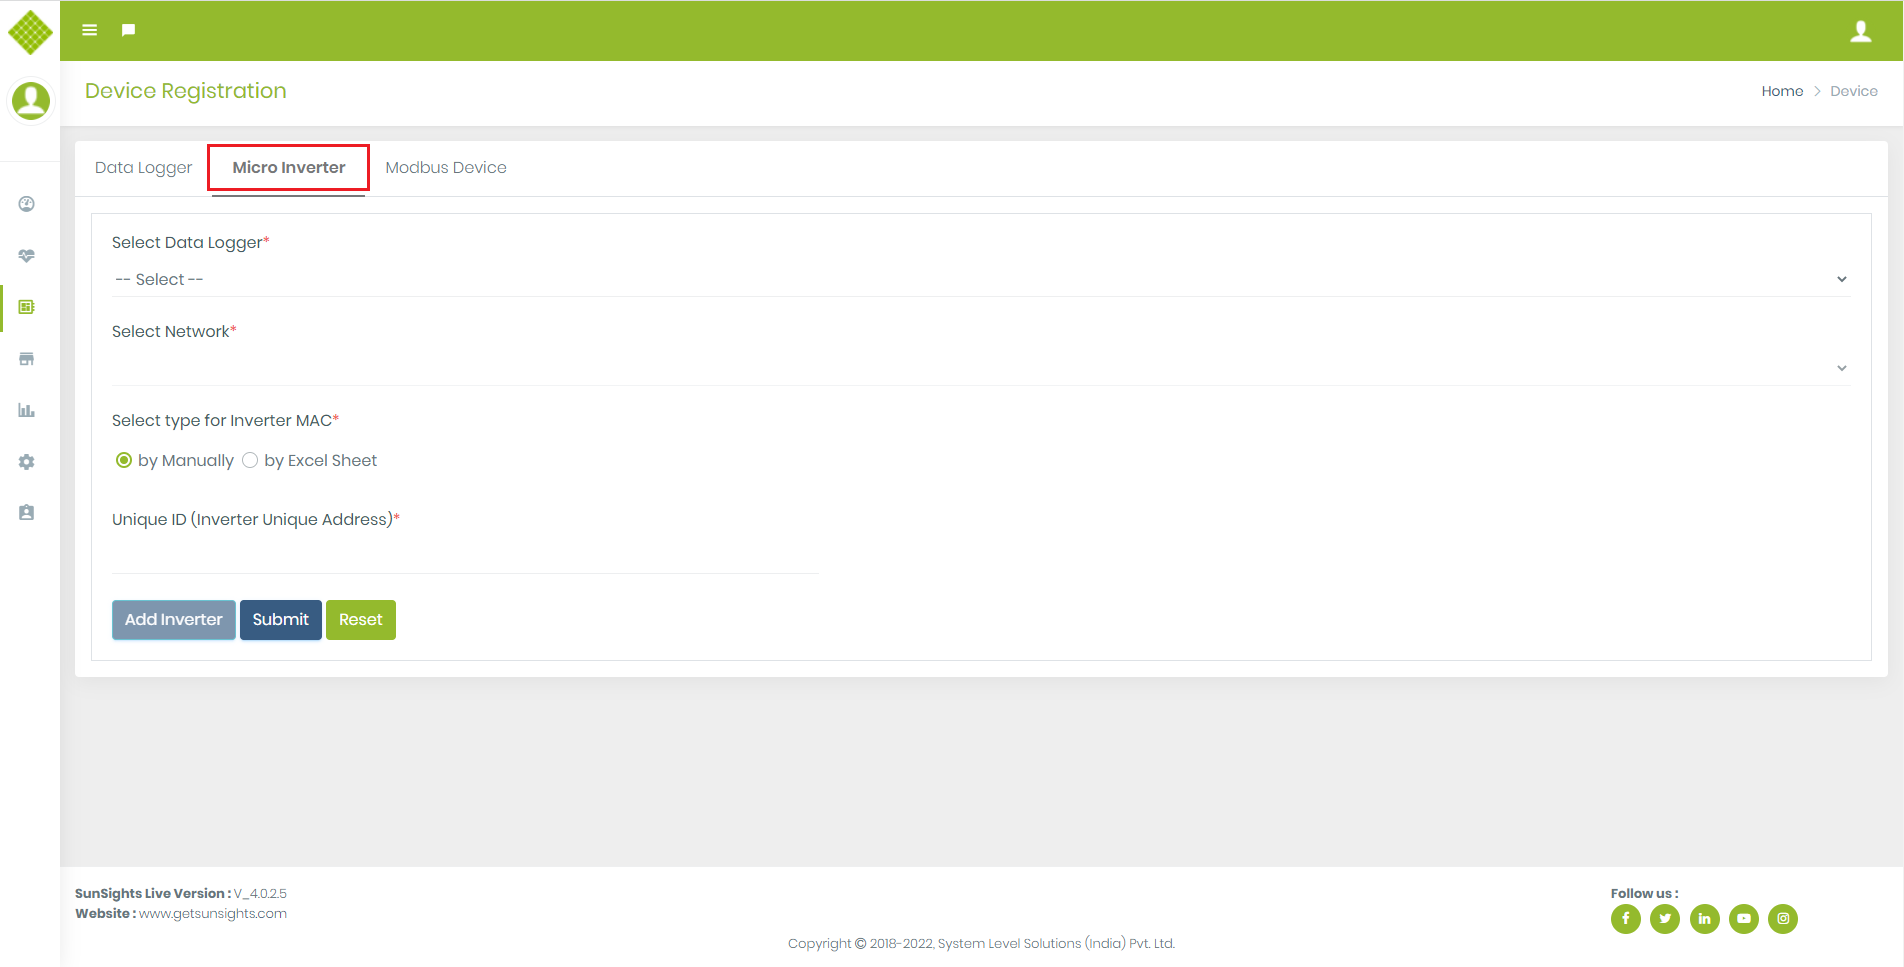
- Click on “Device Management” from Left side Menu. And Click on “Device Registration”.
- You get following screen and click on “Micro Inverter”,You get Form to add Micro Inverter
- All fields are mandatory.
- By default form allow micro inverter to add. But when select gateway it will change (if gateway is type of string inverter site then SlaveId field will be visible otherwise get same layout)
- Inverter Unique id must be 16 character Long.
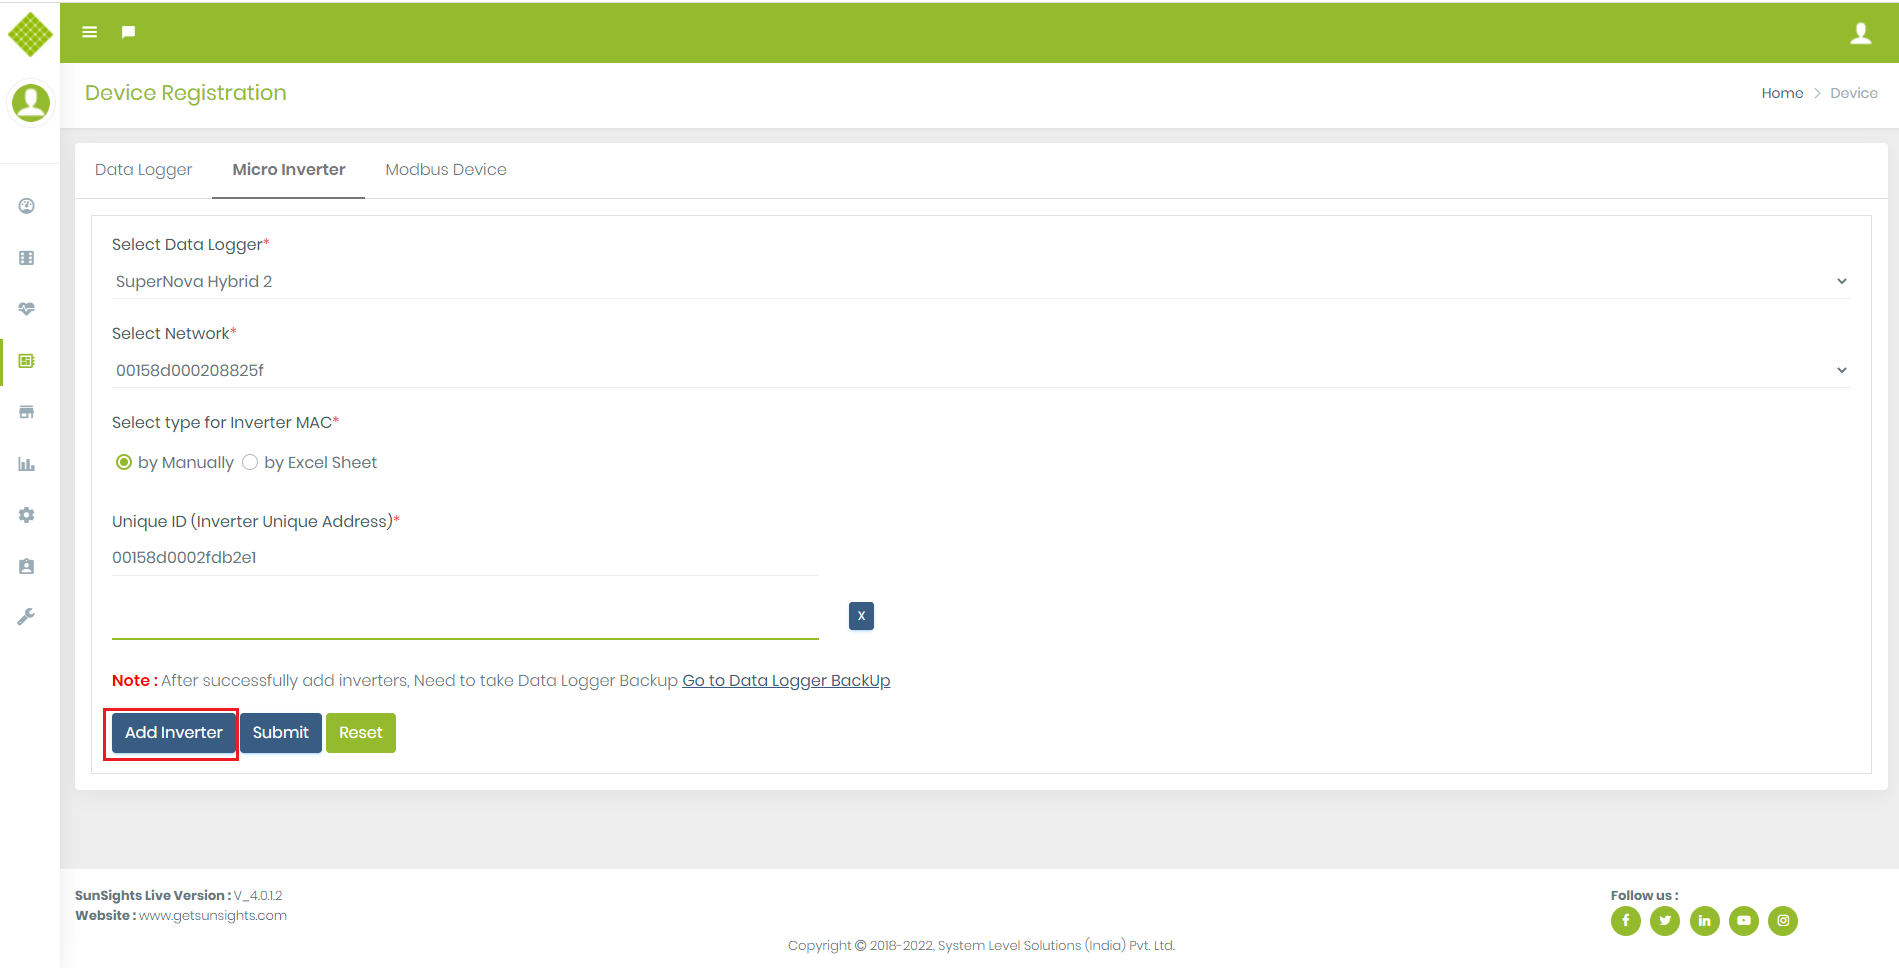
- Once one entry added successful with valid data then “Add Inverter” button will enable to add multiple Inverter.
- Click on the “Add Inverter” button after that you can add new inverter details with Unique ID/Inverter Mac.
- New inverter details (Inverter Unique ID/Inverter Mac)are mandatory.
- You can also delete that entry if not required.
- You can add a maximum of up to 20 inverter details at a time.
- Now you can click “Submit” to add inverter.
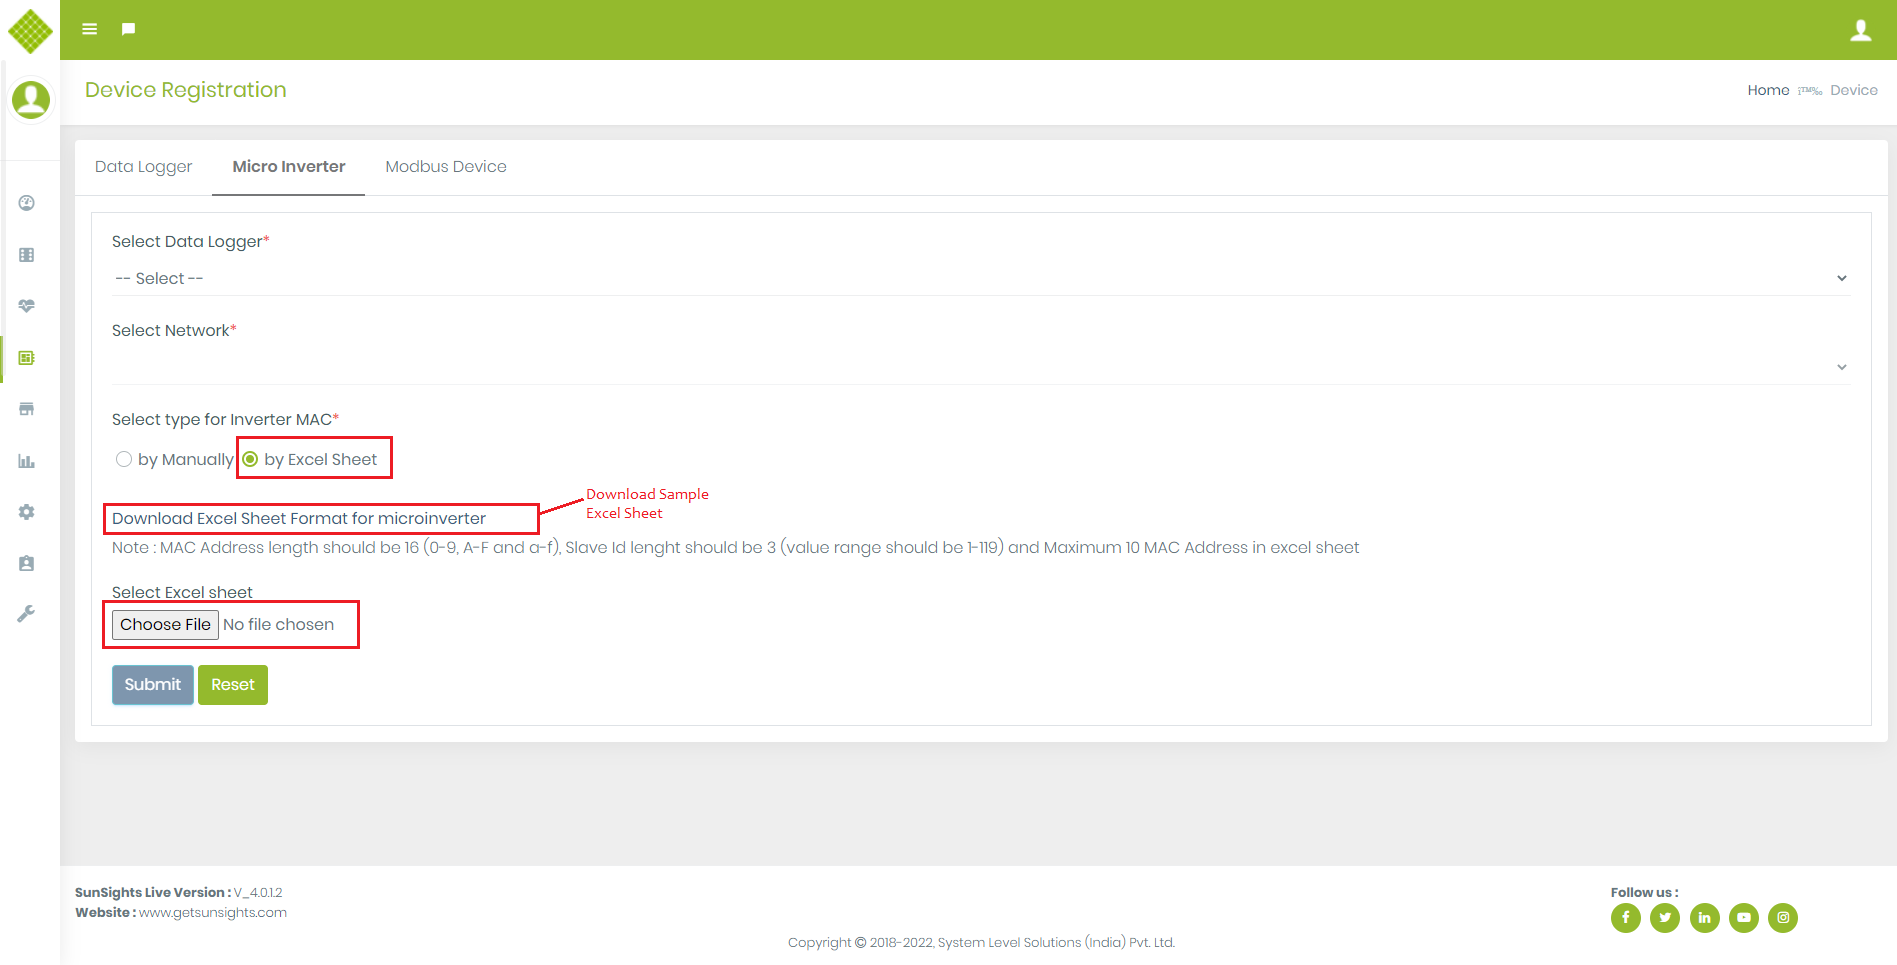
- We can also Add Inverter Using Excel sheet
- Select Gateway, Inverter and Select option “by Excel Sheet”
- You can Download sample format file to add inverter.
- And select Excel File.
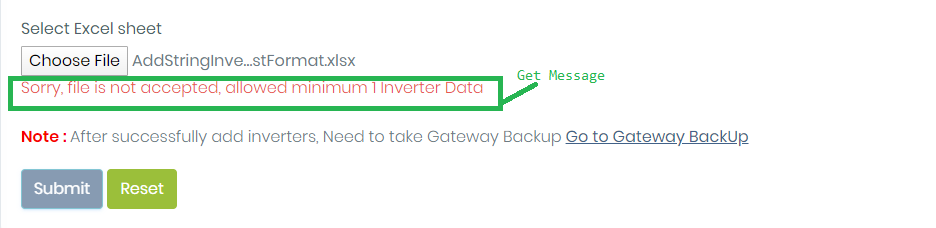
- If excel file is empty then:
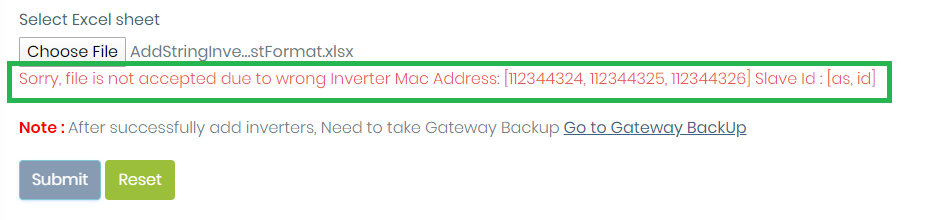
- If You Add invalid InverterMacId in Excel sheet then:
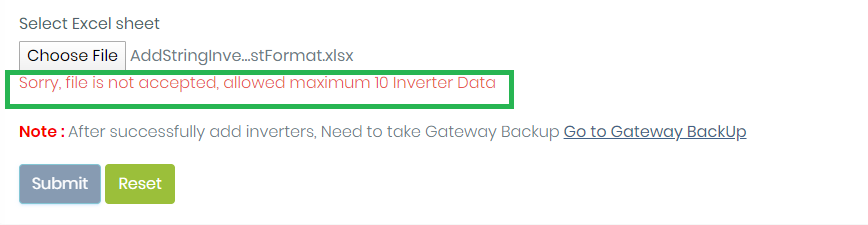
- You can add maximum 10 Inverter details in single excel sheet otherwise get error like:
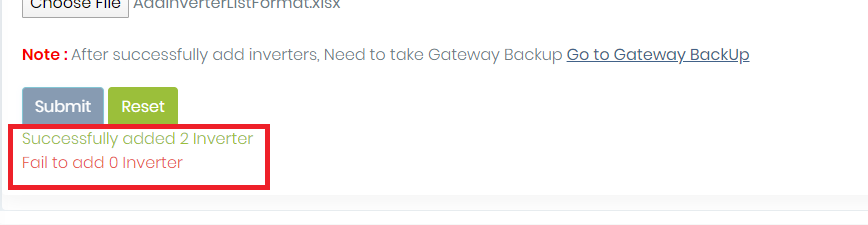
- Once upload excel file successfully without any error you get “Submit” button enable.
- Click on submit. You get message based on success and failure response like:
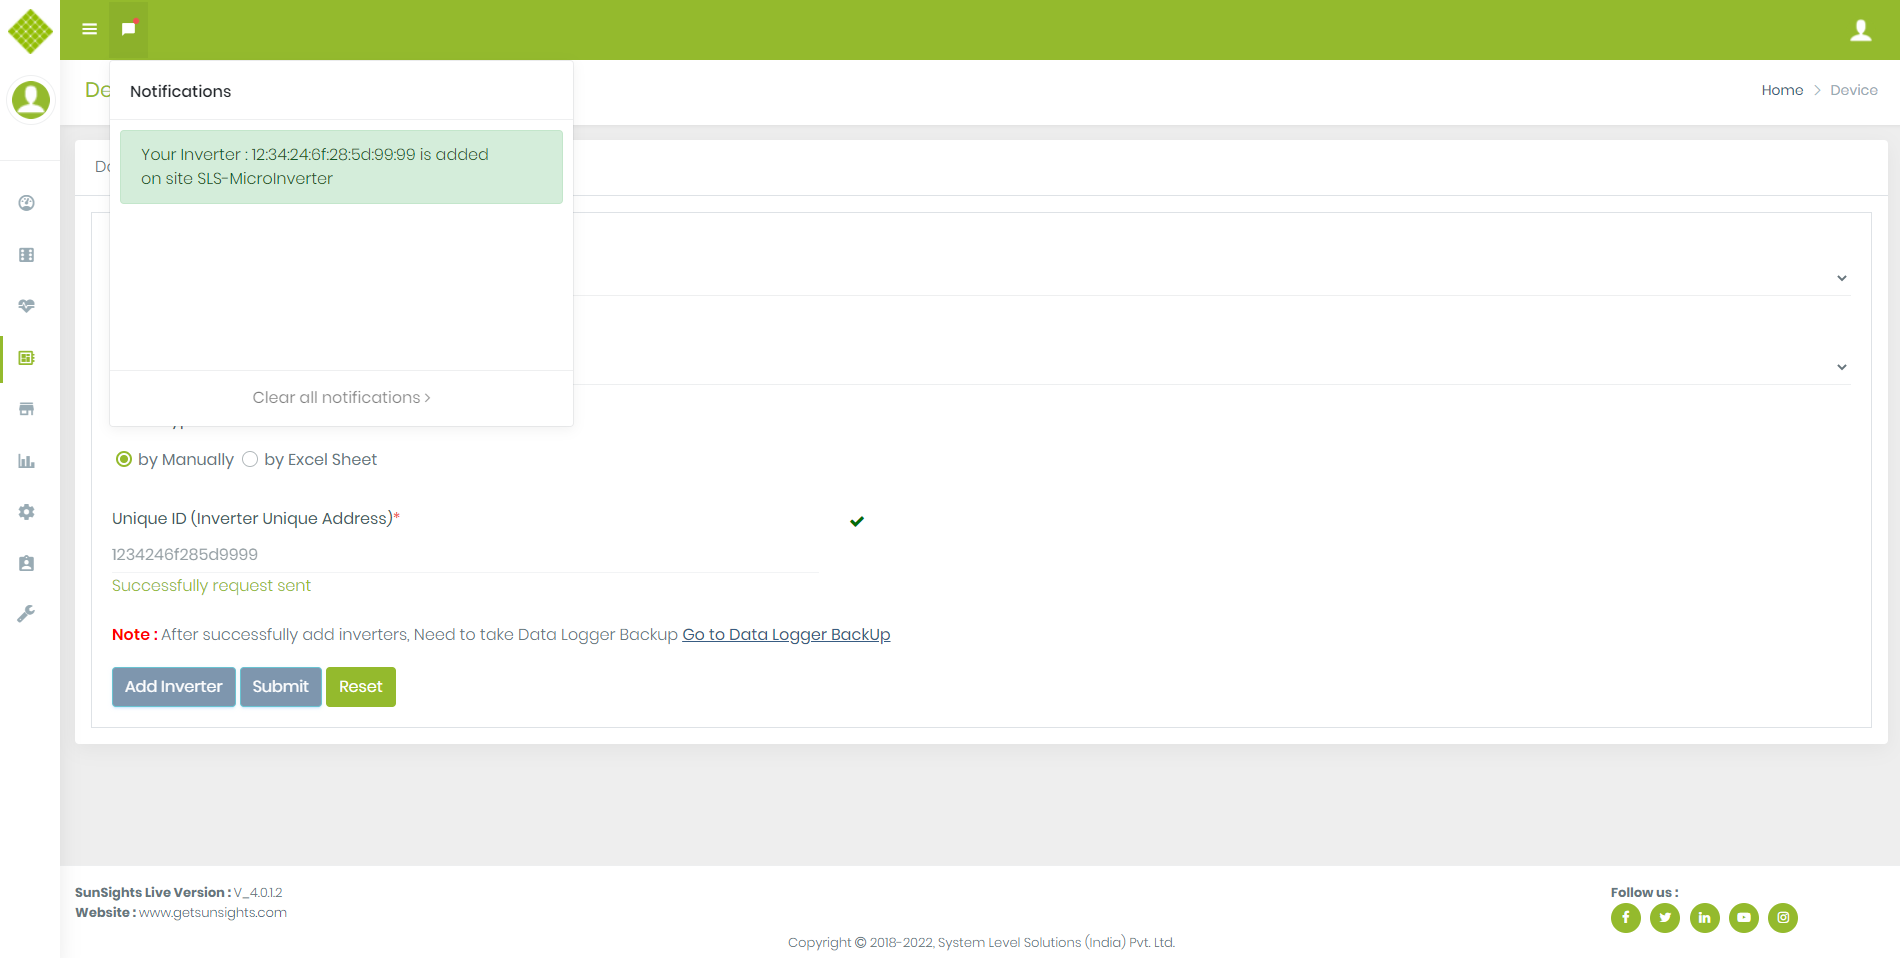
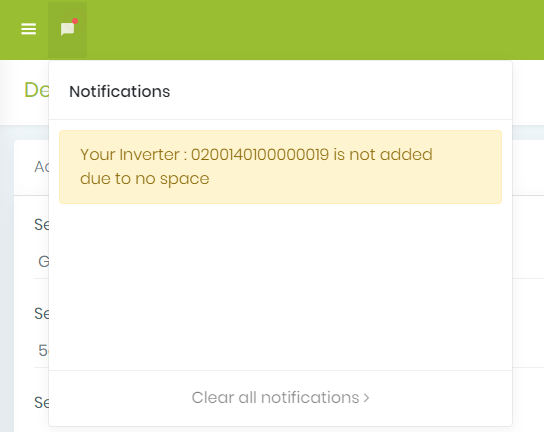
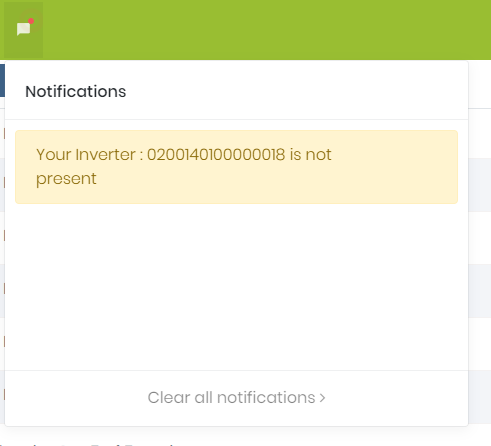
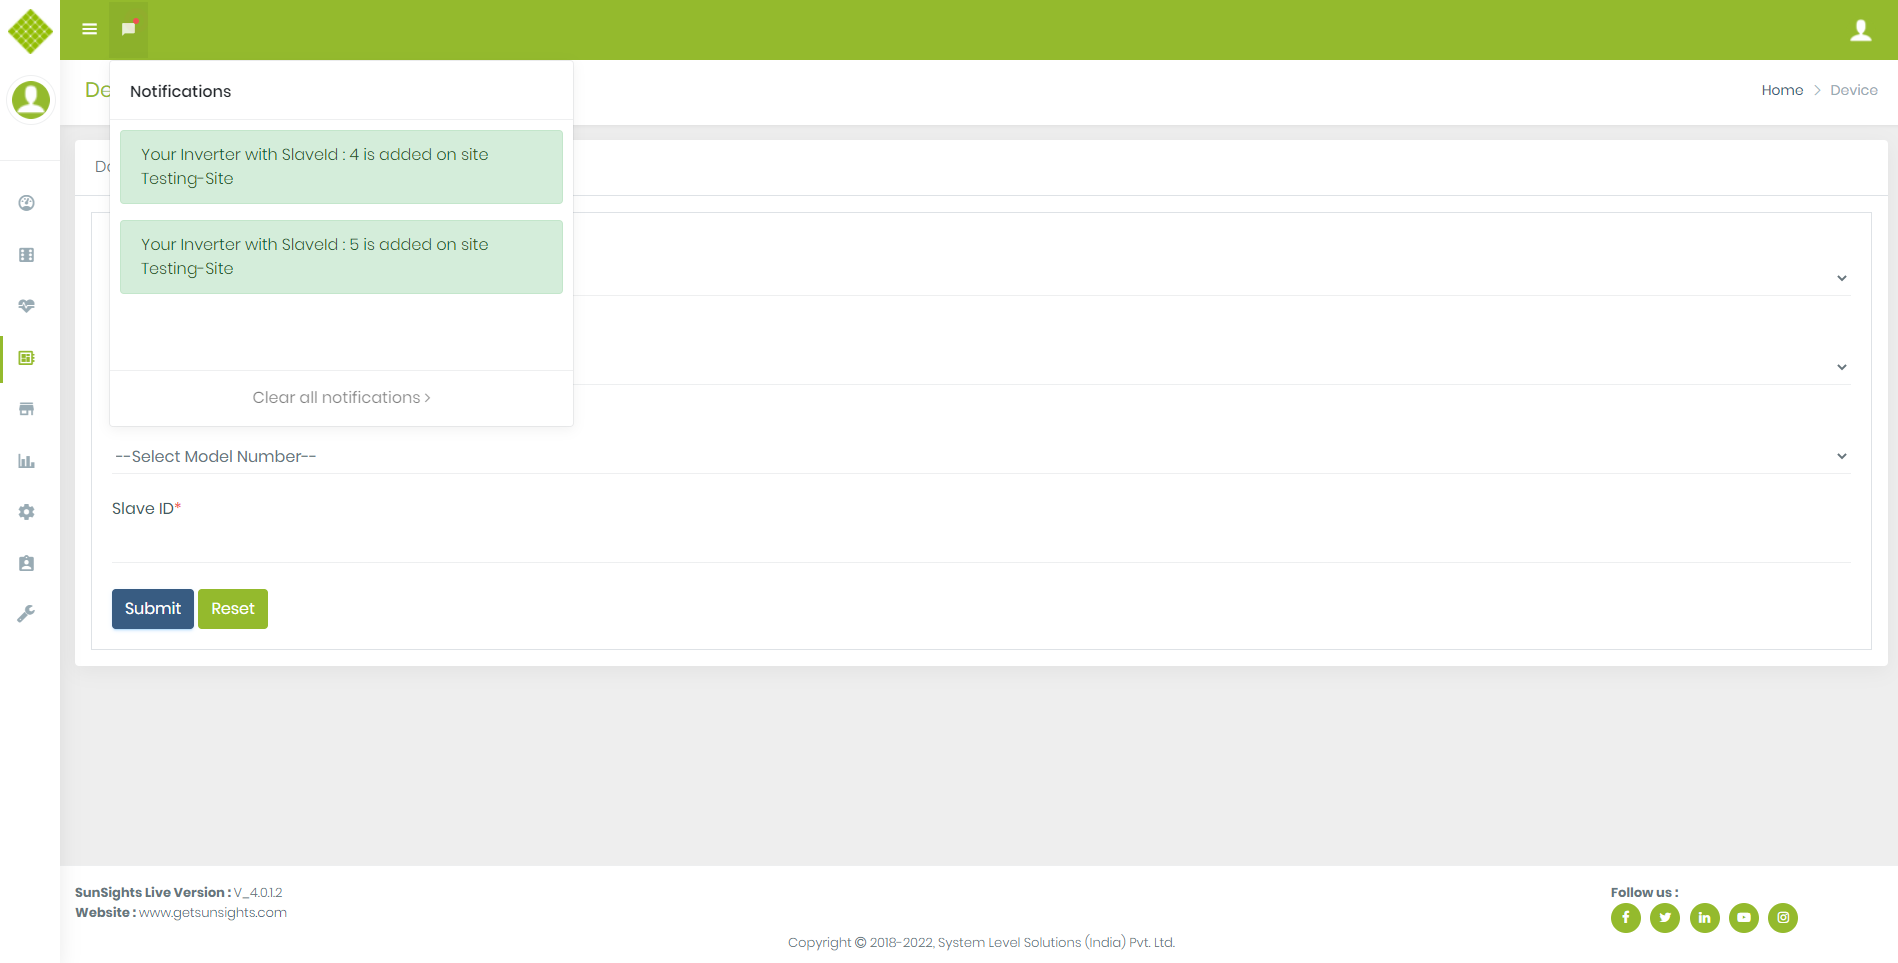
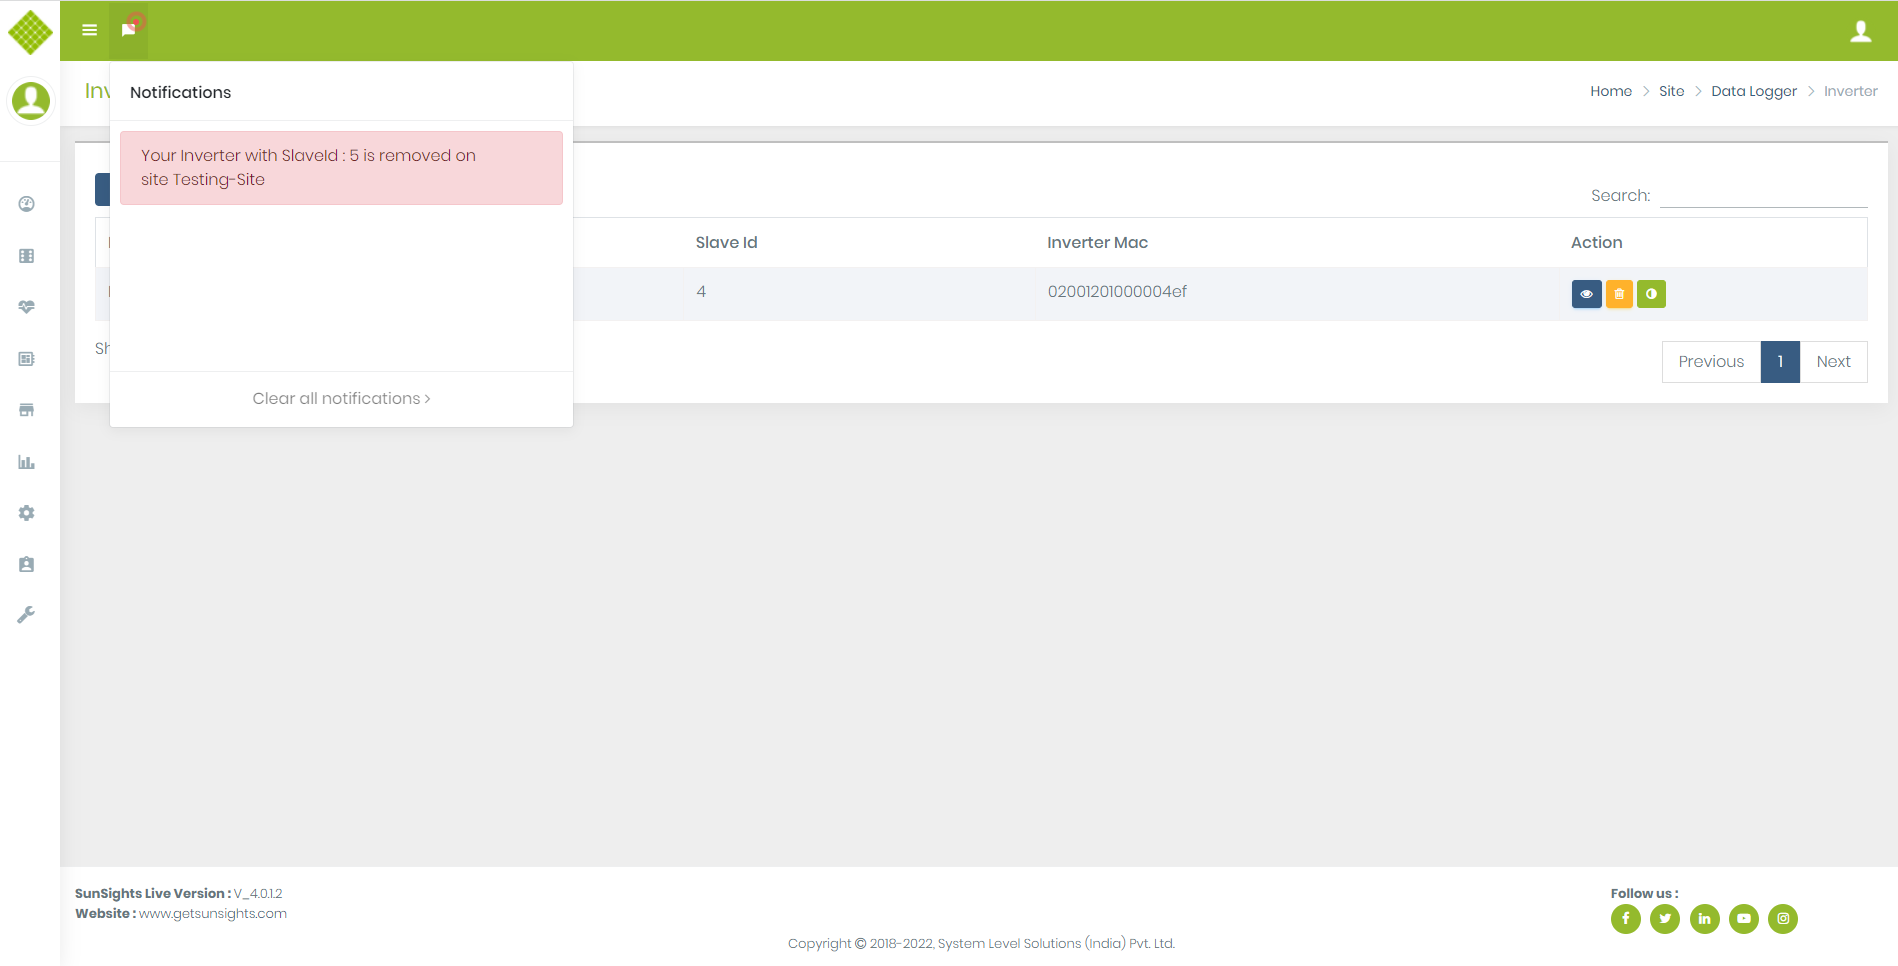
- Once Inverter Added in Gateways You get notification:
- You also get notification in notifications list like :
- You get following notification also when gateway’s allow maximum 5 inverter and you try to add more than 5.
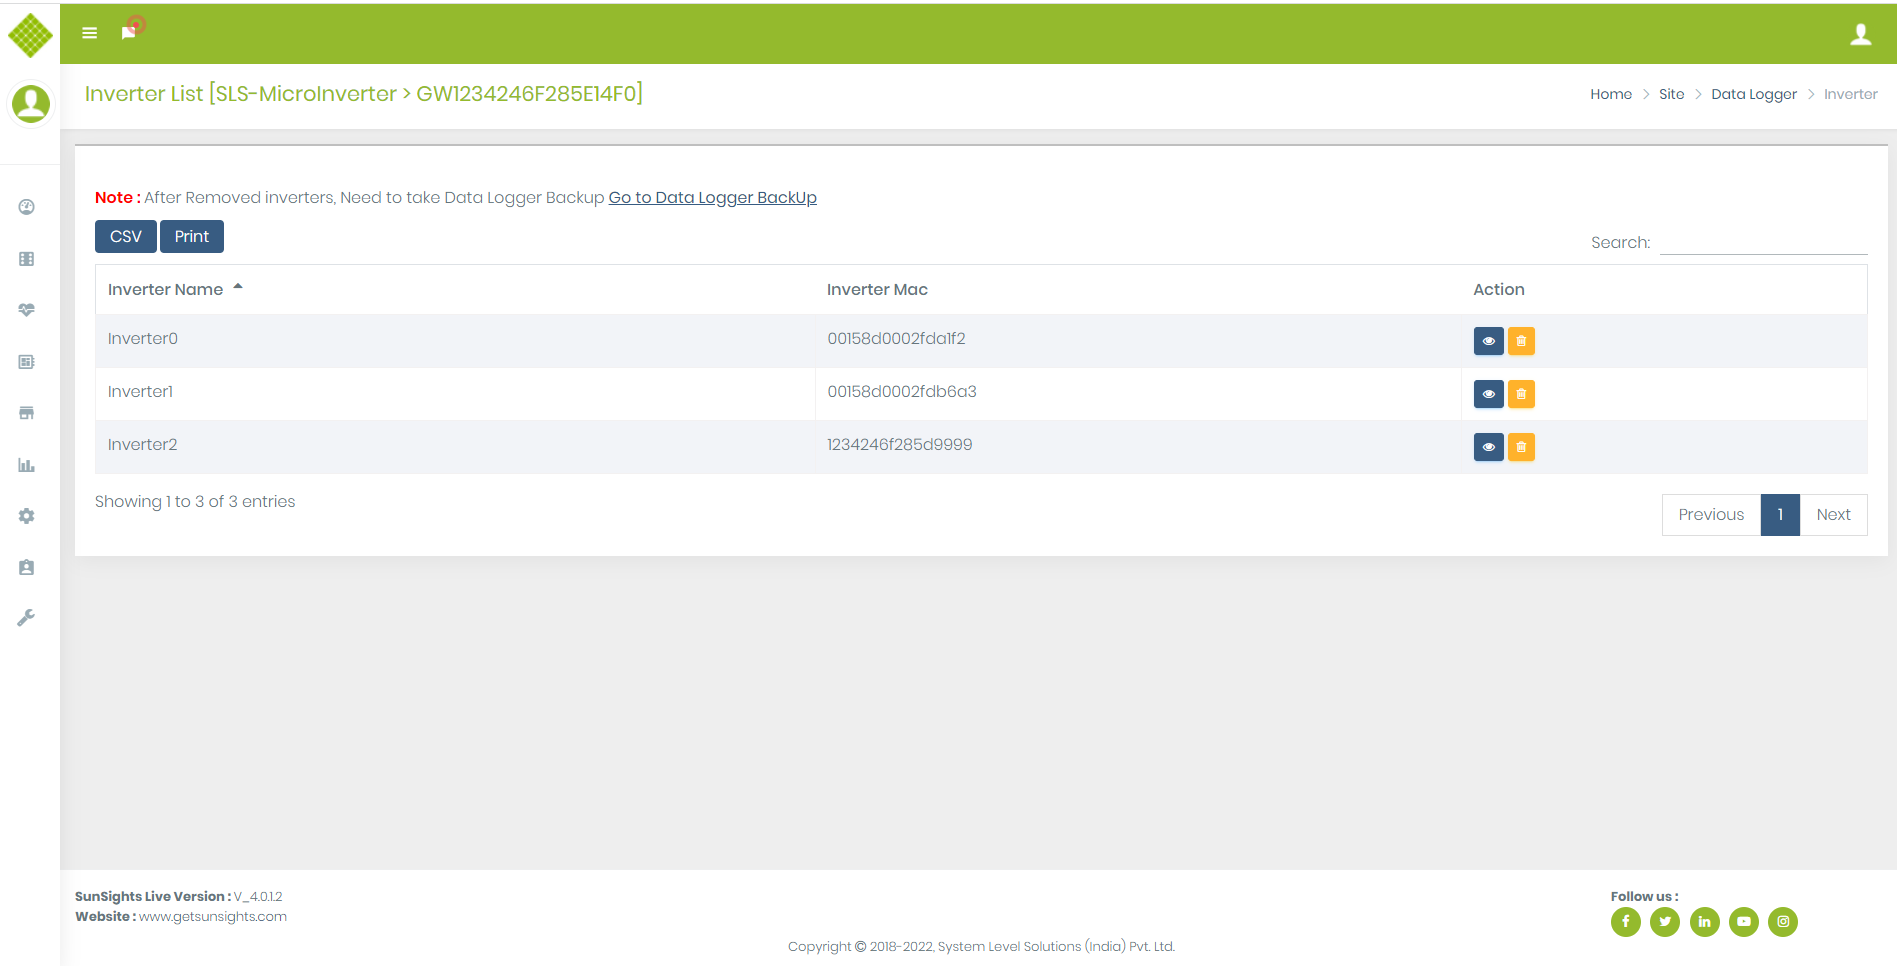
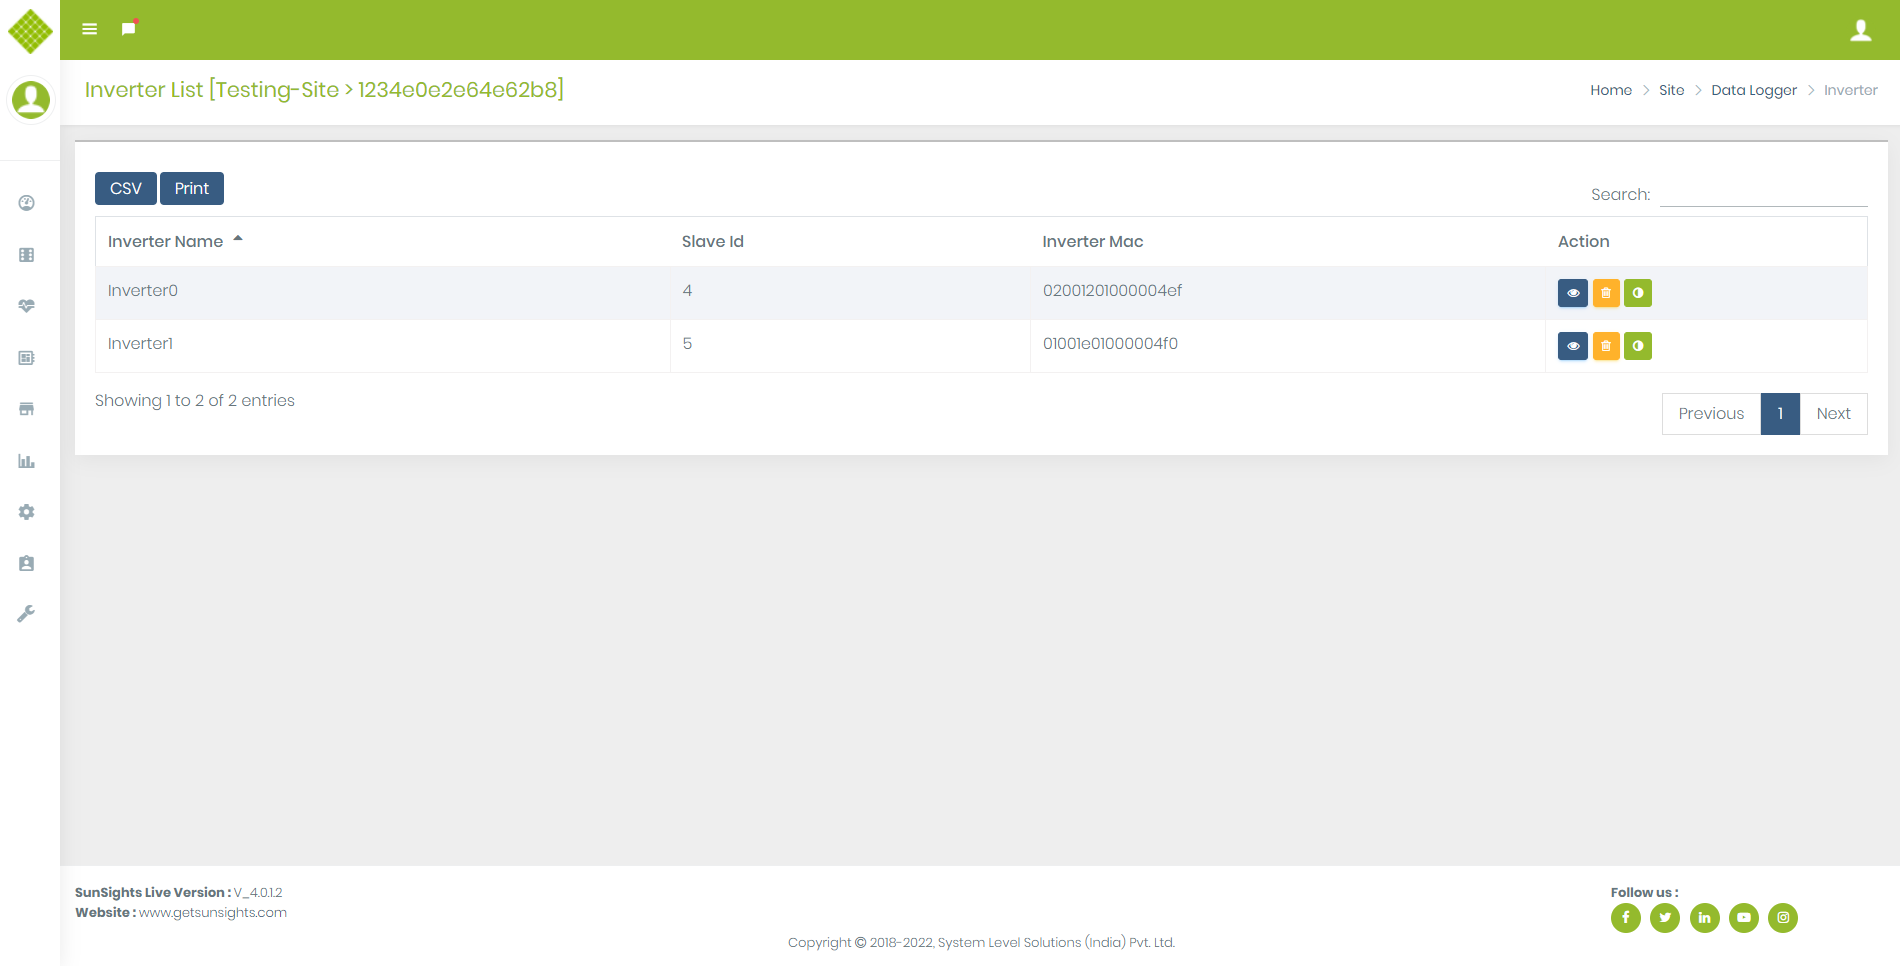
- Now you get List Of Added Inverter under Sites Menu.
- Click on Site Menu -> Select Specific Site ->Click on Gateway List -> Select Inverter List of specific gateway:


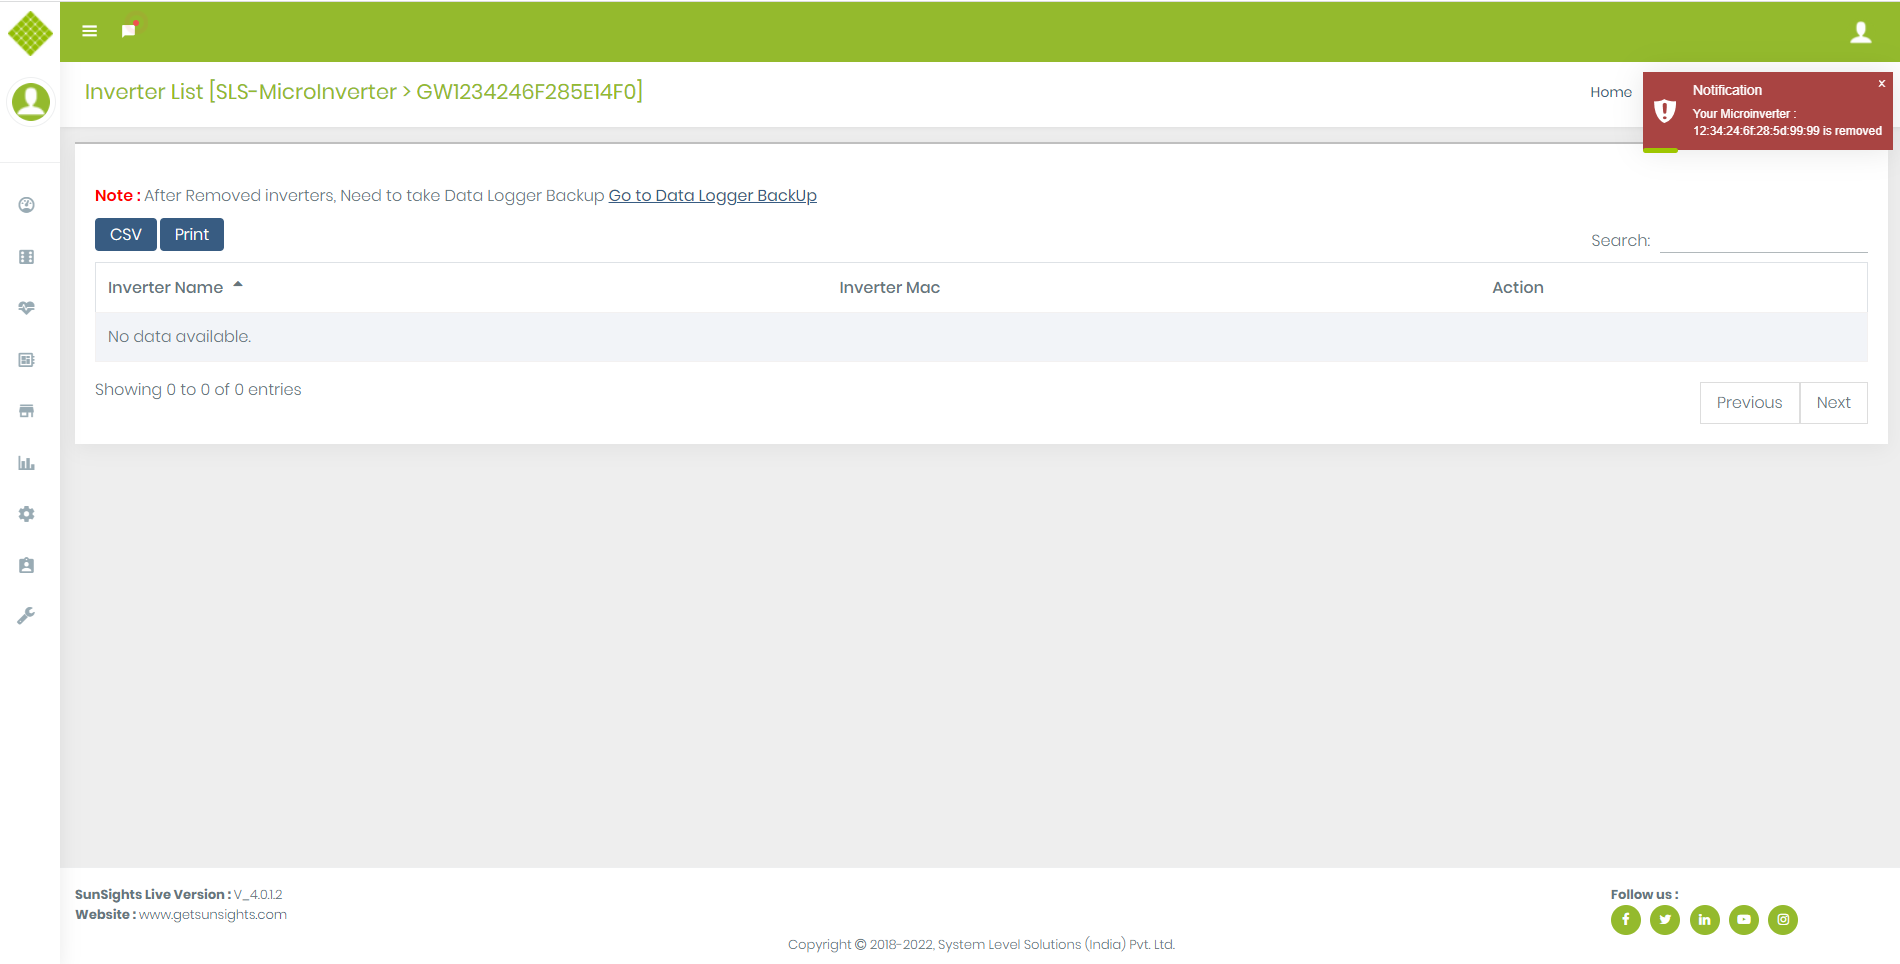
Remove MicroInverter
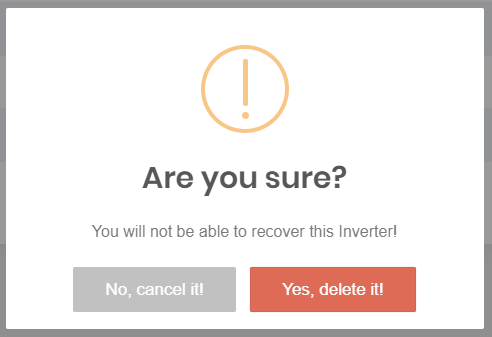
- Now You can remove Inverter. Click on remove button:
- Get confirmation message for delete Inverter:
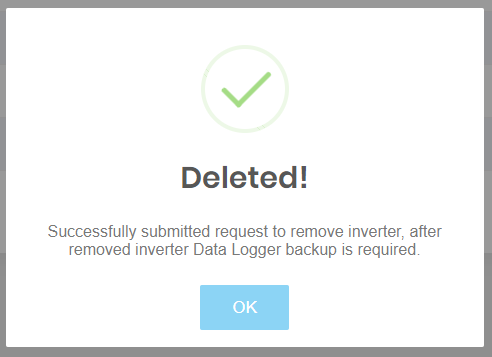
- If select Yes, delete it then get following:
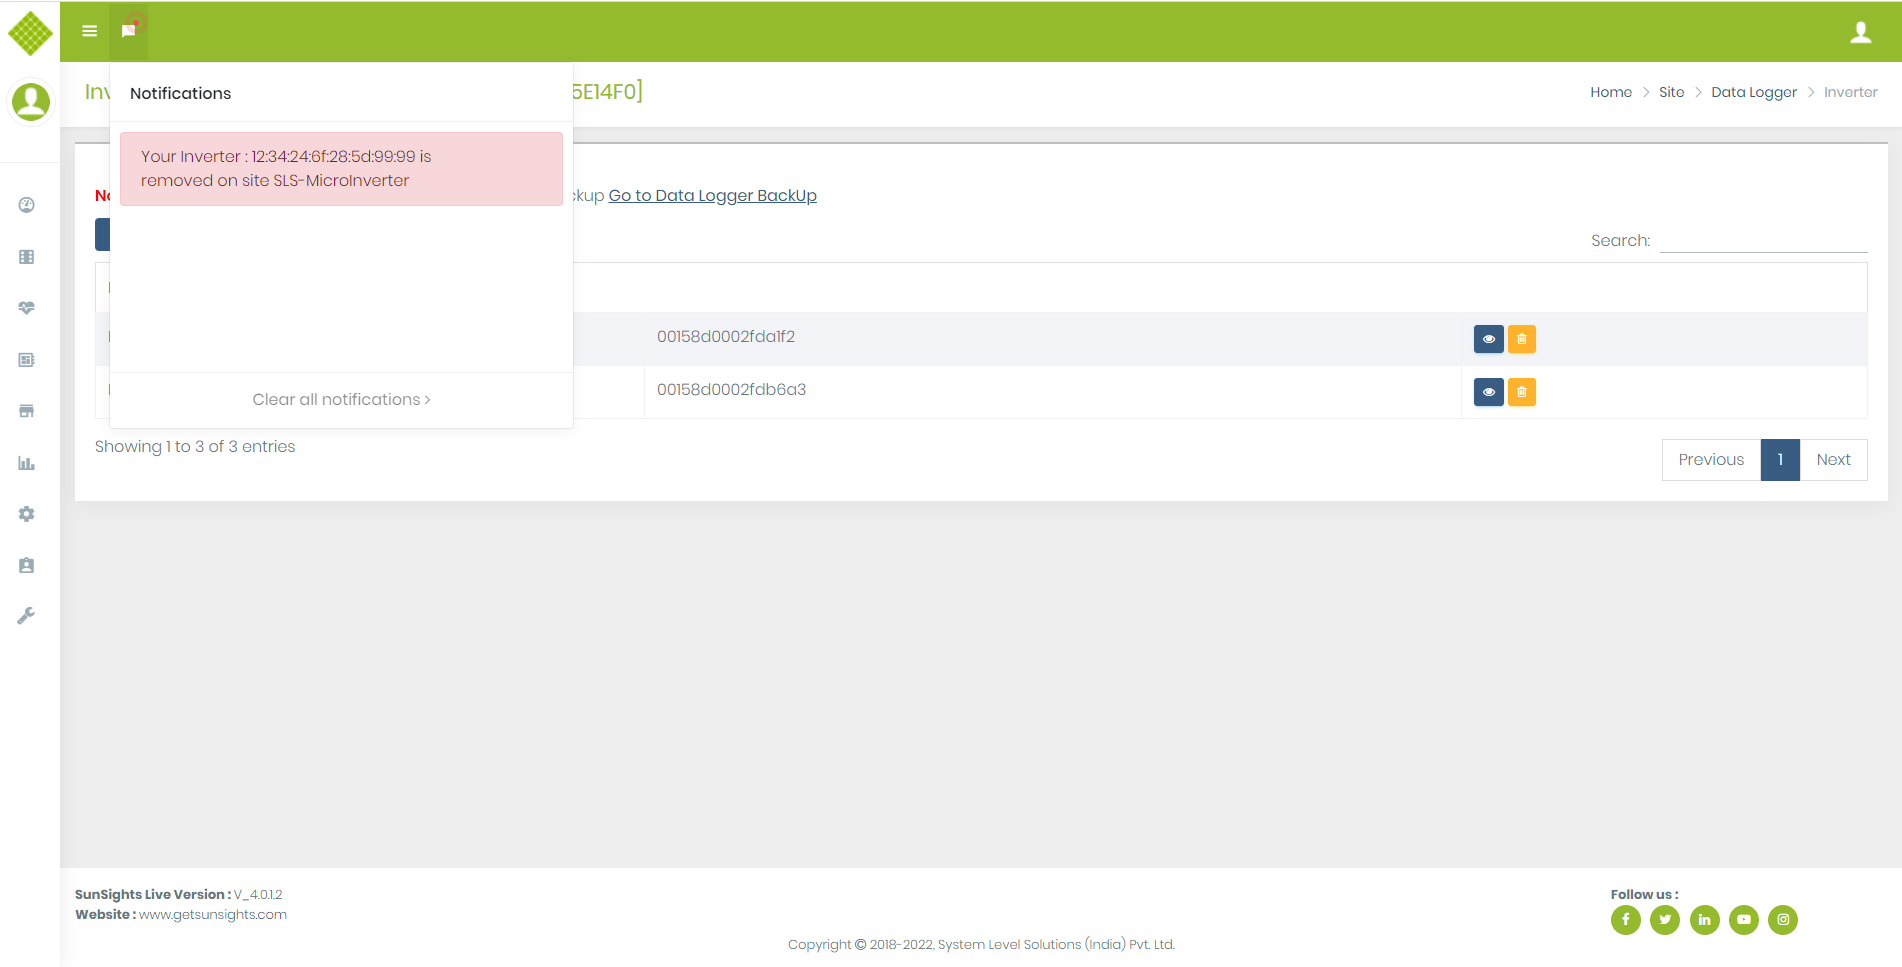
- When Inverter deleted from the Gateway then get notification and inverter entry removed from list.
- Sometimes you not get Remove message immediately and if you try to remove that inverter again then get following notification if inverter will be removed successfully:
- For that you have to wait or refresh inverter list page.
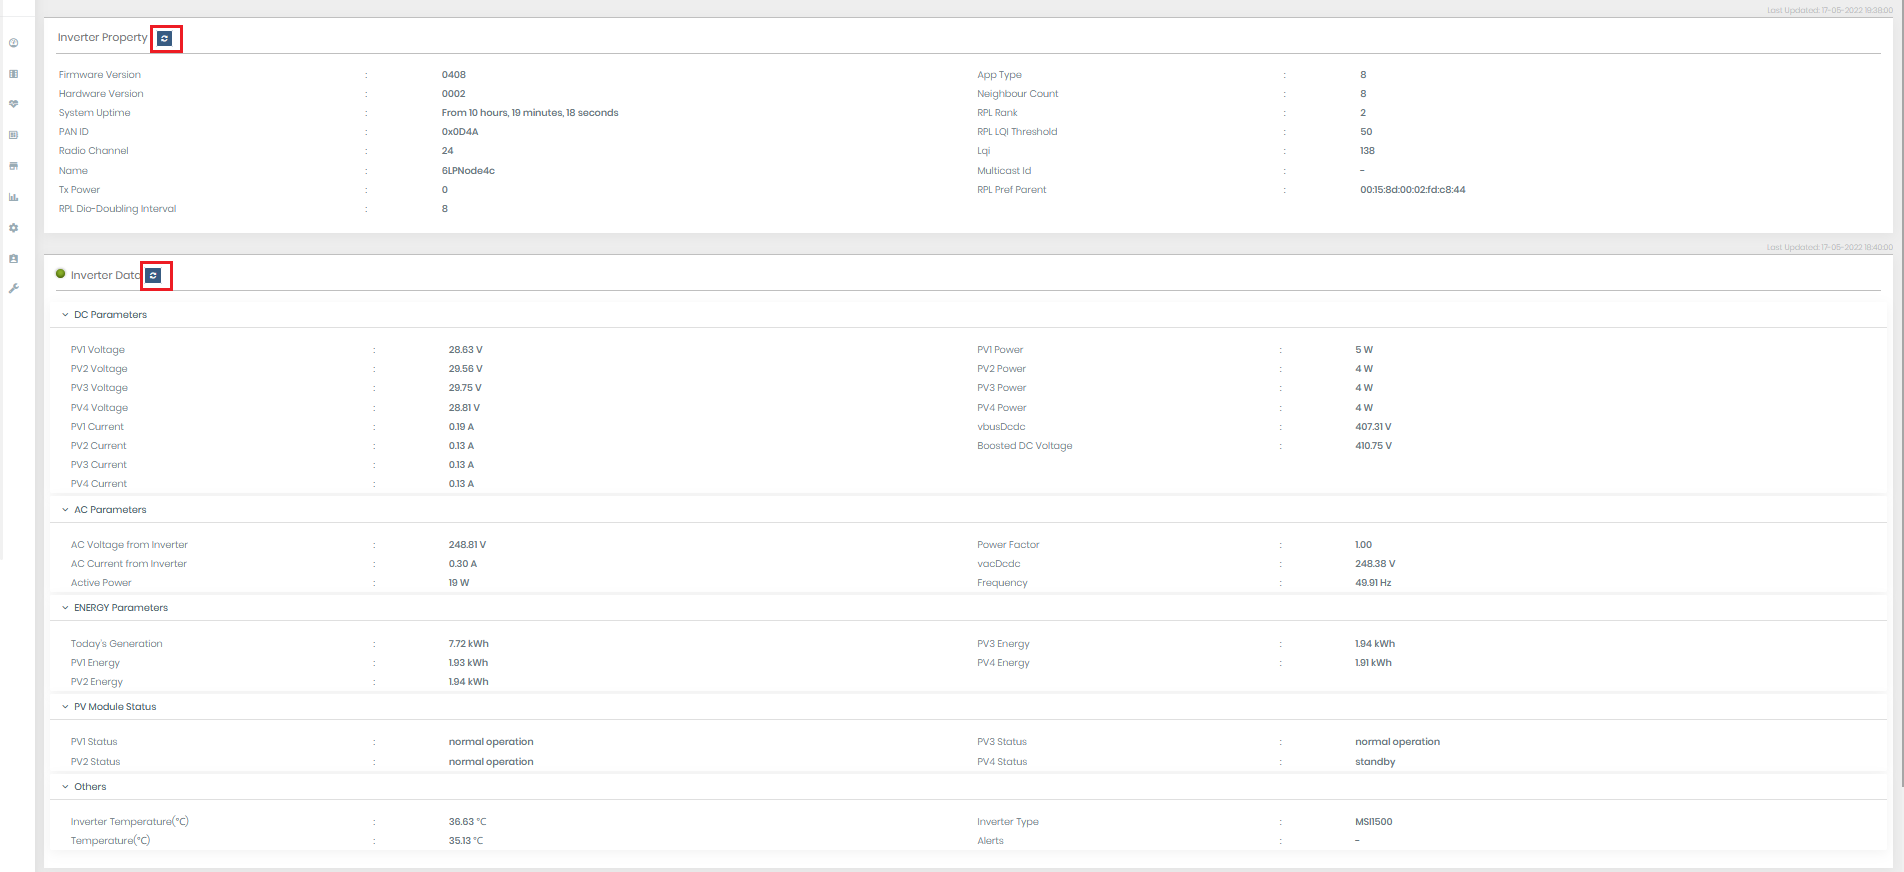
View Micro Inverter
-
Click on
 to View Inverters Detail
- You get all last updated data of Micro Inverter.
- On clicking on refresh button we get current data of Micro Inverter.
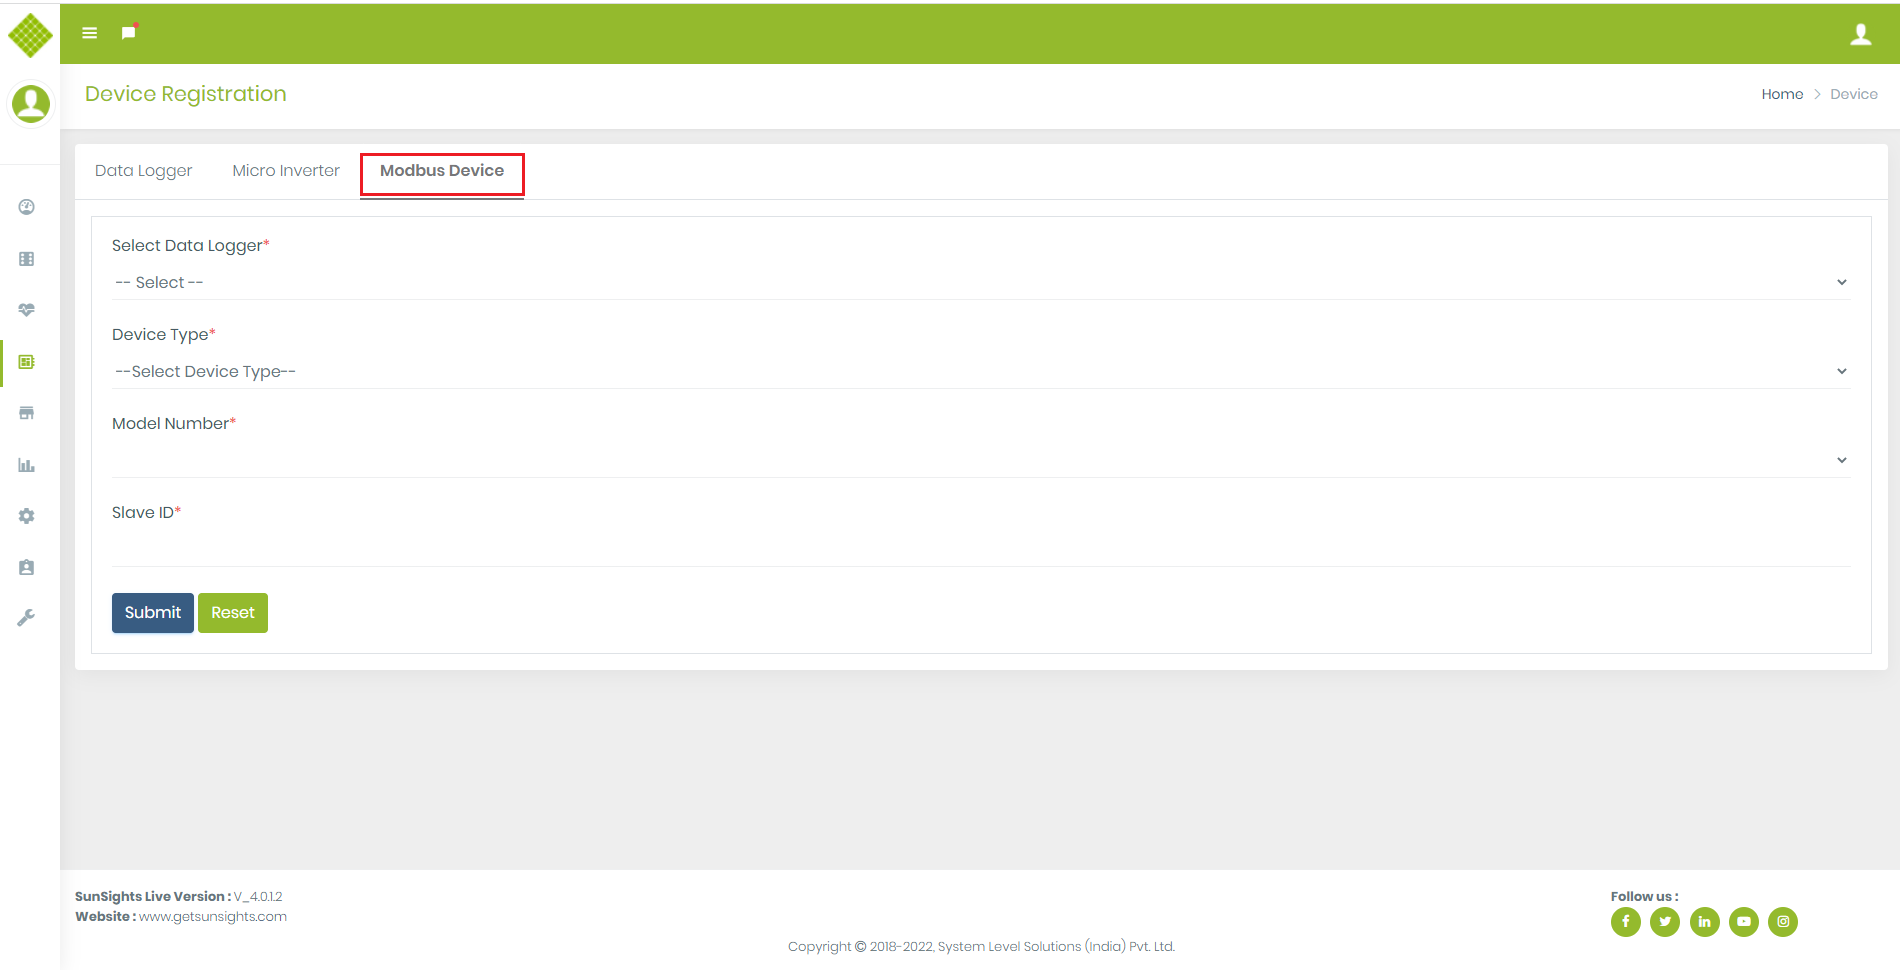
3.Modbus Device
We can add string inverter,meter and sensor as modbus device in portal. Each modbus device has similar flow for add and remove.3.1.String Inverter
Add String Inverter
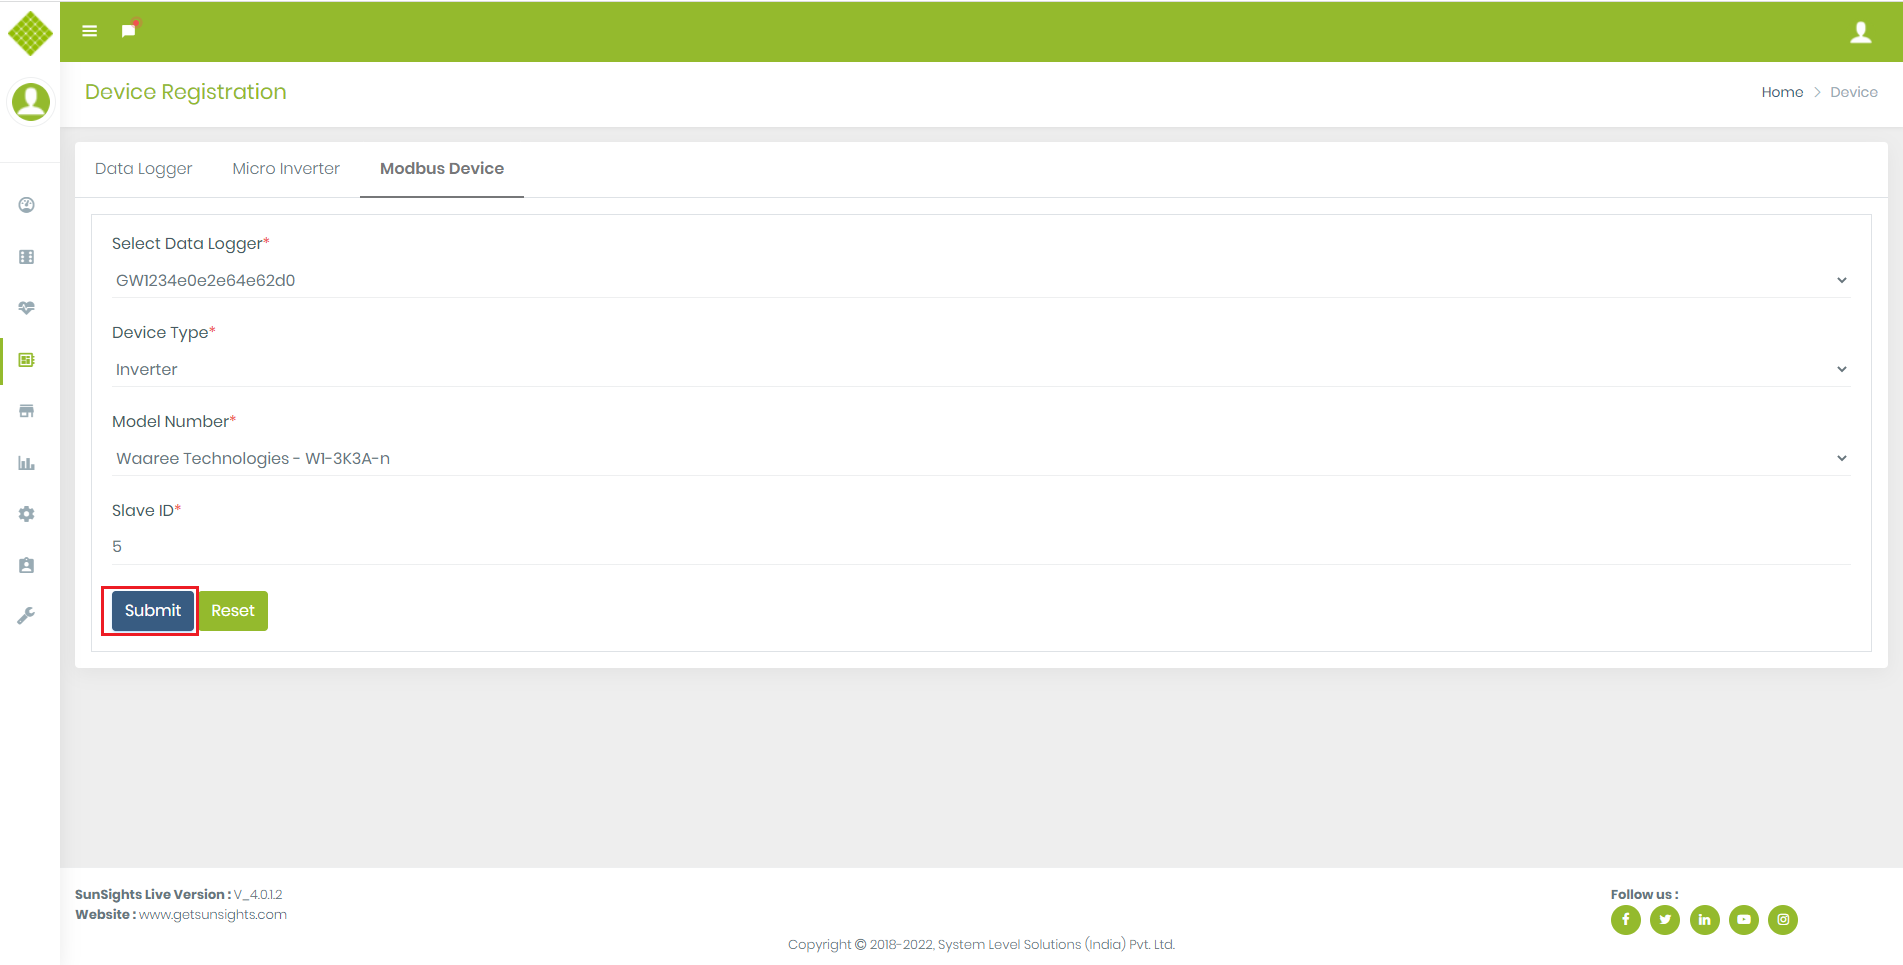
- click on “Modbus Device”,You get Form to add String Inverter.
- Fill up the form and select device type as a Inverter, click on submit button.
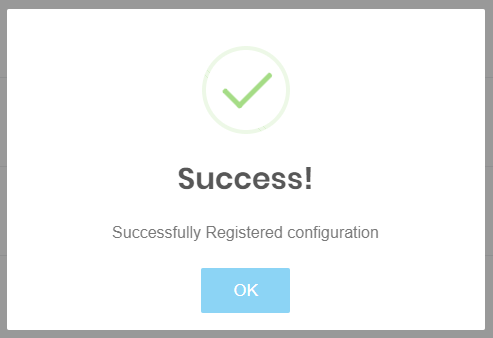
- After Success you get success message.
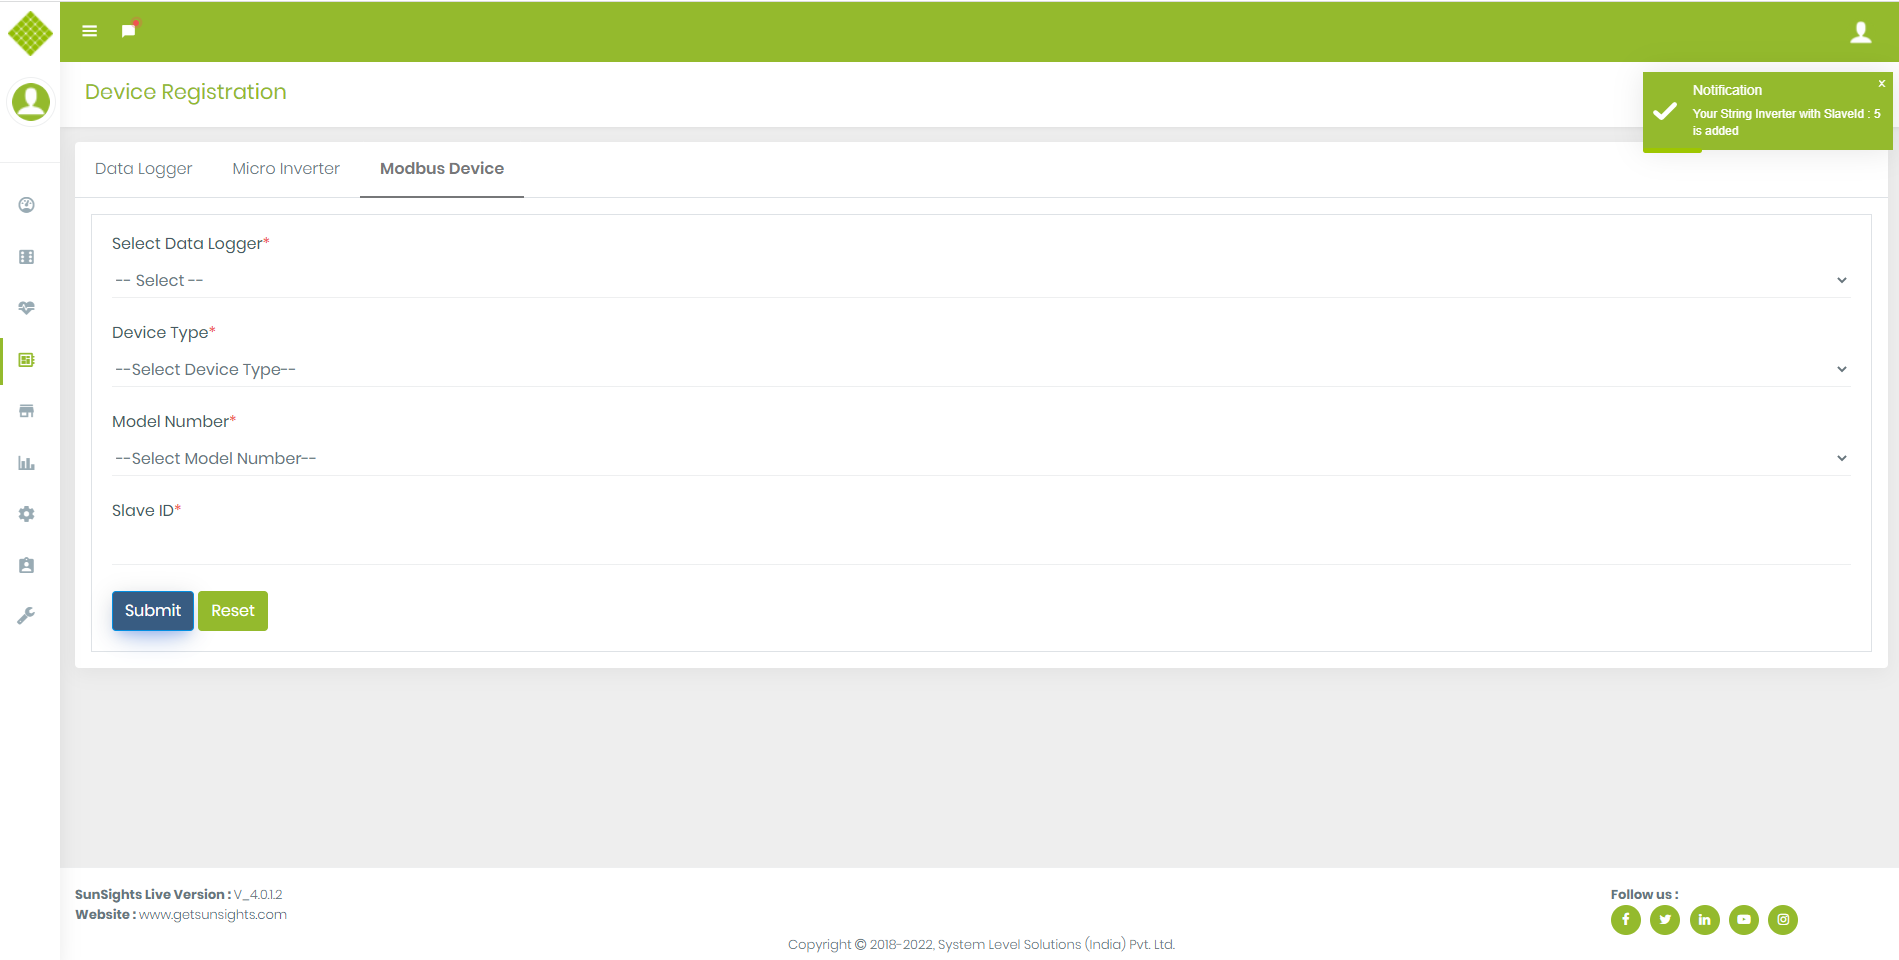
- After Successful adding device on gateway we can get notification like below
- Now you get list Of Added String Inverter under Sites Menu as like microinverter.
Remove String Inverter
- We can remove String Inverter. Click on remove button:
- Get confirmation message for delete String Inverter:
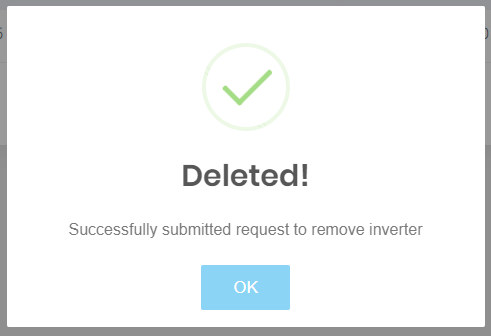
- If select Yes, delete it then get following:
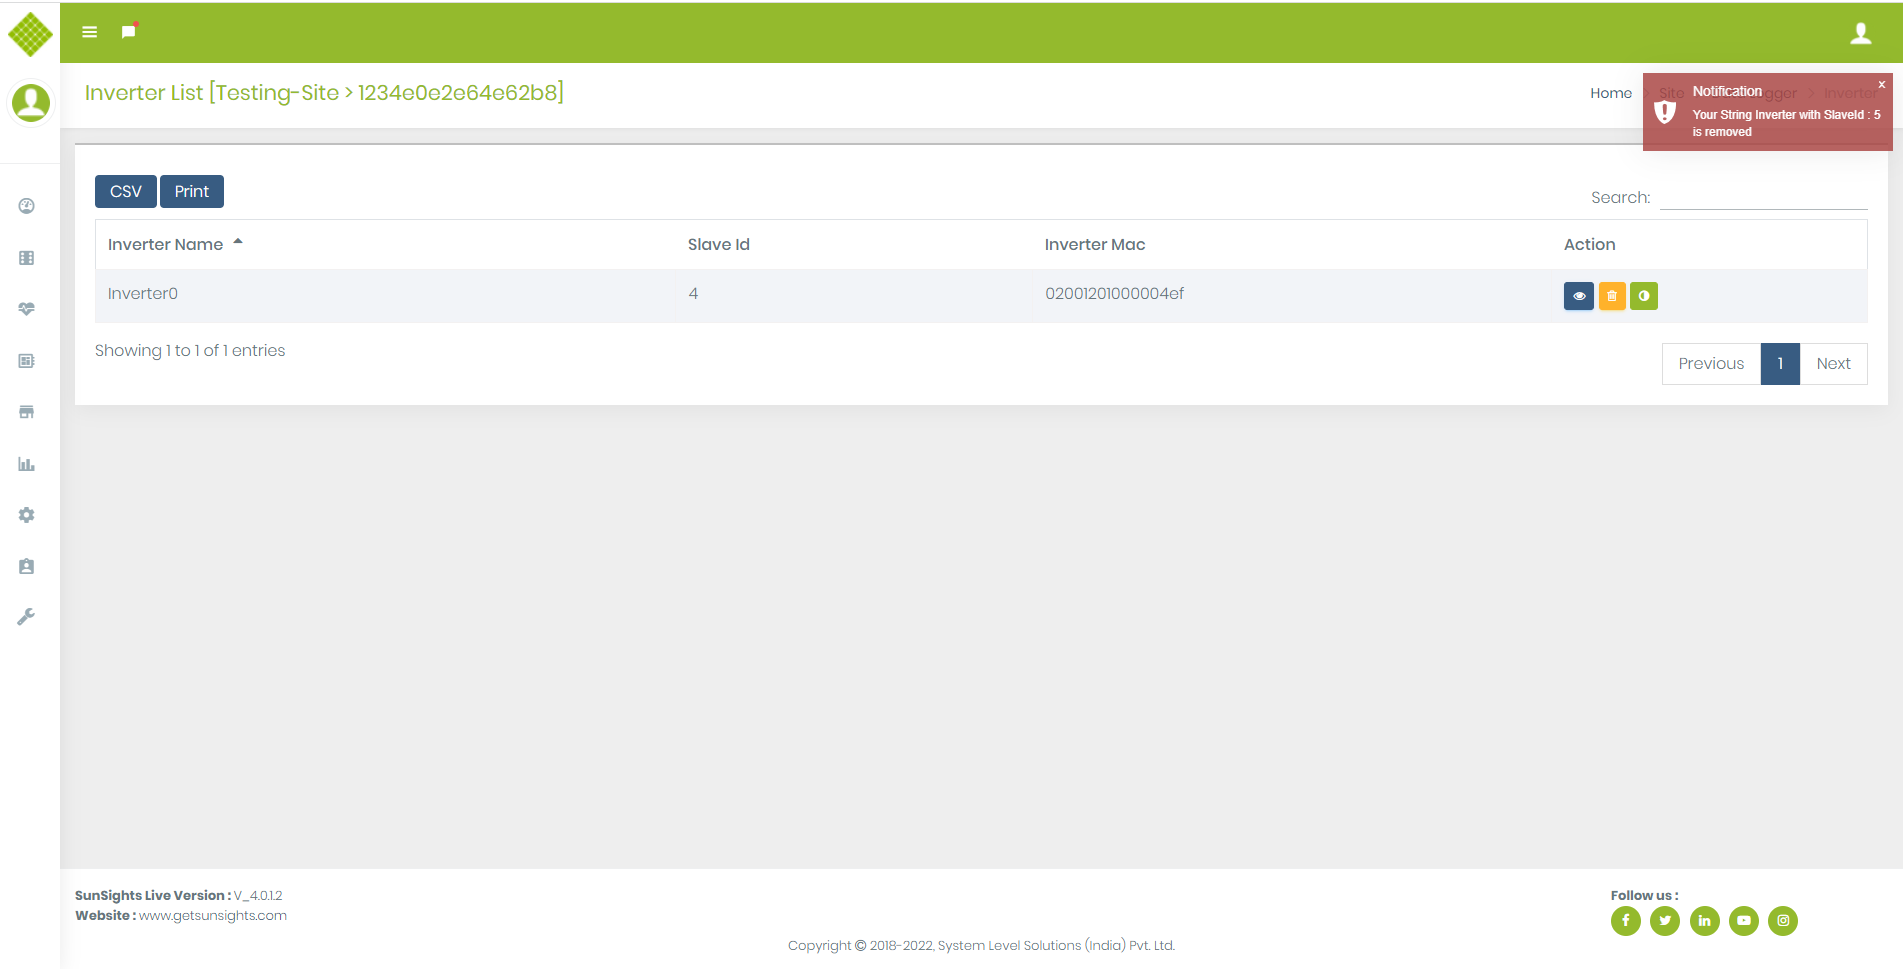
- Inverter is deleted from the Gateway then get notification and string inverter entry removed from list as like microinverter.

View String Inverter
-
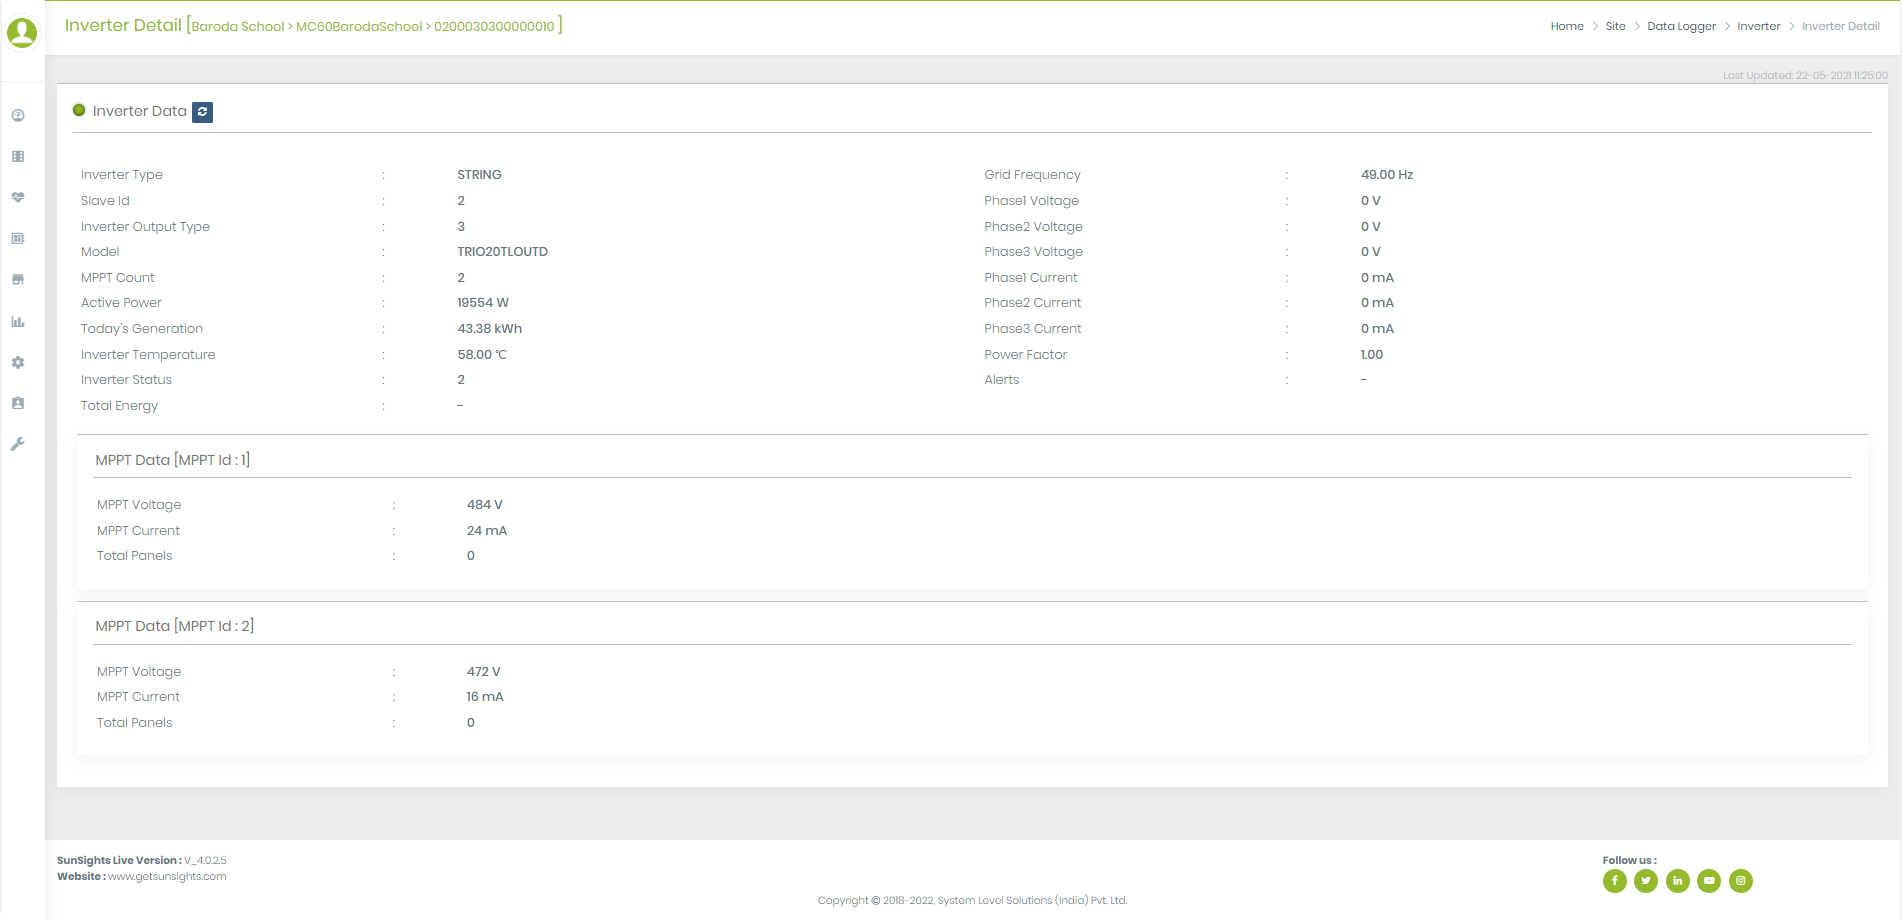
Click on
to View Inverters Detail
- You get all last updated data of String Inverter.
- On clicking on refresh button we get current data of String Inverter.
3.2.Meter
Add Meter
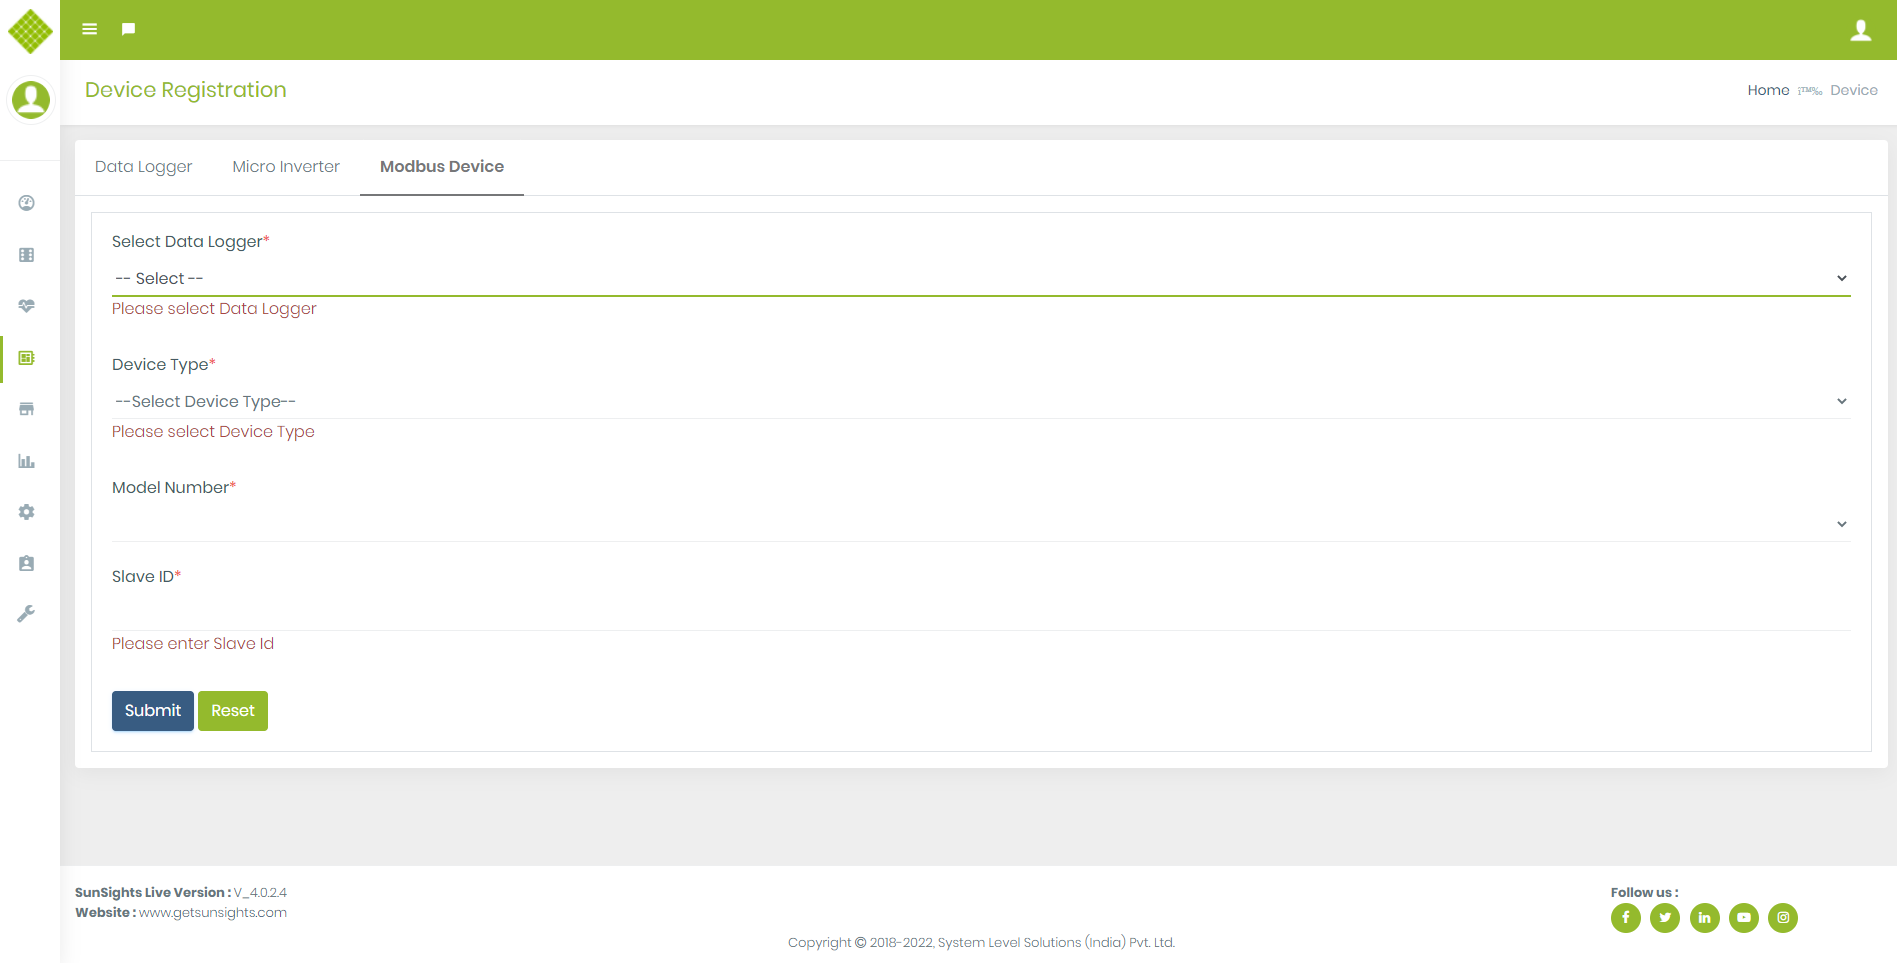
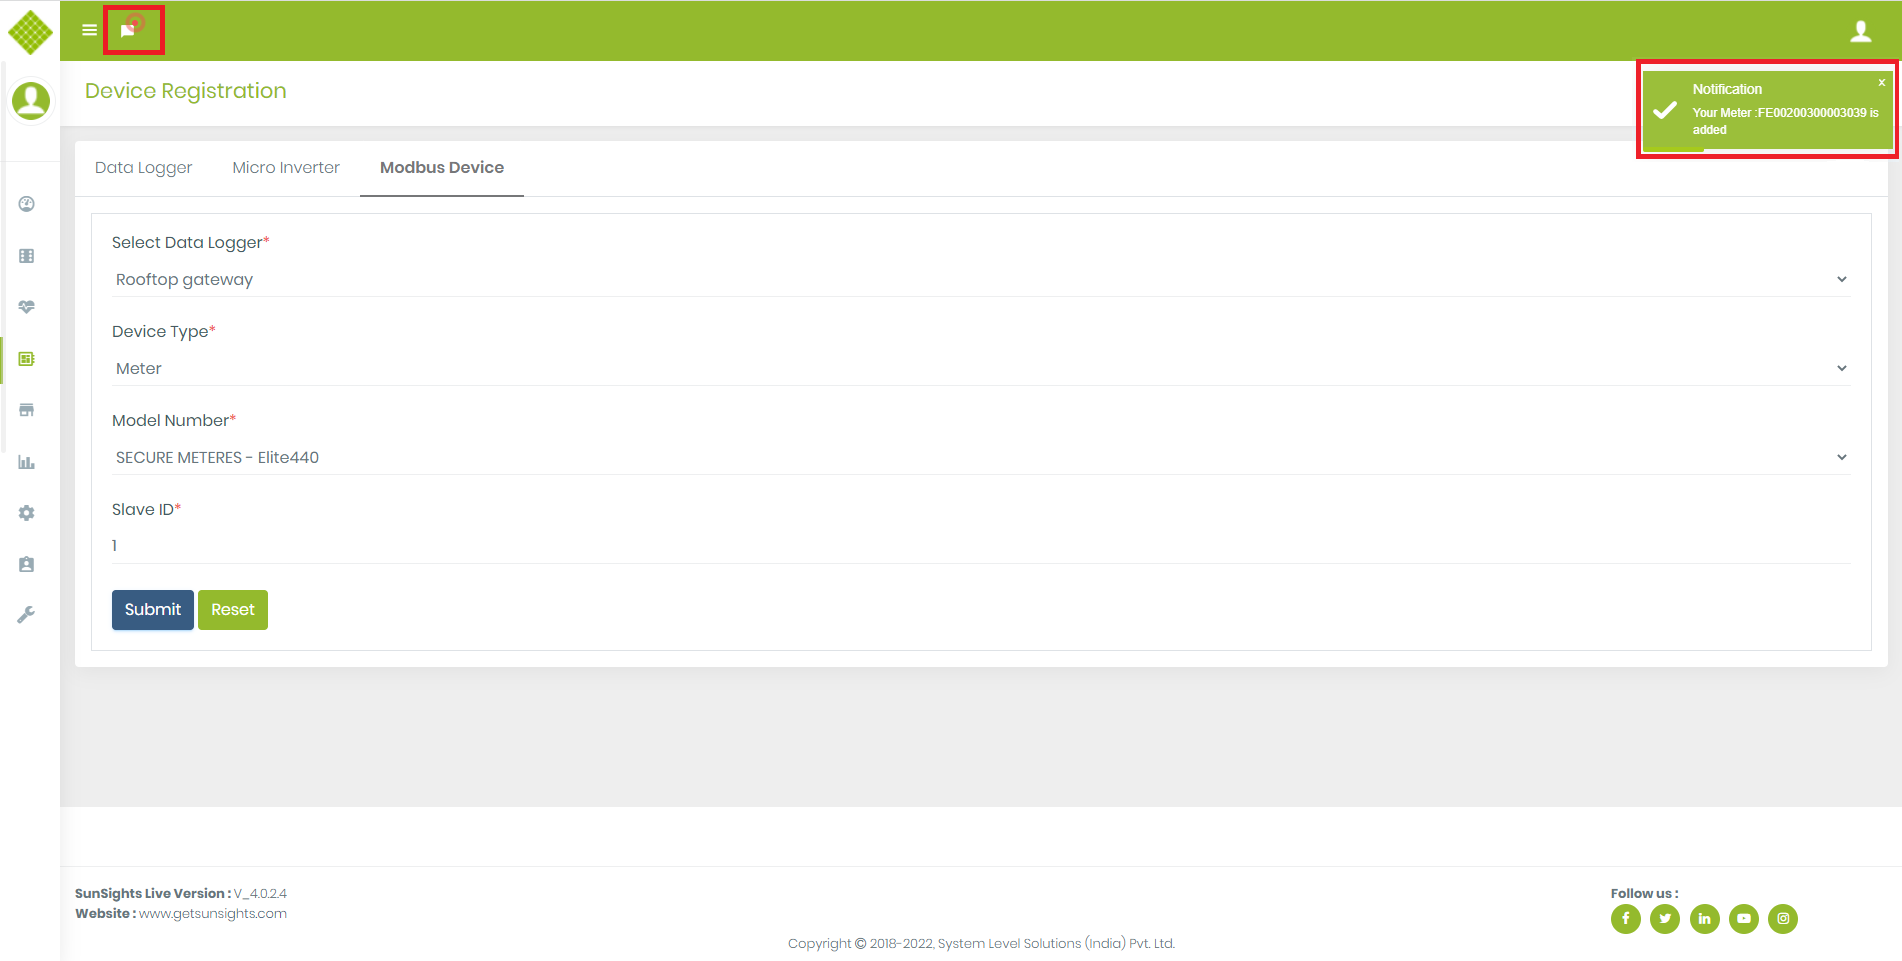
- Click on “Modbus Device”,You get Form to add Meter.
- Click without fill data in the form, you will get error as mention below
- All fields are mandatory.
- We can get model number as per device type selection
- slave id must be numeric and allow between 1 to 247
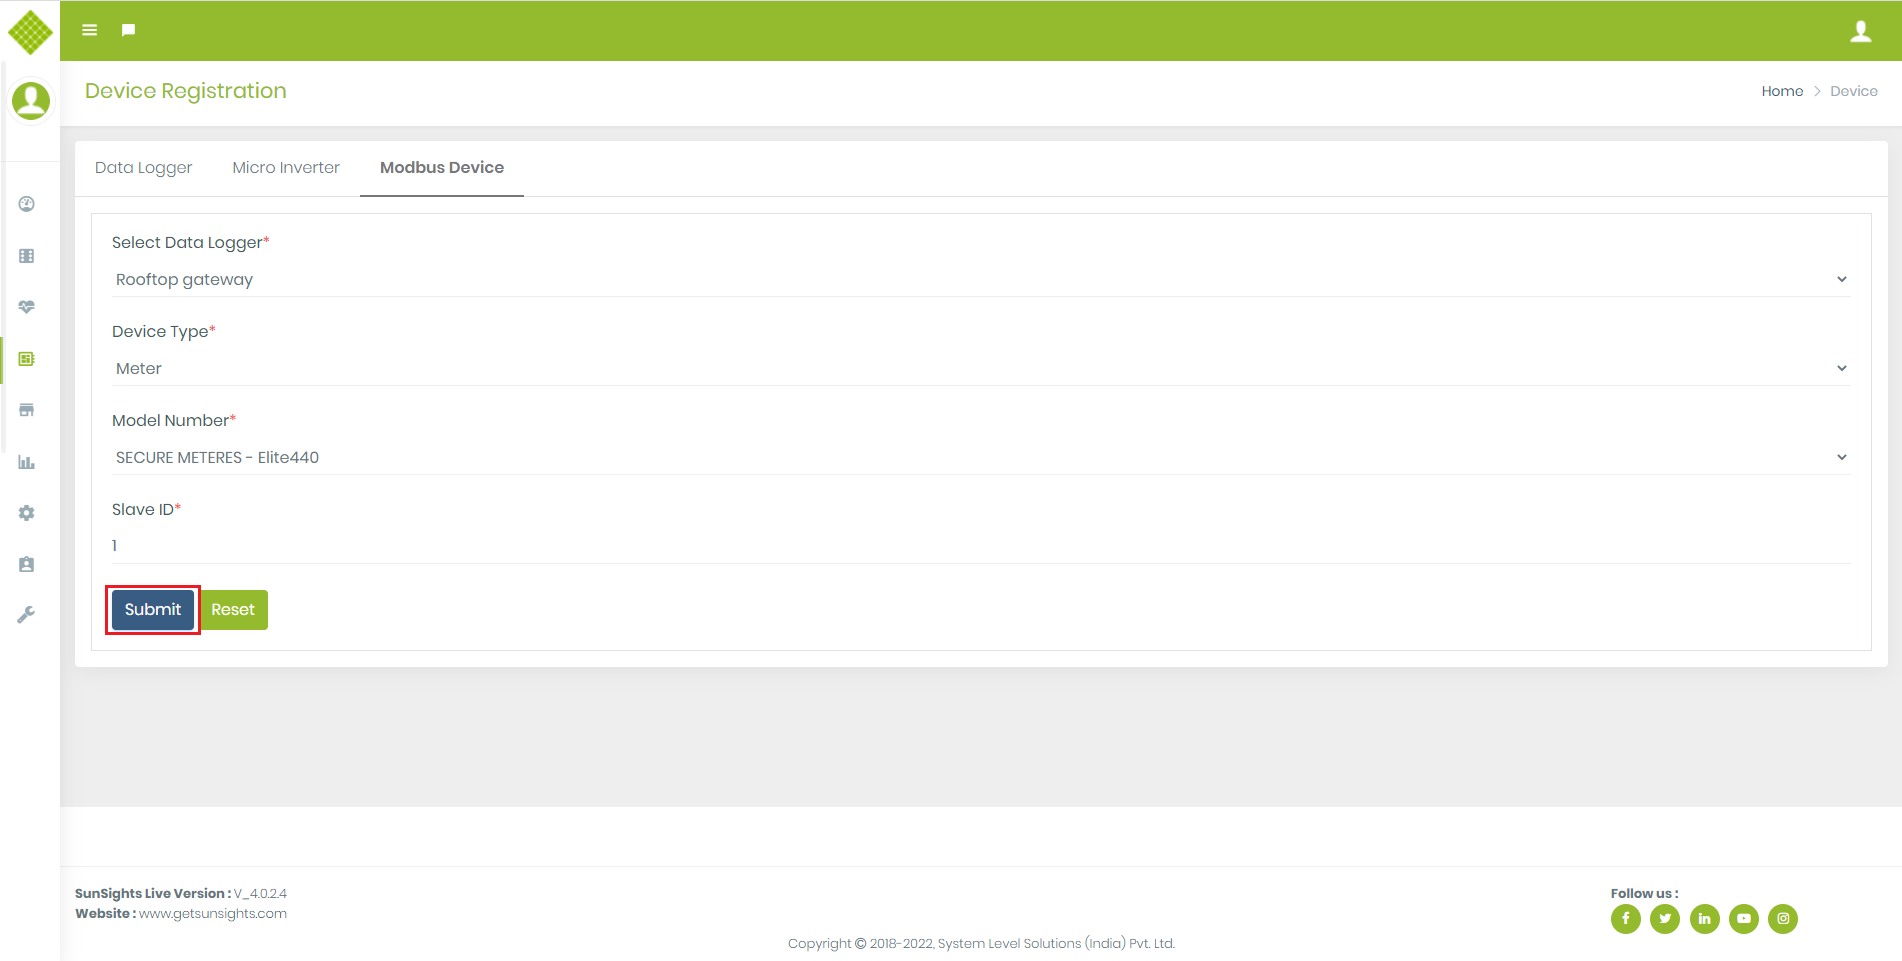
- Fill up the form and select device type as a Meter, click on submit button.
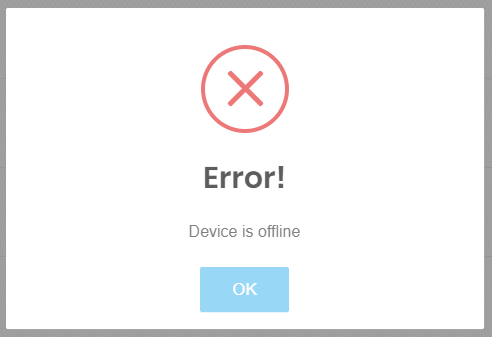
- If Gateway is offline and you try to add meter you get following message as like other device.
- If same Slave Id is already available and try to add meter you get following message:
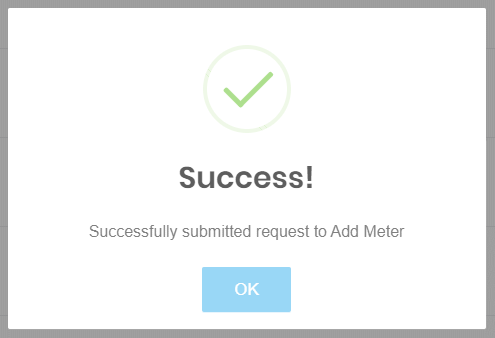
- If Meter request send successfully then you get following message.
- This message not means your Meter added successfully in the site.
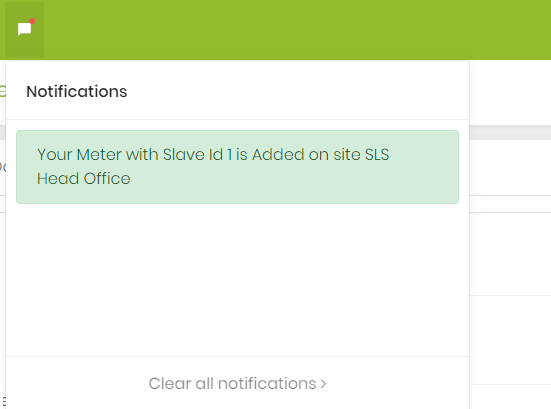
- After send Add meter request successfully you received message and notification as below which indicate your meter is successfully added.
- Notification:
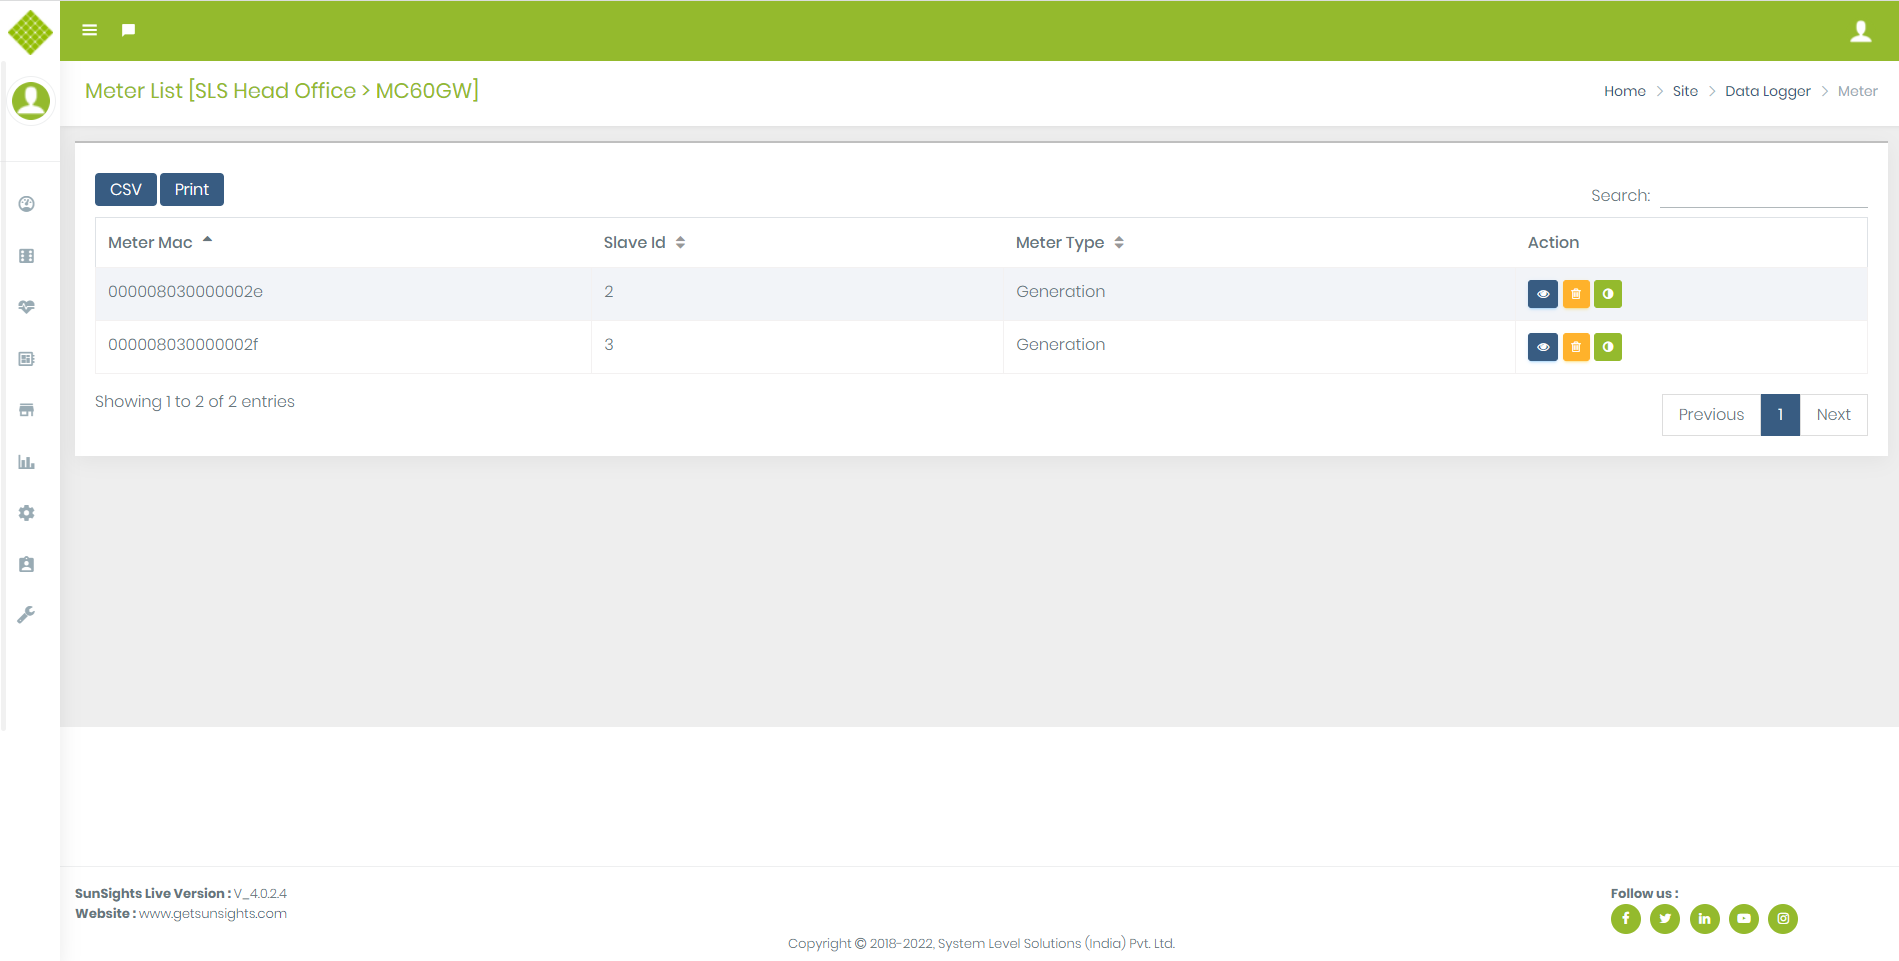
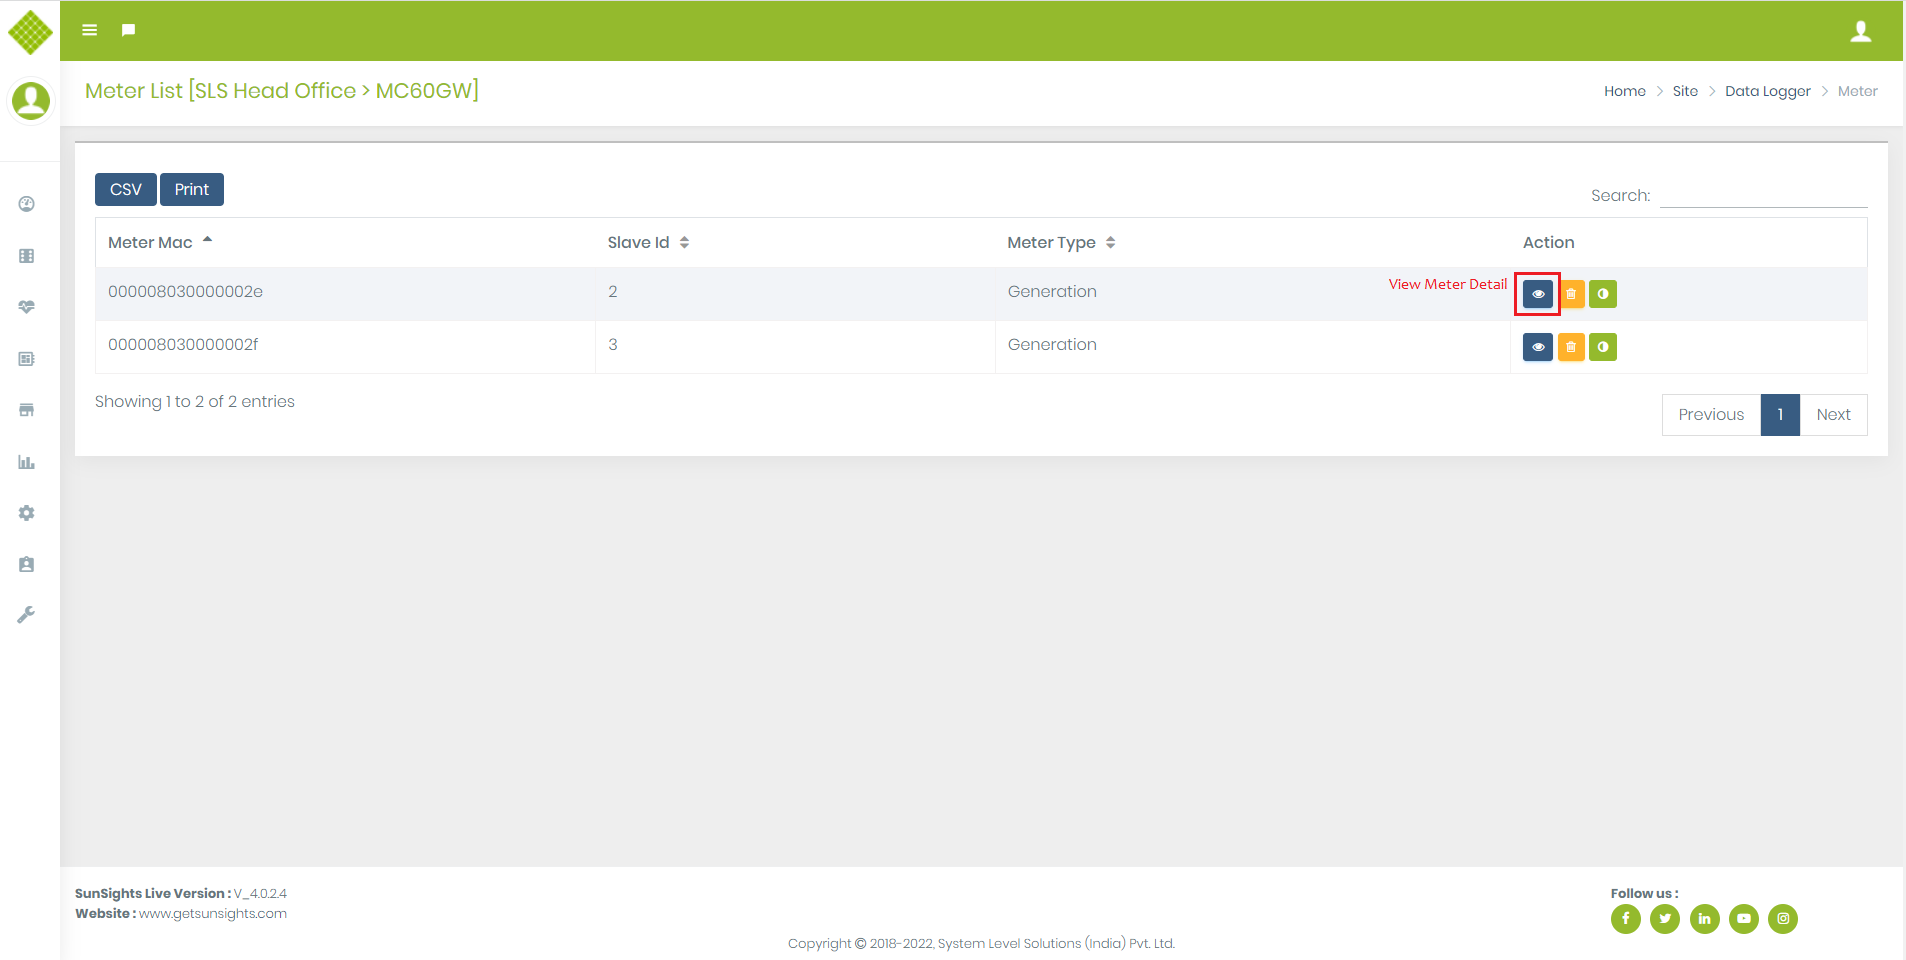
- If we click on View Meter List, it will redirect to Meter list page.
- In Meter you get Remove meter option.
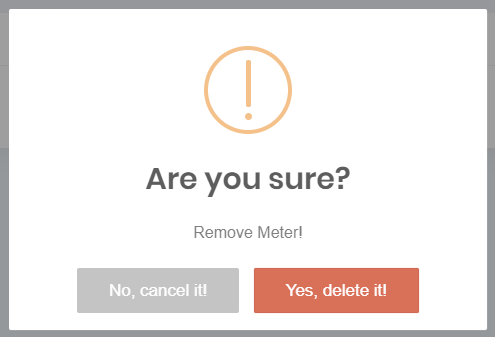
- Click on Remove Meter button.
- You get Conformation message about remove meter.
- If you click on “No, cancel it!” it will not send request for remove meter.
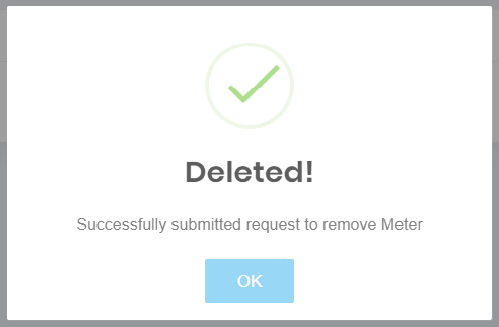
- If you click on “Yes, delete it!” it will send request for remove meter and get following message.
- It don’t mean that meter will be removed from gateway. It just notity that remove meter request send successfully.
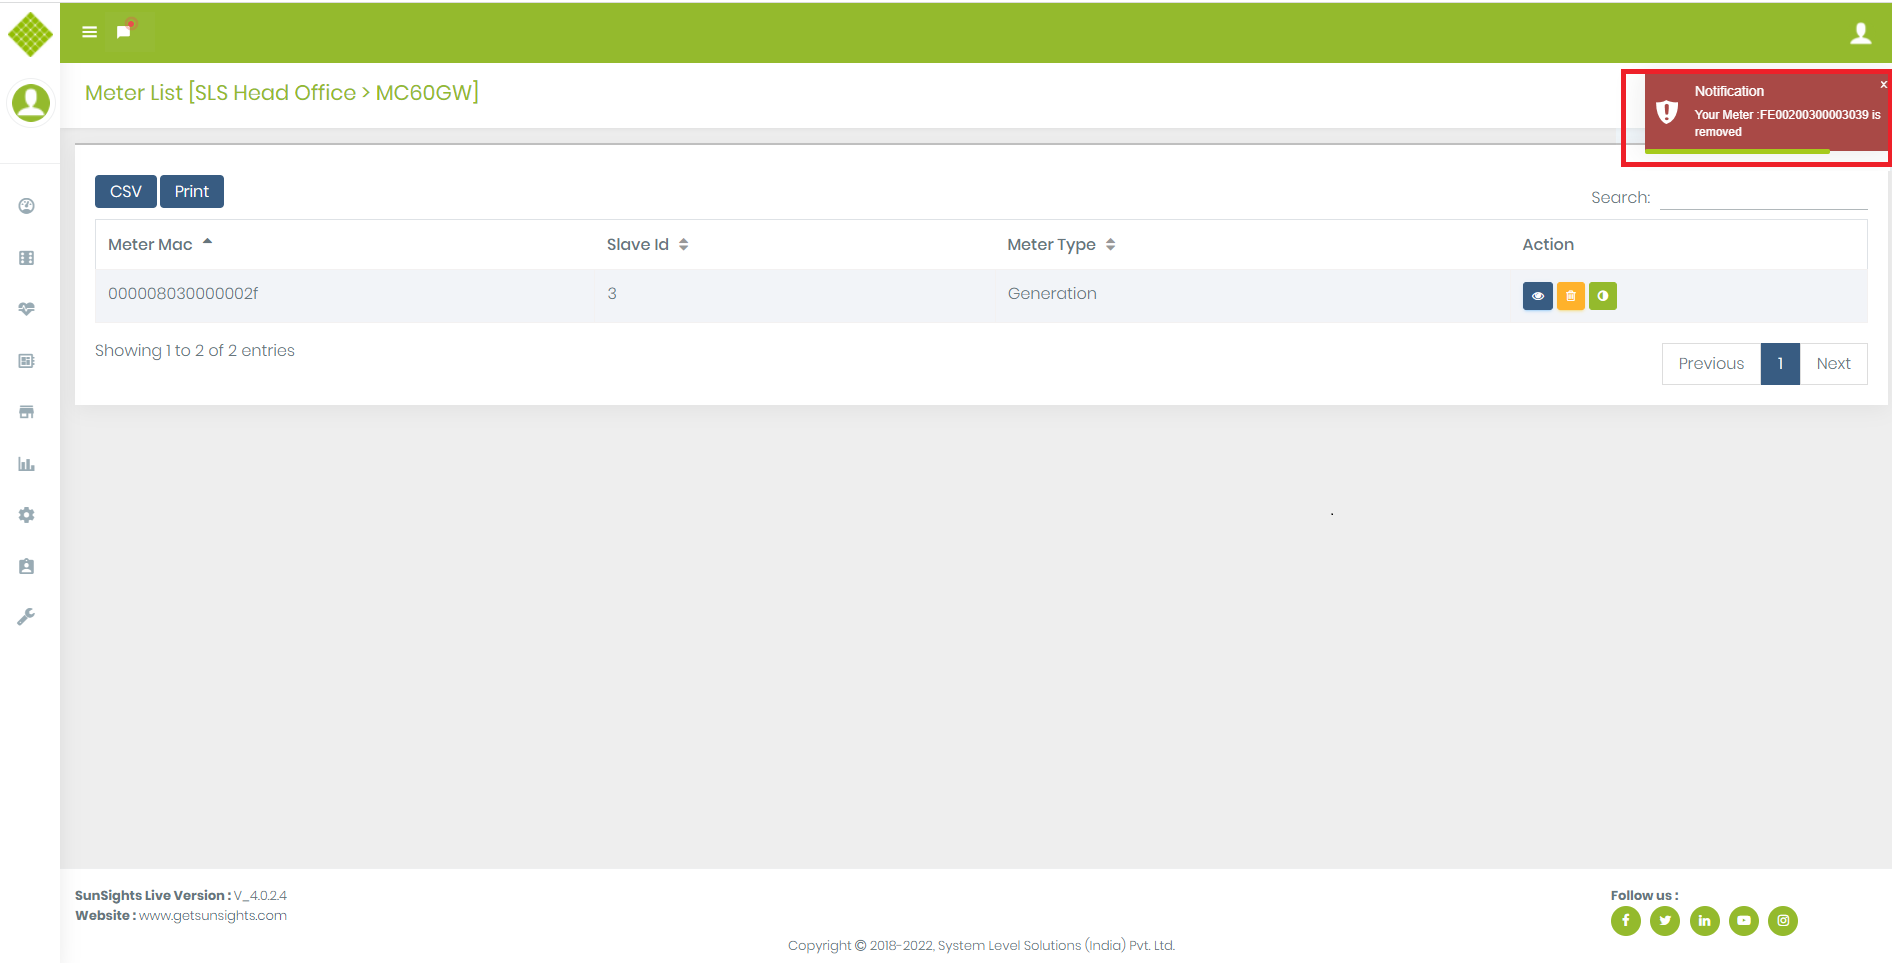
- Meter is remove from site when you received following message and notification.
- Notification


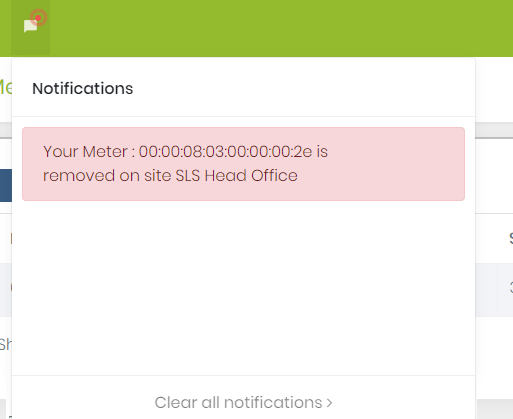
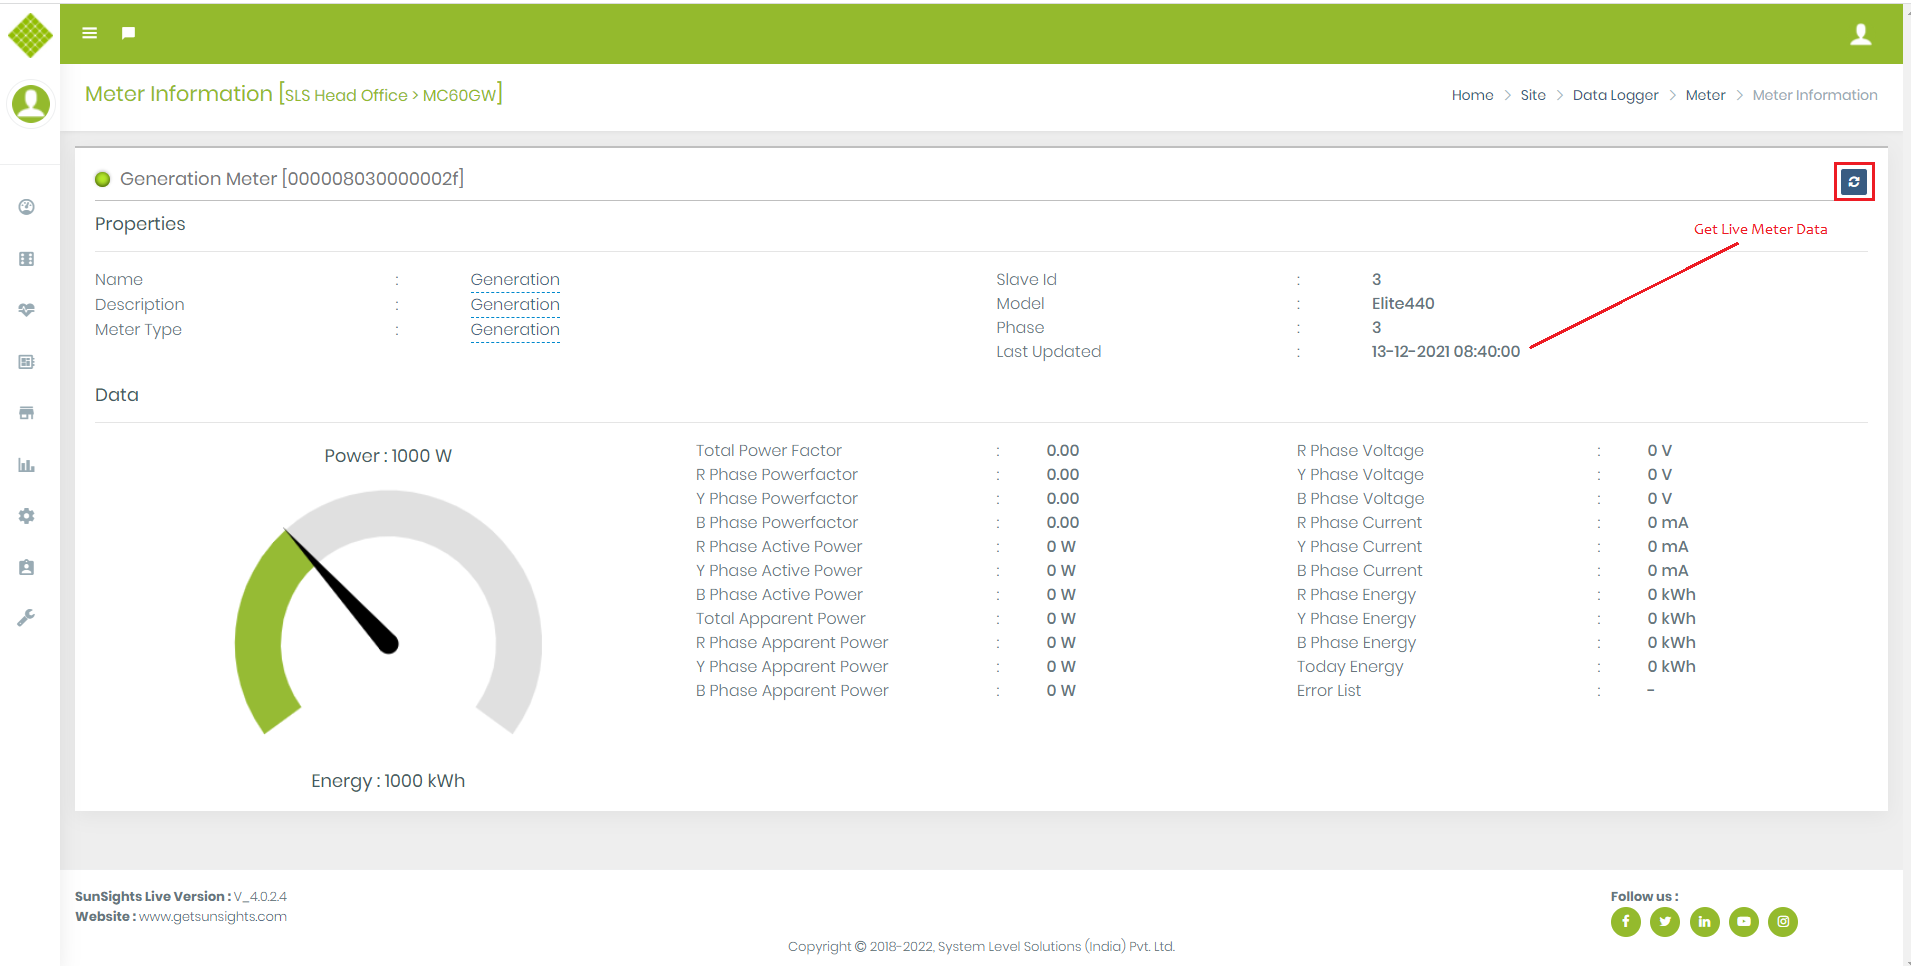
View Meter Data
- Using this functionality user can get details data about specific meter. Also get latest Data.
- Login in the portal with Admin, supplier or customer credential.
- Go to the Site Menu and View Datalogger List of specific site.
- Click on Meter icon to get List of meter.
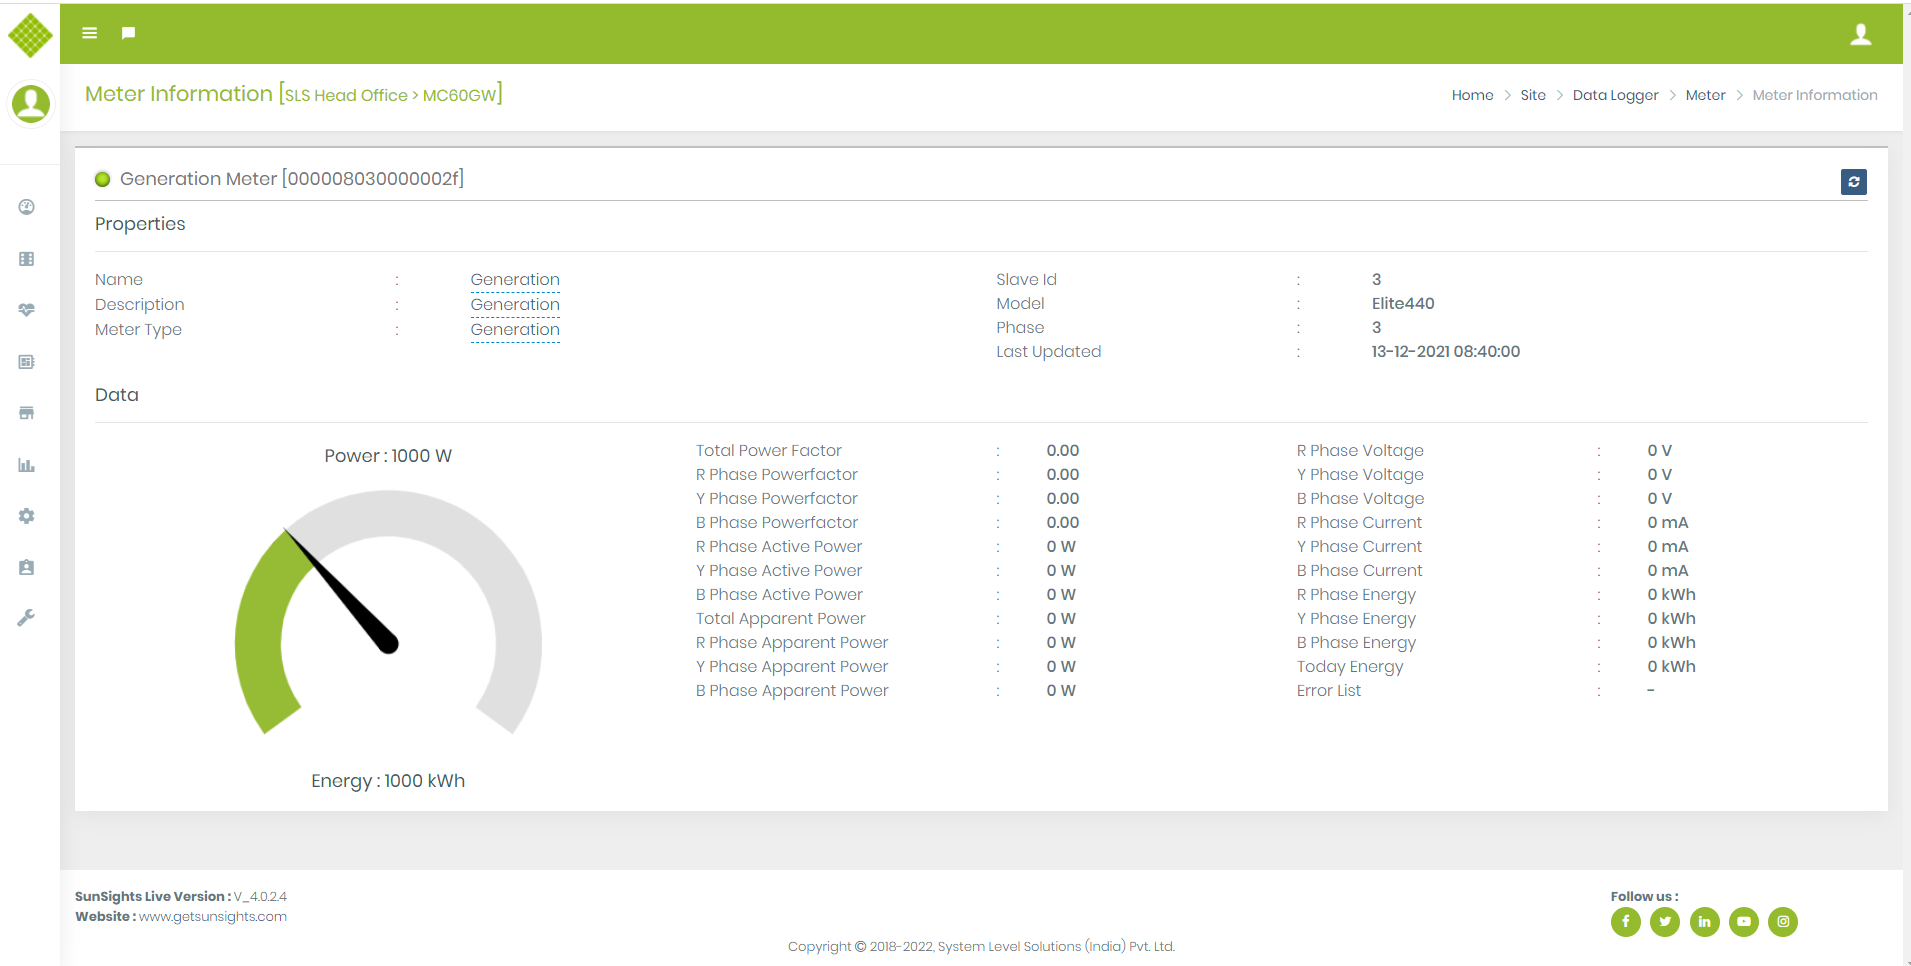
- Click on View Meter you get page which contain meter data.
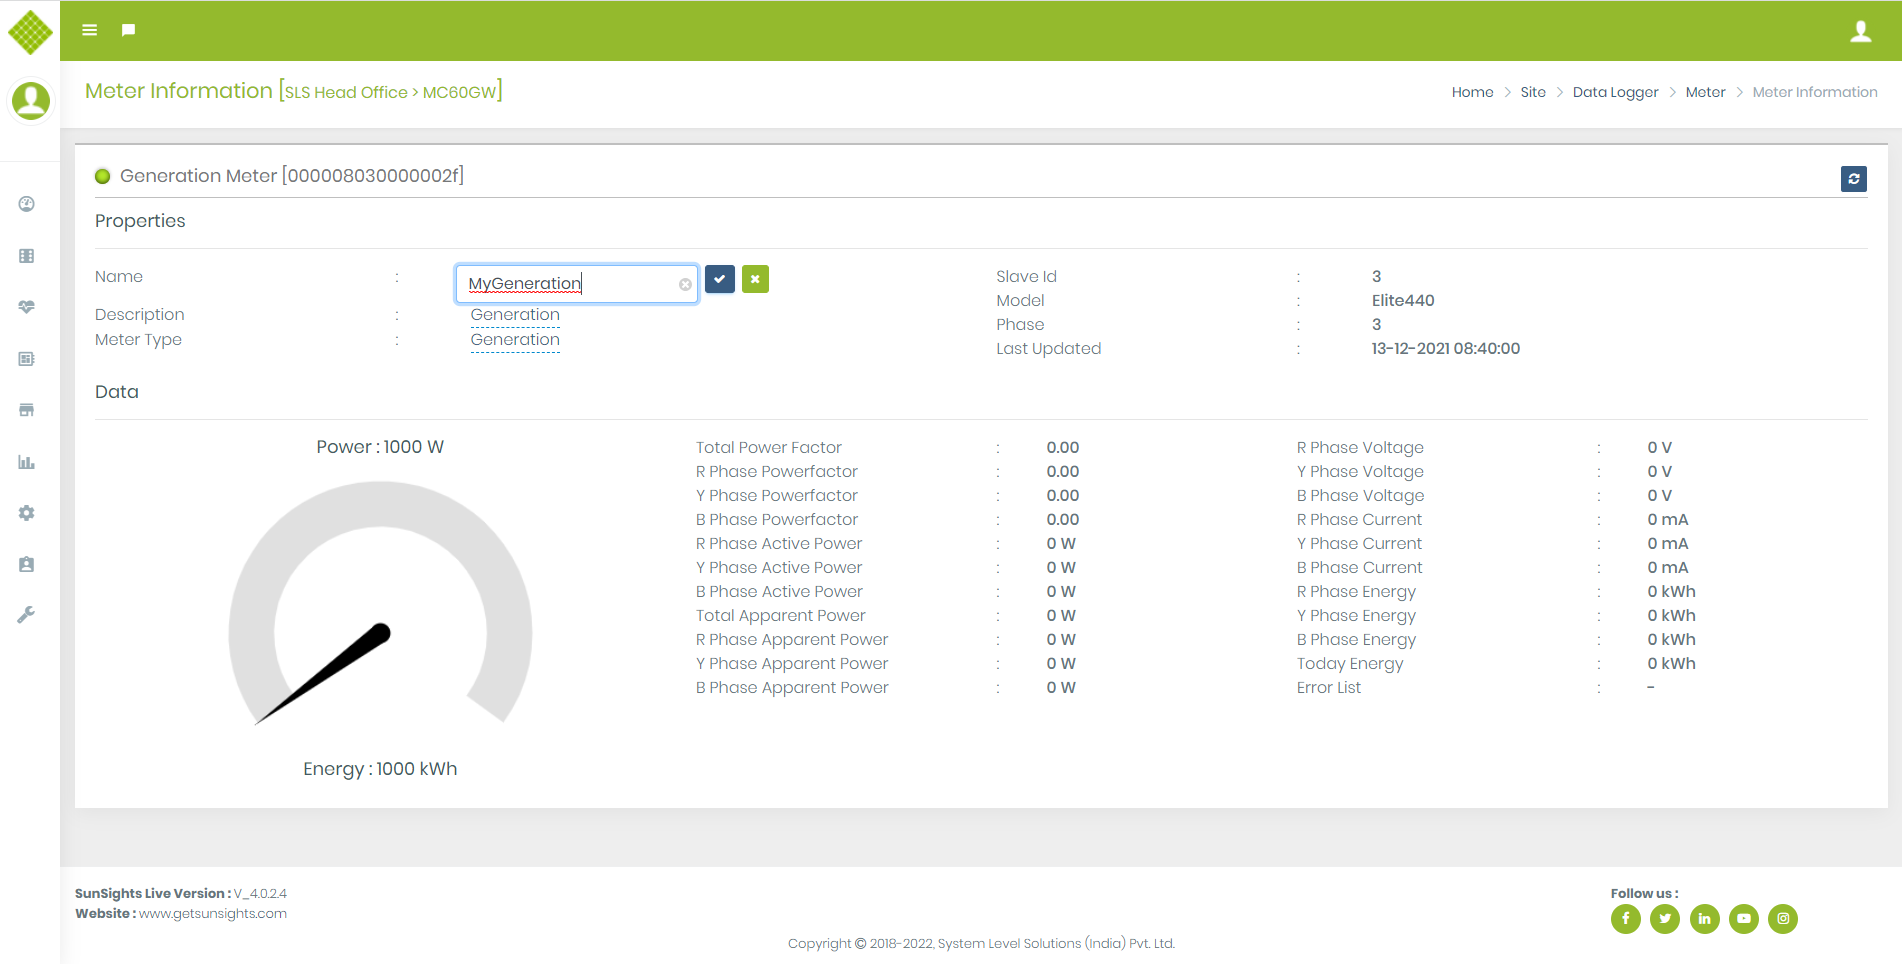
- In this page you get meter property like name, description,..etc.
- You can update name and description by clicking on name and description value.
- Click on “√” to update Name otherwise cancel process.
- If you want Meter live data the click on Refresh button.
- Once you get live data then data will be updated in this page and also note Last Updated date value will be change.
3.3.Sensor
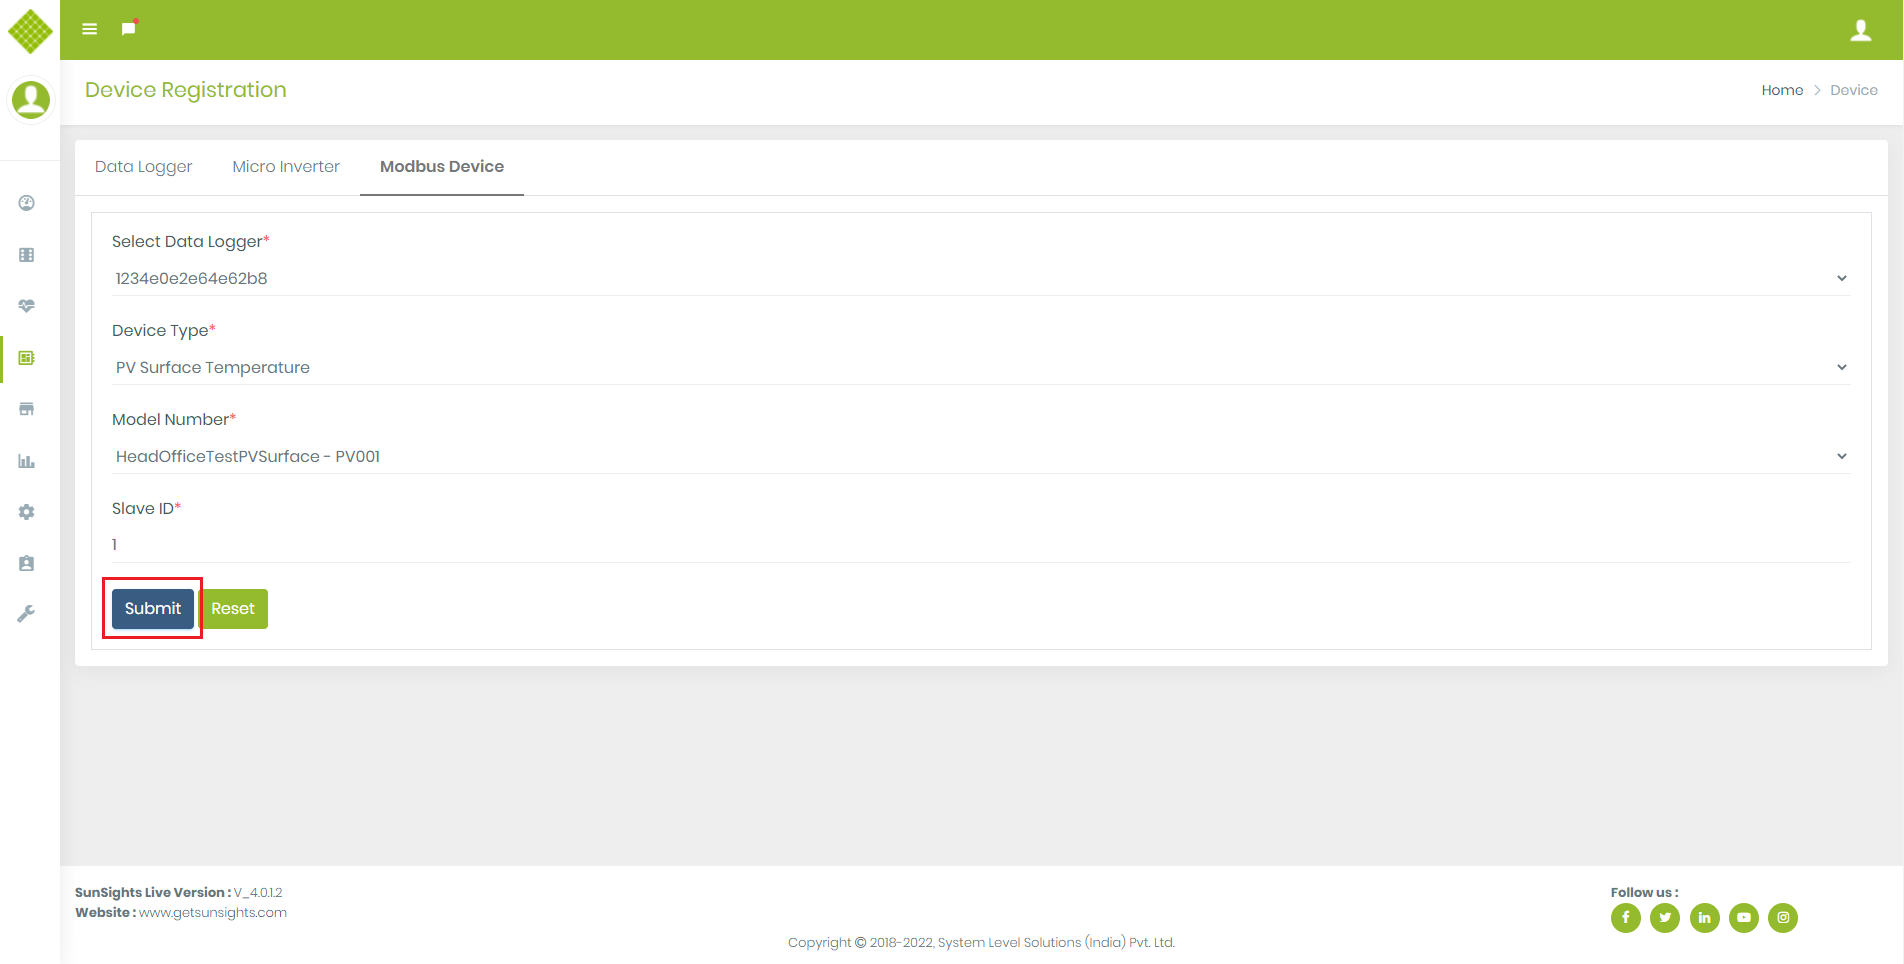
Add Sensor
- Click on “Modbus Device”,You get Form to add modbus type sensor.
- All fields are mandatory.
- We can get model number as per device type selection.
- Slave id must be numeric and allow between 1 to 247.
- Fill up the form and select device type as a PV Surface Temperature, click on submit button..
- If Gateway is offline than also you can add sensor.
- If Sensor request send successfully then you get following message, and device is bind into a datalogger.
- If same Slave Id is already available and try to add sensor on same gateway you get following message:
View Sensor Data
- We can see current value of sensor.
- Login in the portal with Admin, supplier or customer credential.
- Go to the Site Menu and click on View Site Details.
- Following screen will display and you can see total no of sensor added in site, if not any sensor is added on site than counter will be "0".
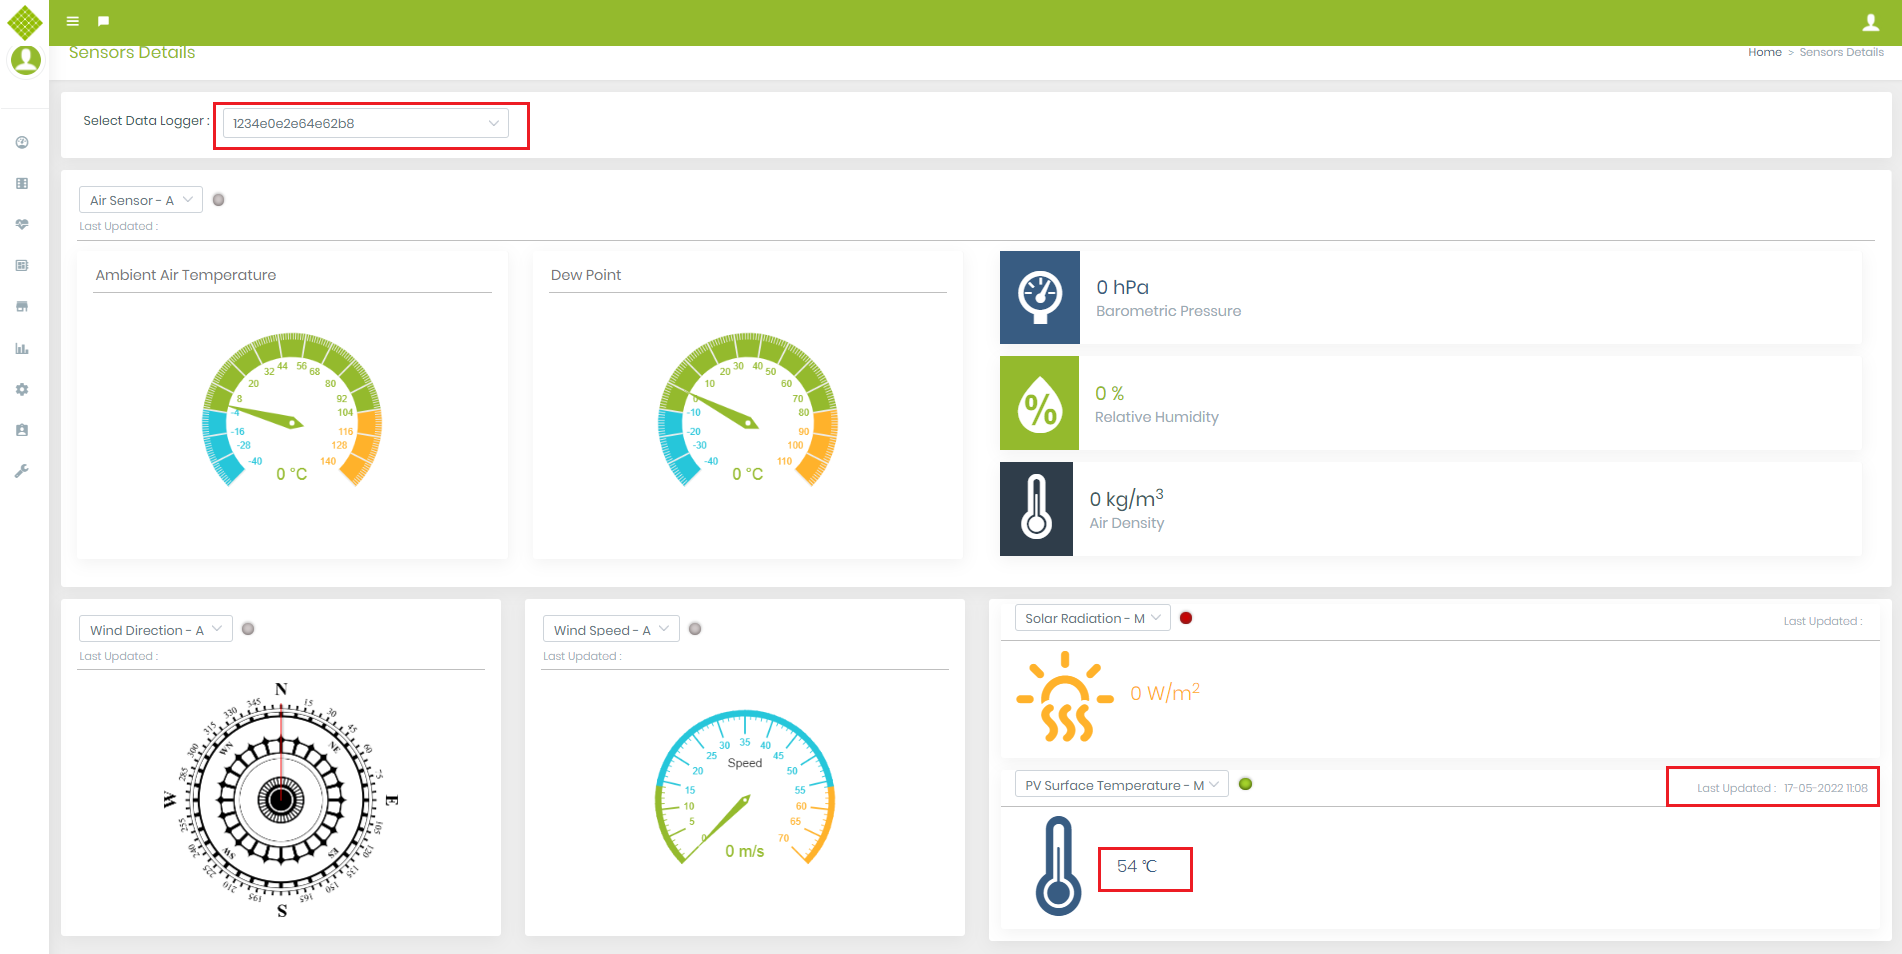
- Click on that eye icon and we can navigate to sensor dashboard page.
- It will display attached sensor of selected datalogger.
- If given sensor is not connected on selected datalogger than besides that sensor name, grey color led will display and its value should be "0".
- If given sensor is connected than led light should display with red or green color.
- If sensor is online than led light should be in green color and we see current value of sensor and current updated time.
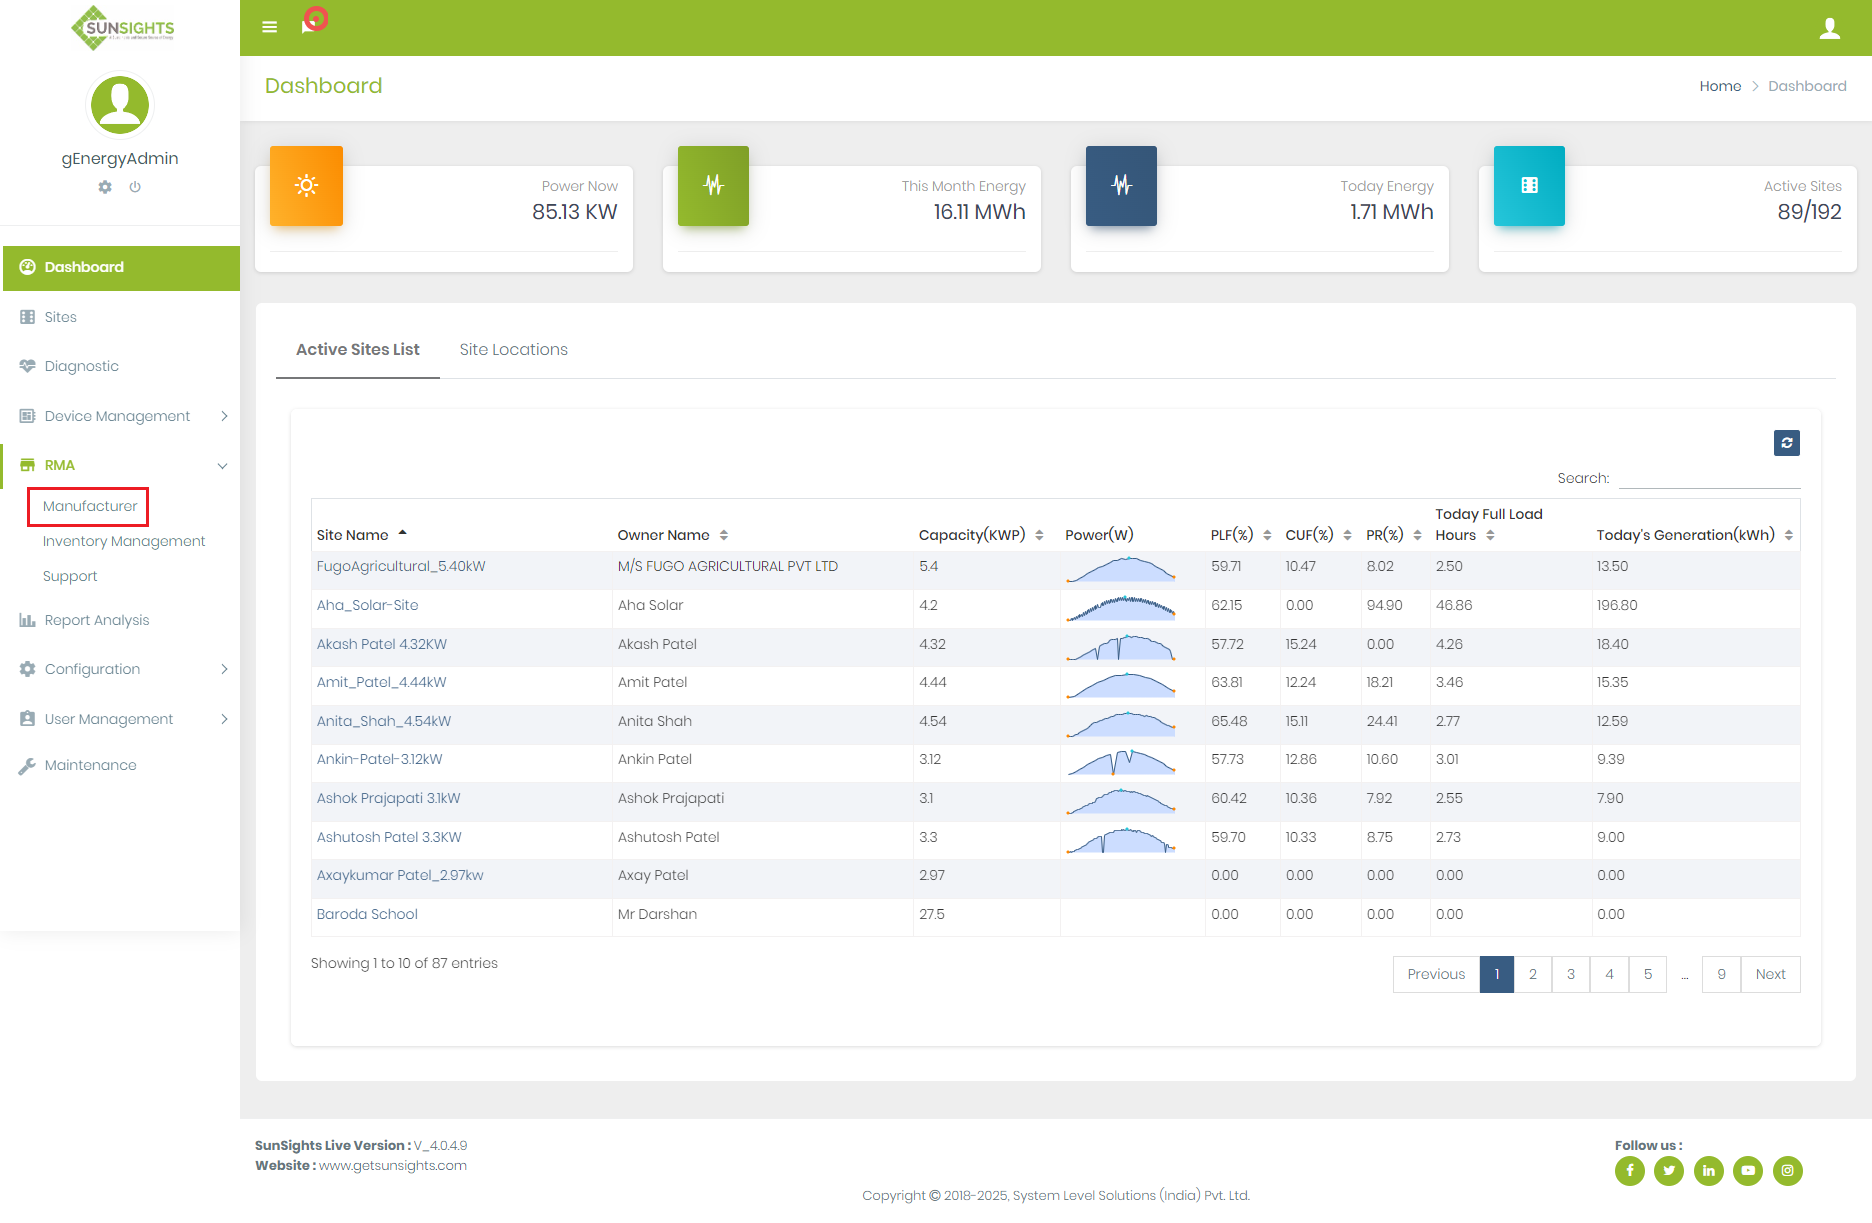
RMA
Manufacturer
- Login in Portal with Admin or Supplier Credential to ADD/Update Assets Details.
- Click on RMA → Click on Manufacturer.
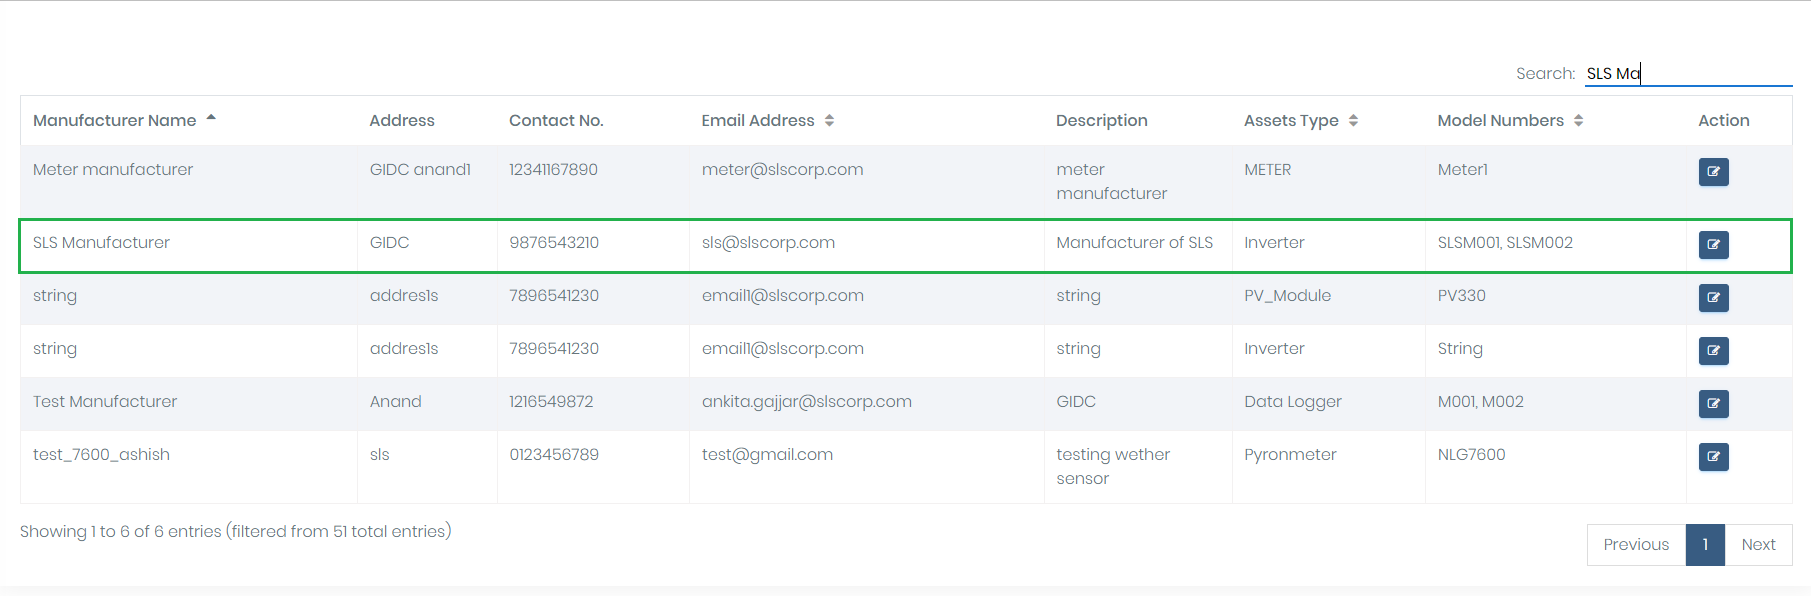
- You get Following Screen to get manufacturer detail.
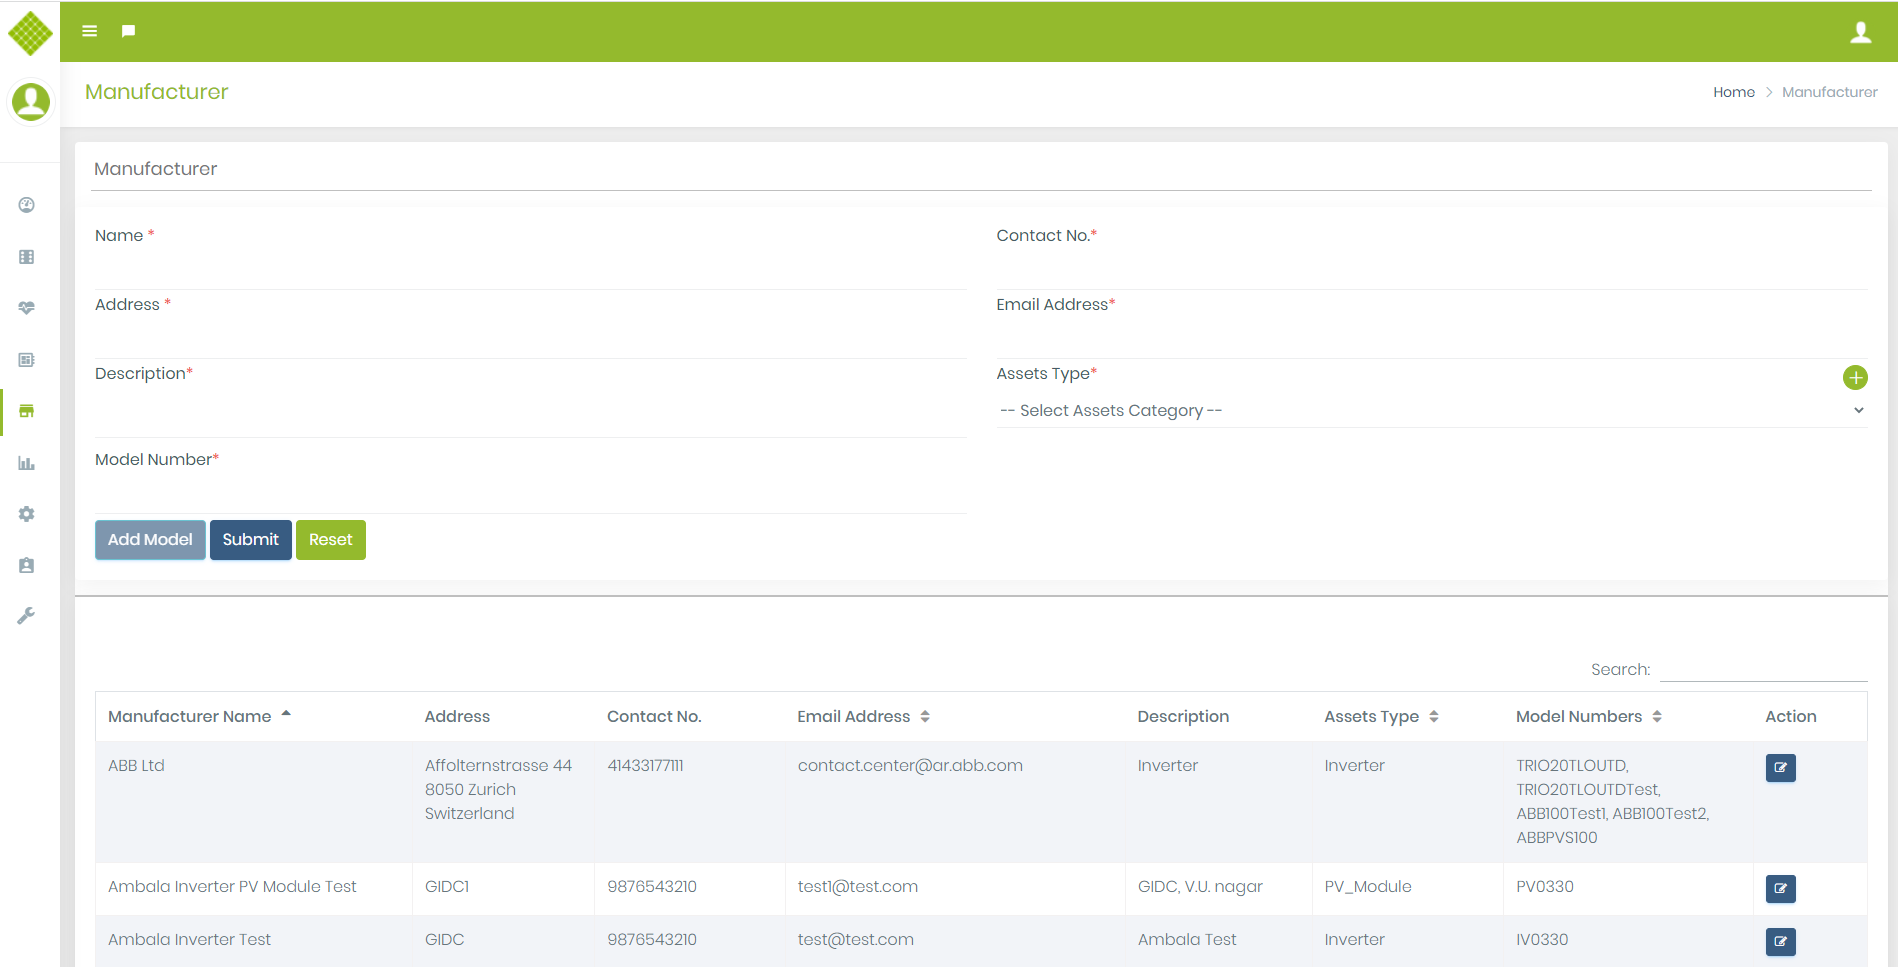
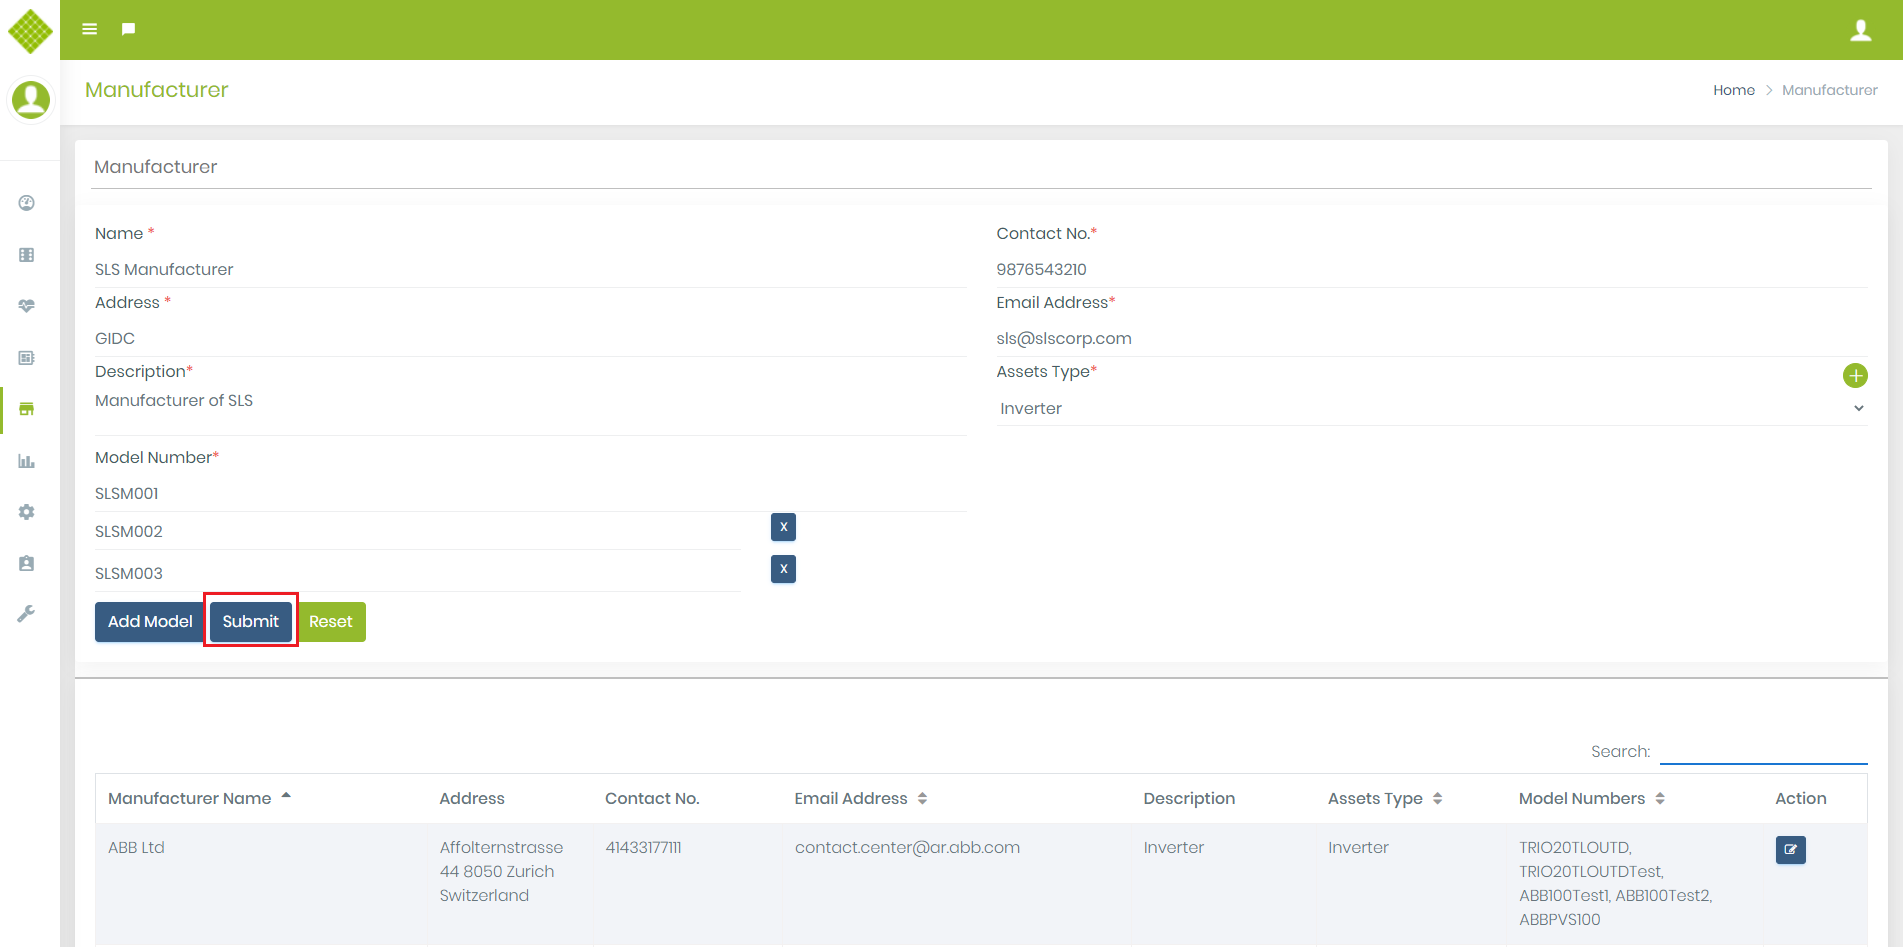
We can Add/Update Manufacturer Details
- Fill Up the form and click on submit button
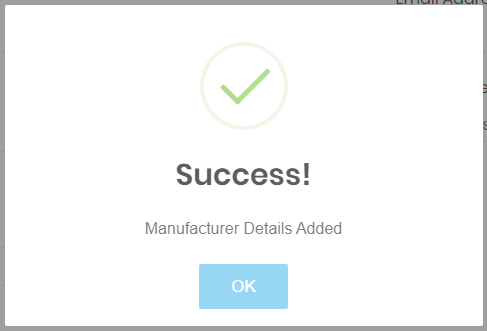
- Submit form: (If all details are valid the you get following screen)
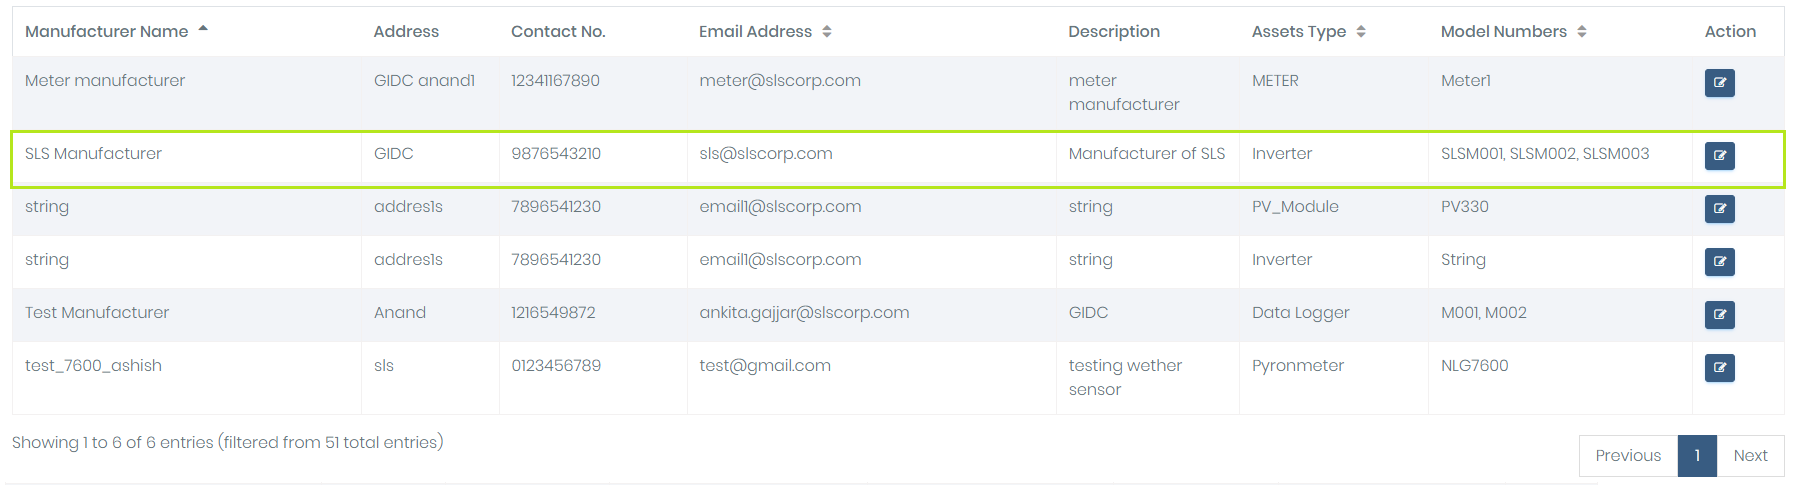
- When you click on “OK” button → newly added record will display in below data table
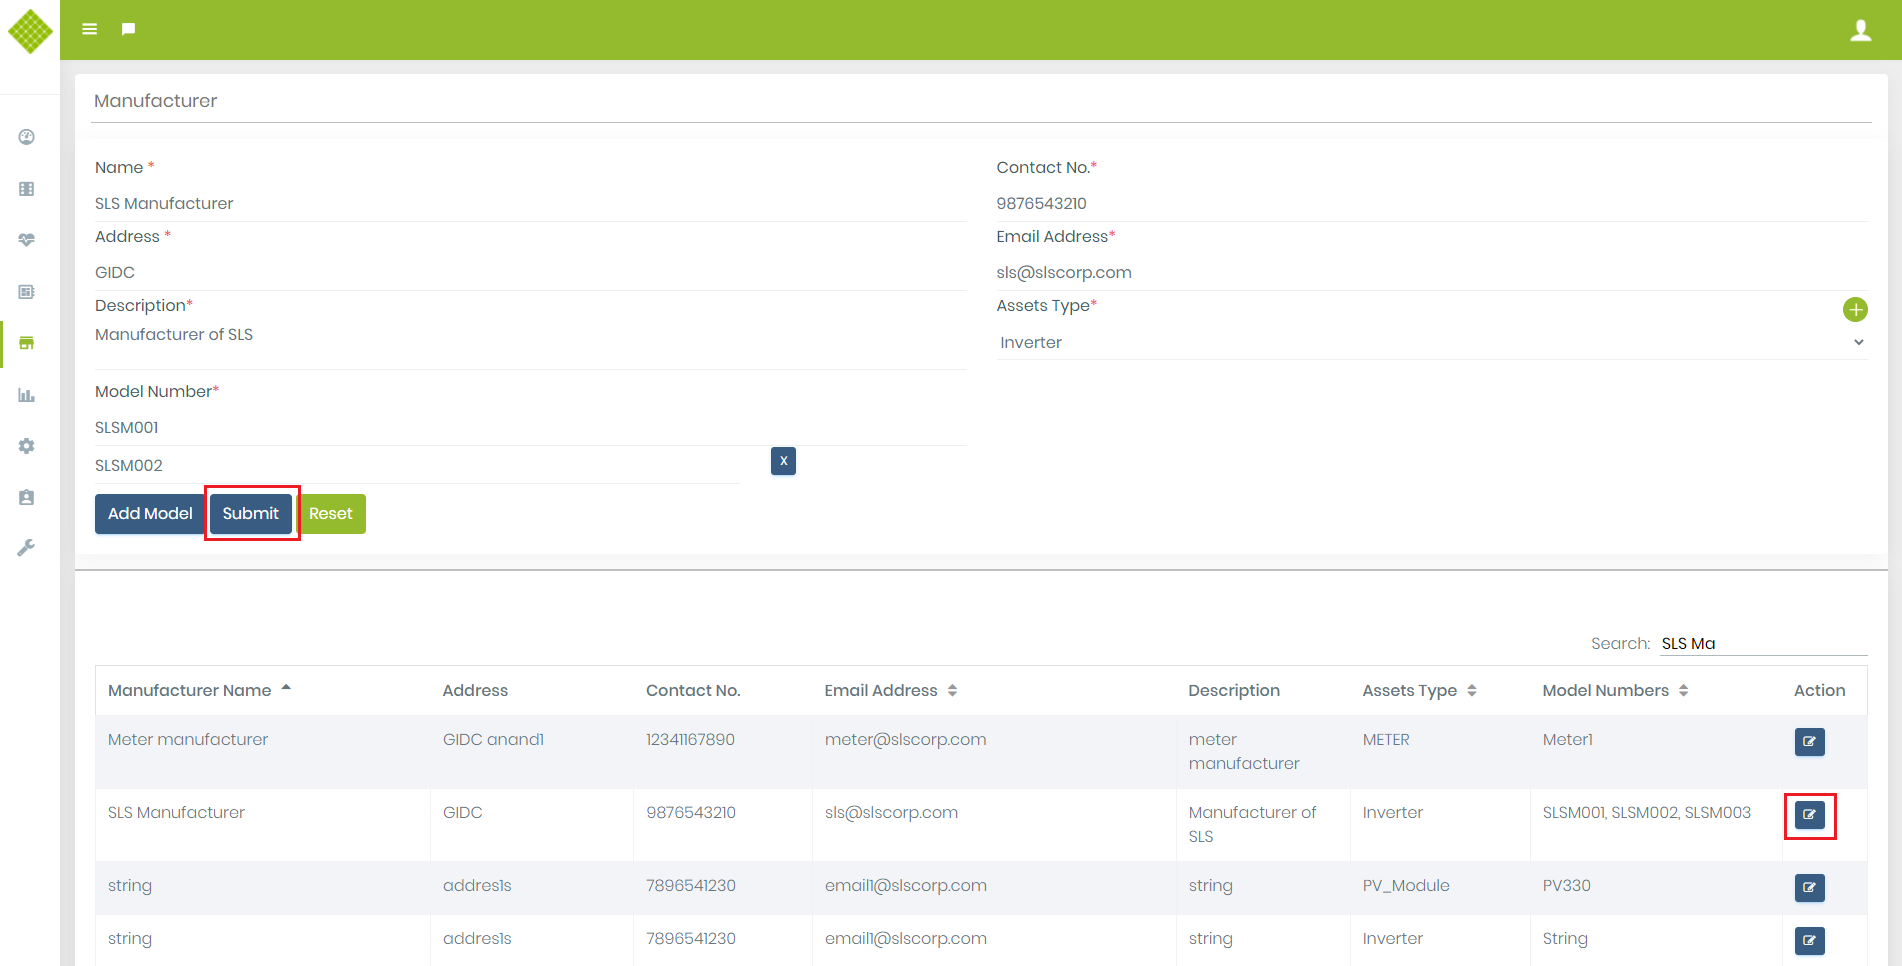
- Click on “Edit” button of particular Manufacturer then you get filled form with that manufacturer details.
- Modify details as per requirement and click on “Submit”.
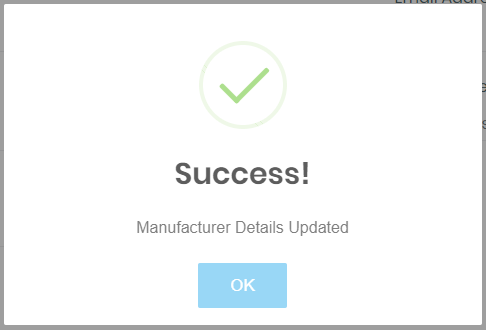
- If Details update successfully then get following screen:
- You get updated list of device inventory.
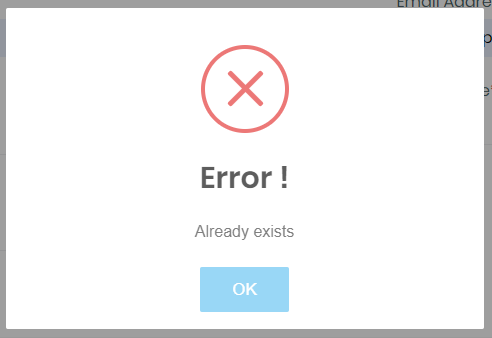
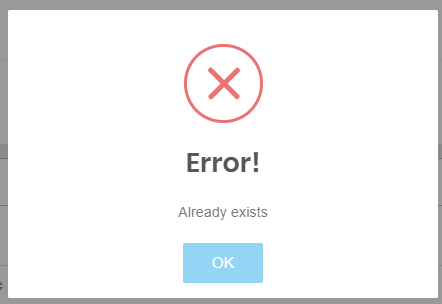
- If you try to add manufacturer which is already exist with same assets type then you get error like:
- So from the same page you can add multiple device in the inventory.
- We can also edit details by click on edit button. And admin can remove that data.
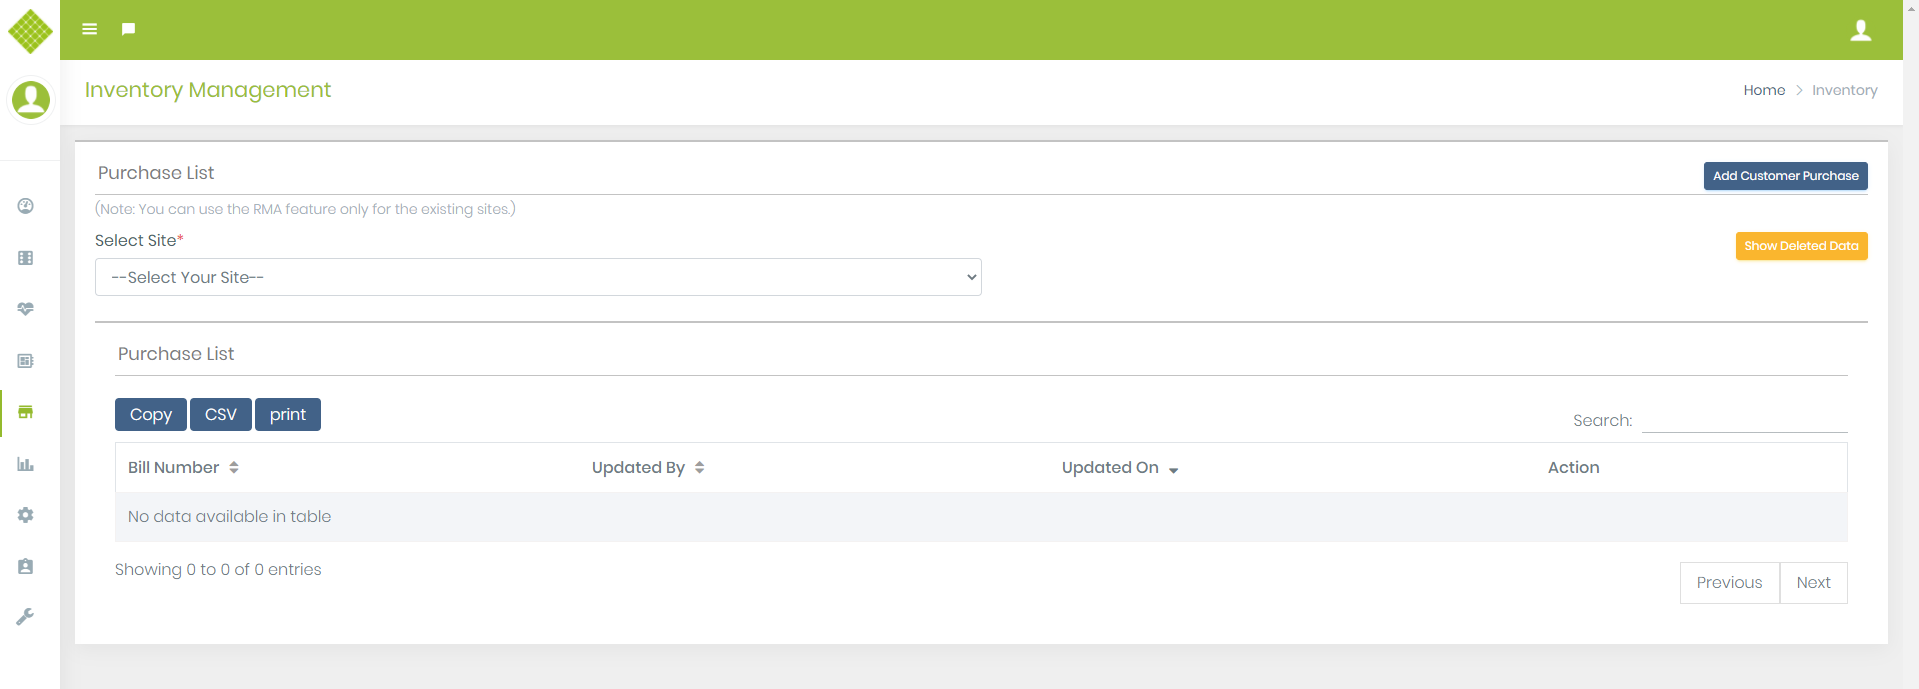
Inventory Management
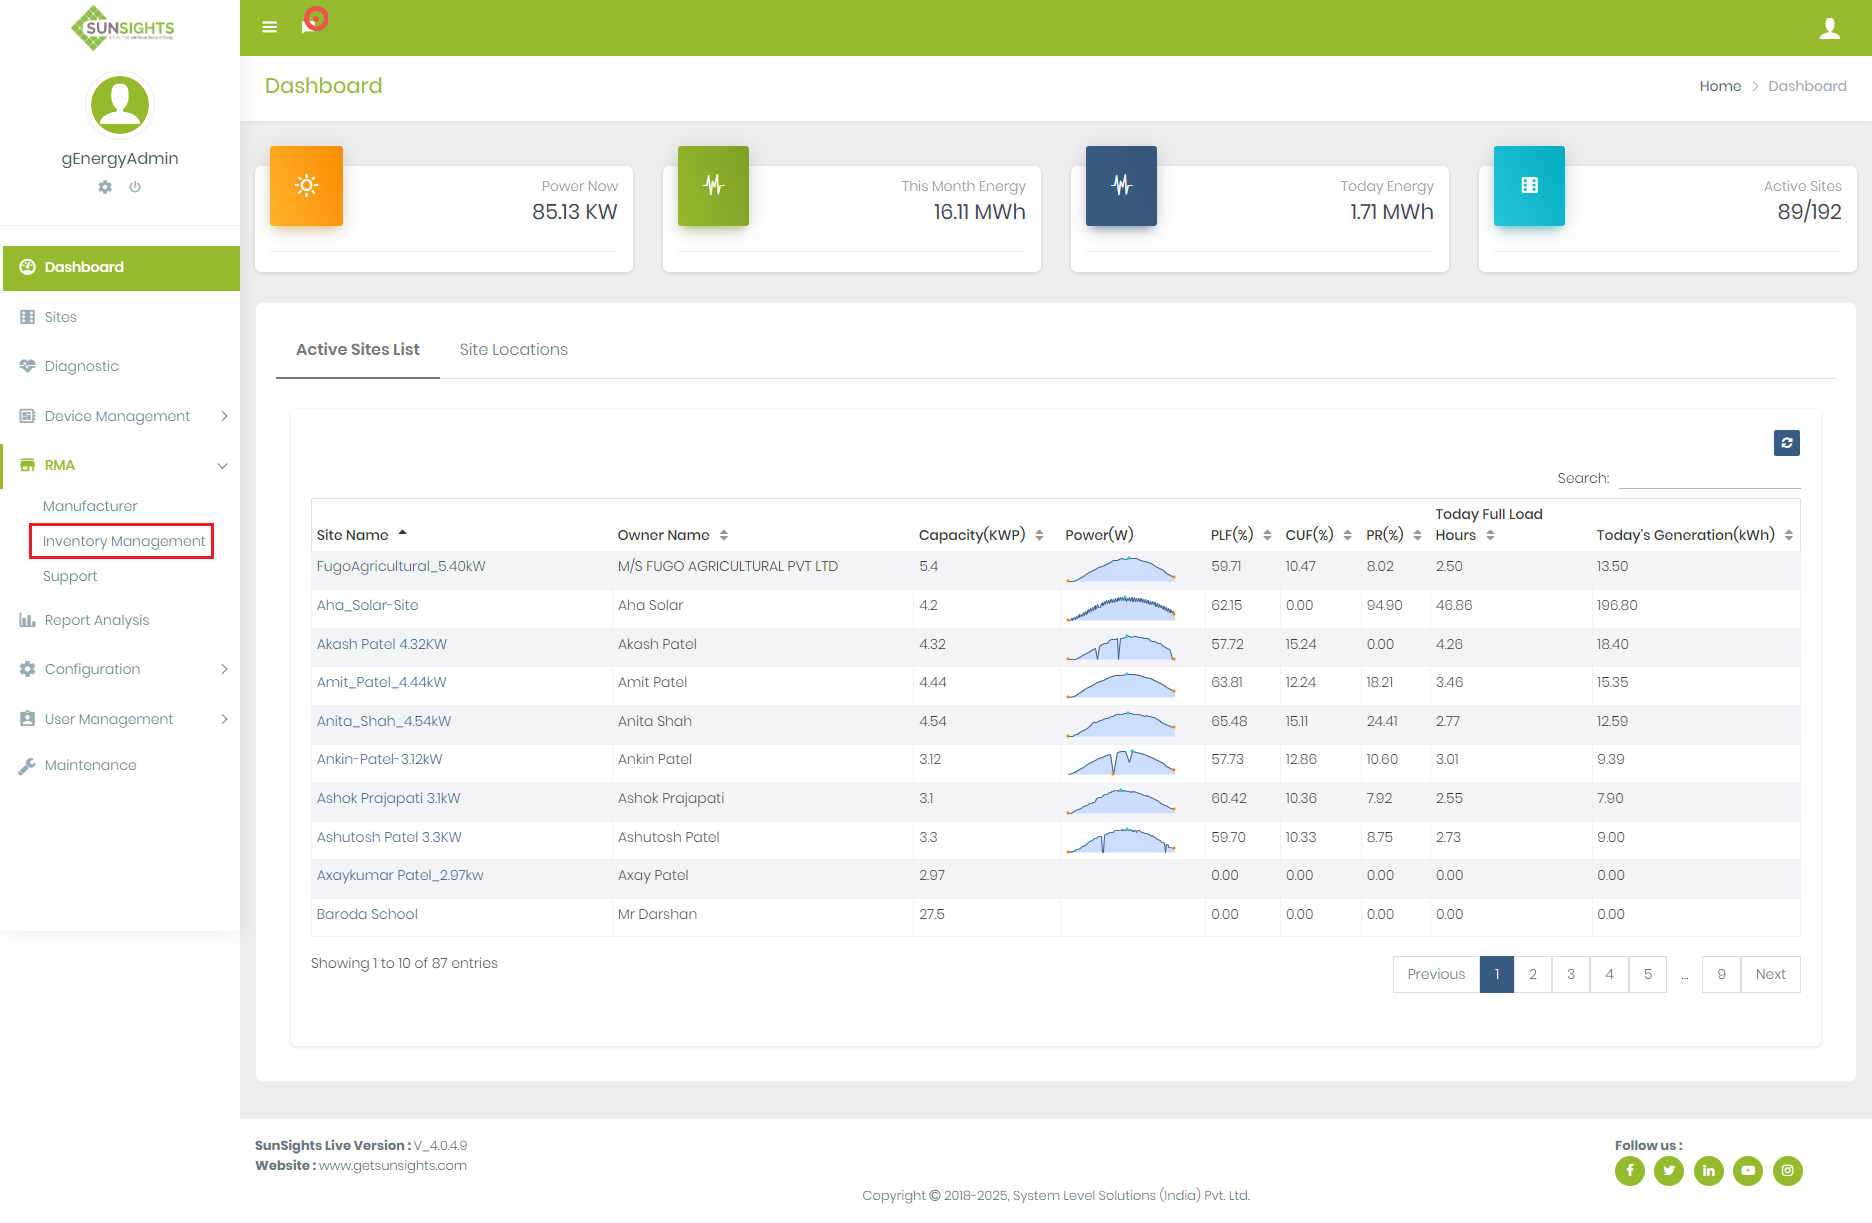
- Click on RMA Menu→ Click on Inventory Management.
- You get Inventory management form as below:
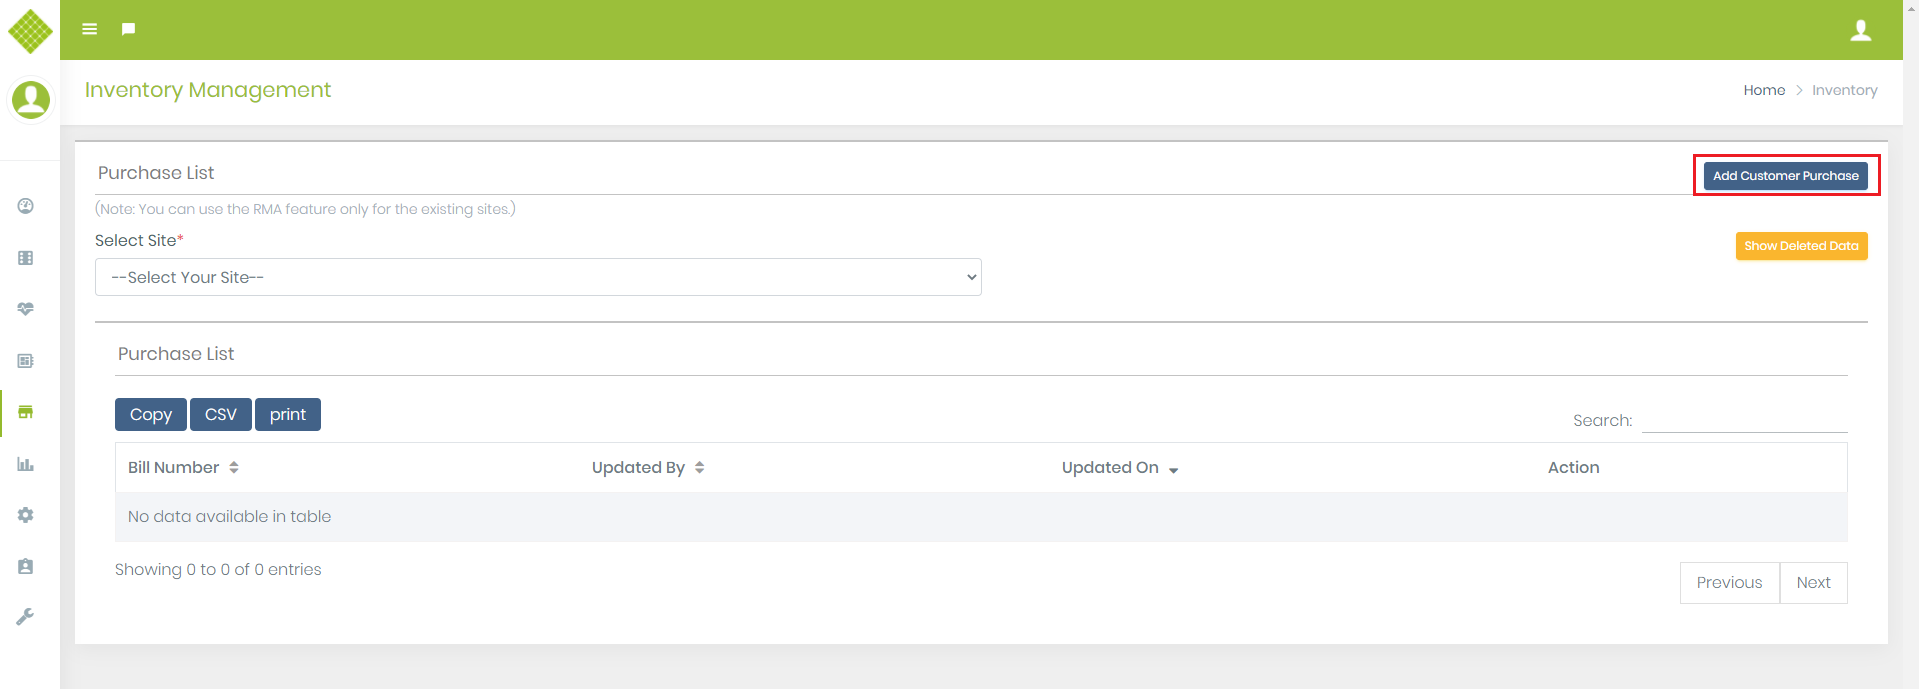
1. Add customer Purchase
- You can Add new customer purchase details by clicking “Add customer Purchase” button.
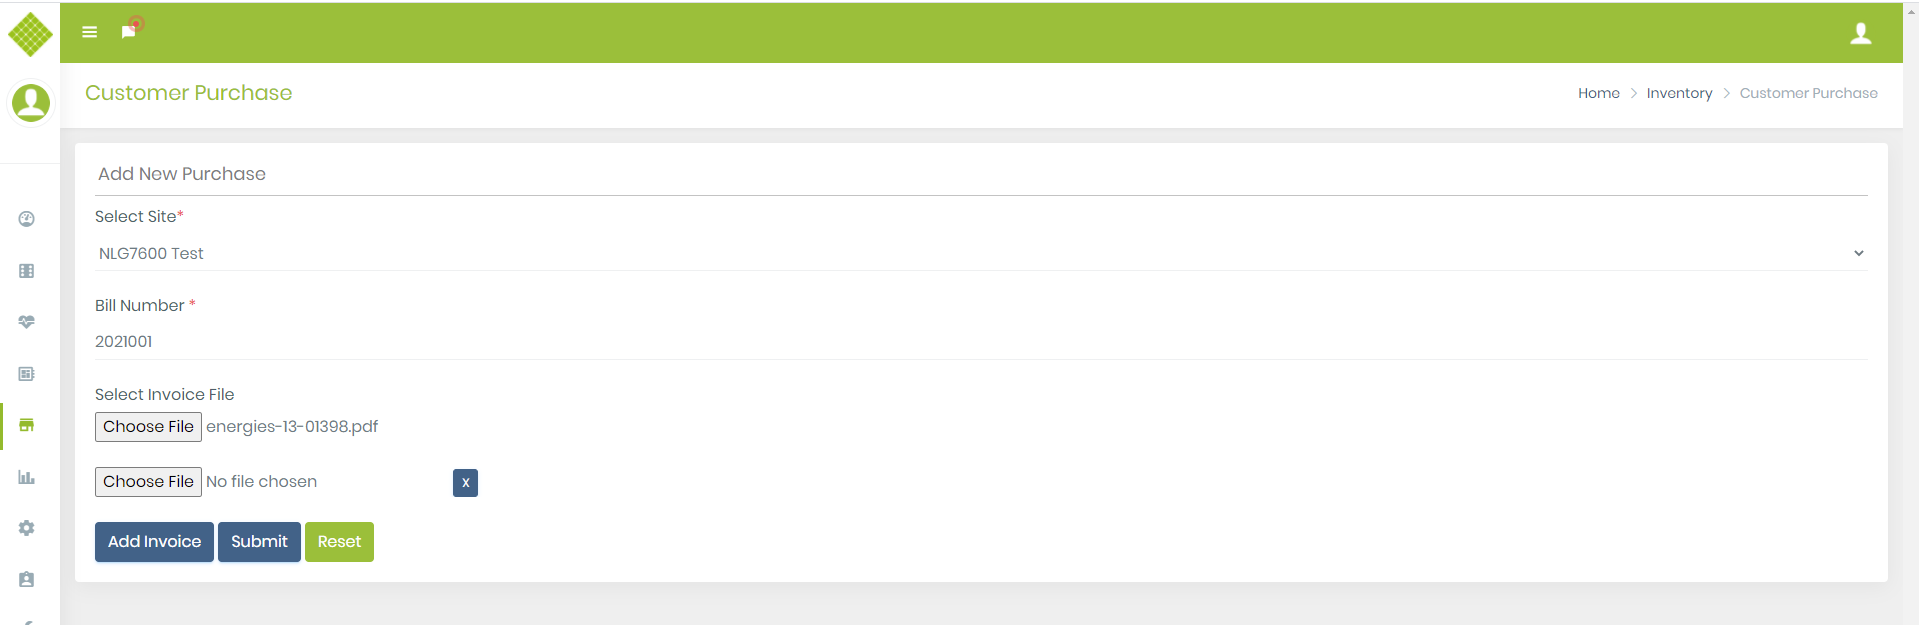
-
Above for contain following details:
- 1.Select Site: Must have to select site for which you can add bill.
- 2.Bill Number: Must add bill number. (allow alphanumeric value only.)
- 3.Select Invoice File: Not mandatory to select. But if you select then it allow only pdf formate file with maximum 5Mb size.
- 4.Once you select file it enable “Add invoice” button to add more invoice file there is not limit to add multiple invoice file.
- You can select multiple file.
- Now click on “Submit”.
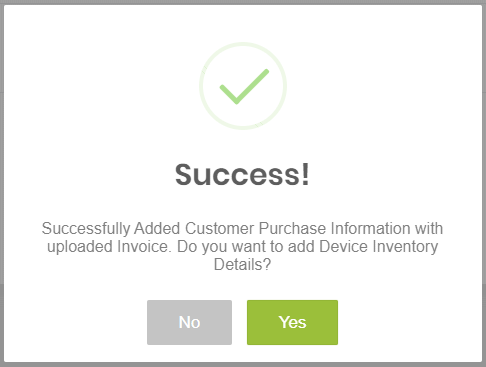
- You get success message if bill added successfully.
- Also get messages for add device inventory for currently added bill.
- Click on Yes. (it will redirect to add inventory)
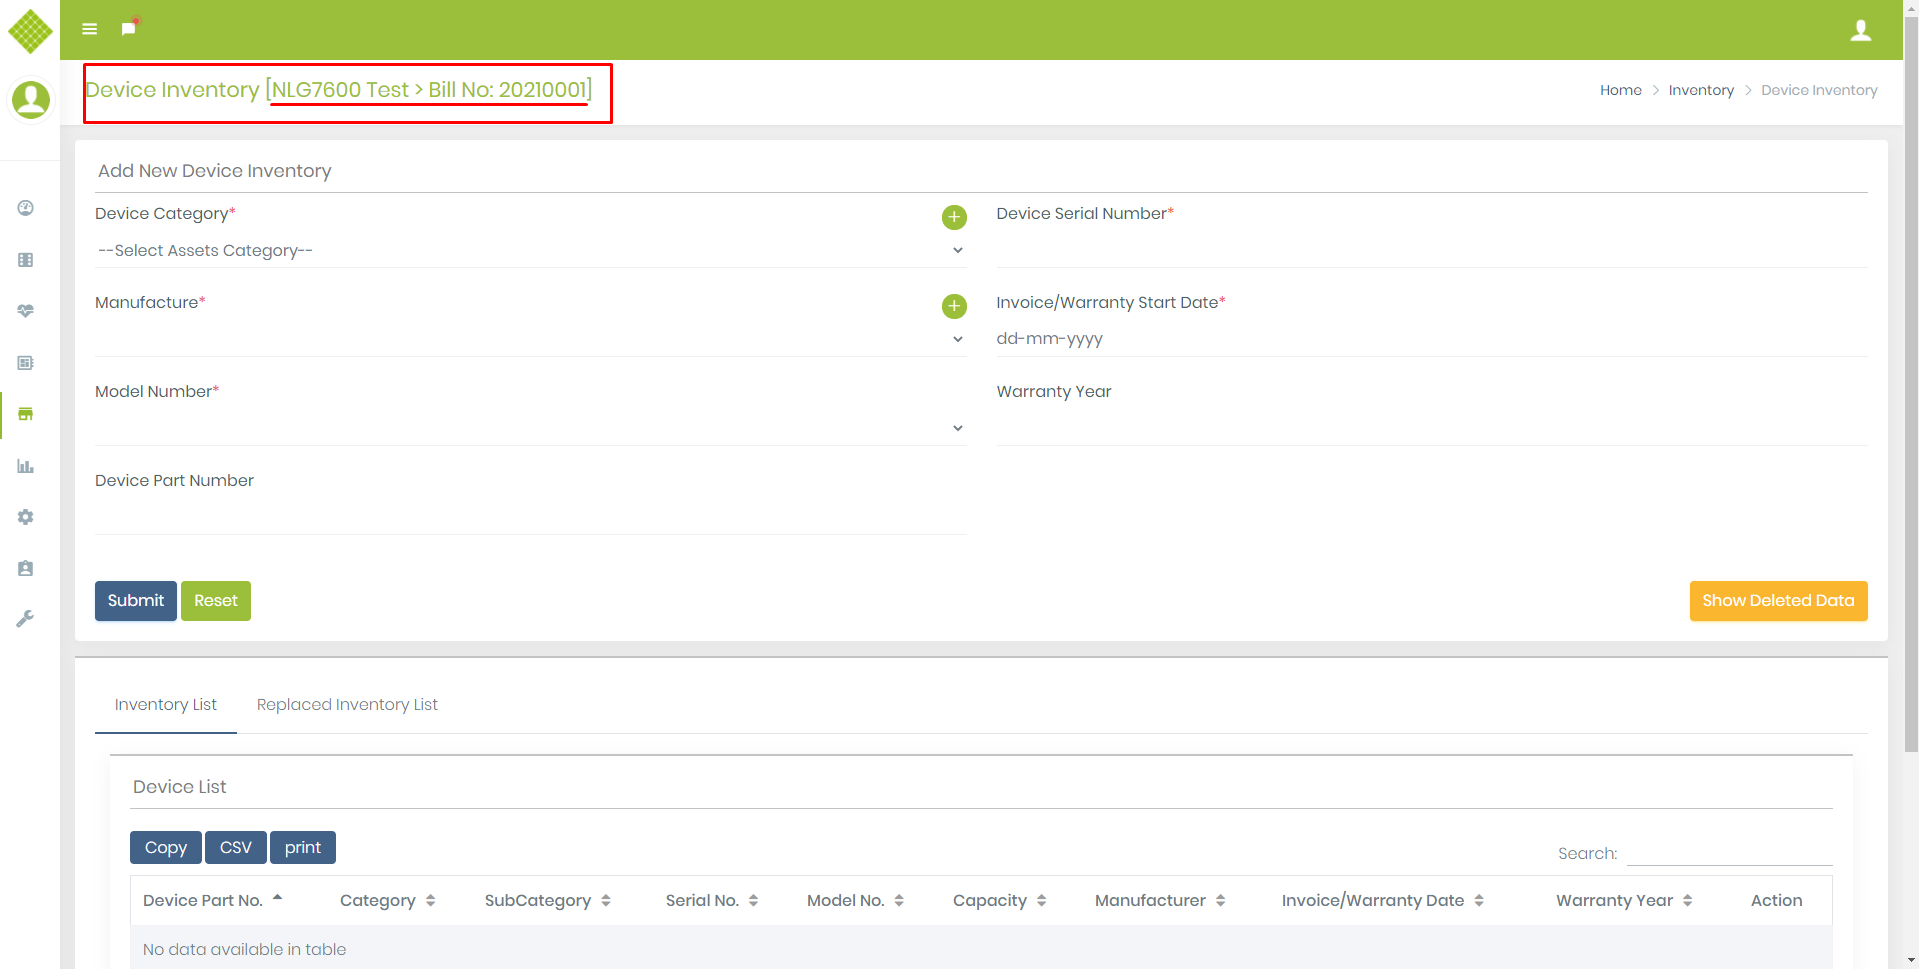
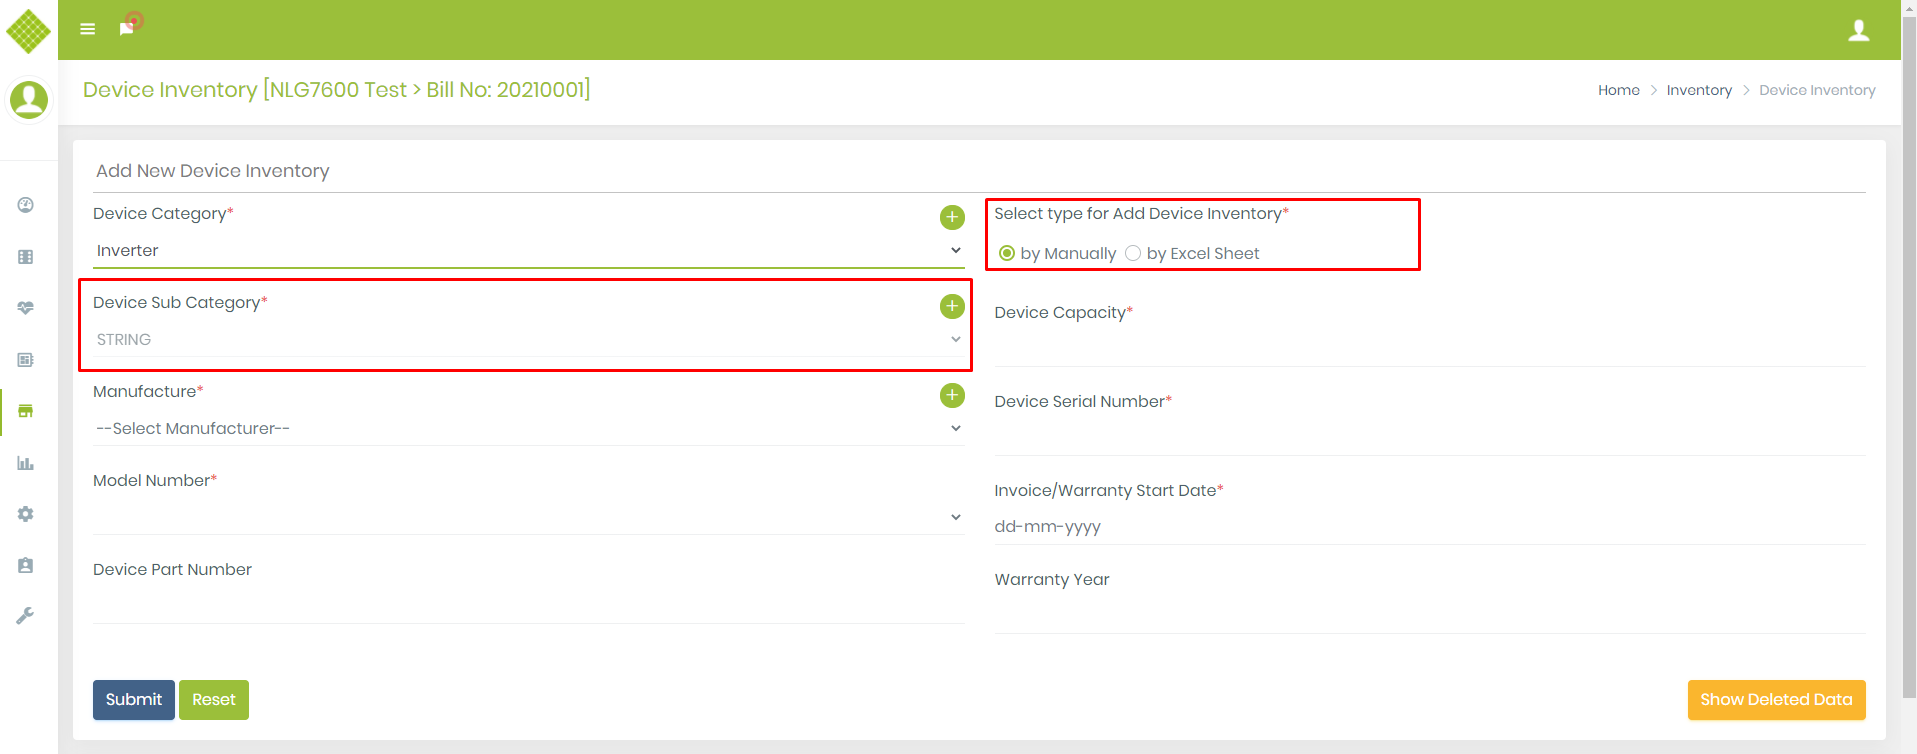
2.Add Device Inventory
- Here you select Device type based on that if device type is inverter or PVModule you get subcategory field and option to add device with excel sheet.
-
Note:
- Id device type is inverter and site type is string inverter with rooftop then default value for sub category is “String” otherwise “Micro”.
- Also if your required Device category/ subcategory not exists then only admin can add by clicking + button visible with field name.
- If required manufacturer not exists then you can click on + sign visible with manufacturer field. It will redirect to add manufacturer page.
- In current flow Device Part Number is not mandatory to remove SLS device dependency. Also provide device capacity for required device category only. For example not get device category field for gateway category.
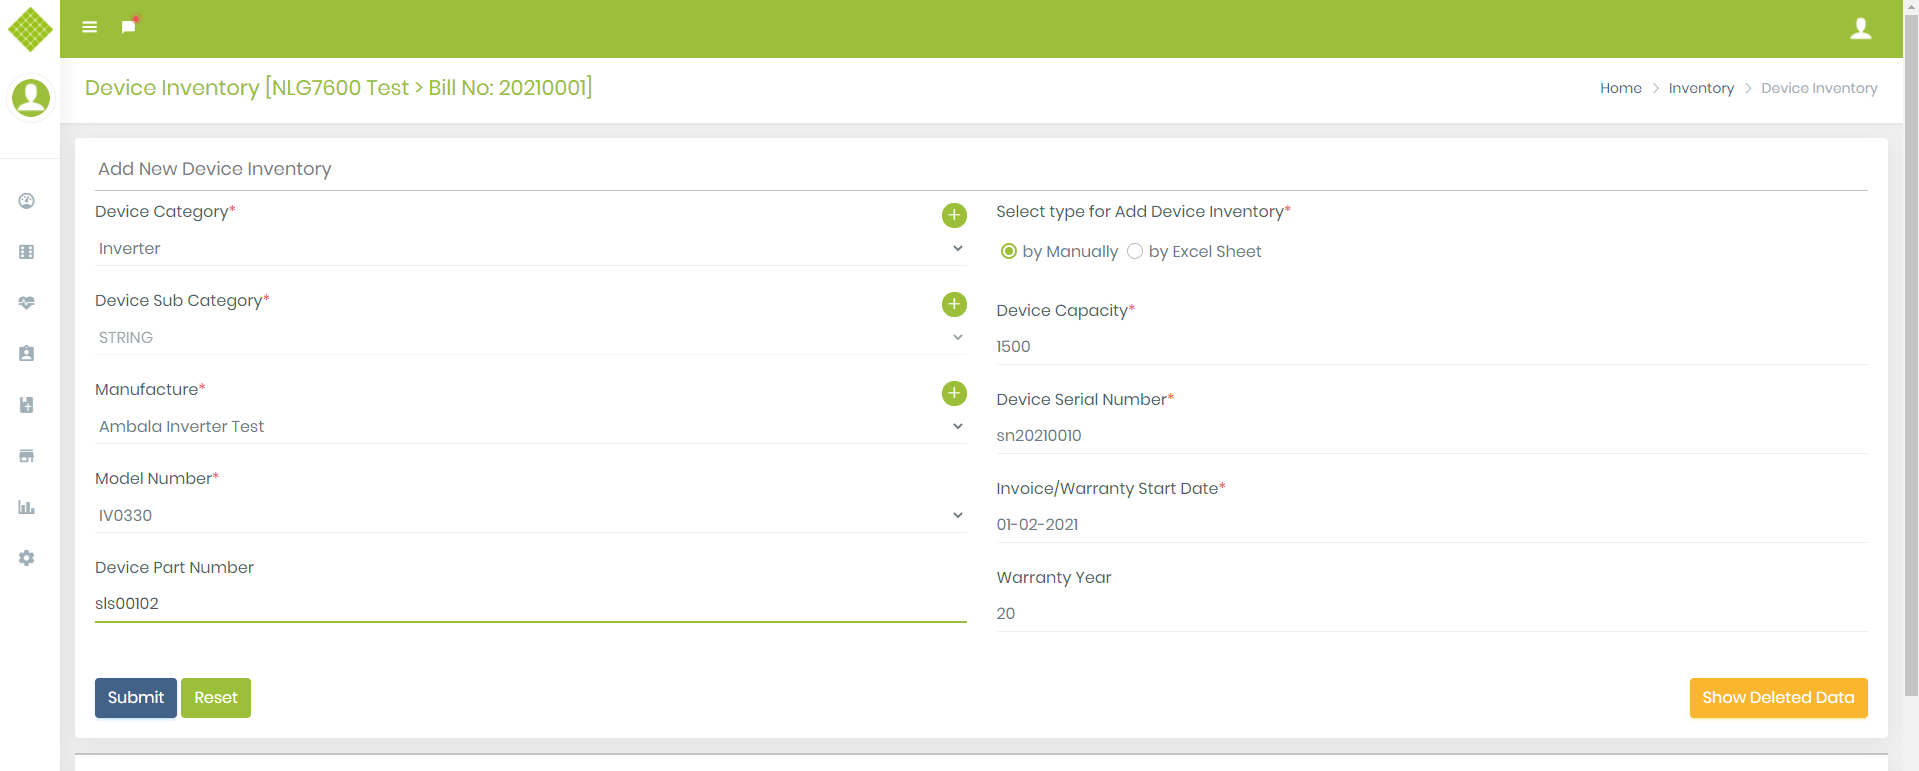
- Filled all required fields
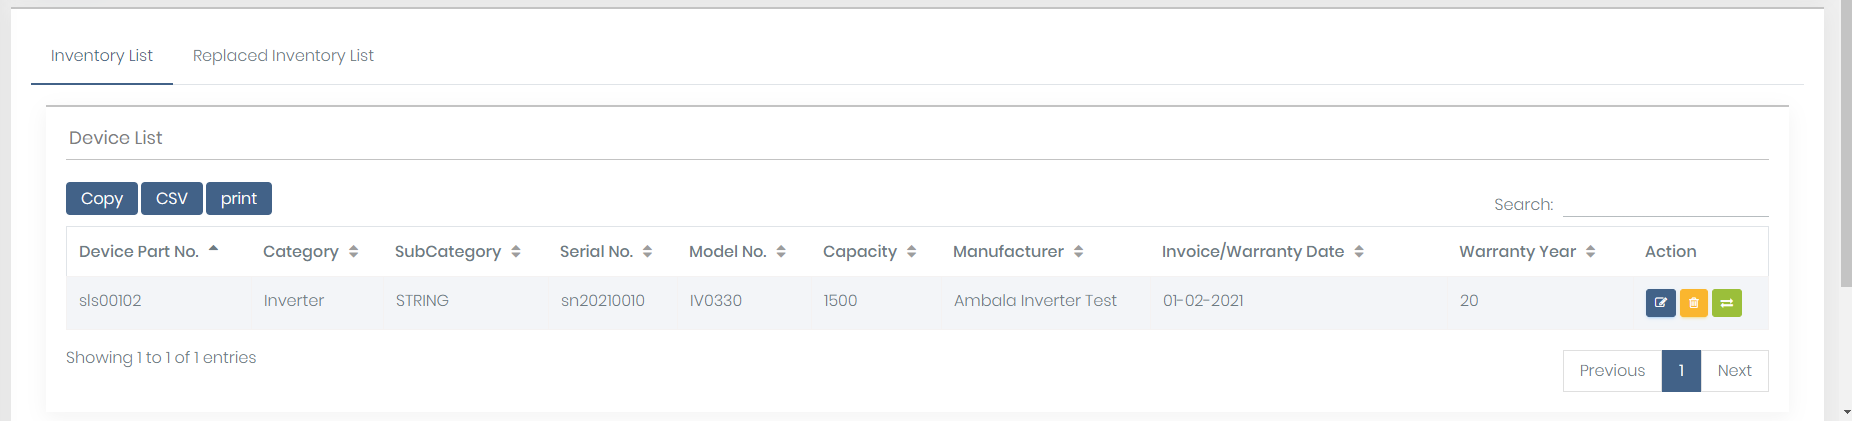
- You get updated list of device inventory.
- From the same page you can add multiple device in the inventory.
- You can also edit details by click on edit button. And admin can remove that data.
- Also provide feature to replace device. (same as existing flow)
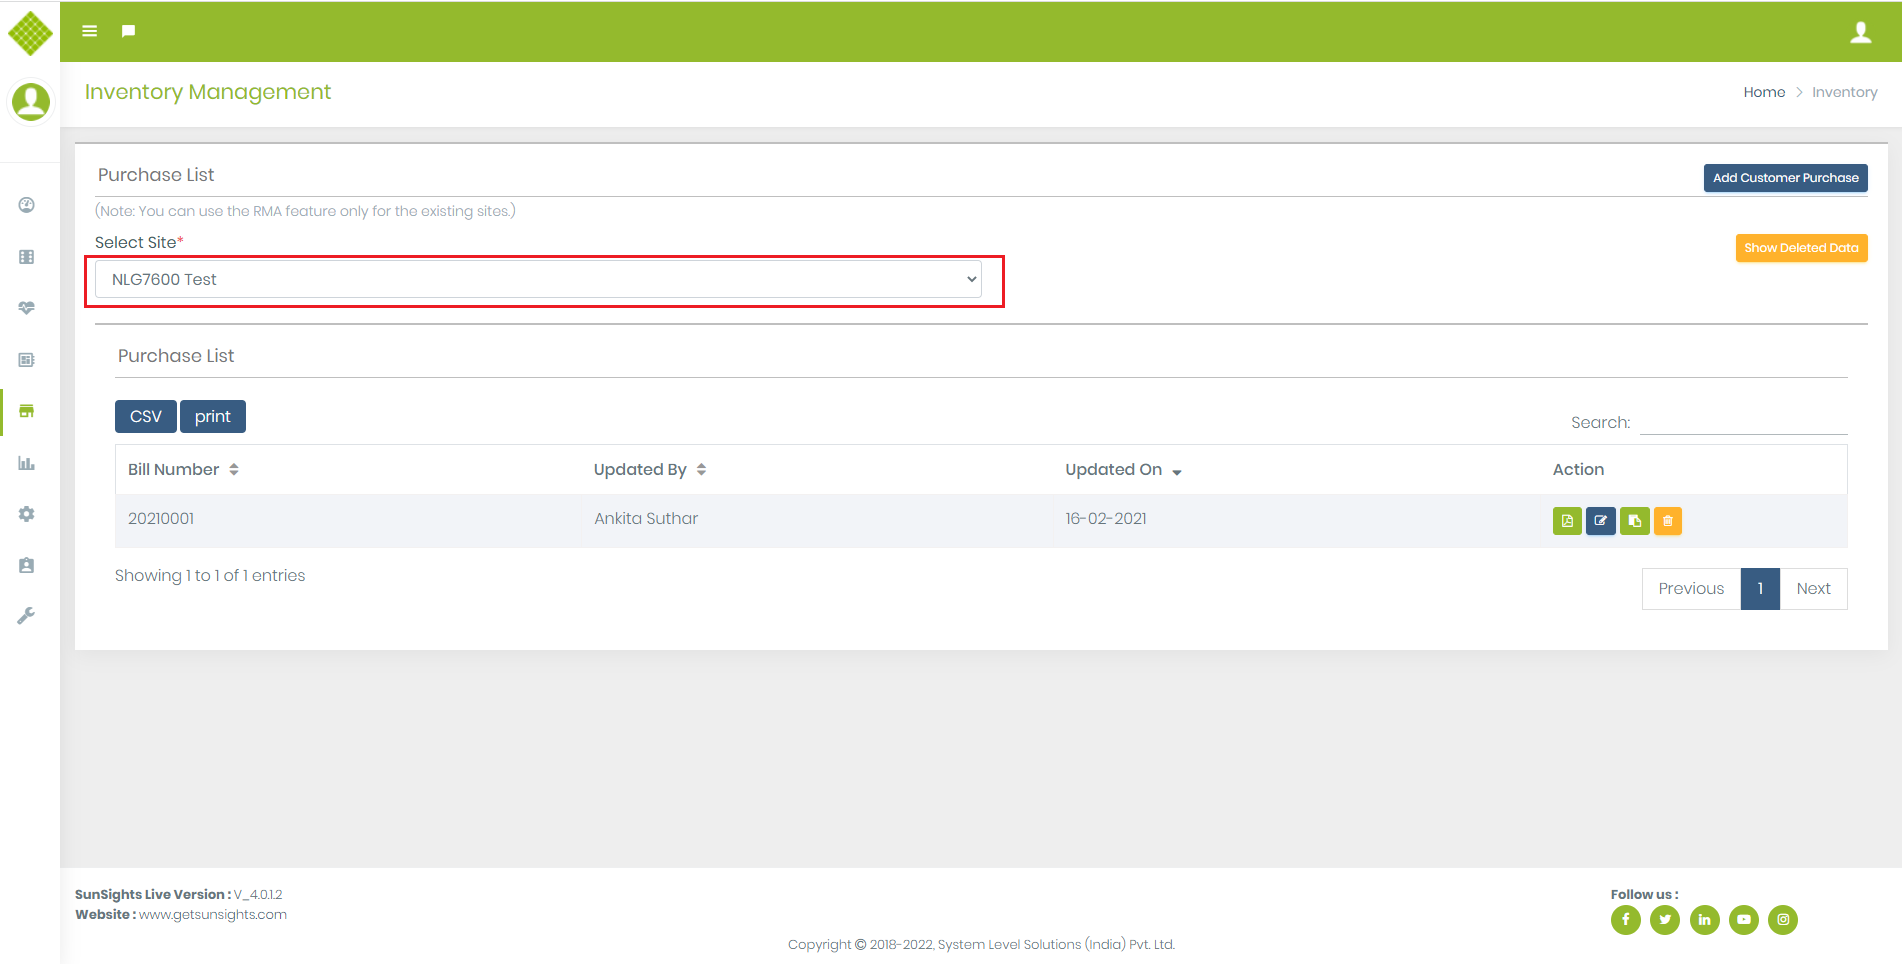
- Now Go to the Inventory page and select Site for which you have been completed RMA
-
You get that site bill data.
- 1.You can add more bill details using “Add Customer purchase”
- 2.Add more invoice file.
- 3.Also edit specific bill details by clicking “Edit button”
- 4.And navigate to selected bill device inventory.
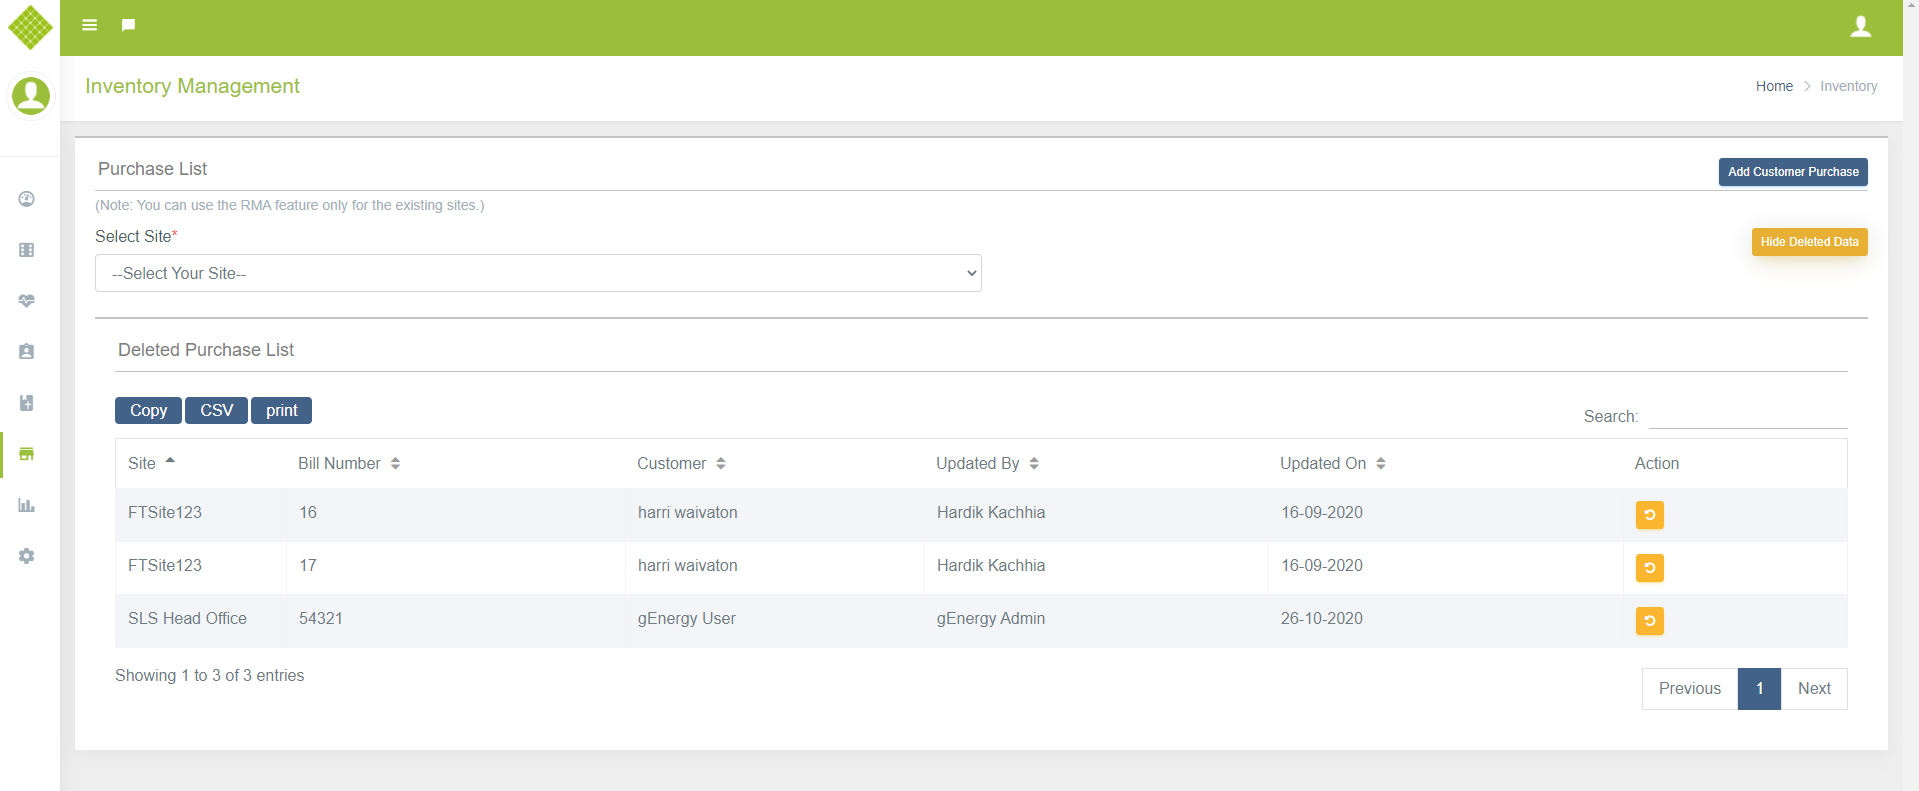
- Delete bill (Only for admin use and “Show deleted data” also use for admin only)
- Click on Show Deleted Data (Only Admin can show and recover deleted data.)
- It will display all site deleted data.
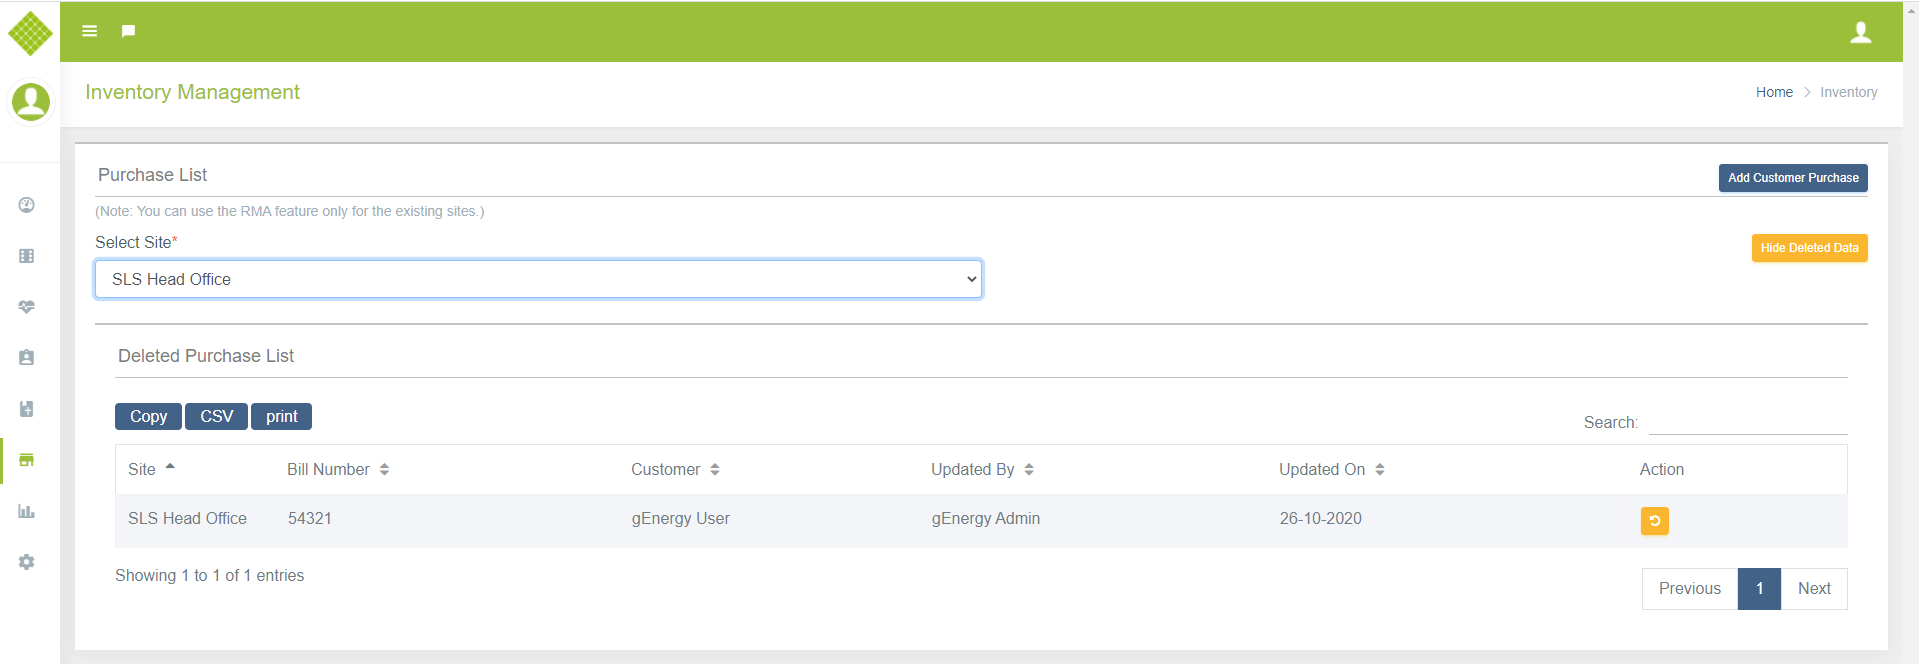
- If you select any site then get particular that site deleted data.
Click on “Submit”.
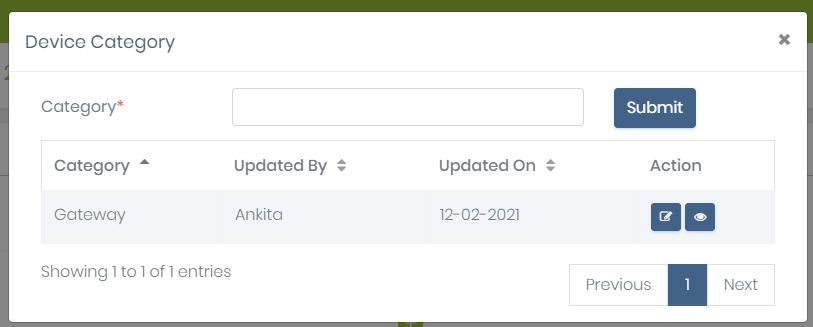
3.Device Category
- we can add Device category and Sub Category from device Inventory.
- Get list of category with “Add”, “Update” and “view subcategory” option.
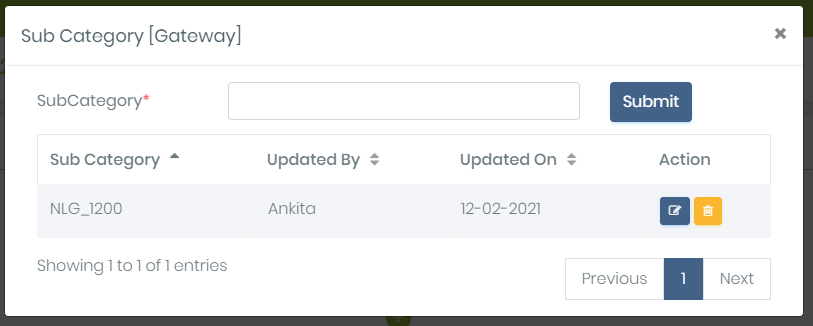
- Click on “View subcategory”.
- Here admin can add subcategory, edit and delete.
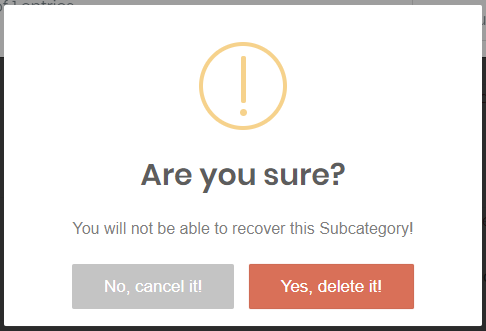
- If you want to remove then ask for conformation.
- if select yes then it will remove that sub category.
-
Note:
- In this flow we can manage RMA for other company’s device also because there is no dependency for SLS Part No. Also no need to pass capacity for gateway it only for inverter and panels. Here only Site dependency.
- As per the discussion we will provide new site type support to manage customer who only buy device instead of whole sunsights.
Support
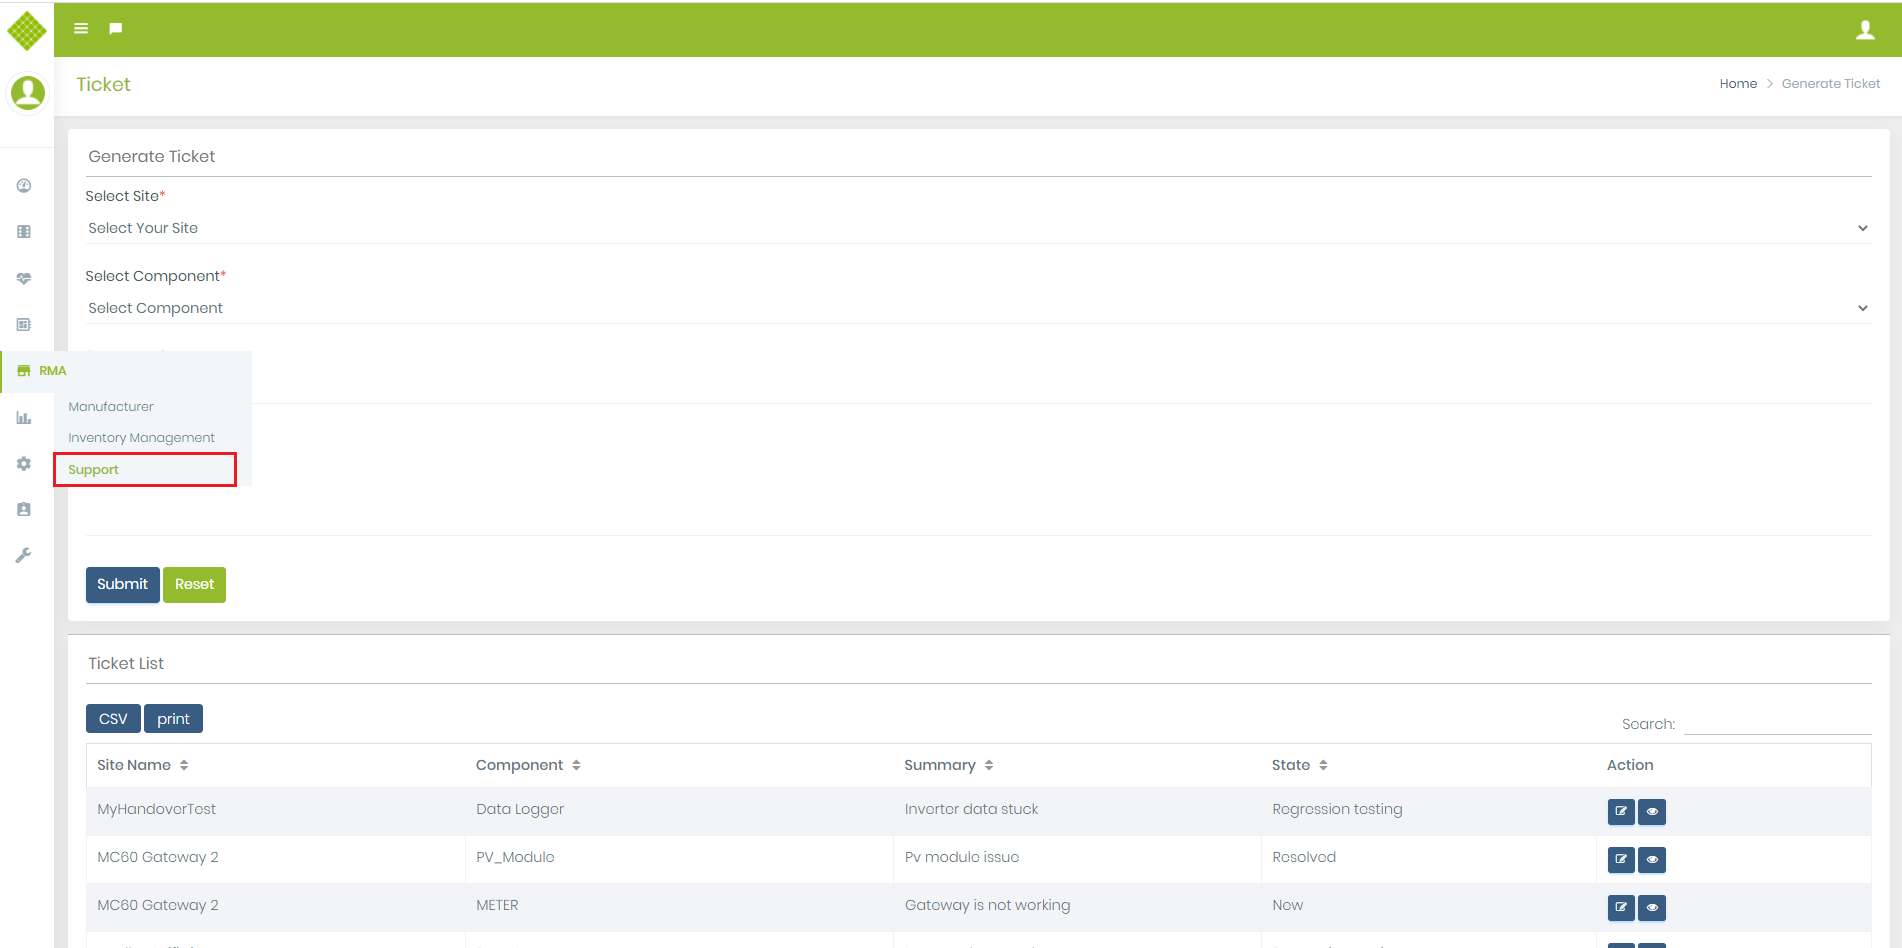
This feature is used to add Provide support to the admin,supplier and customer and make tracking of solving issue by EPCContractor.1.Generate/Update Ticket /Support
- Click on RMA Menu,after that select support submenu.
- Get Ticket Generate form with list of previously generated ticket with edit functionality.
- Once Ticket generated successfully then data updated in Ticket list.
- In above page, admin/supplier get functionality to generate ticket, get old generated ticket list and edit ticket and view ticket feature.
- To update ticket details click on edit ticket details button of specific ticket.
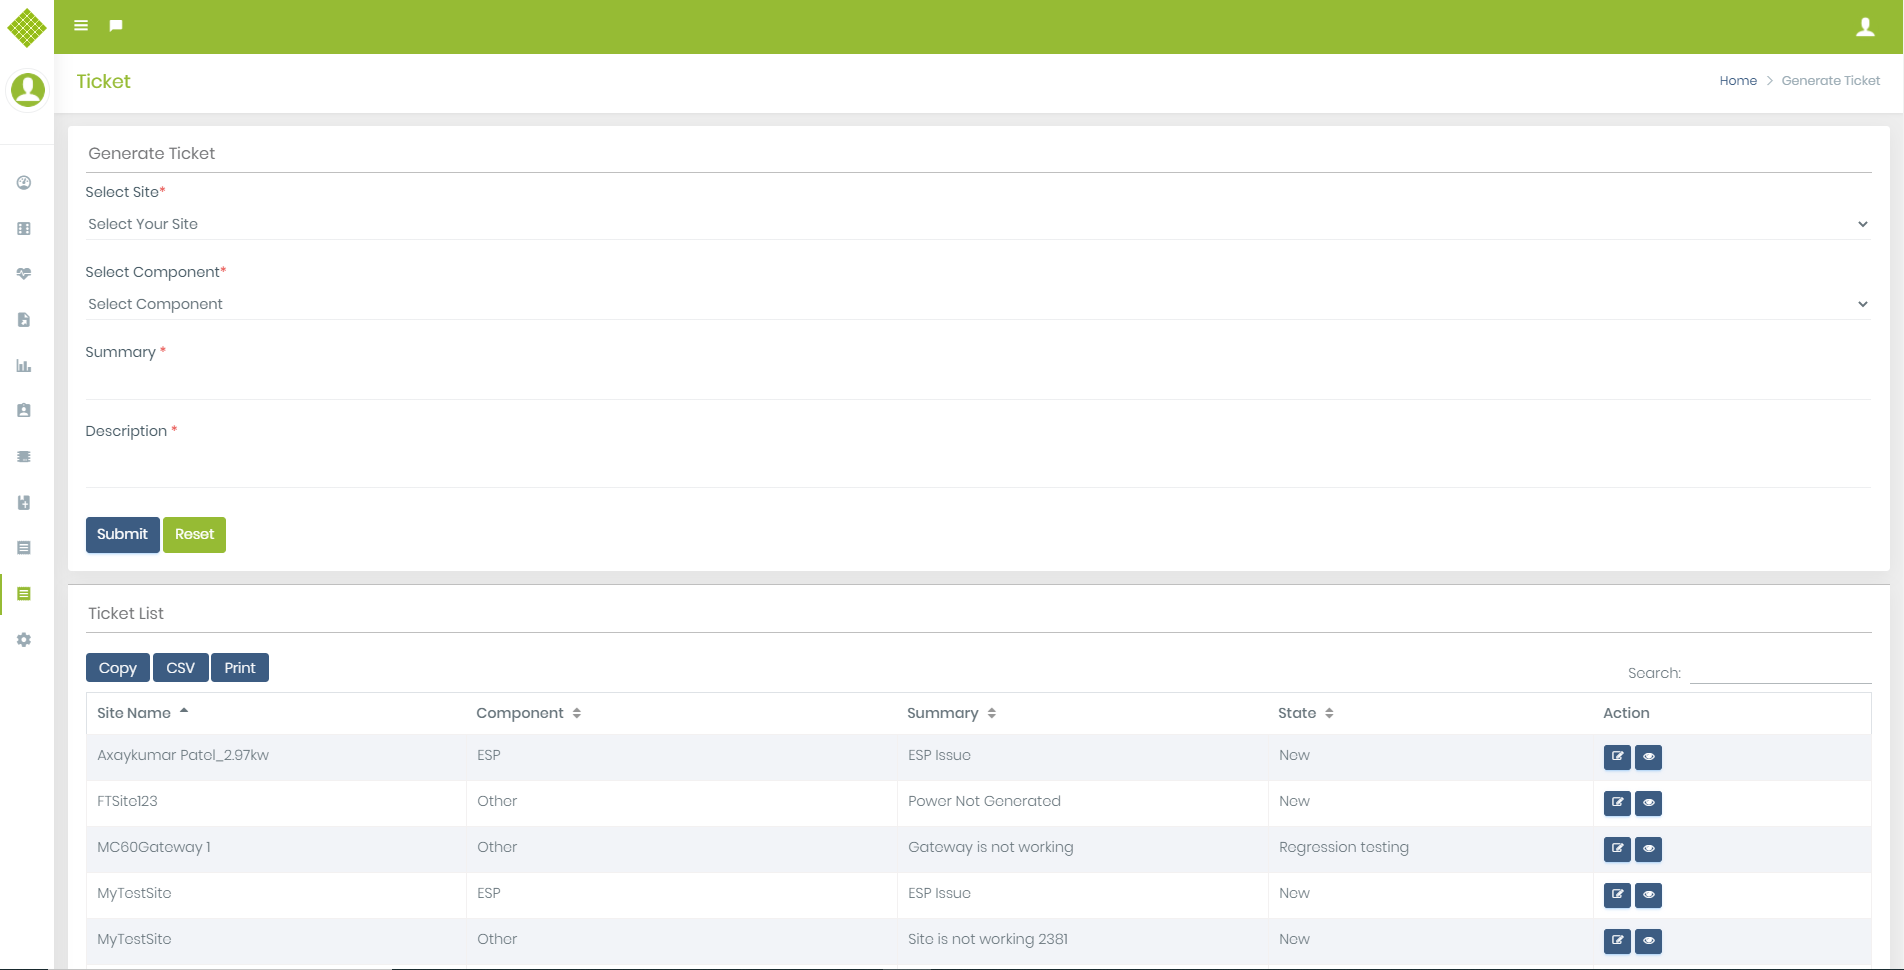
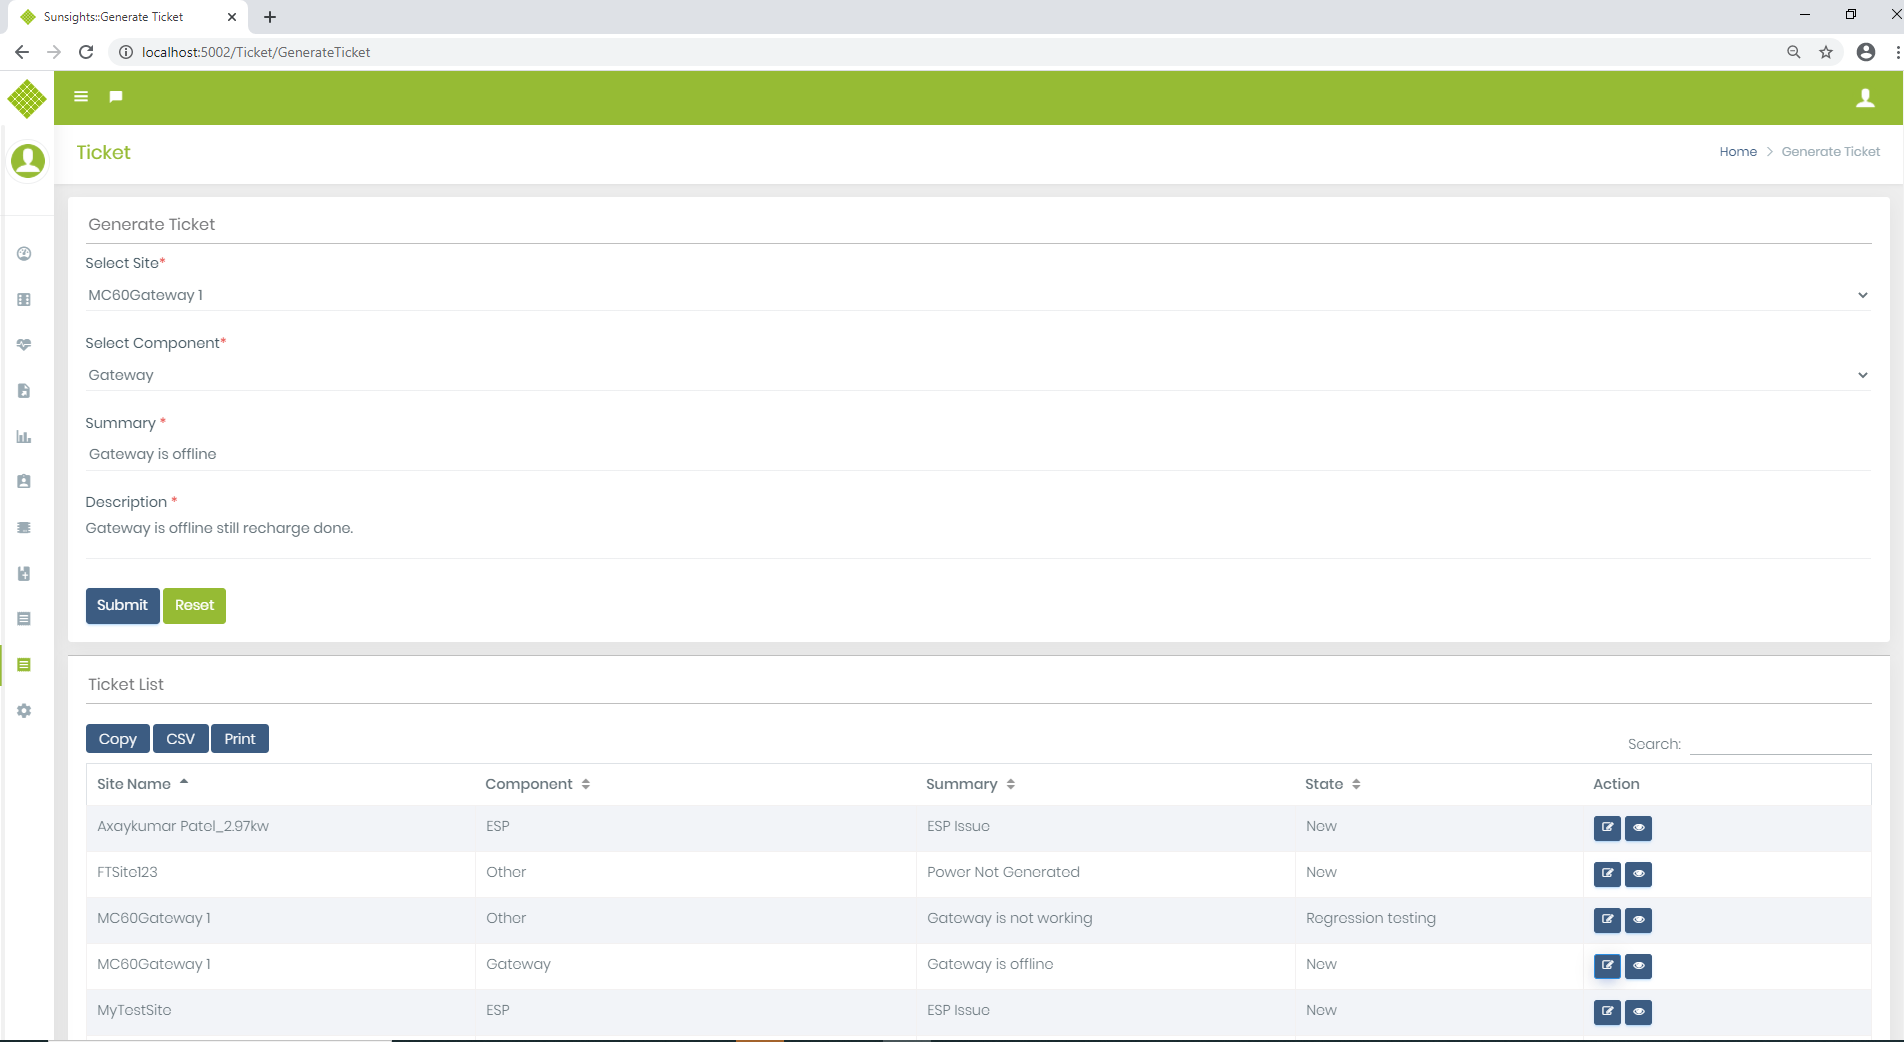
2.Steps to Generate Ticket
- Generate Ticket form contain Site selection if there is multiple site. Otherwise single site selected and site selection disable., Component selection (for get basic idea about fault), summary and description.
- All fields are mandatory. If you not fill form and try to submit.
- Summary and description not allow blank value.
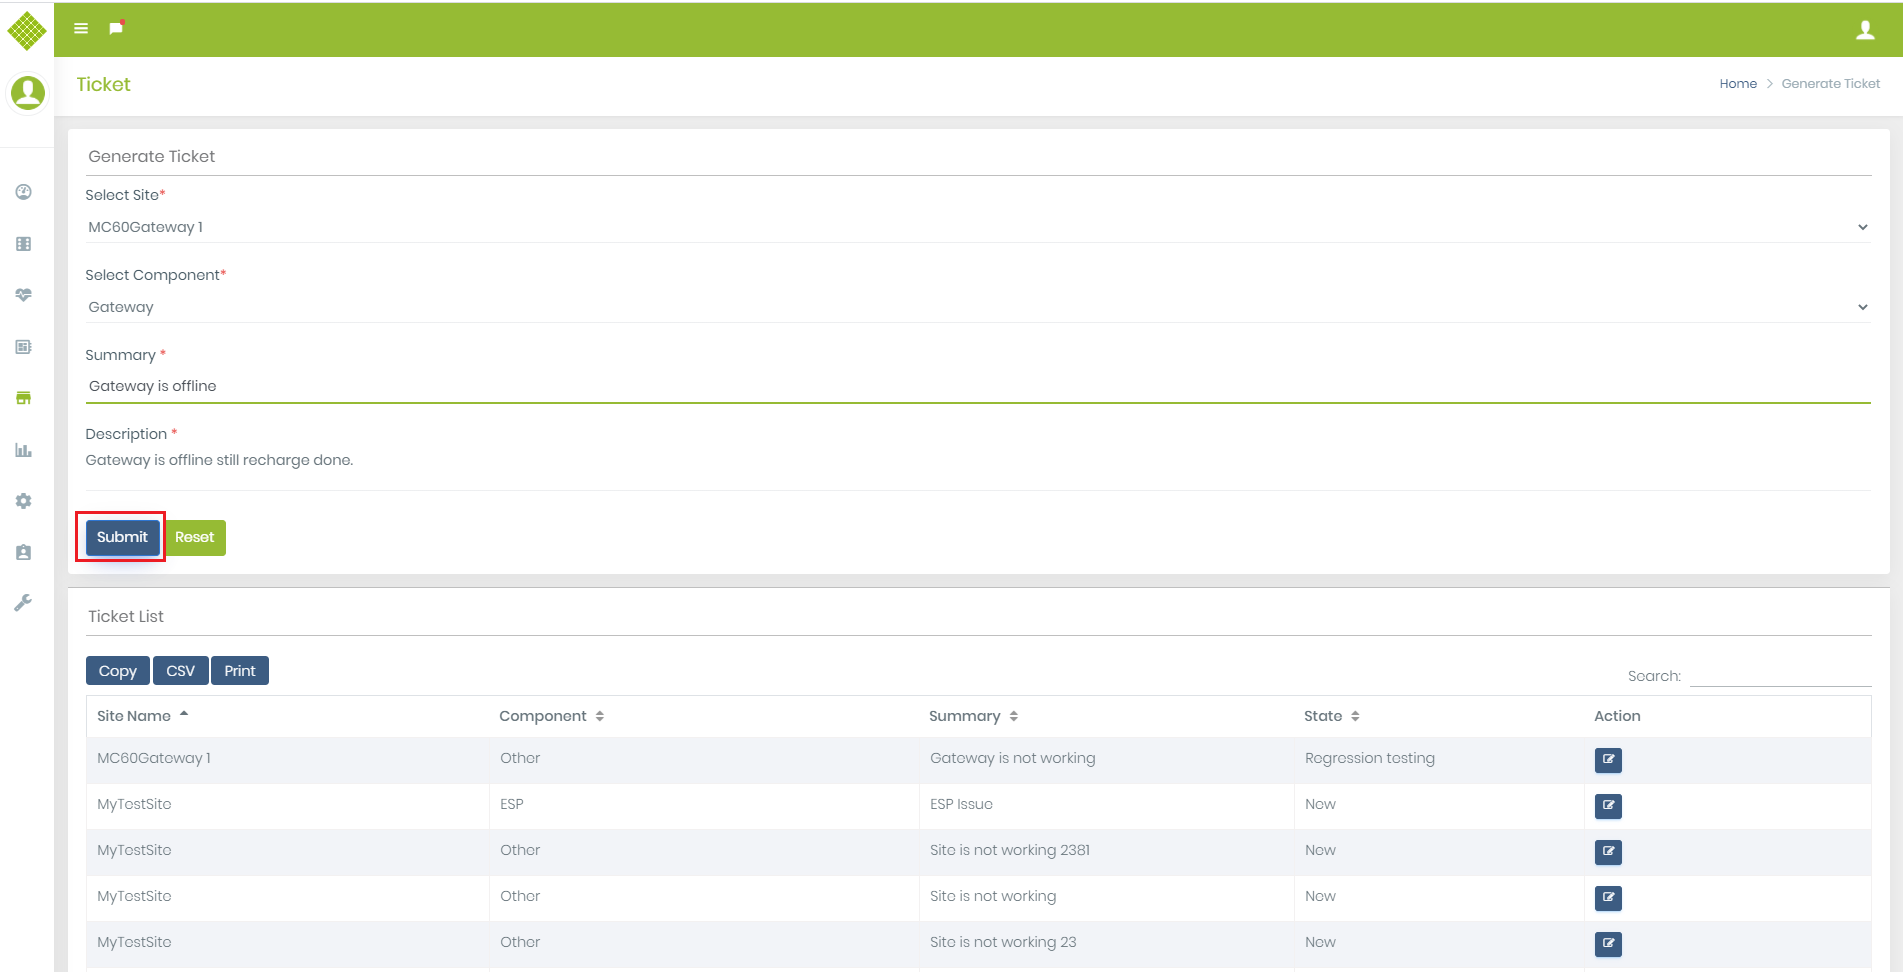
- Enter valid data with valid selection.
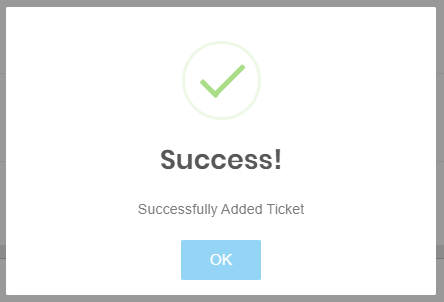
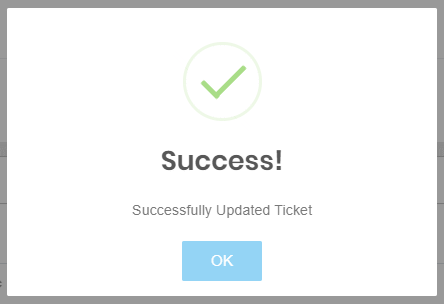
- Click on Submit, It will send success message as below.
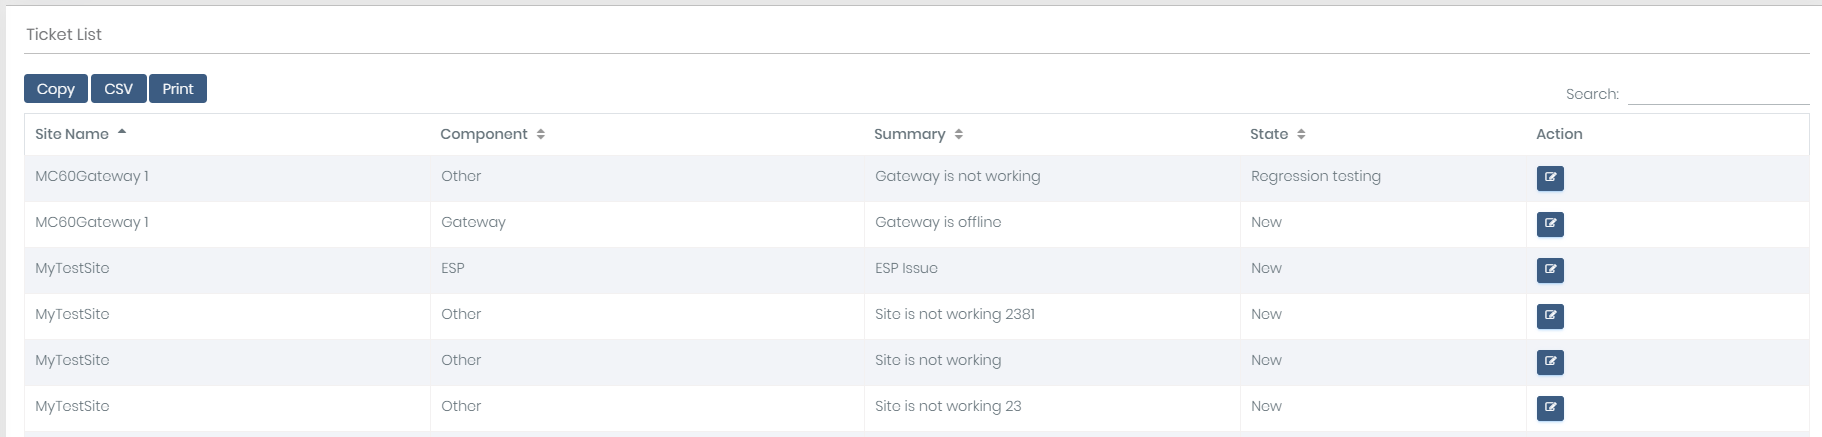
- If ticket generated successfully then data will be updated in the ticket list with default state is “New”.
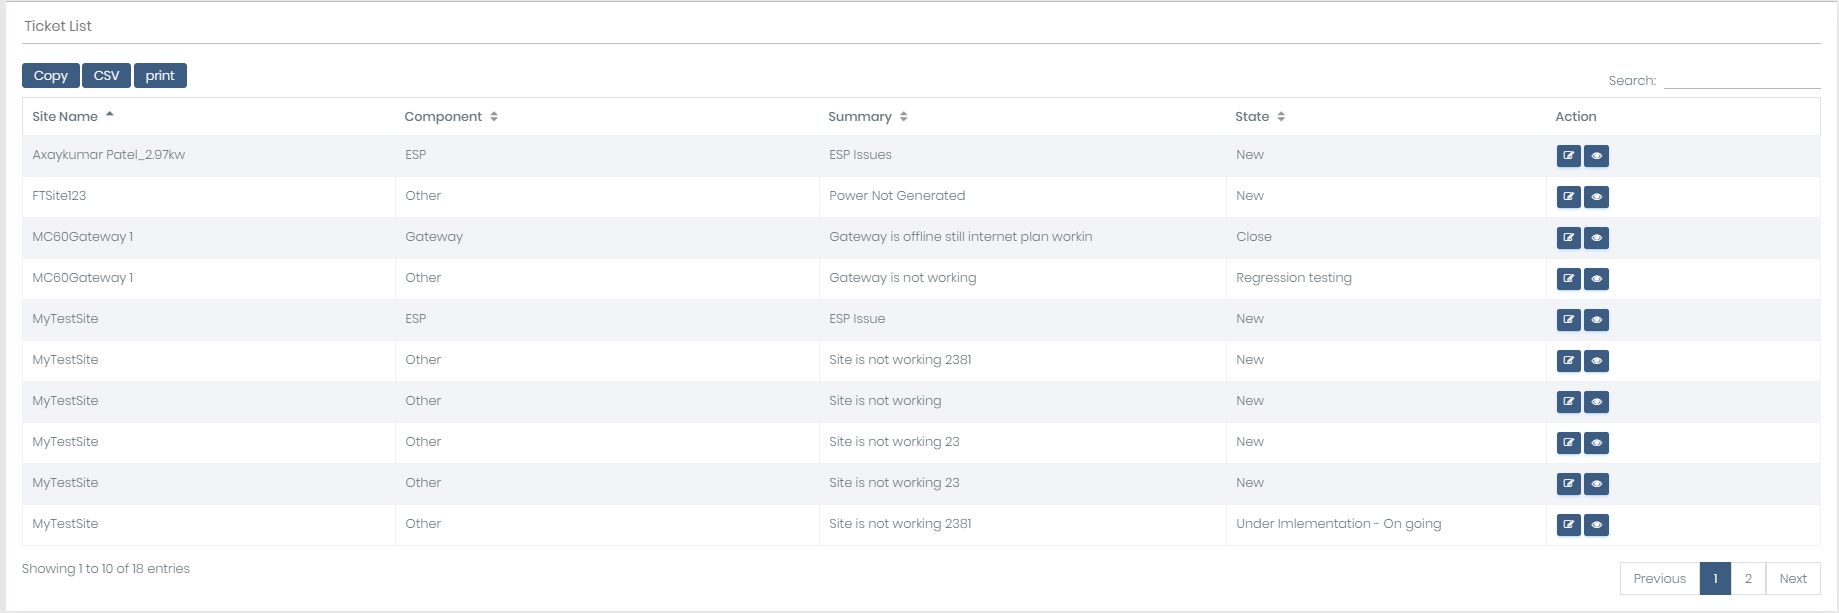
3.View Ticket List
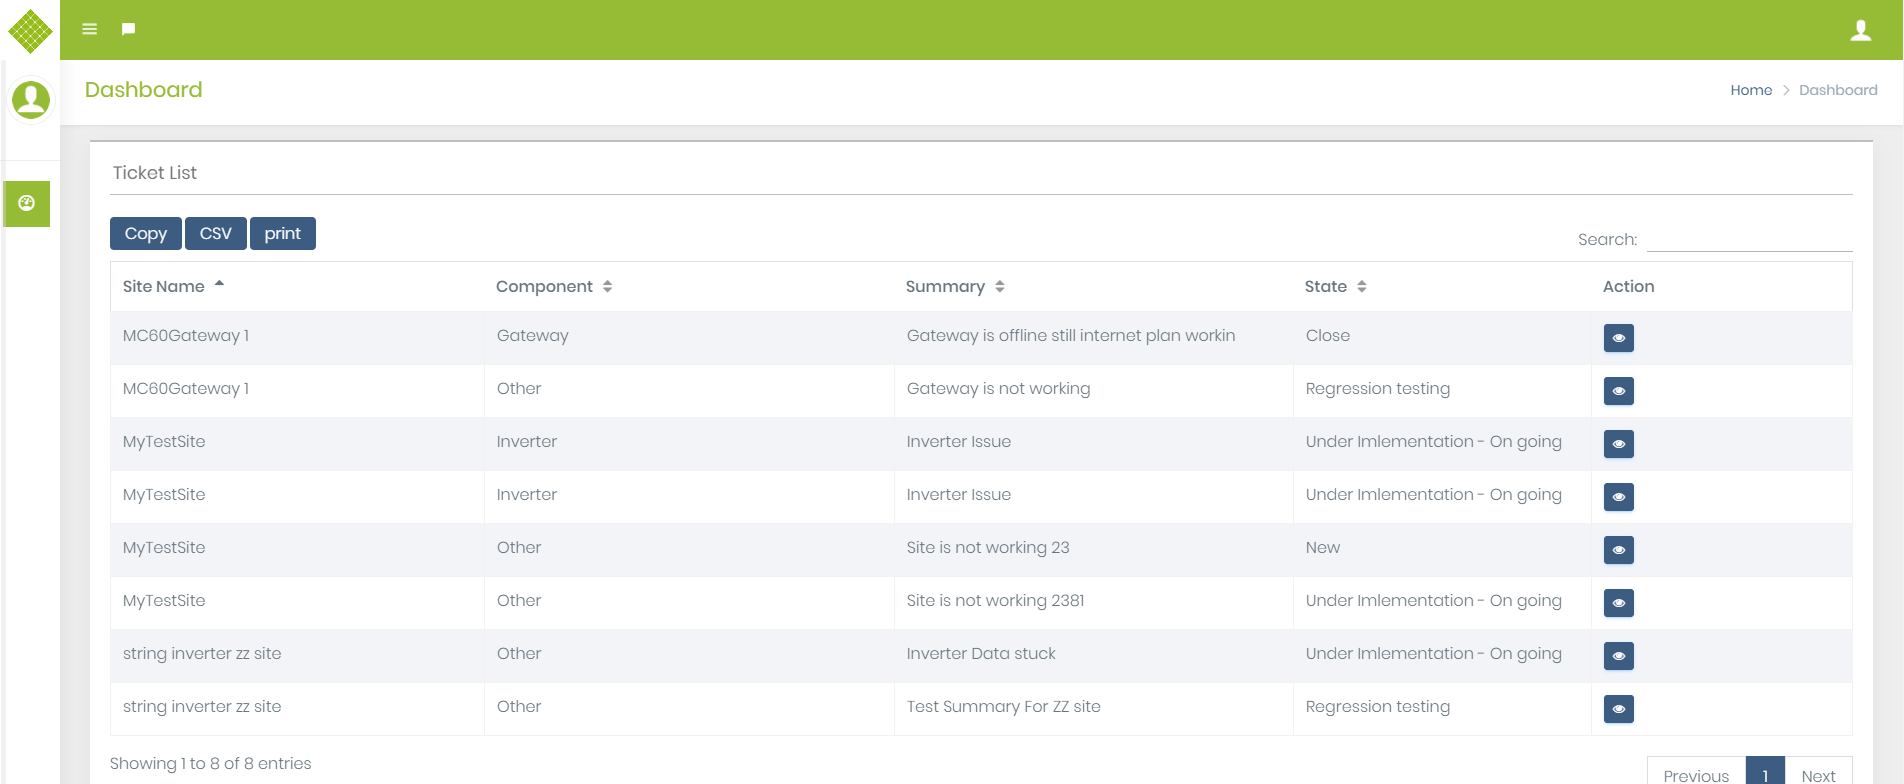
- Login with Customer/Admin/Supplier/EPCContractor user
- 1) For customer click on Support menu (with edit functionality)
- 2)For Admin/Supplier Go to ticket menu and click on Generate ticket. (with edit and view details functionality)
- 3)For EPCContractor login in the portal and get dashboard page. (with view details functionality)
- Table contain Copy, Print and CSV button.
4.Steps to Update Ticket
- Click on Edit Ticket Details.
- It will fill selected ticket data in above form to update.
- Update details and submit.
- Once Data updated successfully it will updated in ticket list.
- Try to update same details.
5.View Ticket Details
-
This feature accessible by Admin, Supplier and EPCContractor user.
- Click on View ticket details of specific details.
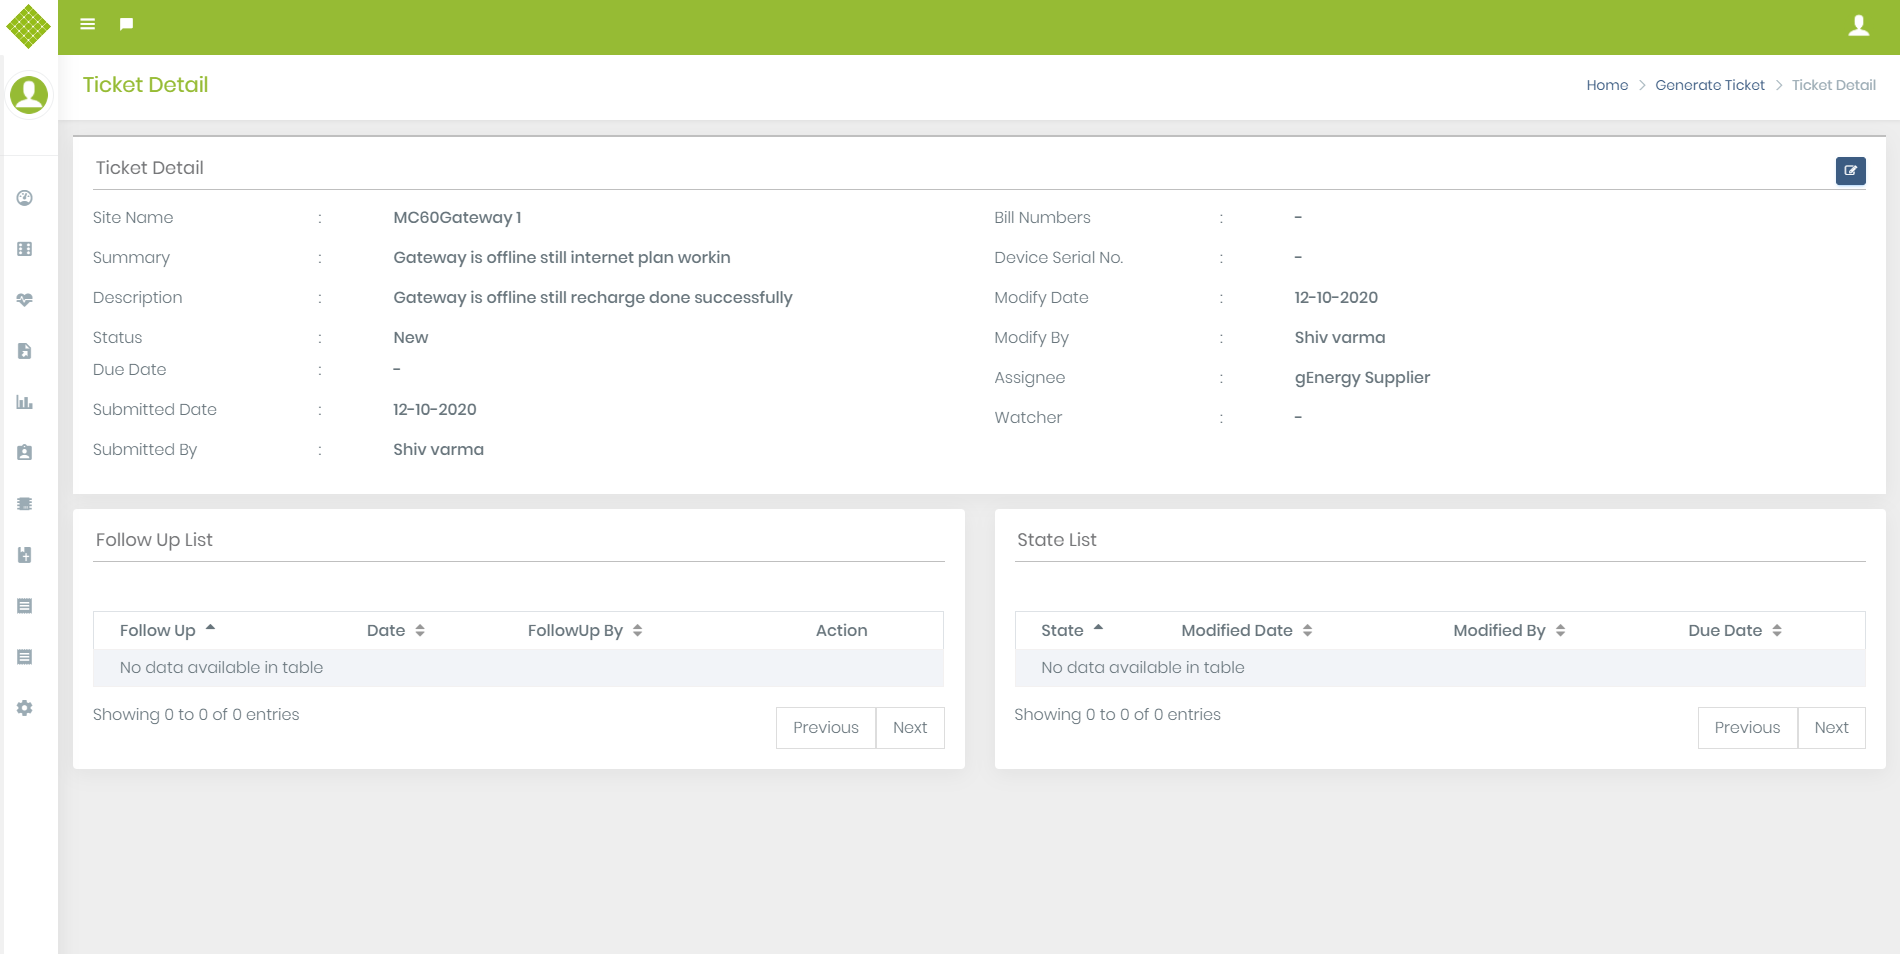
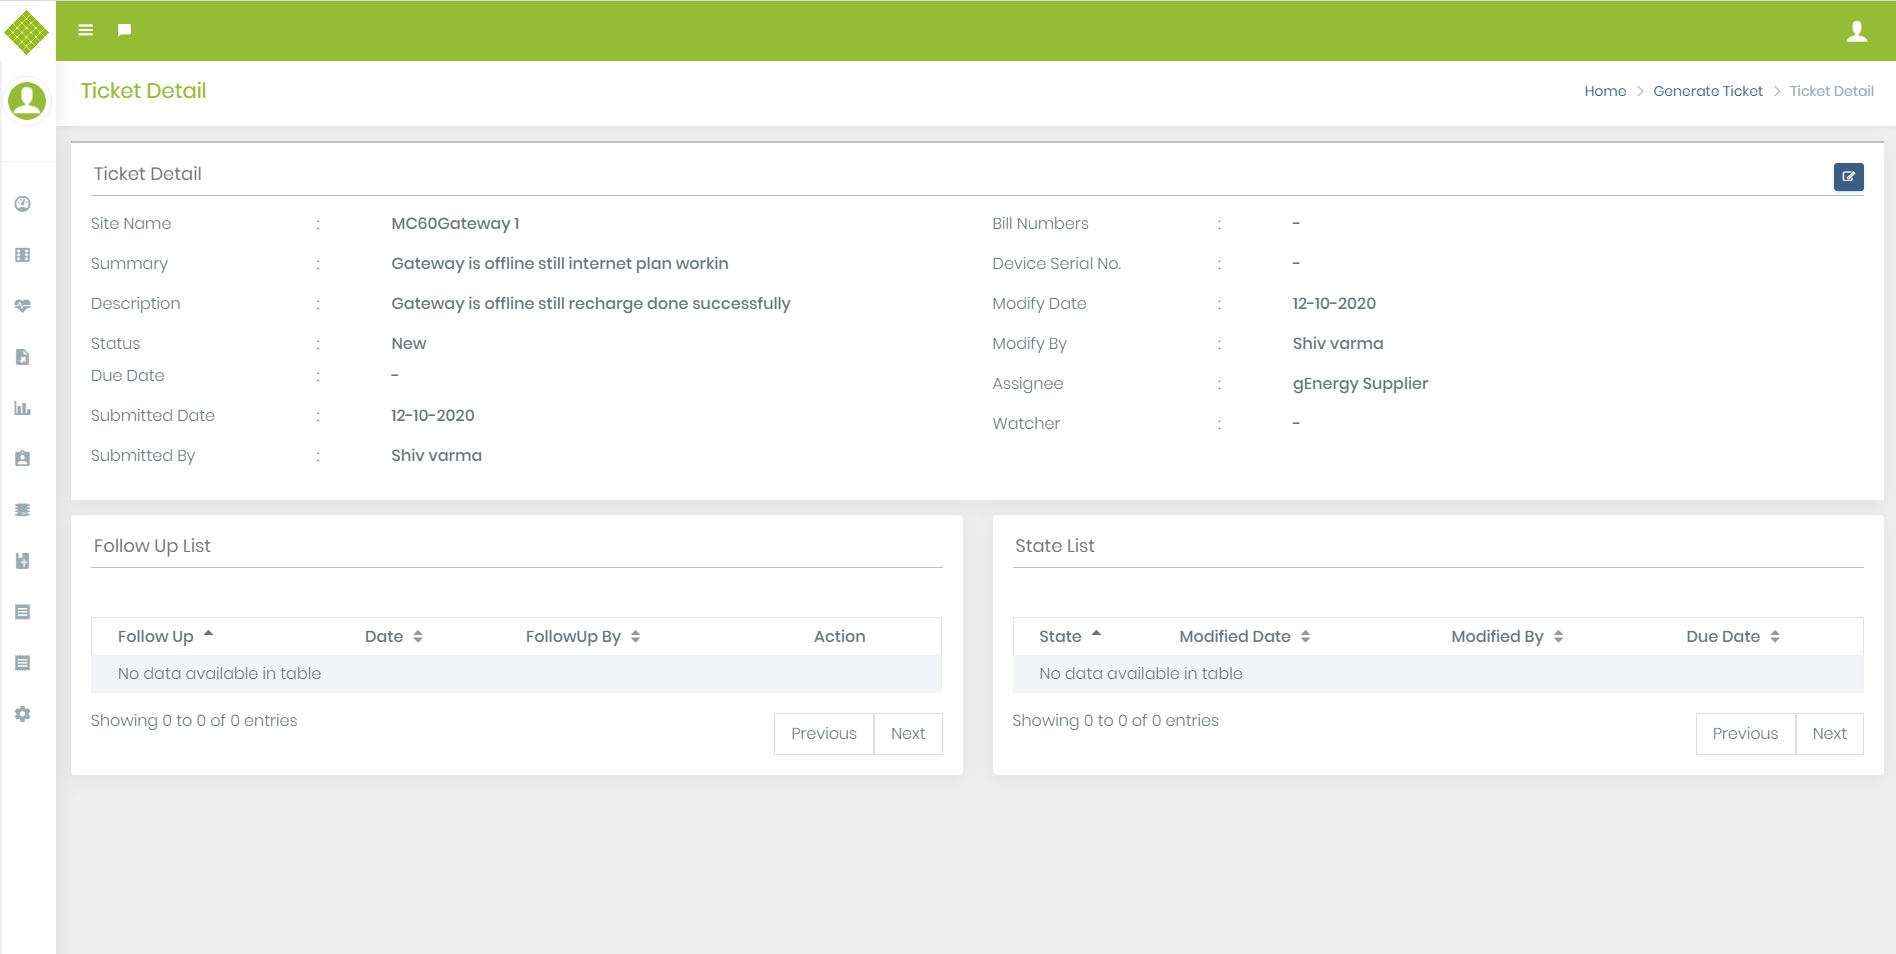
- User get ticket details. (First time Due date, bill no, device serial no and watcher are empty.)
- Also Follow up list and state list empty at first time.
- Only Admin and supplier can update all fields. EPCContractor can update due date, follow up and state only. (First view)
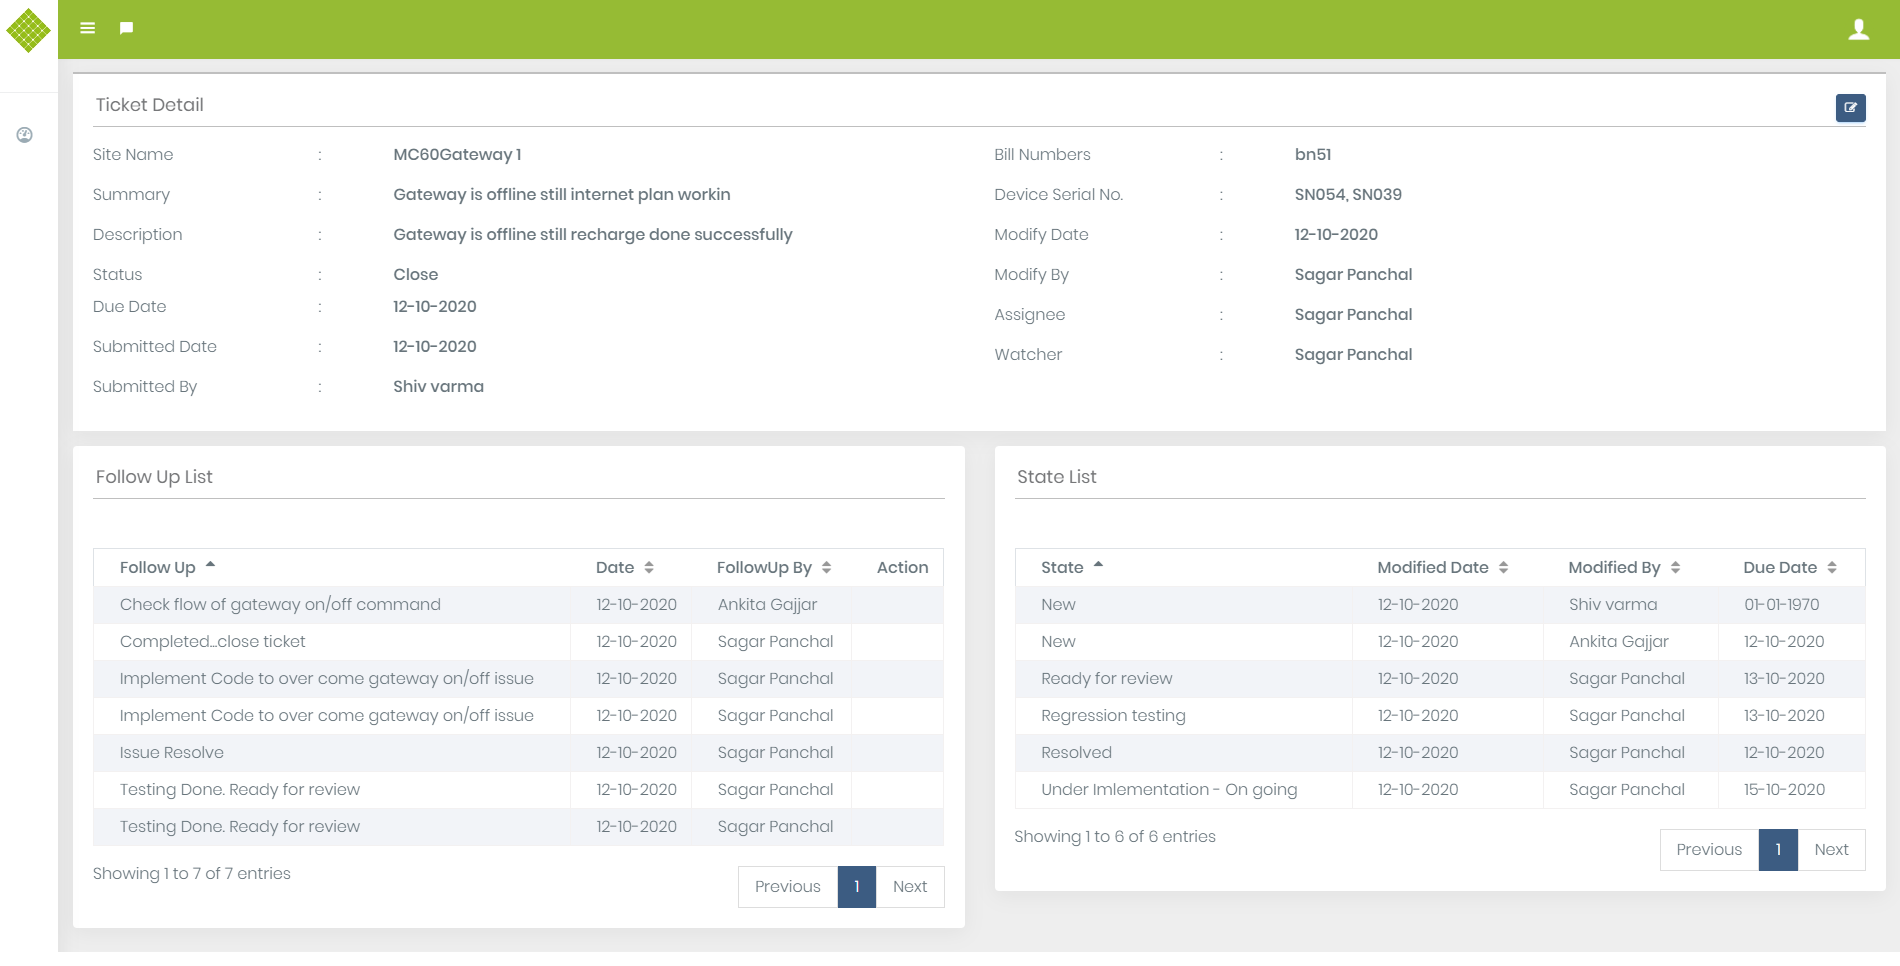
- Ticket details which is under resolving process.
6.Update Ticket details
Update ticket functionality accessible by Admin, Supplier and EPCContractor. They are allow to update due date, follow up and state of ticket as per task perform in ticket. Customer get update state information by mail and in view ticket list. Also mail sent to the person who has updated ticket details.- Login in the portal as Admin/Supplier or EPCContractor.
- Go to the Ticket List.
- Click on View ticket details of specific ticket which you want to update.
- Click on Edit Ticket details located at top right corner.
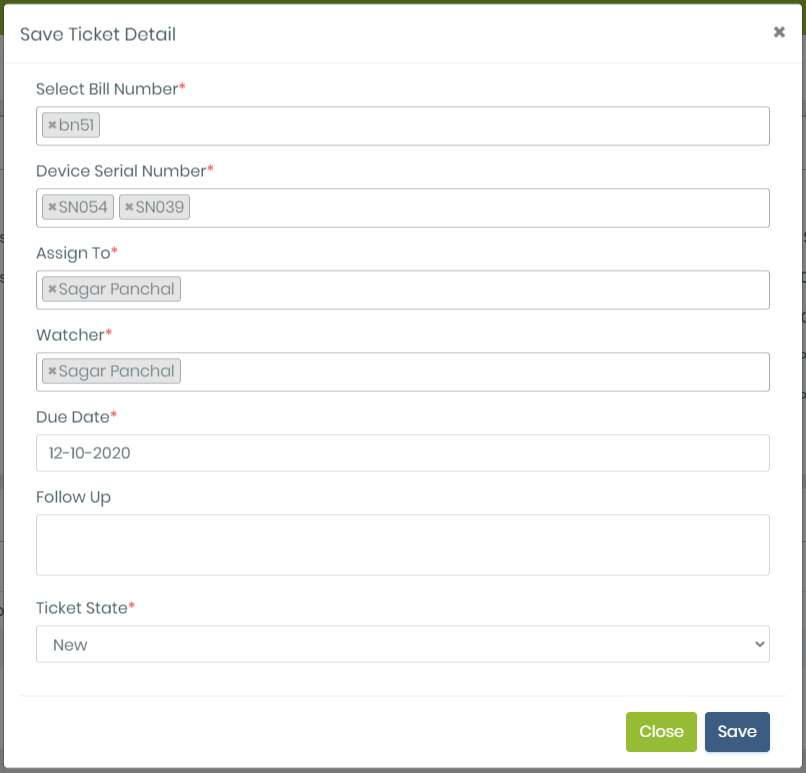
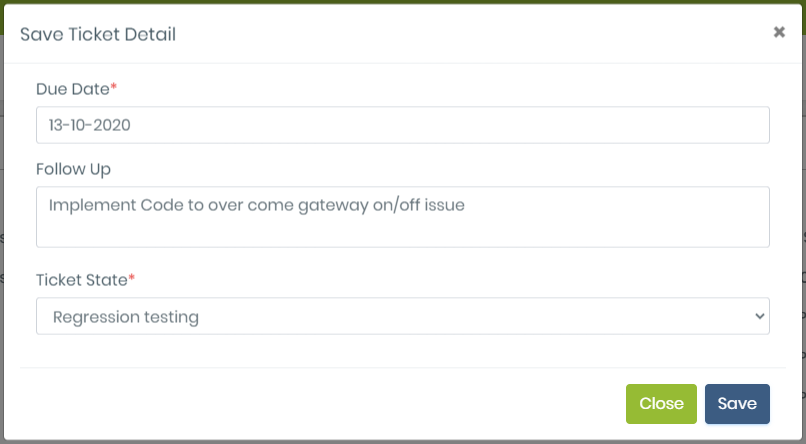
- Get following form for update ticket. First time all fields are empty only due date as current date and ticket state as “New” default selected.
- Select Bill number, Serial no, Assign to, watcher and change due date and state if required.
- User can selected multiple bill no, serial no, assignee, watchers.
- Now click on Save.
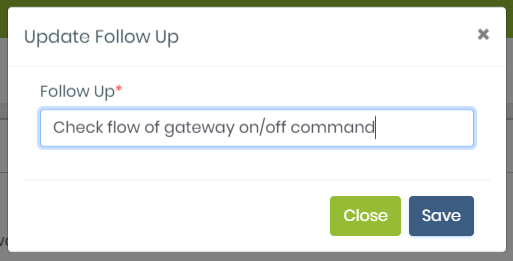
- Get updated follow up table with Edit follow up button.
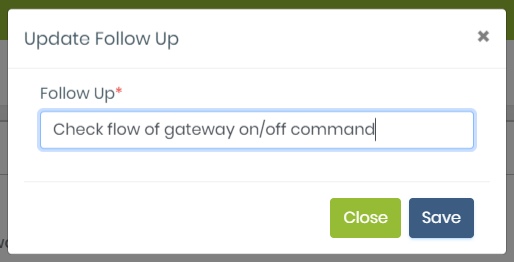
- Click on Edit follow up button.
- Update follow up message and click on save
- We can get success notification.

6.Update Ticket details by EPCContractor.
- Login with EPCContractor and click on view ticket details of specific ticket.
- Click on edit ticket Details.
- Update Details and click on save.
- Click on Edit follow up button.
- Update follow up message and click on save.
- You will get the success notification.

Report Analysis
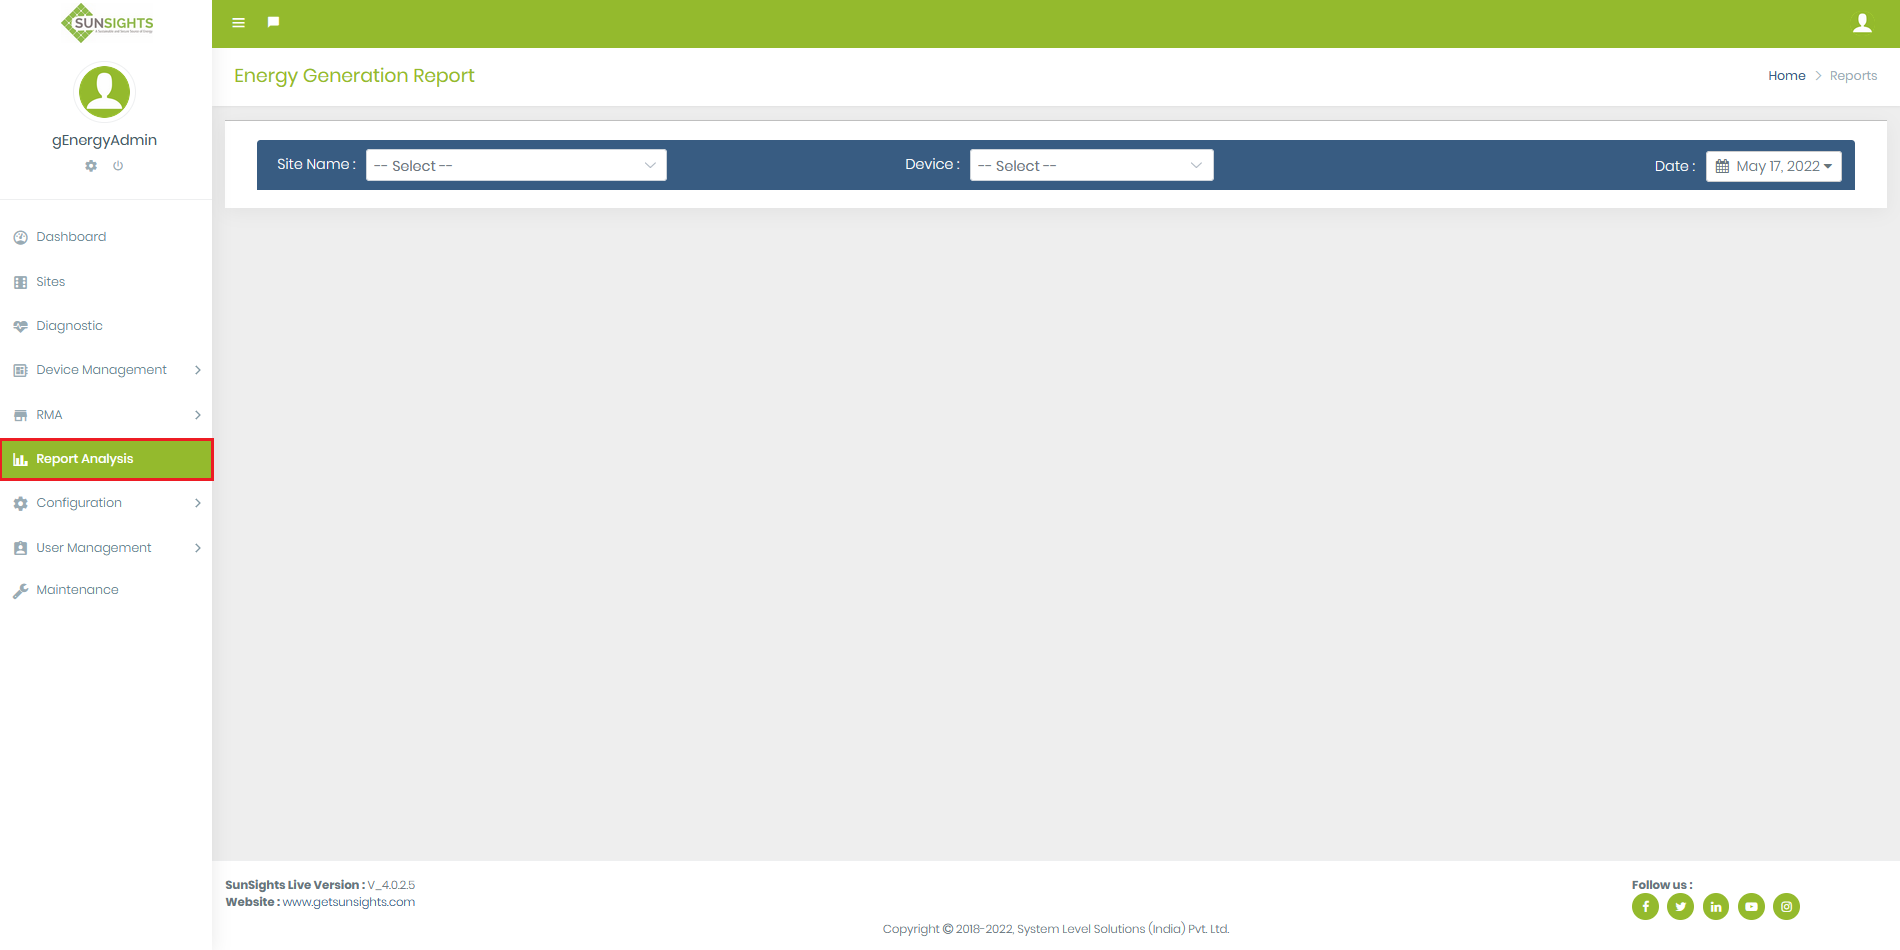
- Login with Admin, Supplier, Customer credential or Use View Demo.
- Click on “Reports Analysis” from Left side Menu.
- Now you select Site for which you want to generate Report, and can select Inverter,Meter or Sensor mac to generate a report.
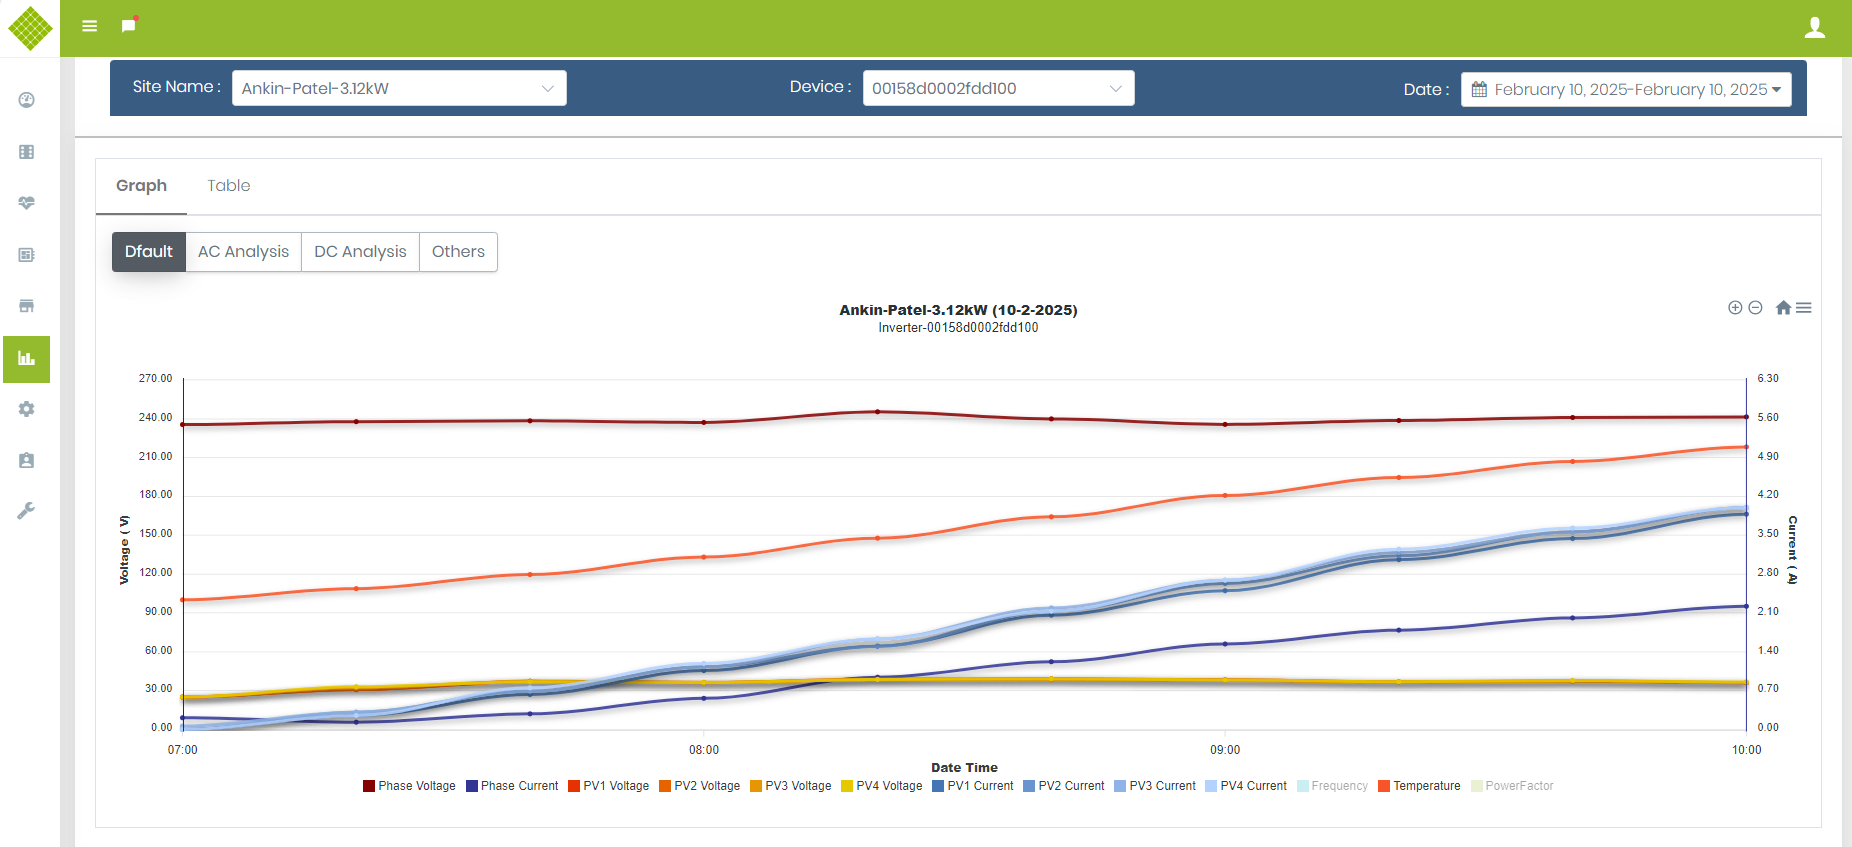
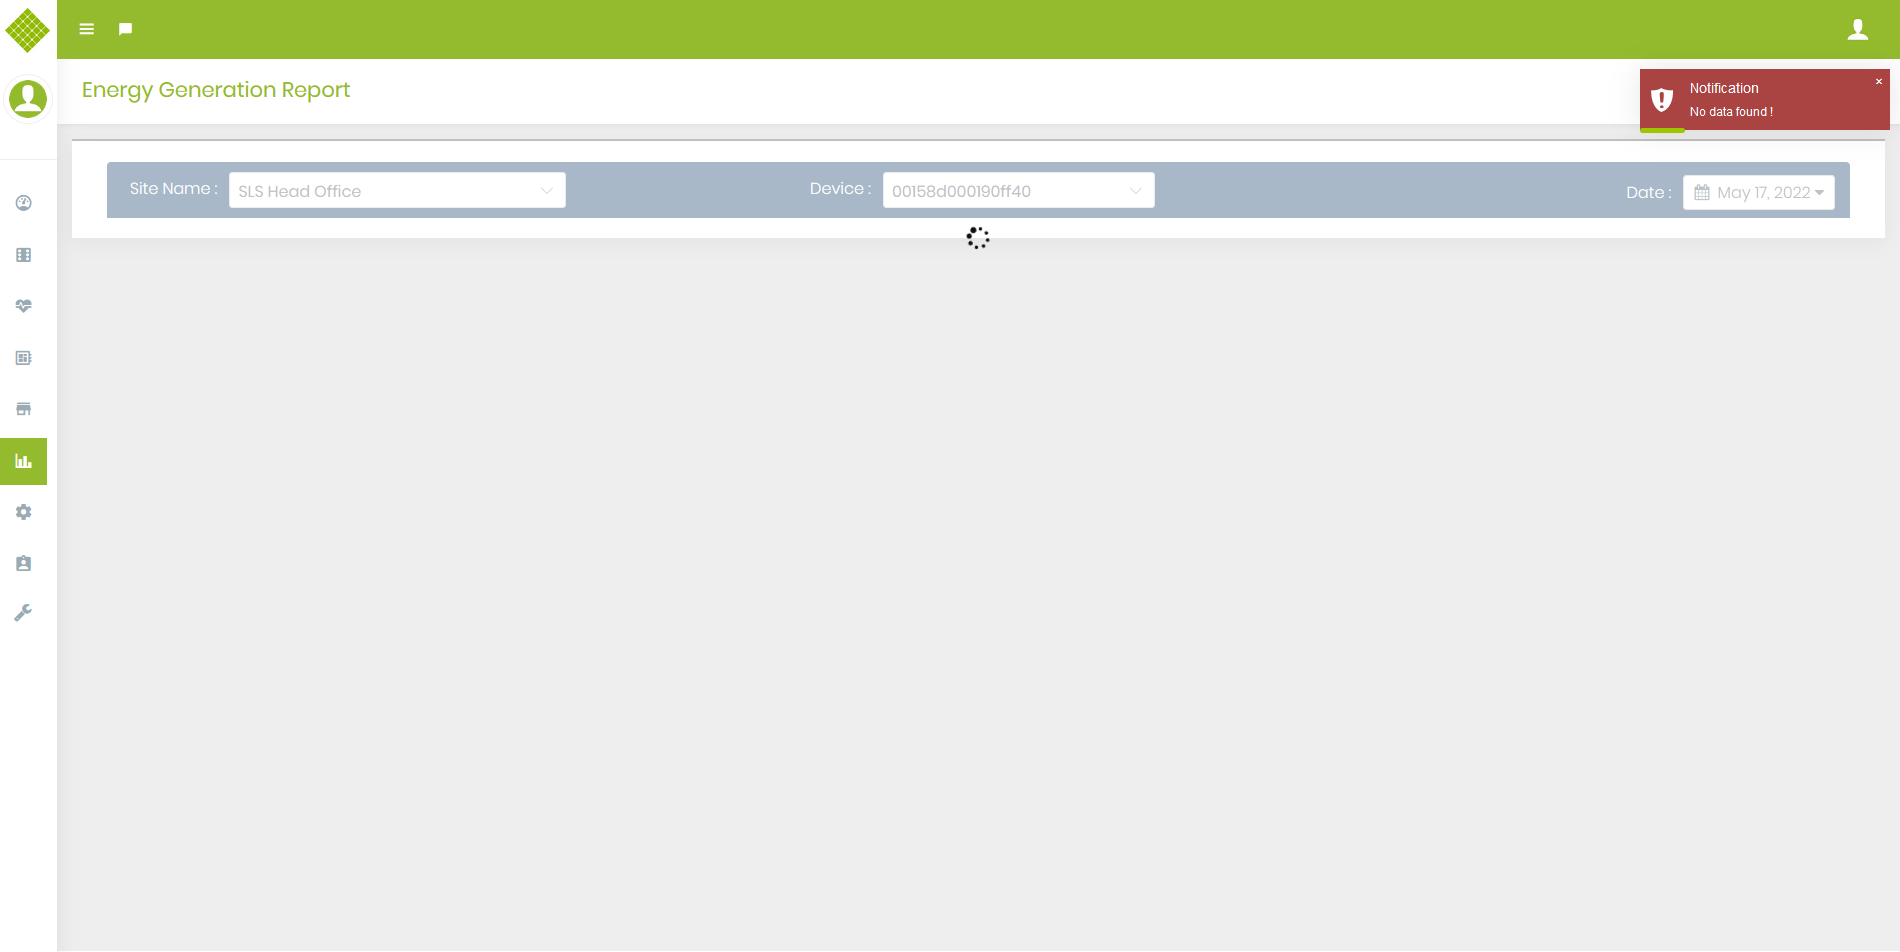
Energy Generation
- After selecting string inverter site name and string inverter mac you can get selected date data on chart format.
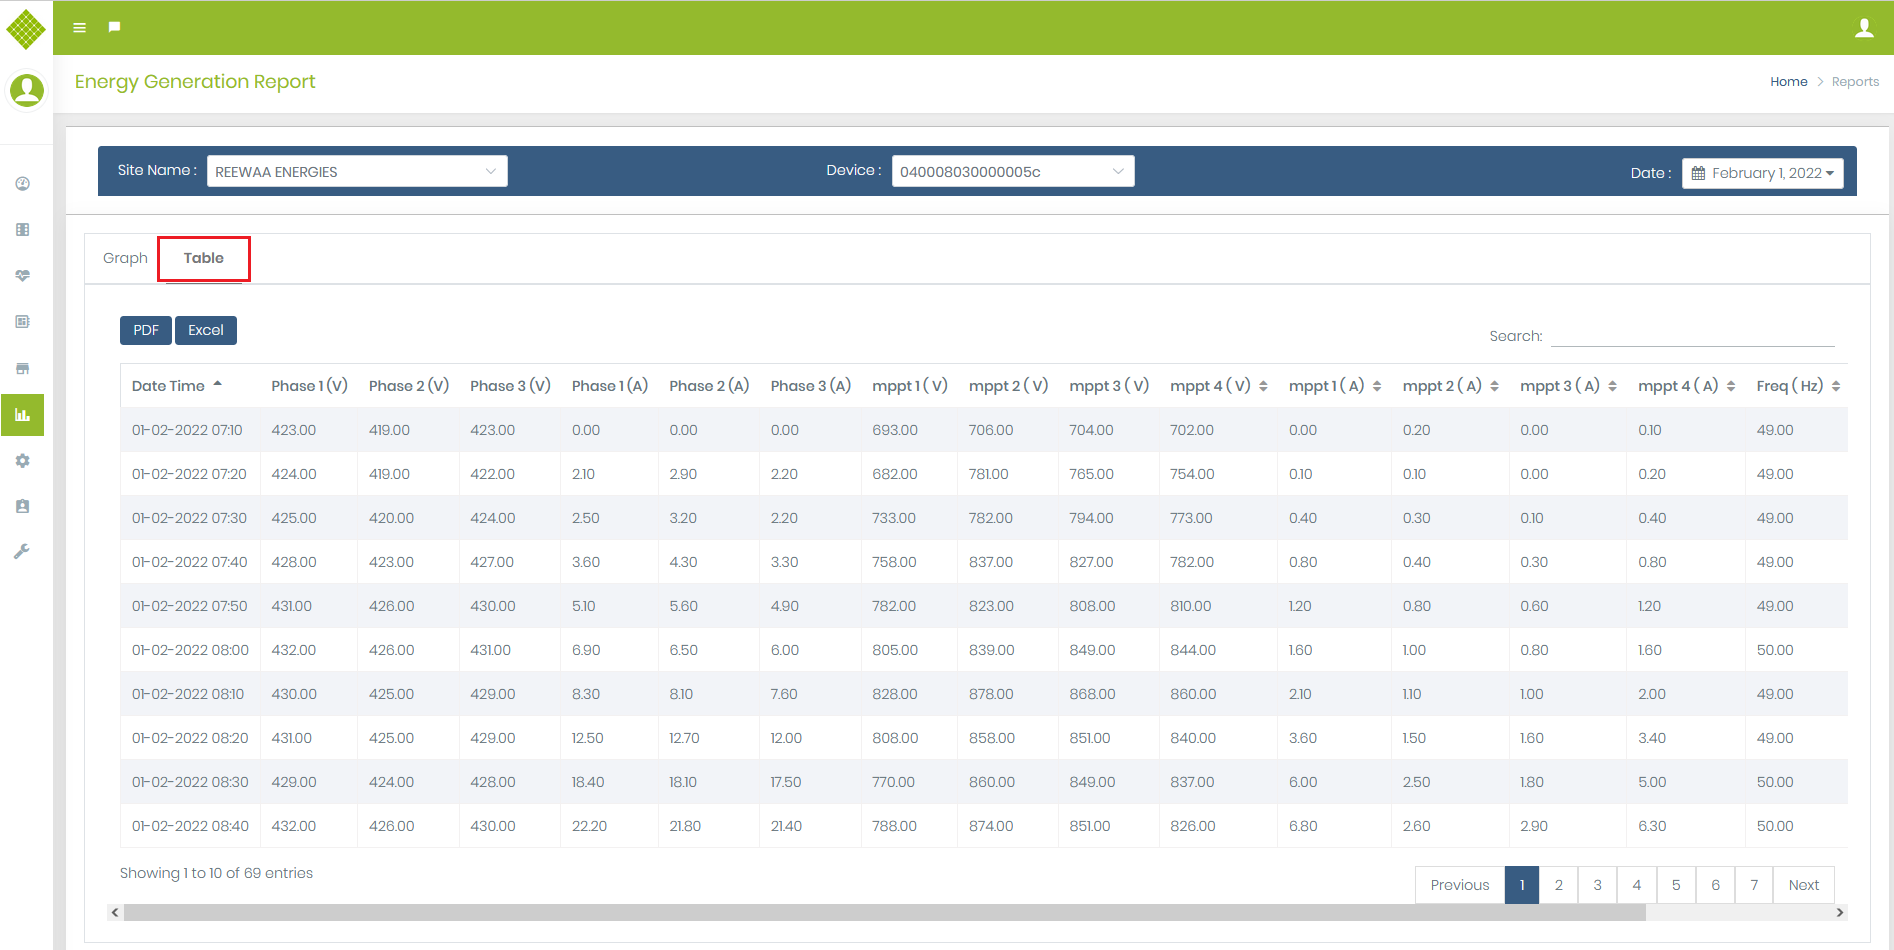
- We can also see data on on tabular formate as selecting Table tabel :
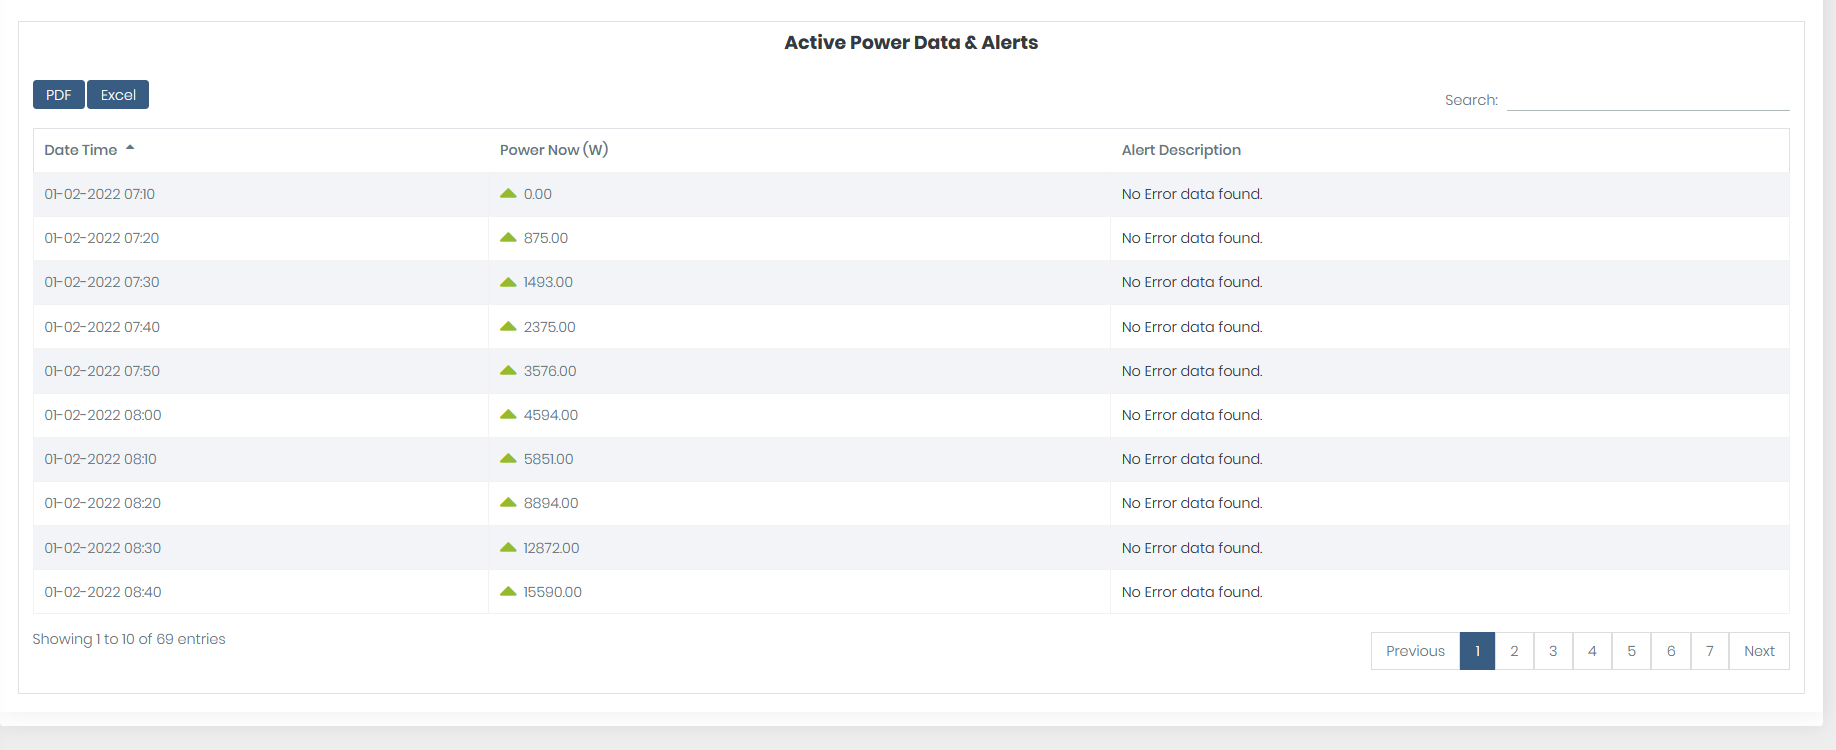
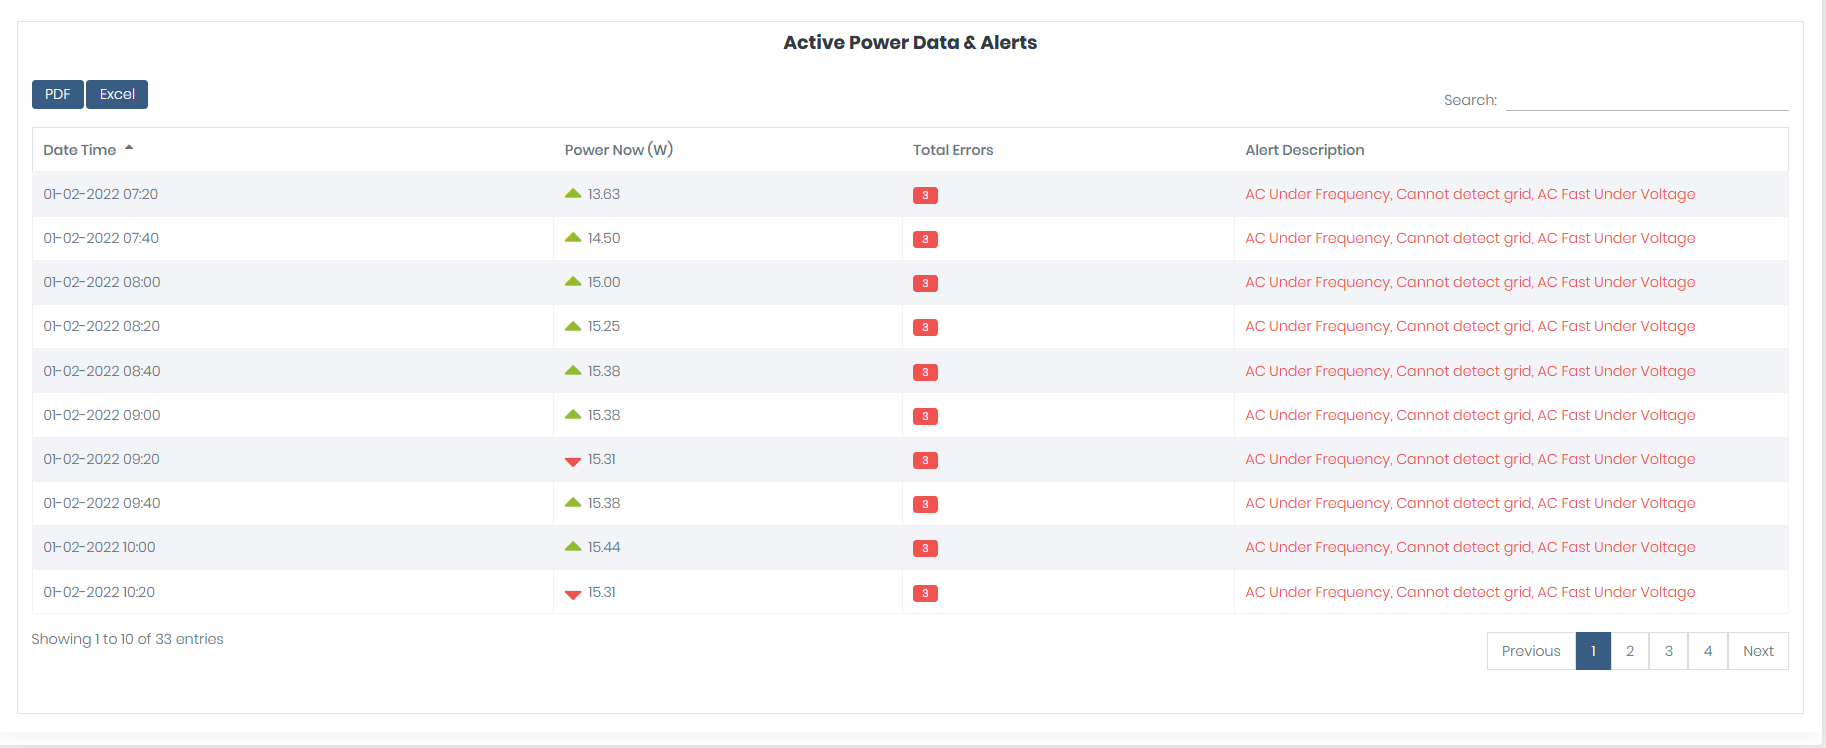
- We can get Error Data in "Active Power and Data Alerts" section
- If error is there than Error Message is display inside Alert Description with red font.
- If there is no error than "No Error data found" message will display.
- If there is no data available on seleted date than "No Data Found" notification will display.
Configuration
Firmware Configuration
Upload Binary
- Only Admin have rights of upload firmware file.
-
How to upload binary
- Go to Configuration menu, click on Firmware Configuration in left sidebar.
- Select Upload Binary option in menu. It will open GUI of upload.
-
In GUI, All fields are required.
-
Select Binary file.
Only .bin file acceptable with any name. - Select Site Type.
- Select Gateway Hardware Type.
-
Enter Host Firmware Version.
Accept 4 digit with hex value only. -
Enter Network Firmware Version
Accept 4 digit with hex value only. -
Enter Inverter Firmware Version
Accept 4 digit with hex value only.
-
Select Binary file.
- If you want upload binary then click on Upload Button
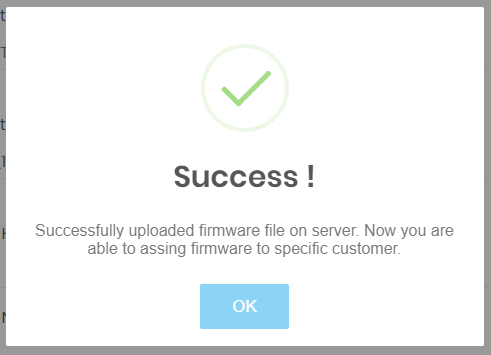
- If Successfully binary upload then open popup and display message like
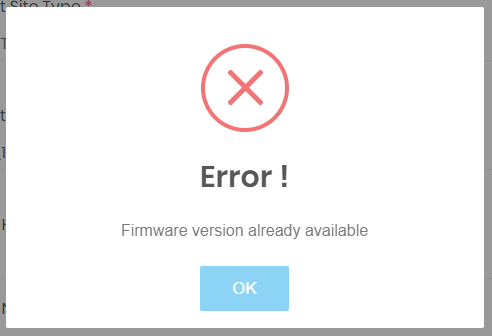
- If Error in upload binary then give error message like

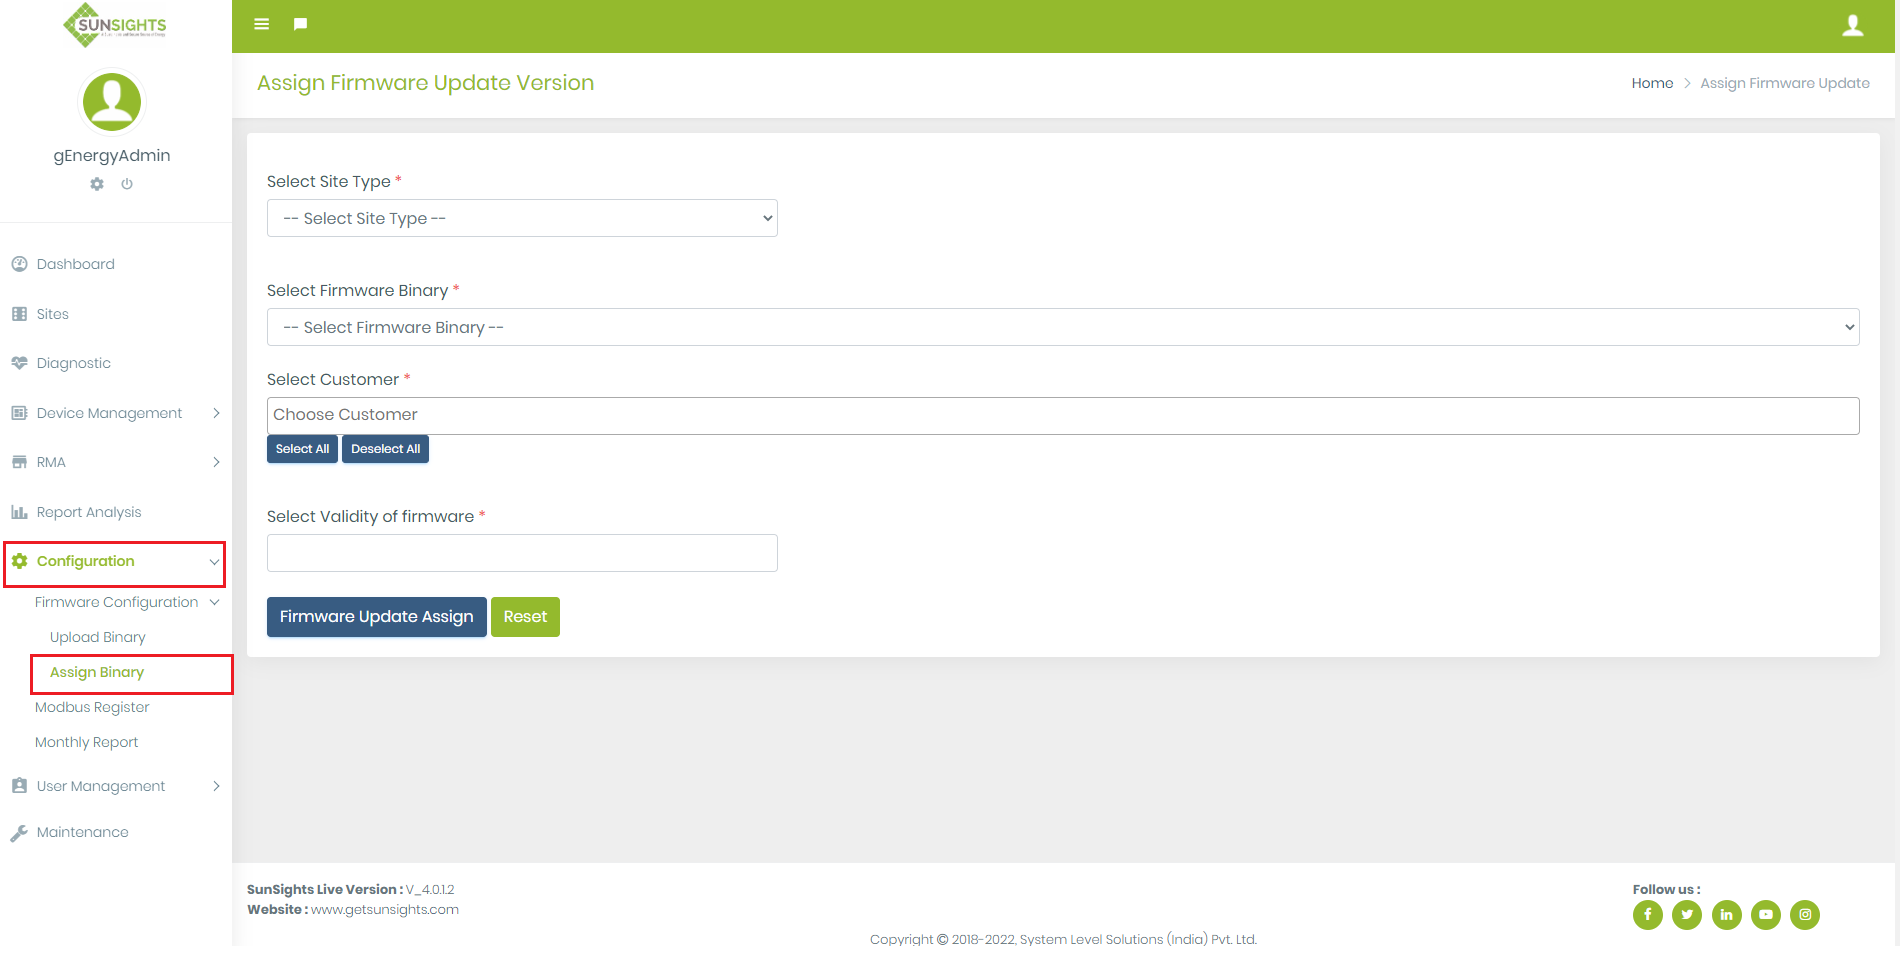
Firmware Version and validity Assign to Customer
- Admin and Supplier have rights to assign firmware to their customer.
-
How to assign firmware version to specific user.
- Go to Configuration menu, click on Firmware Configuration in left sidebar.
- Select Assign Binary option in menu. You can see it in below image.
-
In GUI, All fields are required.
- Select Site Type
-
Select Firmware Binary
As per selection of site type, getting firmware files that have location already stored in data base. - Select Customer
-
Also as per selection of site type, getting customer list.
 You want to select all customer then click on this button.
 You want to deselect all customer then click on this button.
-
Select Firmware Validity
Give selection of date from current date.
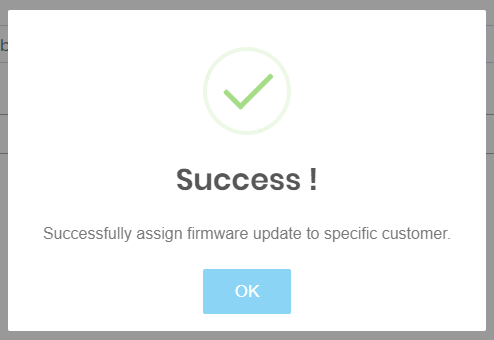
- If want to assign firmware update to specific user then fill the form and click on “Firmware Update Assign” button.
- If Successfully firmware update assign then open popup and display message like
- If facing error during assign firmware update then give error message in popup.
Firmware Update
How to do firmware update-
Go to Site List module.
See below image. -
Go to Site details module by click on
 from site list of specific site.
- If firmware update is available for site then display firmware update link in site information.
- If firmware update is not available for site then not display firmware link in site information like below image
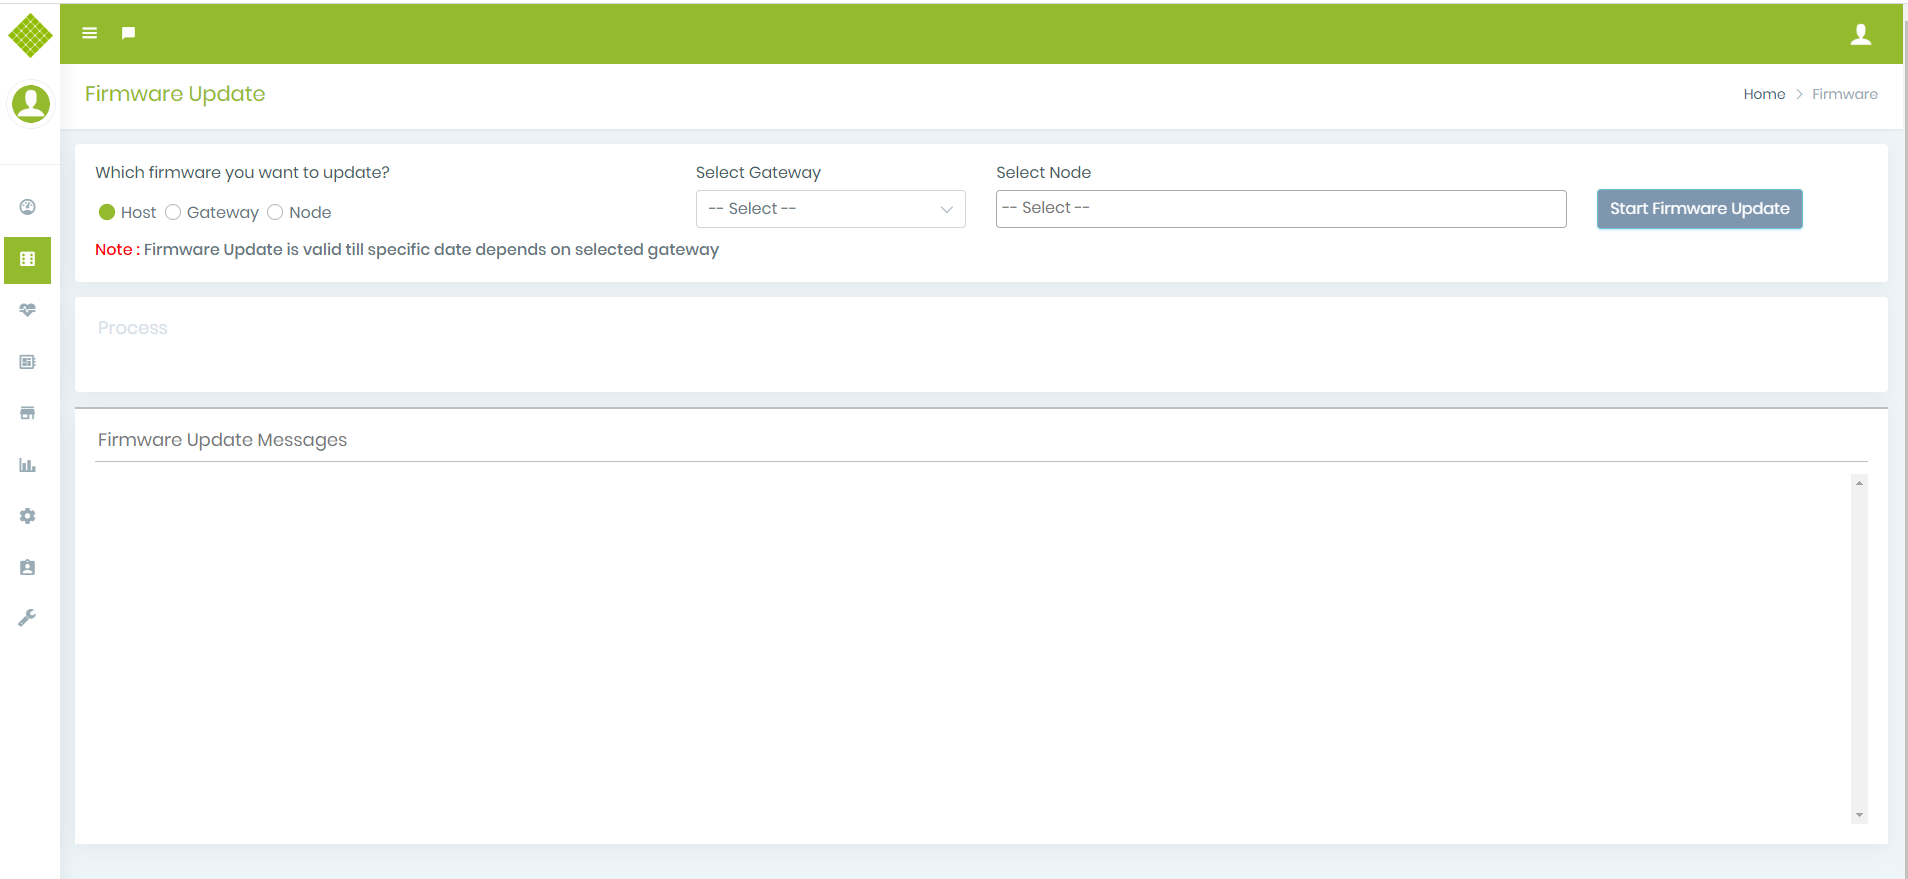
- If want firmware update then click on firmware update link. View GUI of firmware update module.
-
If want firmware update then give specific inputs and click on

Type of firmware update- Host
- Gateway
- Node
- Getting list of gateway that have firmware update available and fill drop down.
- Displaying validity of firmware in notes base on gateway selection.
- Selection of Gateway is required for all firmware types.
- Fill node list base on gateway selection.
- It is enable only when node firmware update type selected.
- We can select multiple node to firmware update.
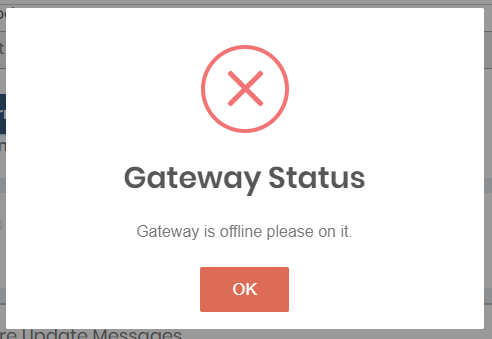
- If gateway is offline then display message like
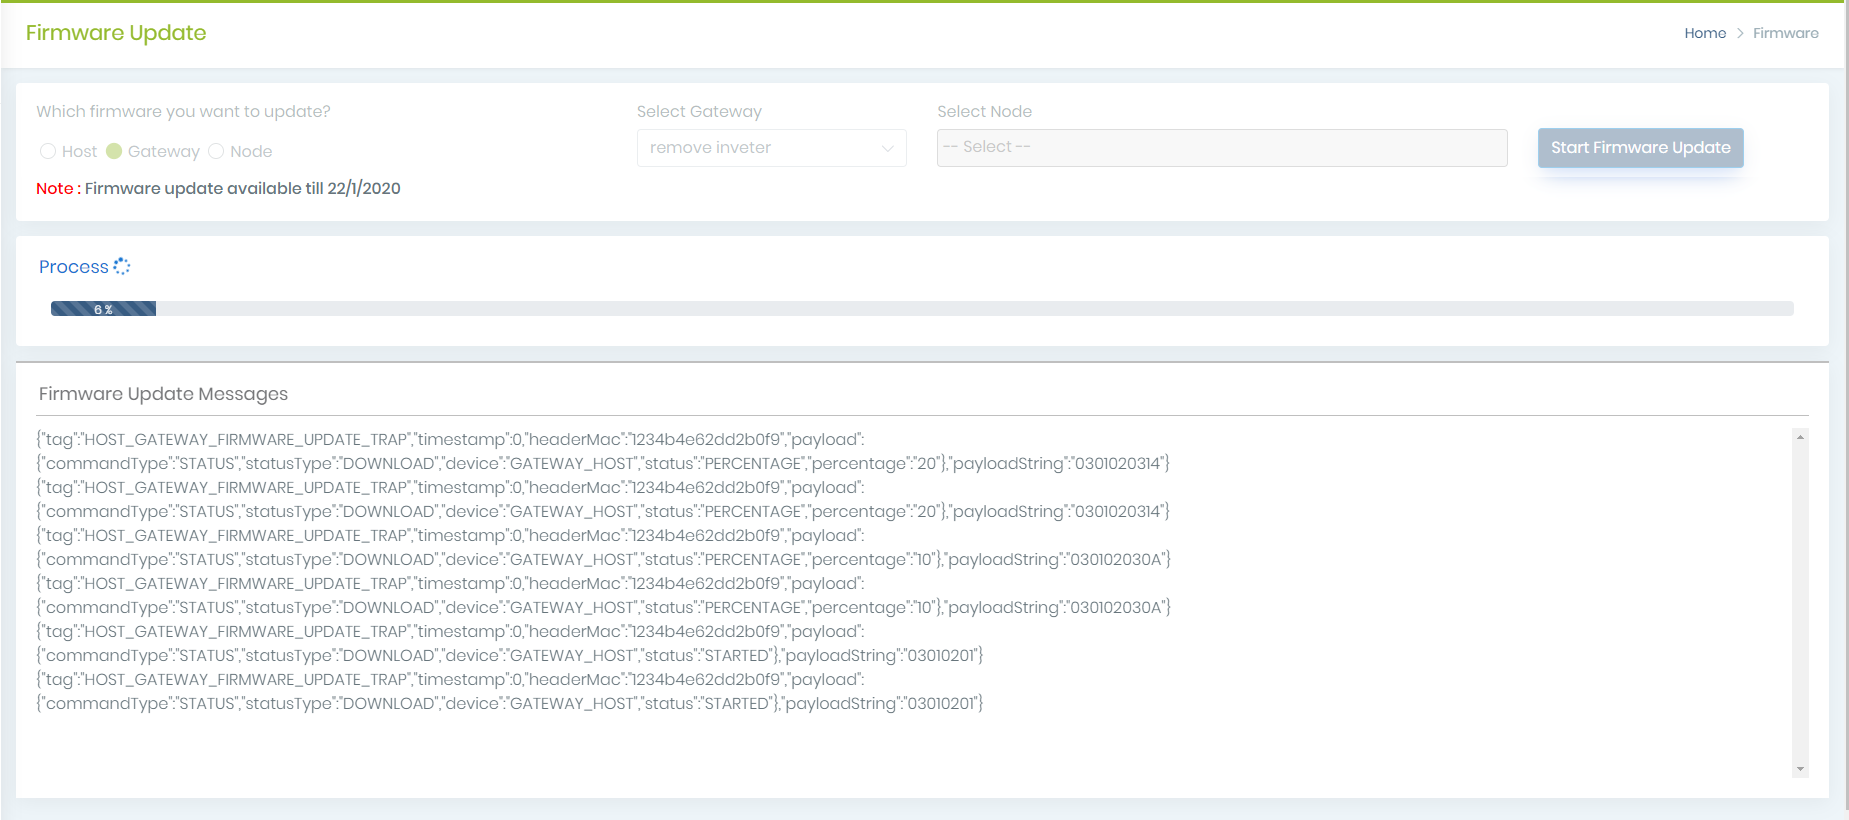
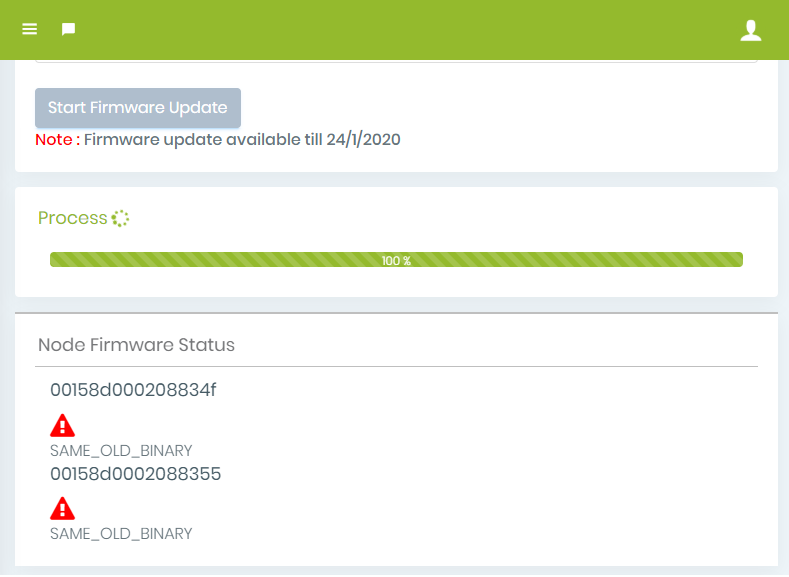
- If gateway is online then start firmware update. You have selected gateway of host firmware type then you can view GUI Like
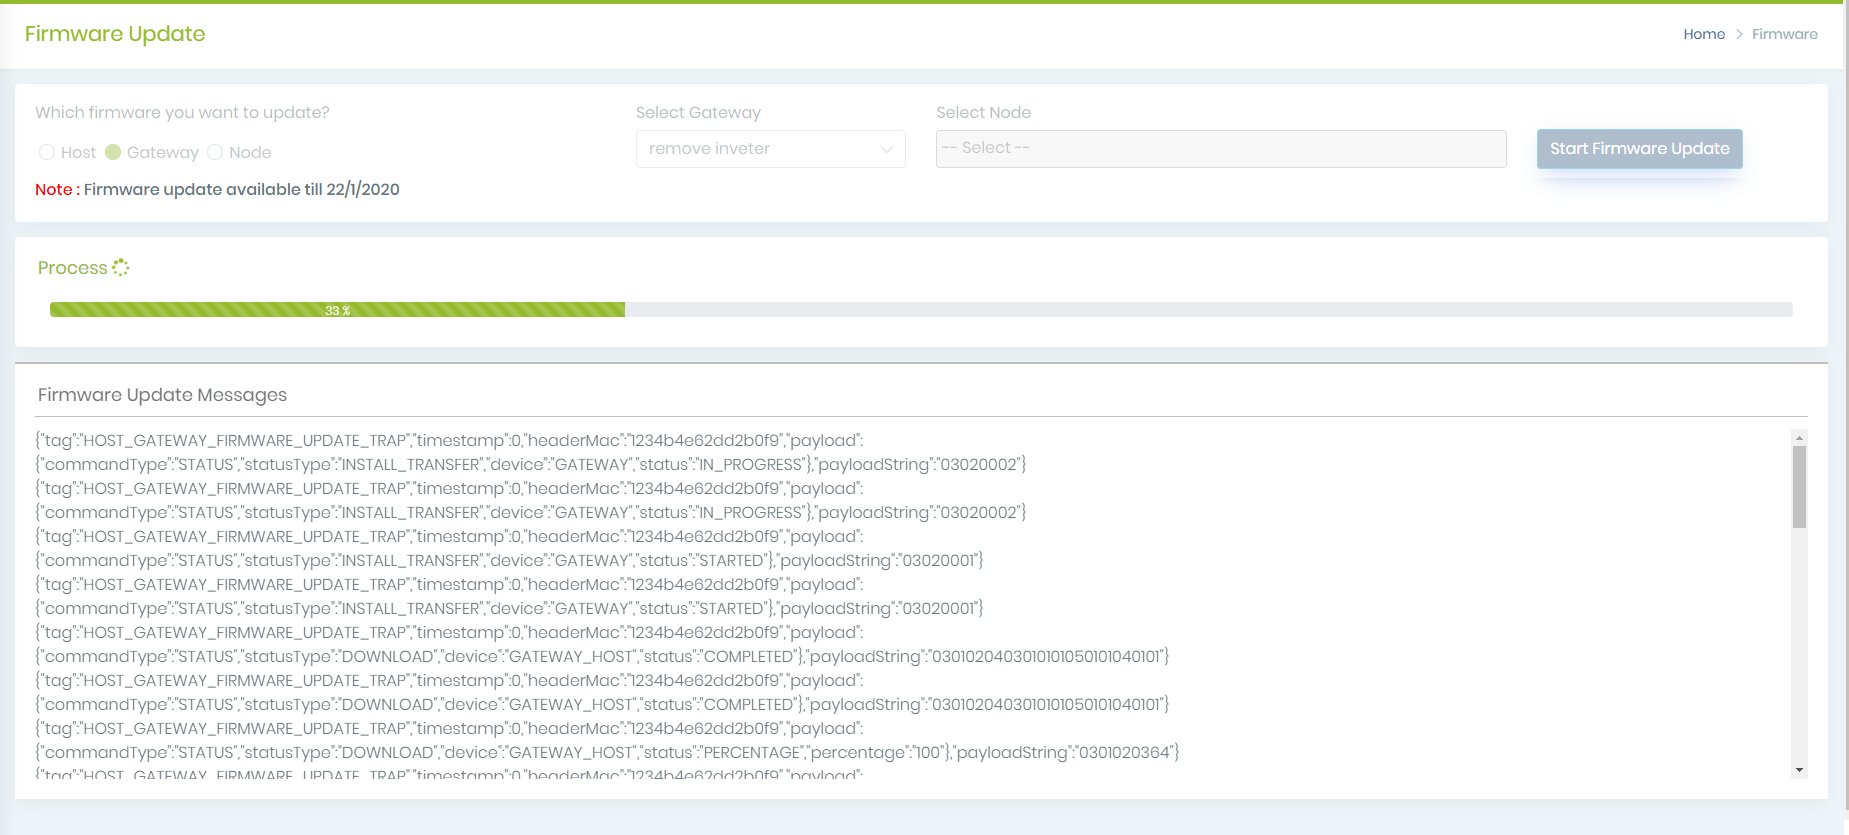
- After some percentage completed, you can see like
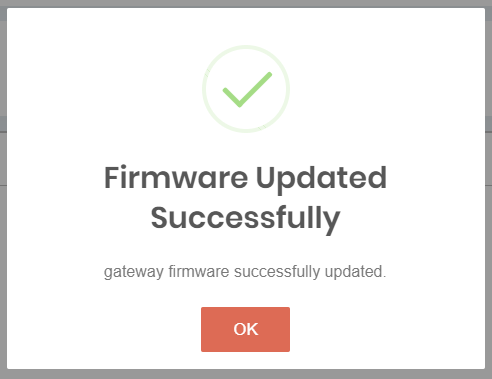
- Successfully completed firmware update then view like
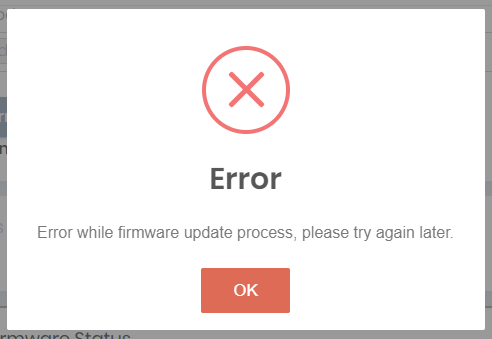
- If facing any other issue then display popup with error message.
- When doing node firmware update and facing issue of same binary, give error message like
This link is continuous blinking.

If you have selected Node then display GUI like

Here, Giving Node Firmware Status view. It display status of node when done node firmware.
Modbus Register
1.Add Modbus Detail
-
Go to Configuration menu, click on Modbus register menu in left sidebar.
You get Following Screen: -
Click on the the
 to add new configuration
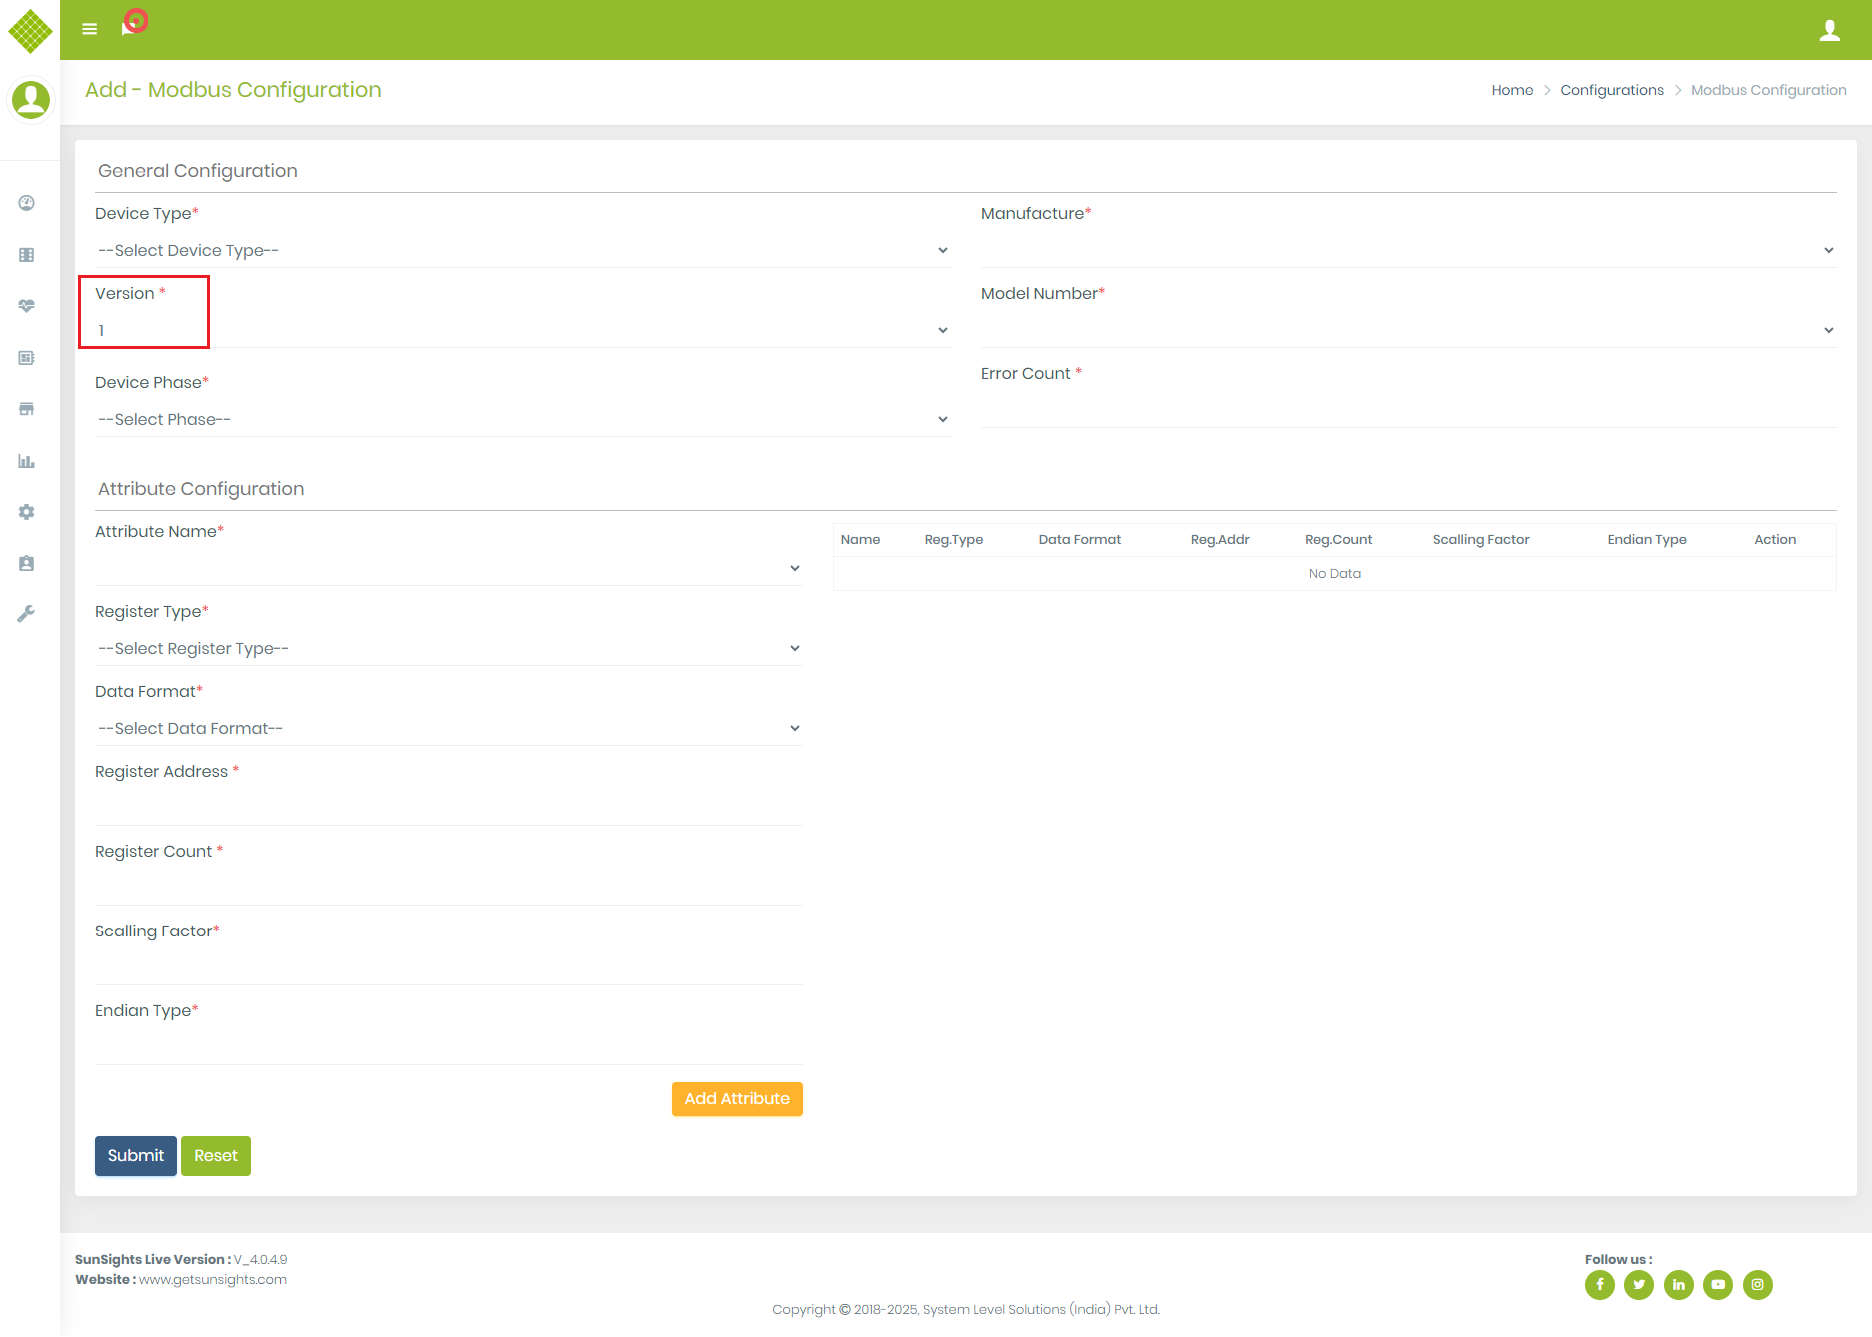
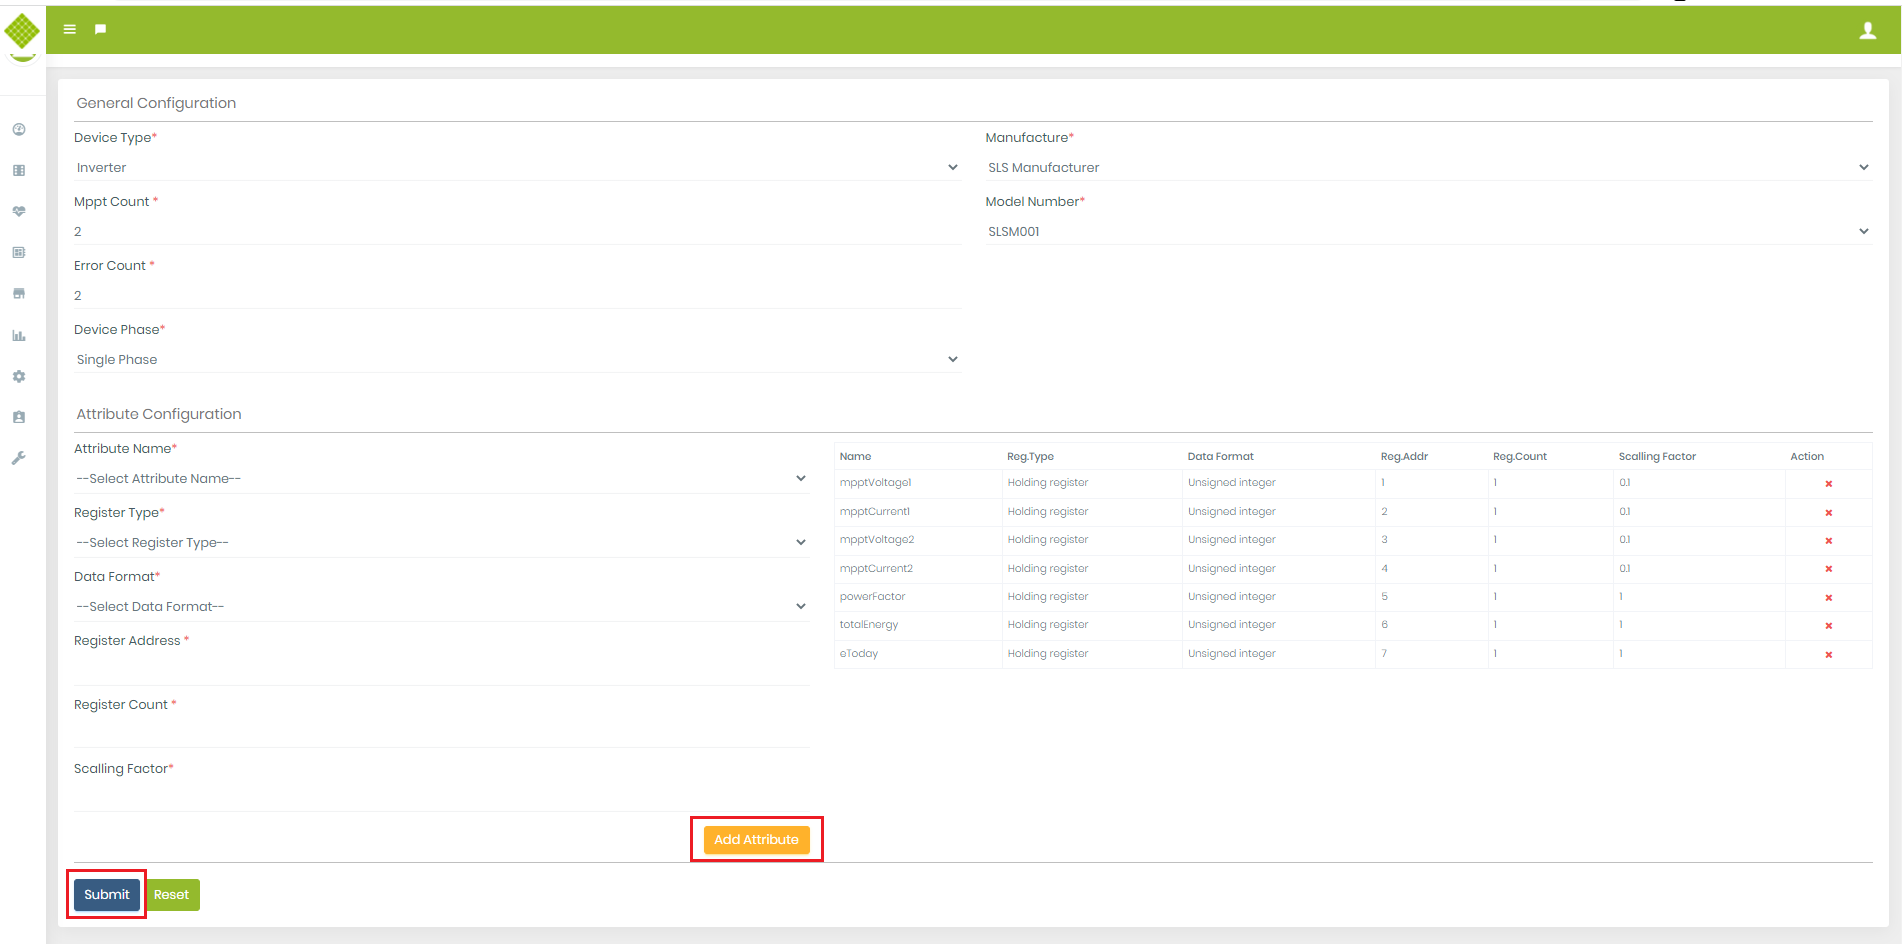
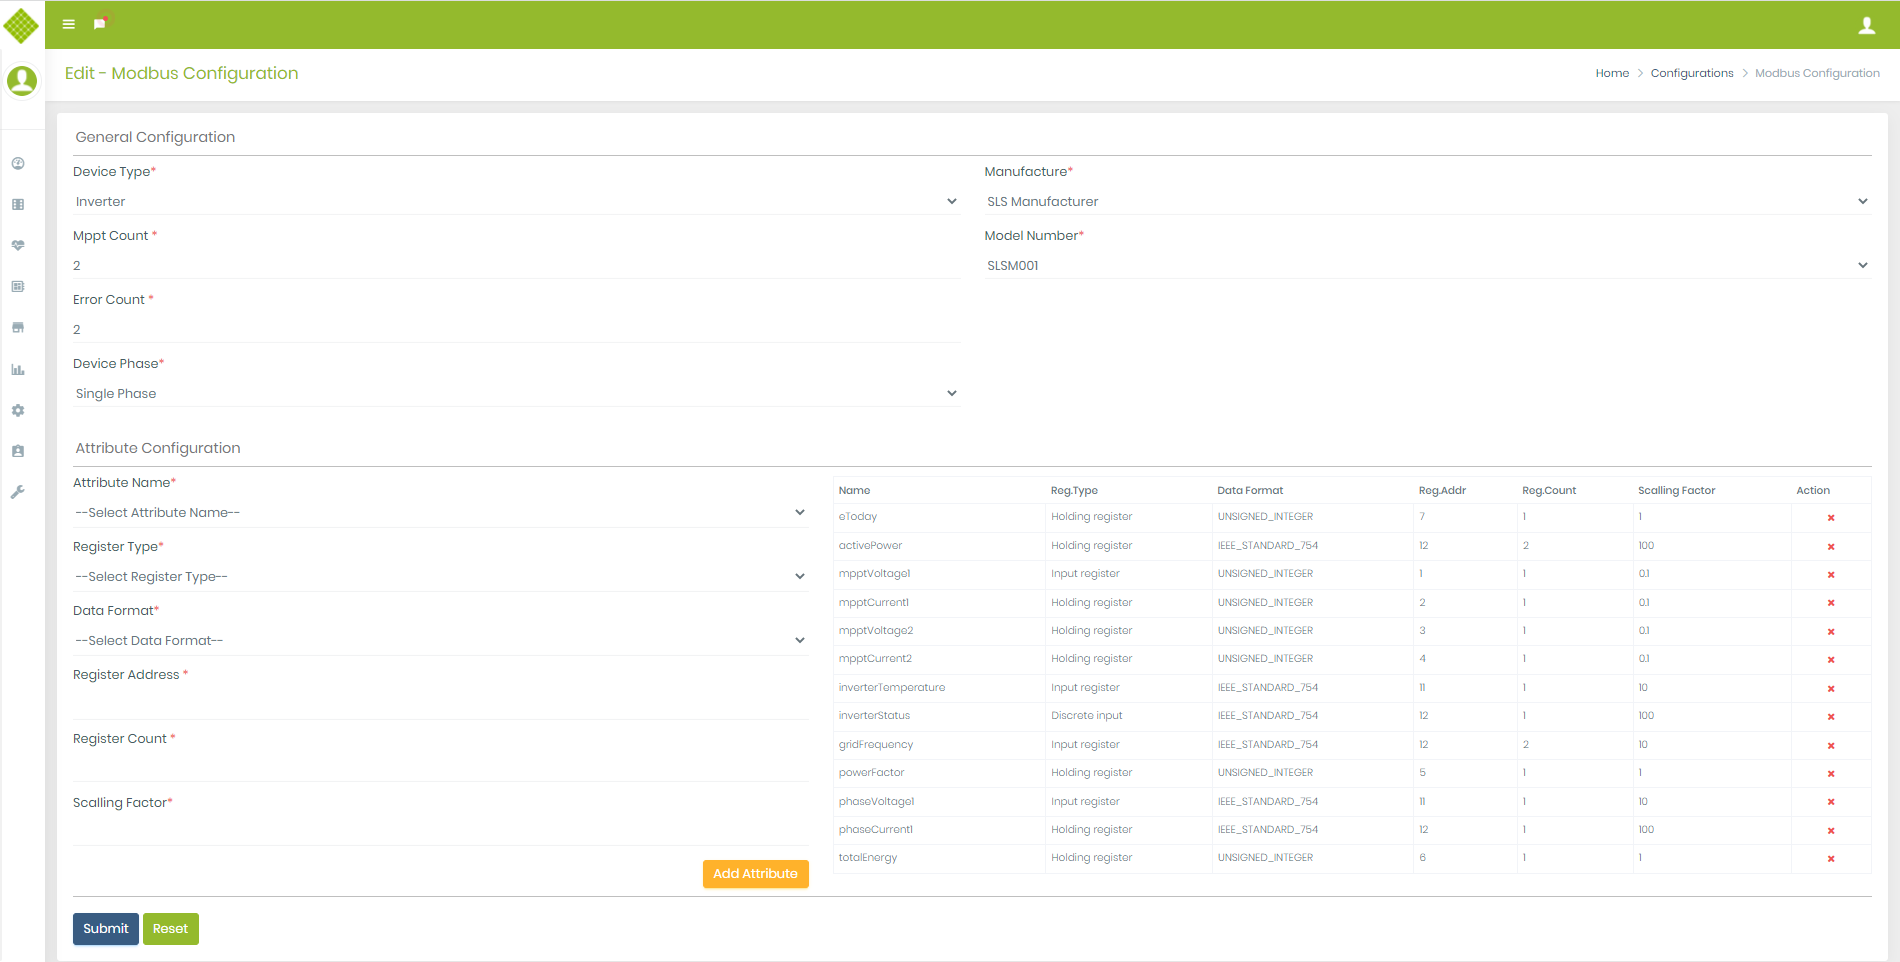
- Here you select modbus Device type, it is Inverter, Meter or Sensor based on that you can add configuration of that device.
- Based on device type General Configuration and Attribute configuration may vary.
-
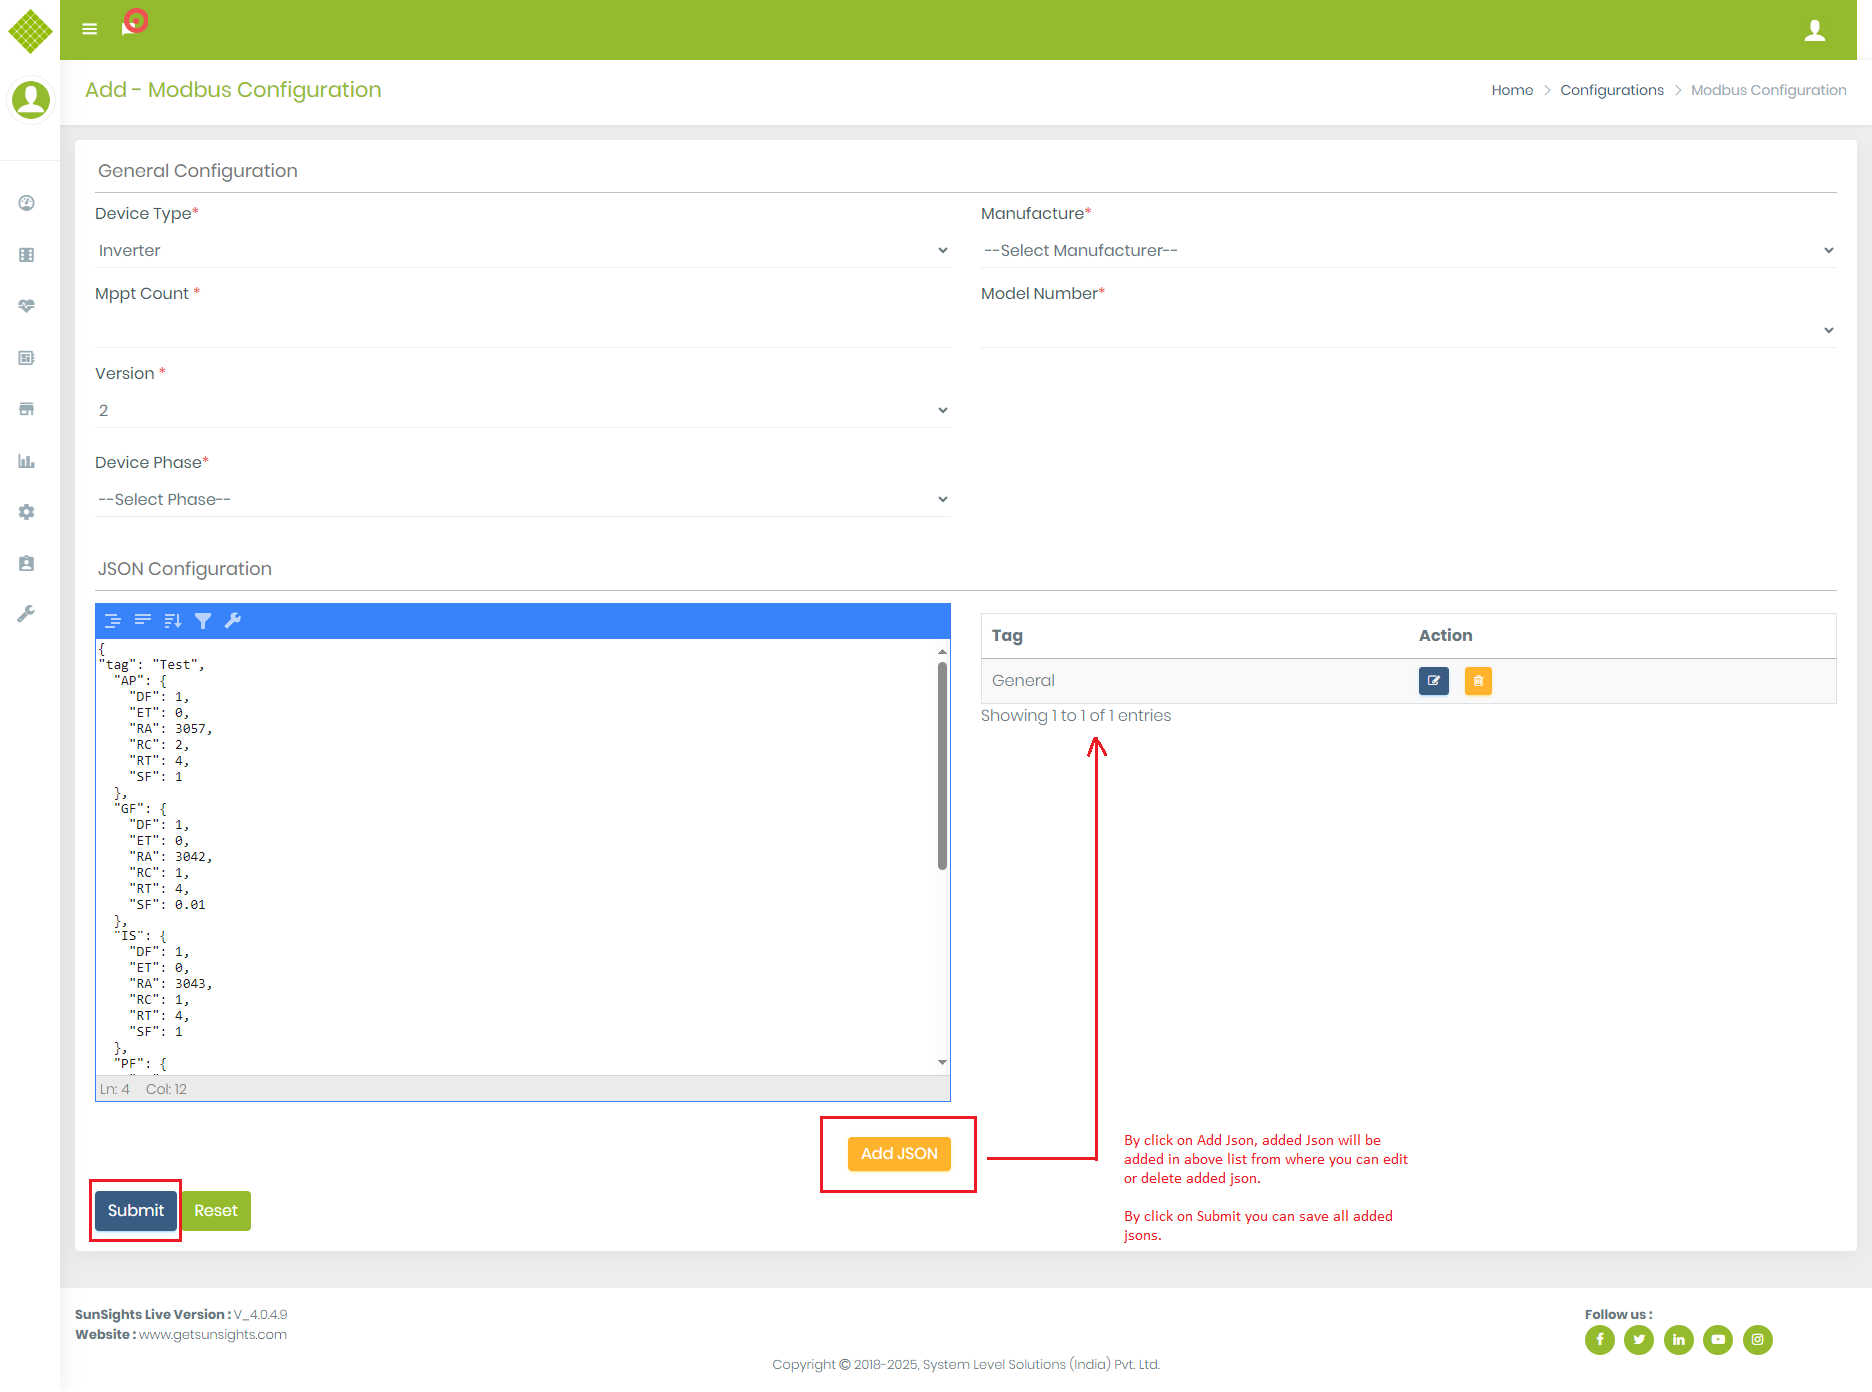
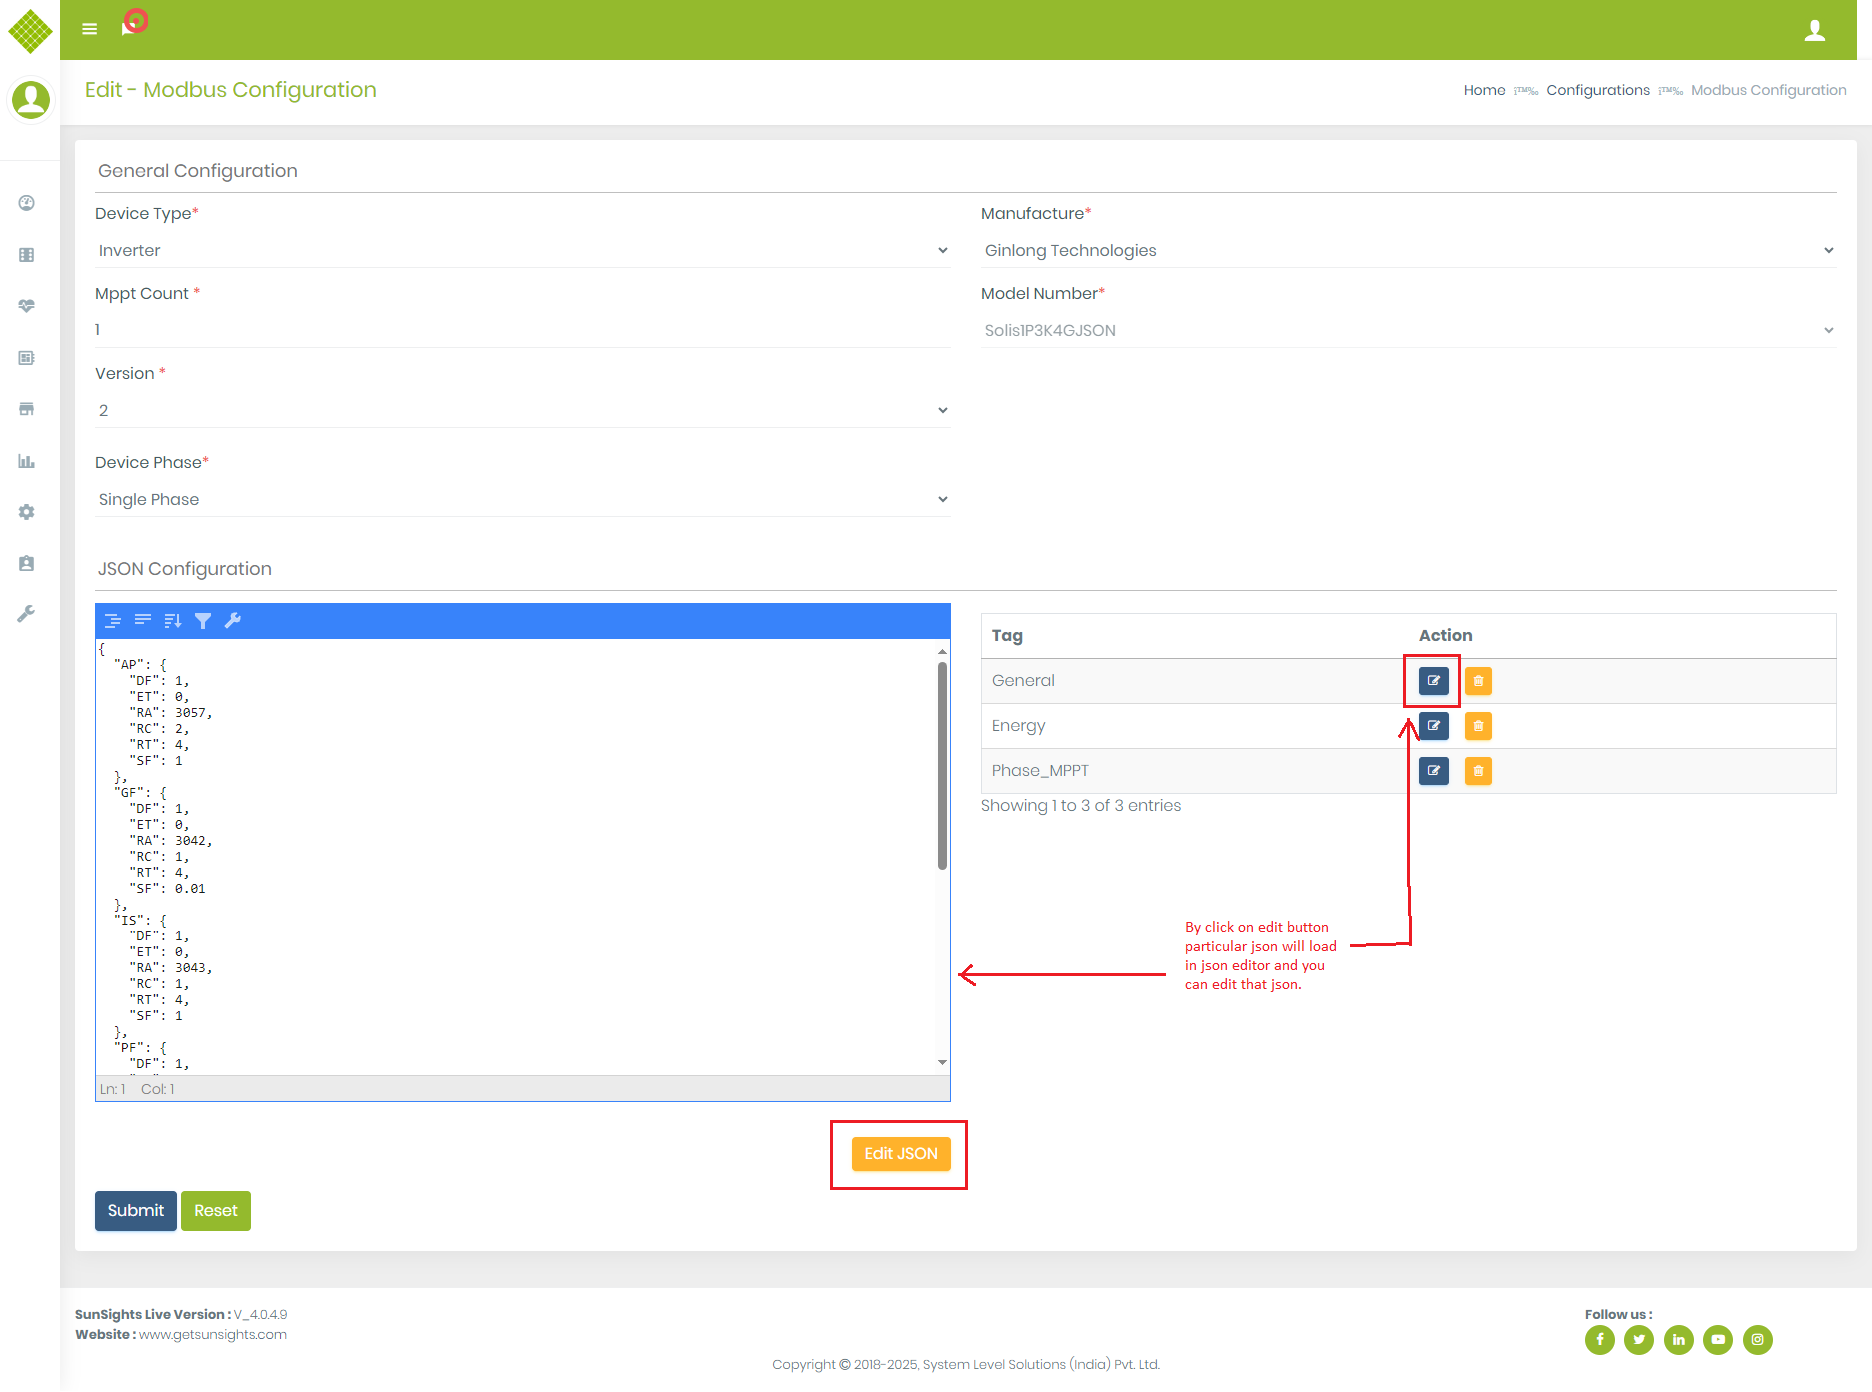
Version here is plays important role on how COnfiguration will add.
→ For Version 1 configuration is added as attributes.
→ For Version 2 configuration is added as JSON. - On clicking on add configuration of multiple attribute of that selected device.
- After adding all attributes configuration click on Submit.
- We get Success Notification.
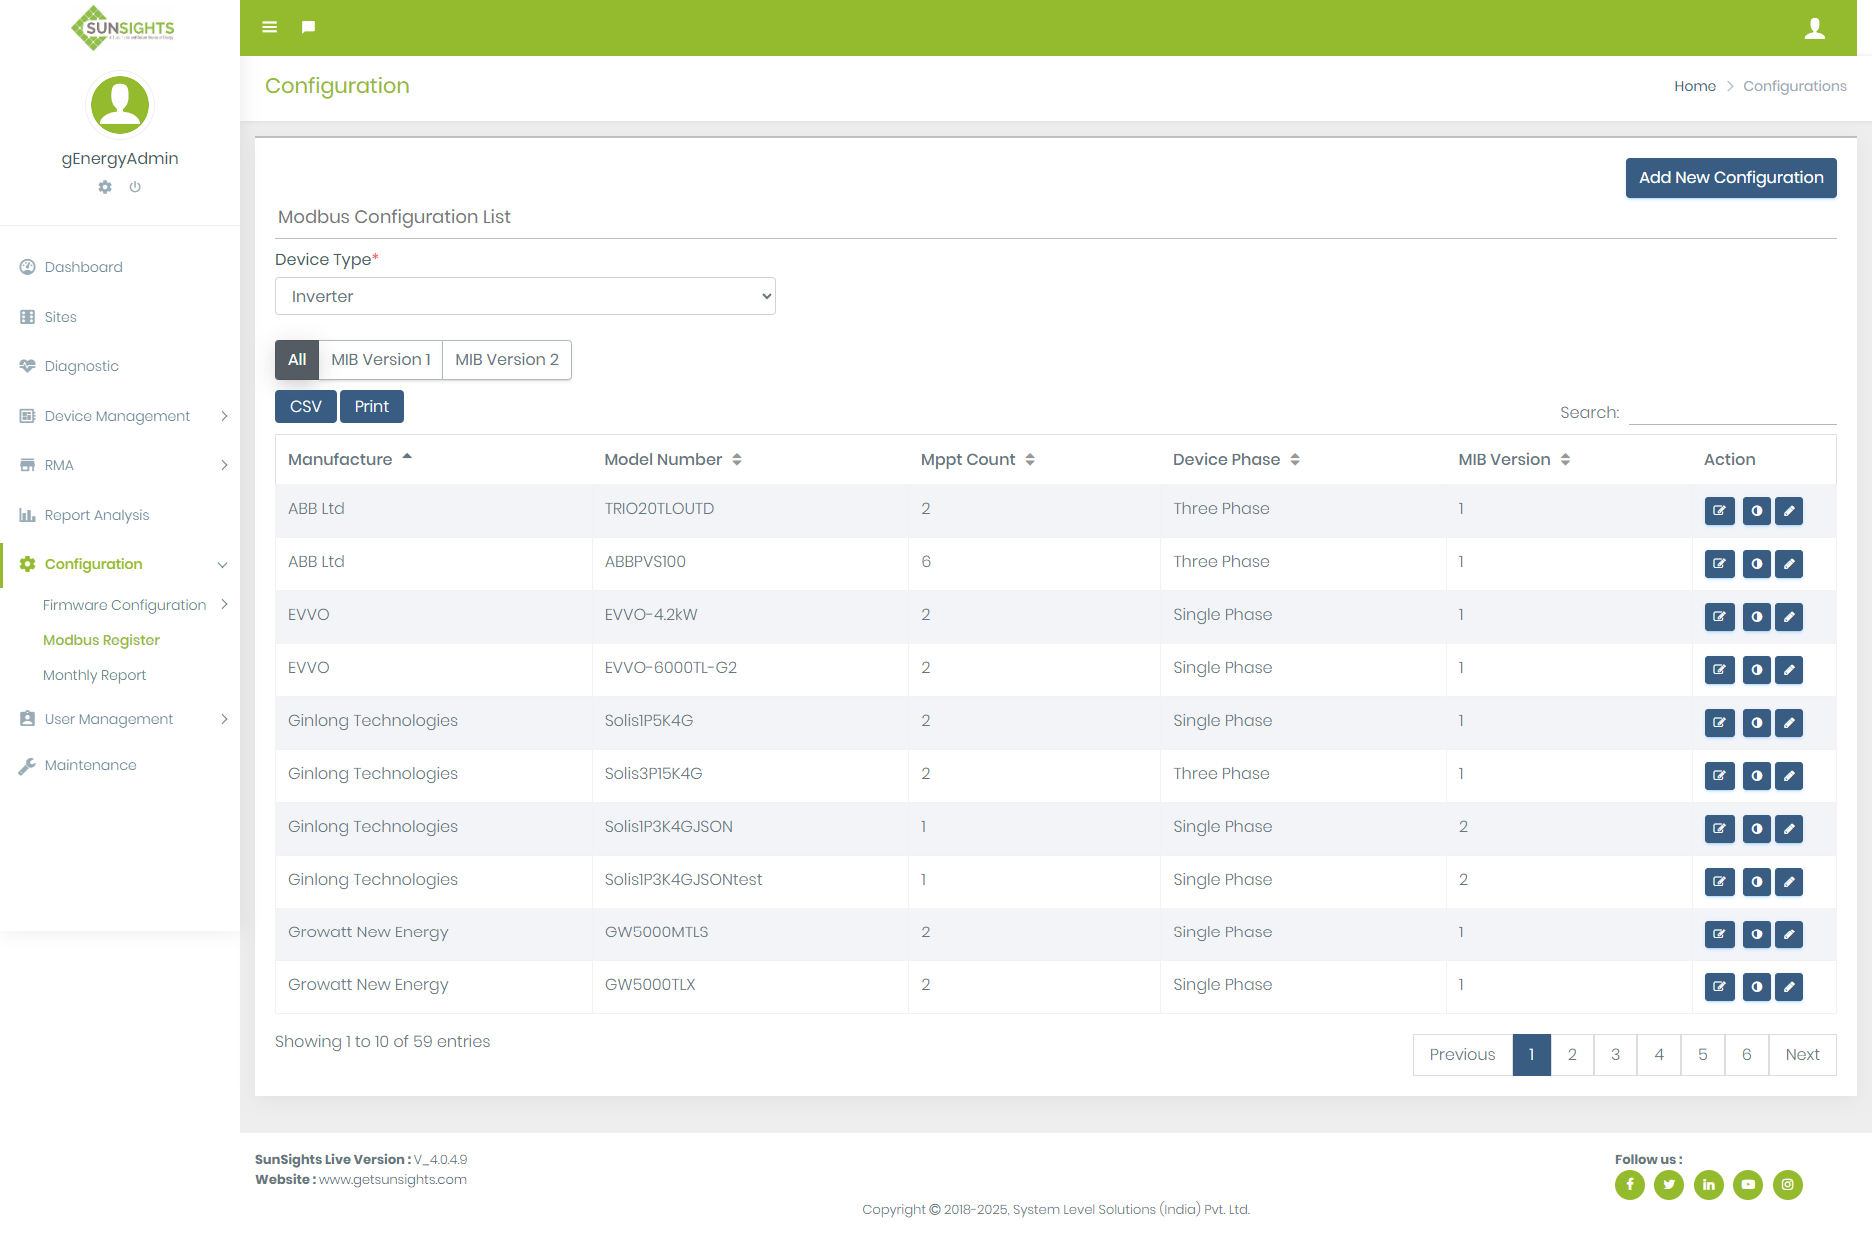
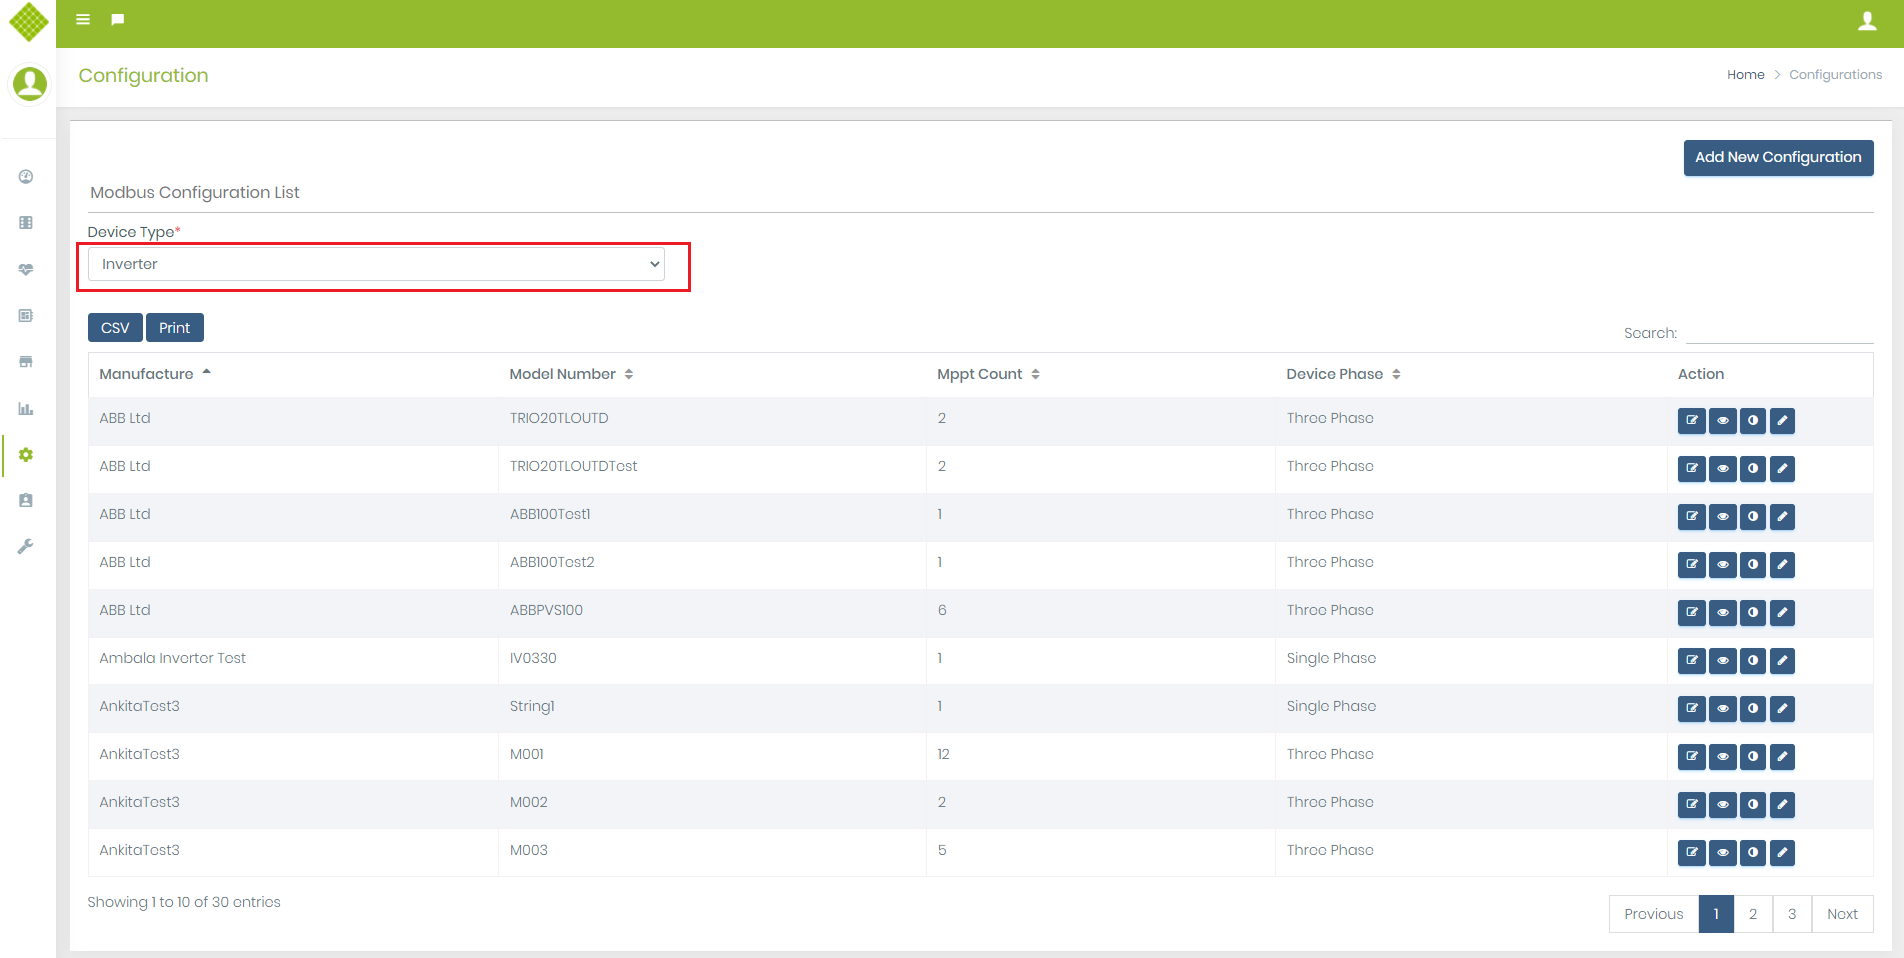
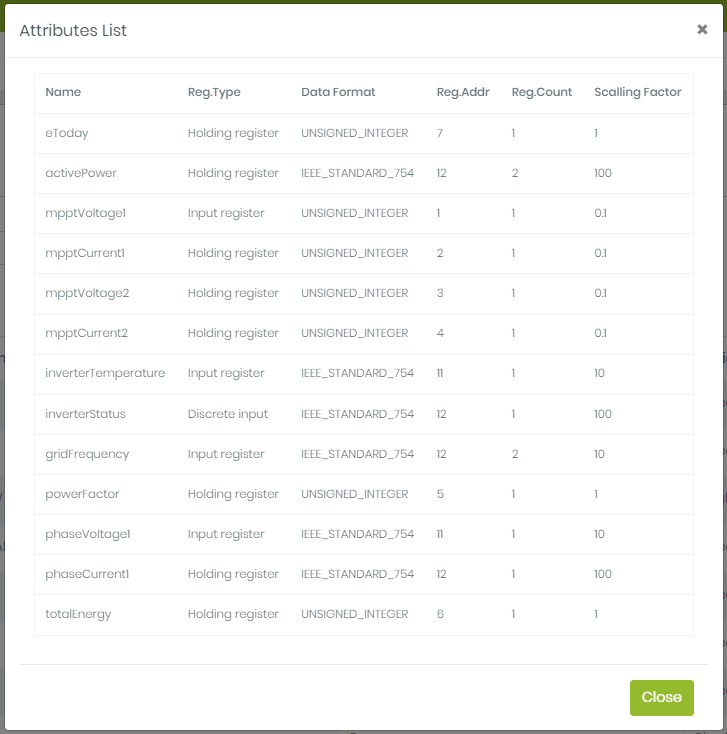
2.View Modbus Detail
- Open Modbus Register page Select Device Type.
- We get list of created configuration base on device type.
-
Click on
 to View Modbus Configuration
- You can get added configuration detail in popup.
3.Update Modbus Detail
-
Click on
 to Edit Modbus Configuration
- You can update General Configuration, Remove and Replace Attribute Configuration.
- After updating click on submit.
- We get Success Notification.
-
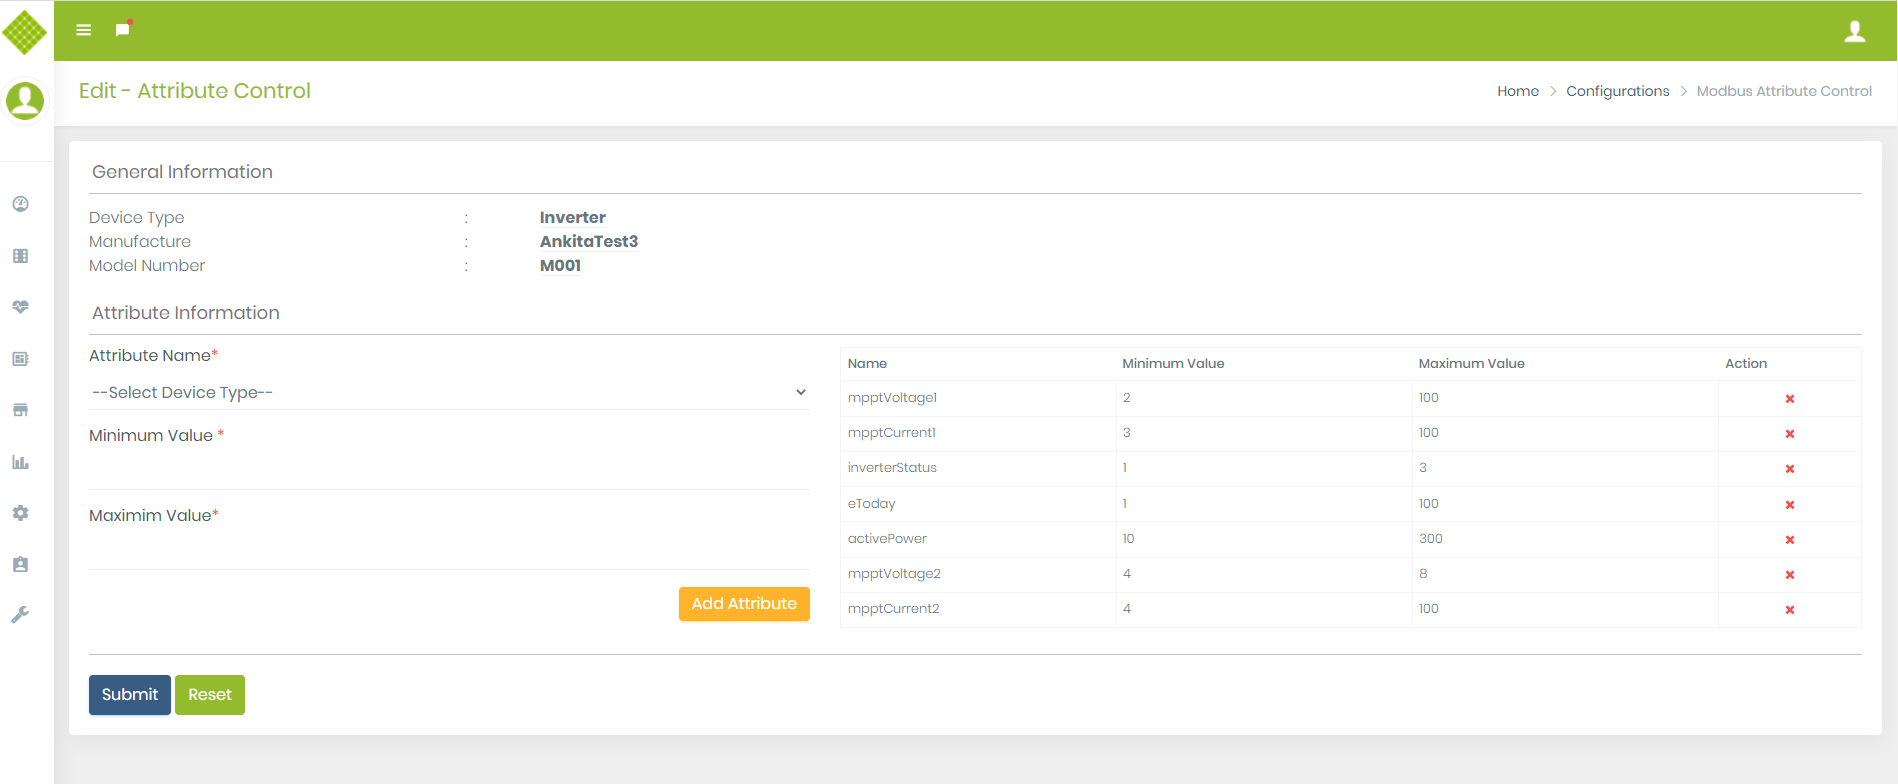
Click on
 to set Modbus Configuration Attribute Value.
- We can set min and max range of each attribute using this feature.
- Using Add Attribute we set multiple attribute as same time.
- After submiting the data we get Success Notification.
-
Click on
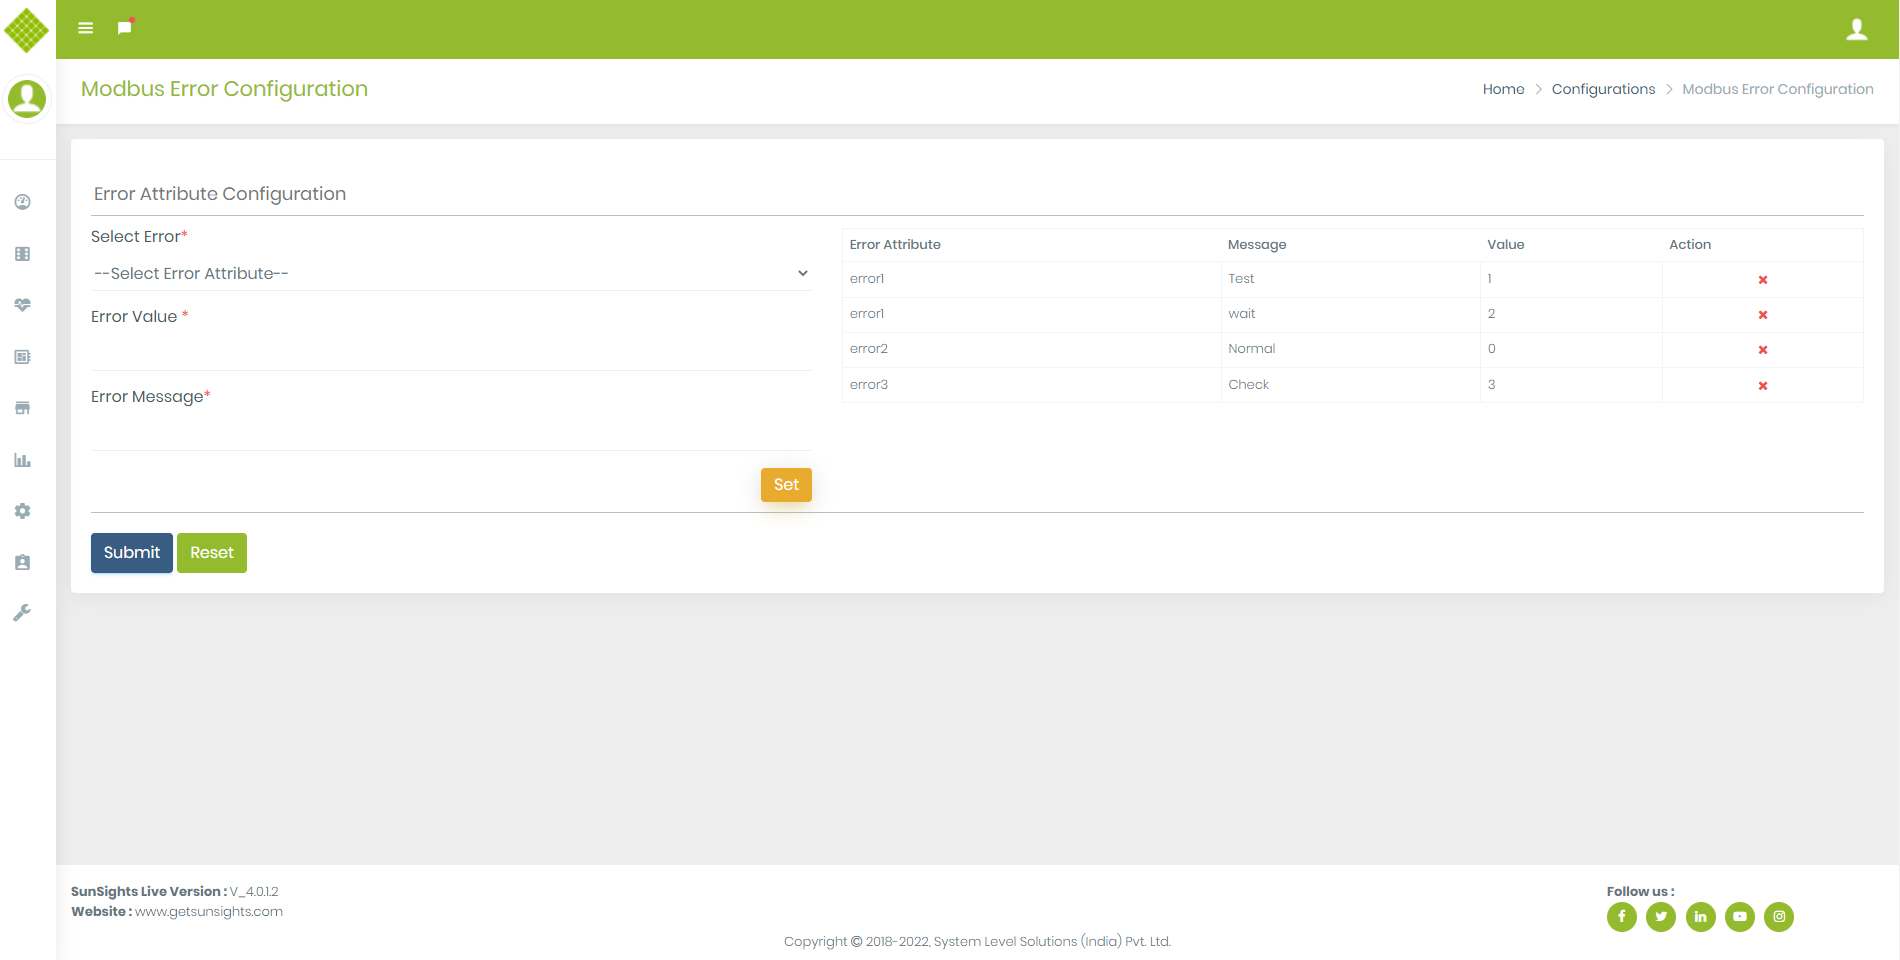
 to set Modbus Configuration Attribute Value.
- You can add Error Message name and its value.
- You can add multiple error at same by using Set.
- After submit you get Success Notification.
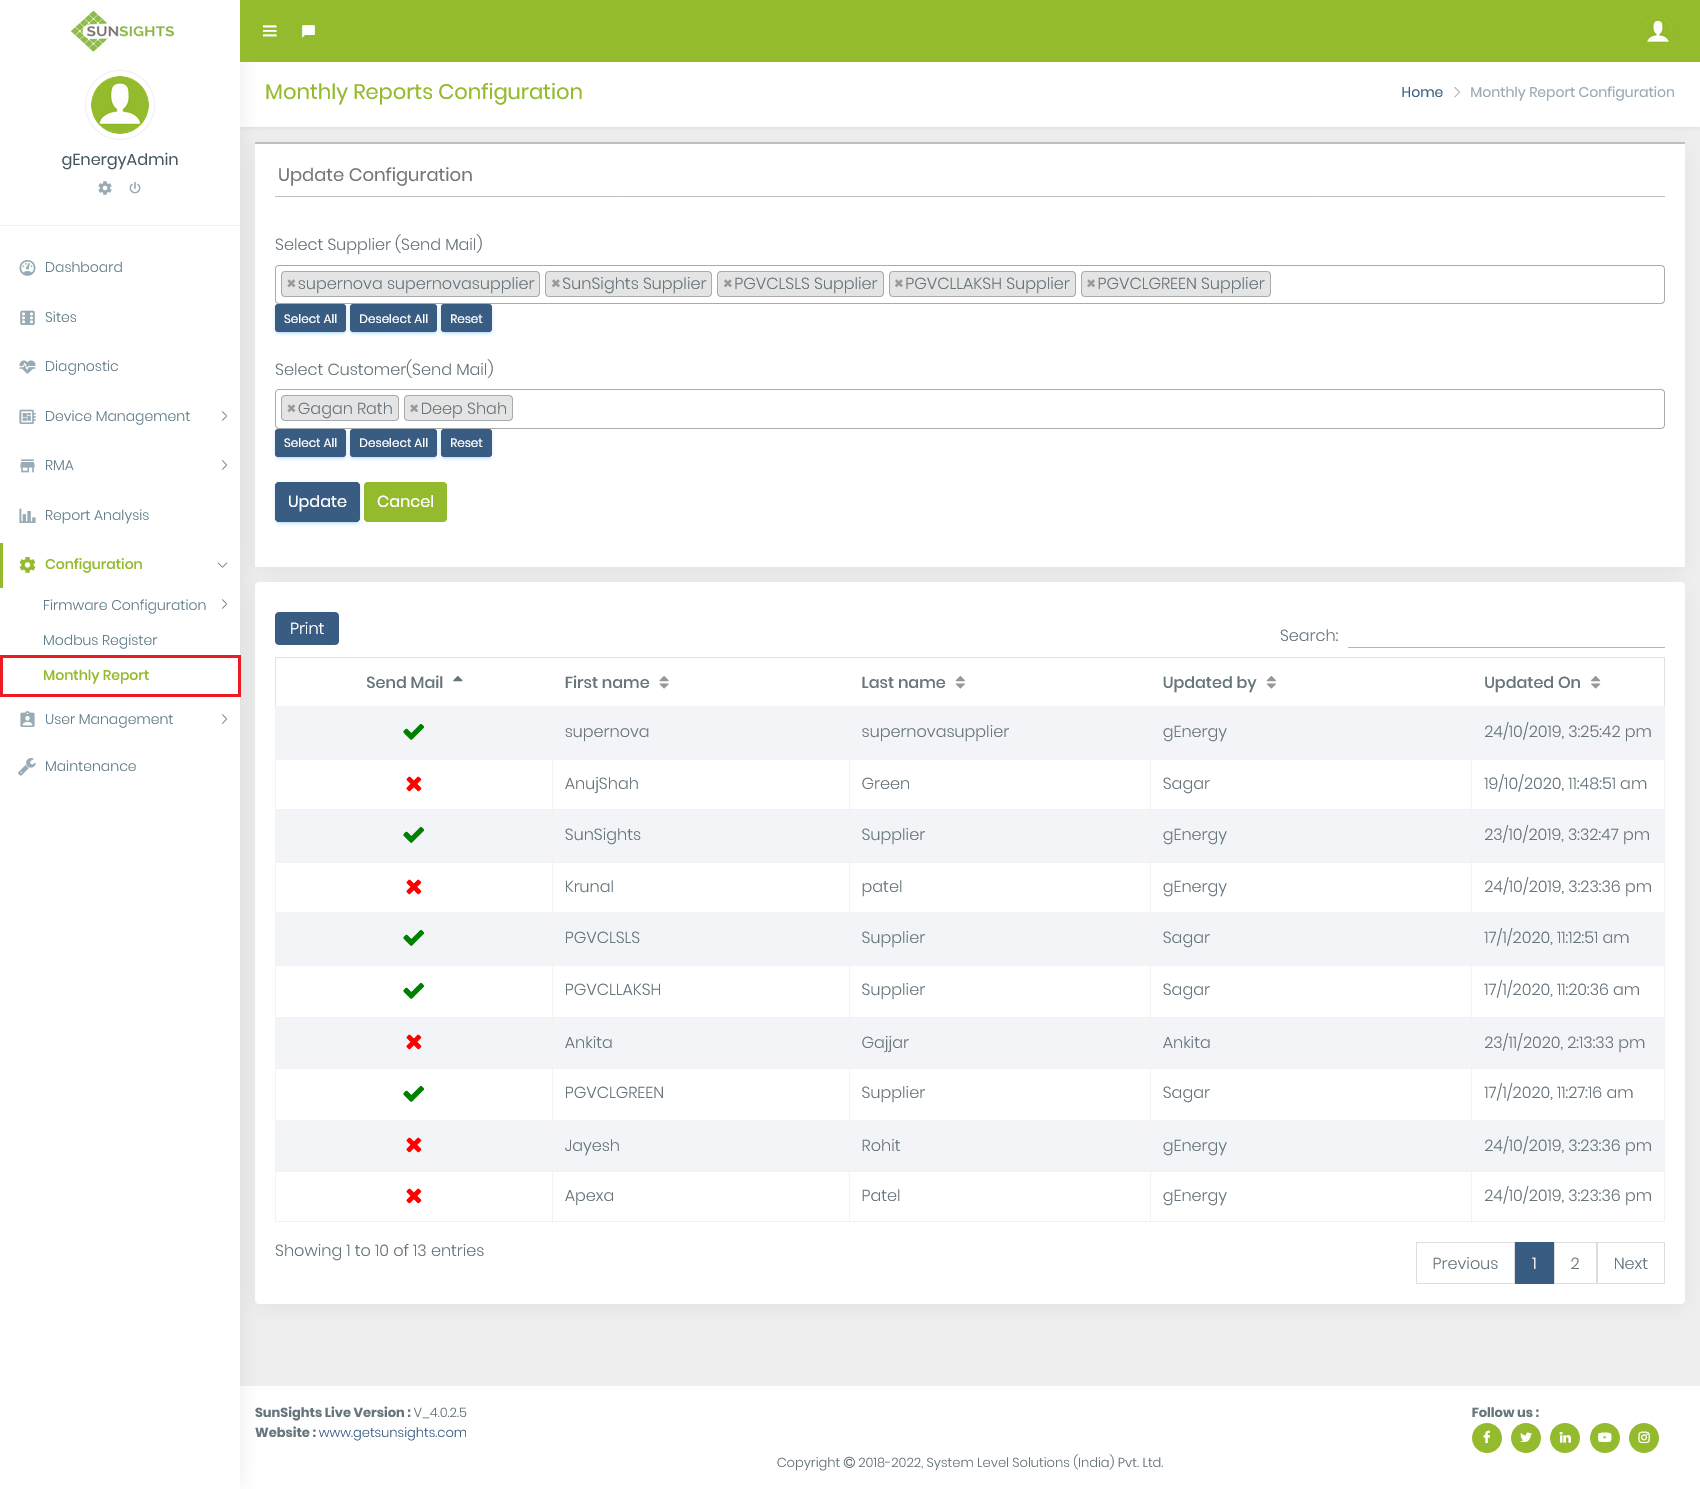
Monthly Report
You get Following Screen:
User Management
Register User
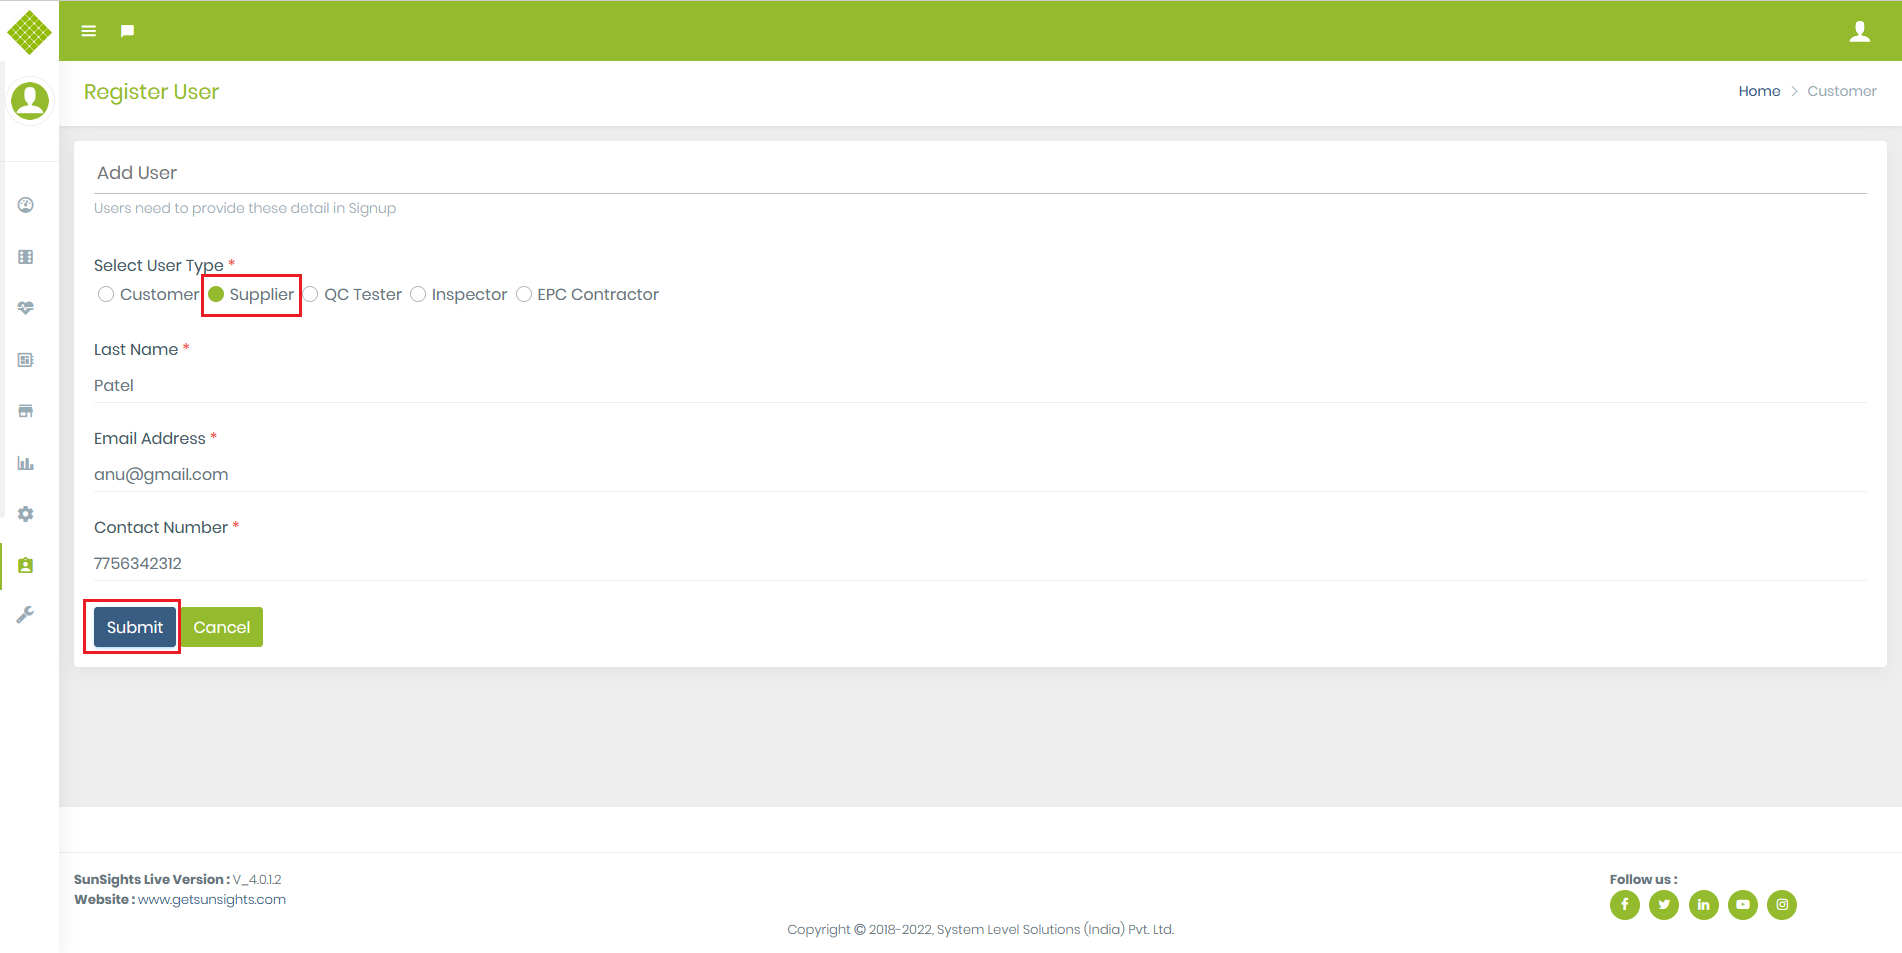
- Click on User Management menu, select Add User sub menu,
- Before sign up, admin or supplier will register user from here,and also define its role,if user is not 1'st added by admin or supplier than user will get the err message during sign up as like below.
- Admin will allow to add Customer,Supplier,QC Tester,Inspector, EPC Contractor.
- Supplier will allow add Customer,QC Testor, Inspector and EPC Contractor.
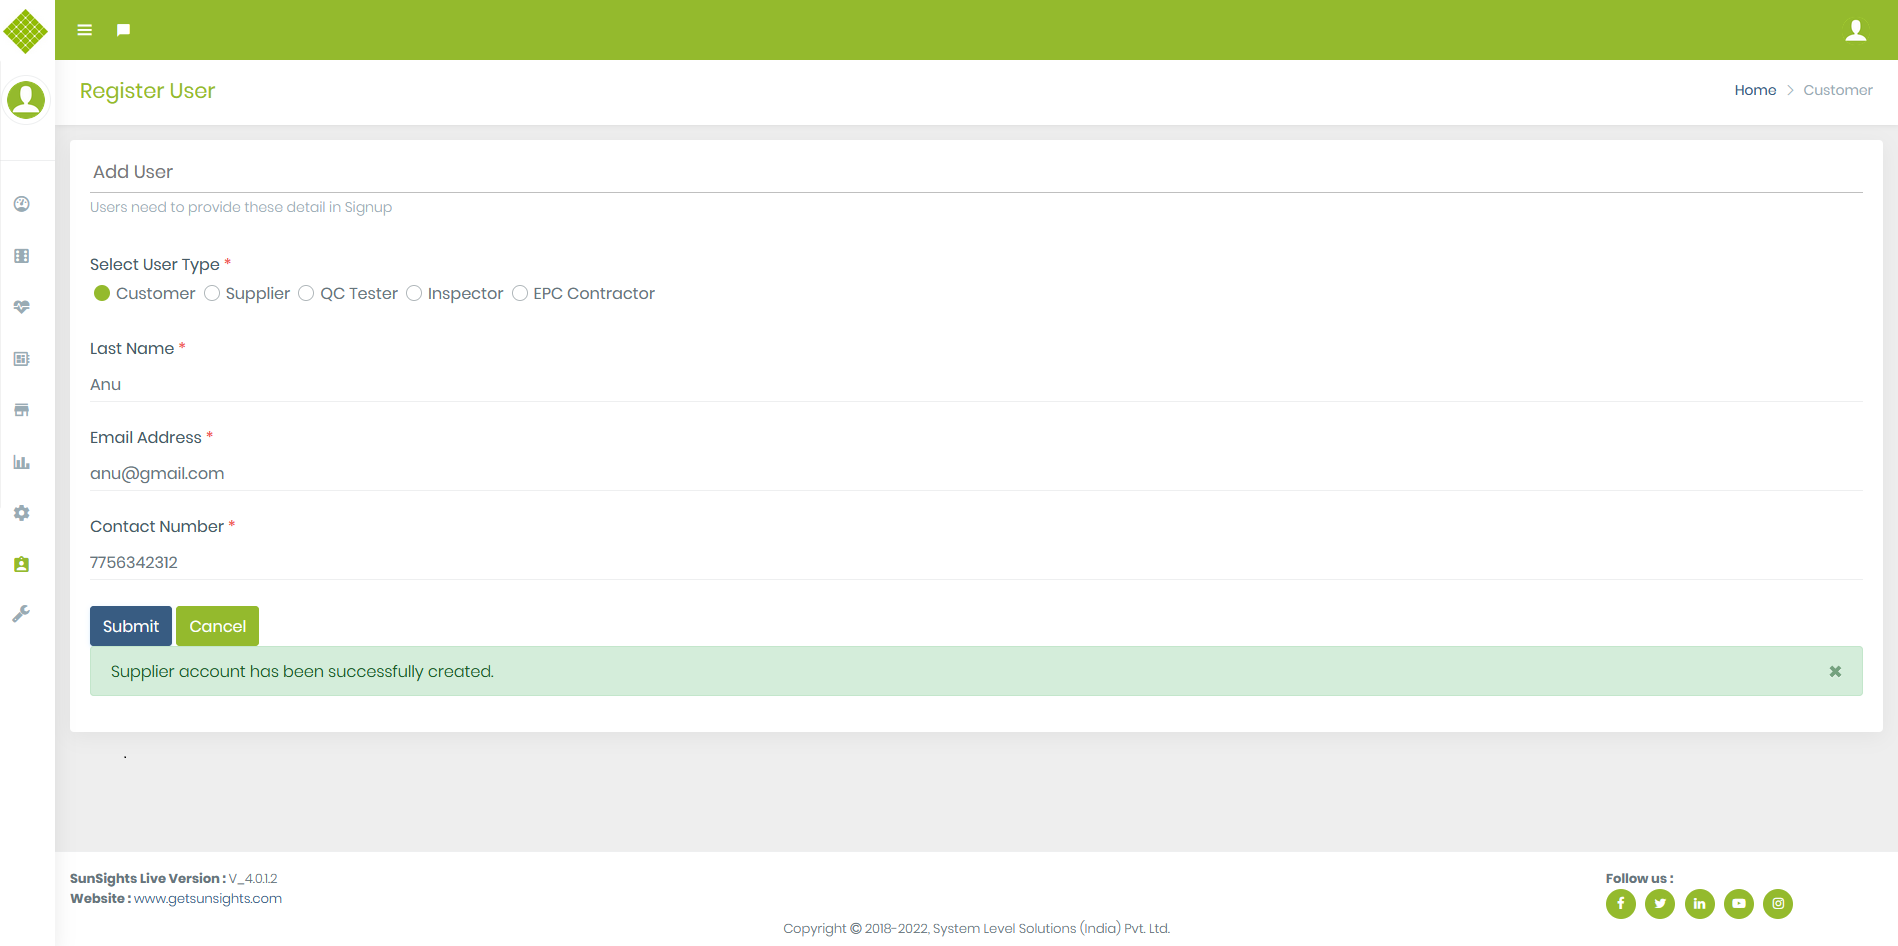
- Add User as a supplier and click on submit, you will get following notification on success.
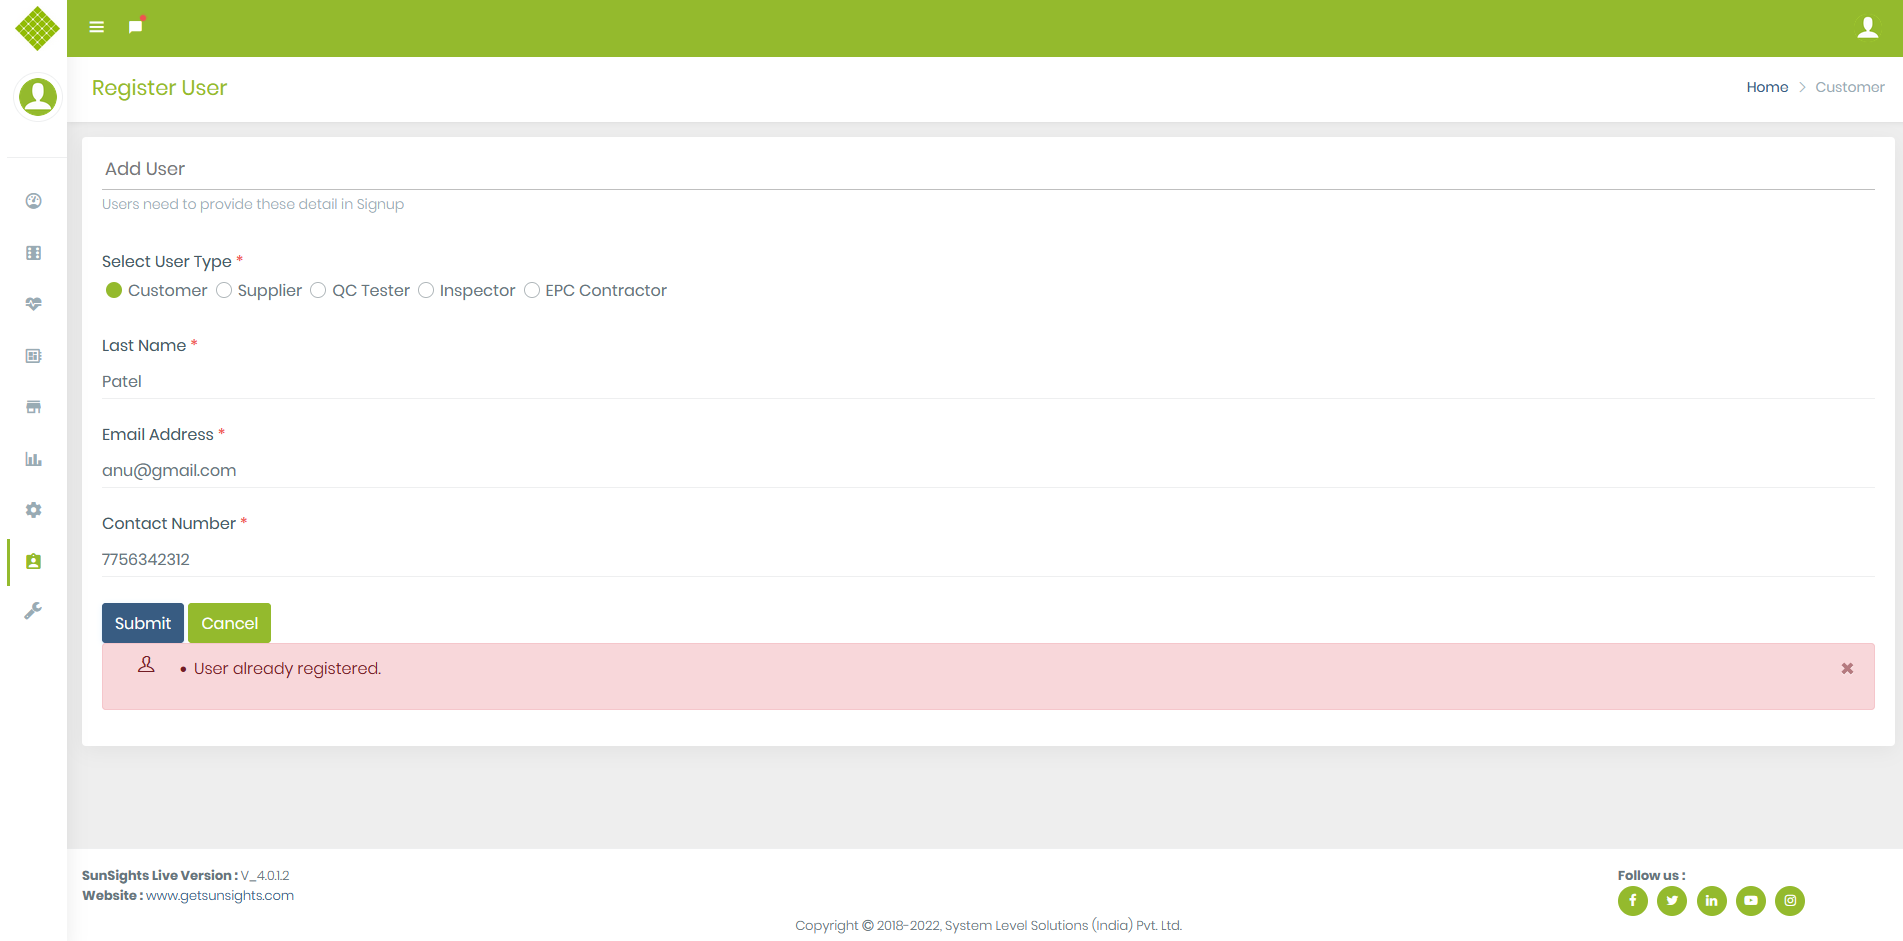
- If user is already added and you try to add that same user again than you will get following error.
User List
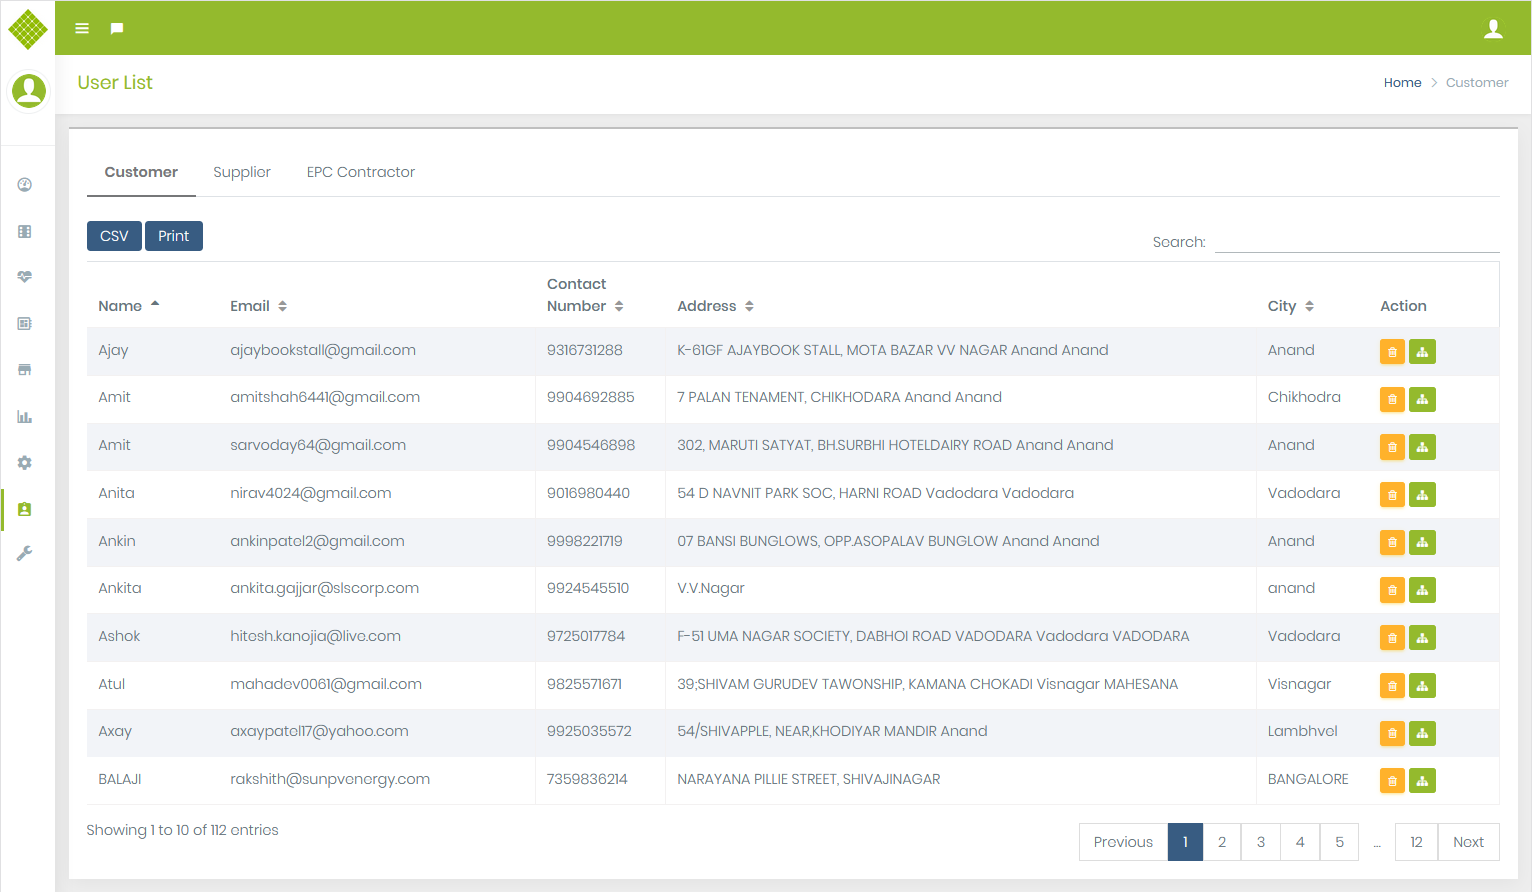
- Click on User Management and click on the "User List" option.
- We get registered user list.
- If you login with the admin than you will get list of registerd Customer, Supplier and EPC Contractor.
- If you login with the supplier than you will get list of registerd Customer and EPC Contractor.
- Note: If you want to add a new site for customers then the customer must be registered in the portal.
- You get a list of user with the "Delete" and "Add New Site" option.
-
Click on Add New site
 button of the specific customer for whom you want to add site.
-
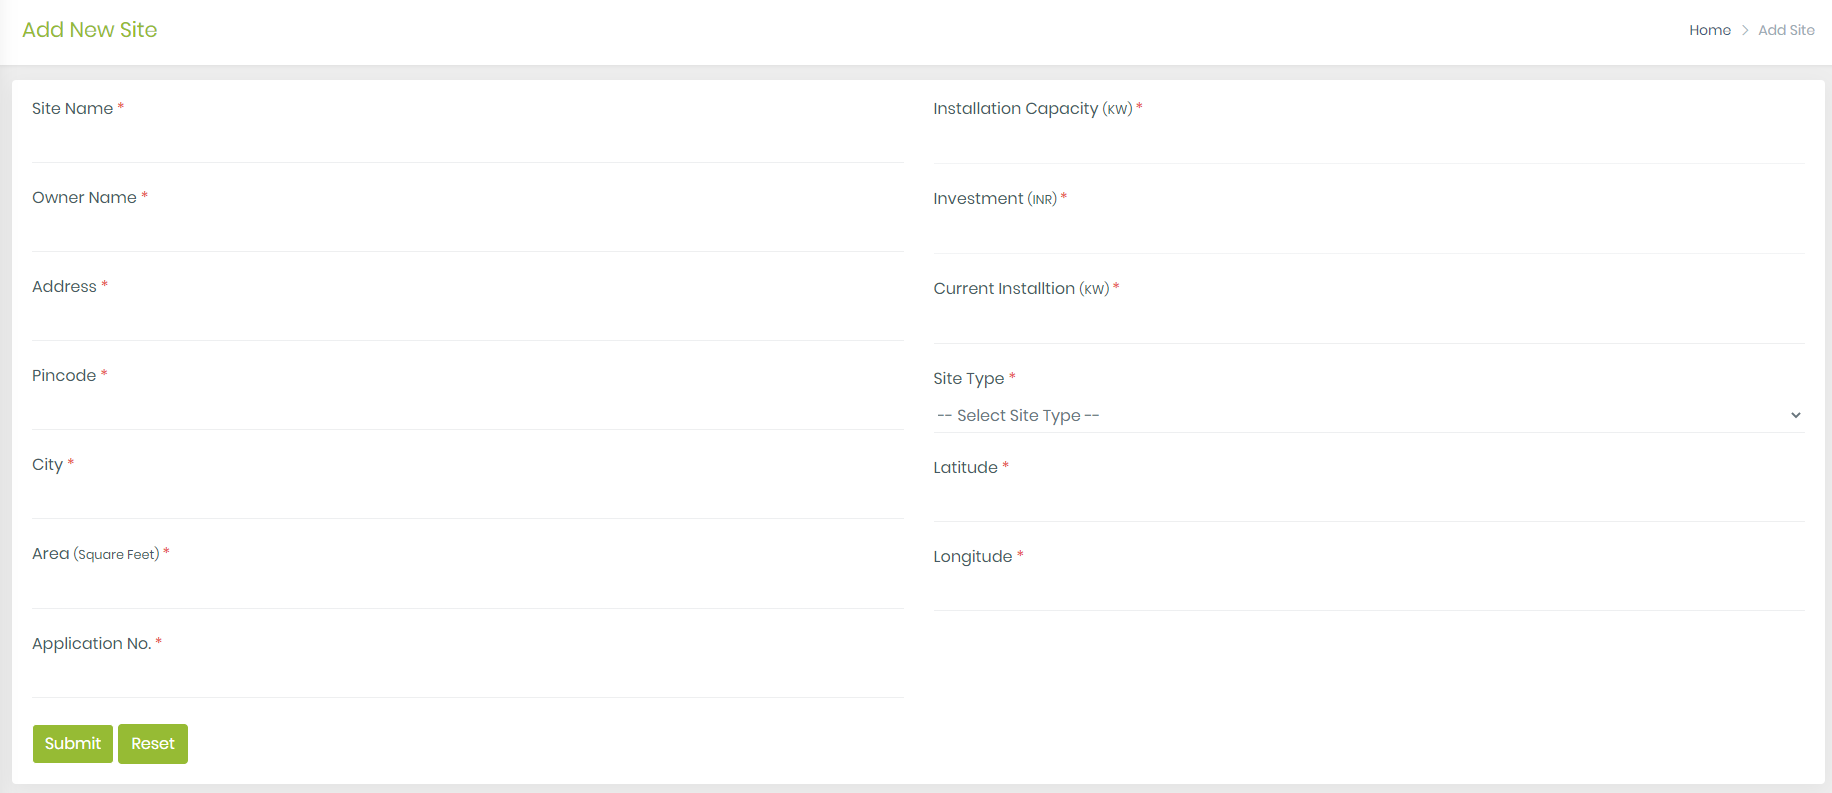
Here you get the form to add a new site. It contains many fields and all are mandatory.
- Site Name: Must require to enter the site name, only blank spaces are not allowed as a site name. Also, the site name must be unique for the same customer. Valid Site names: ShreeHareSite, Michal_Roof, etc.
- Owner Name: Must require to enter Owner name, only blank spaces are not allowed as a Owner name. Valid Owner name: MichelRush, Smith@20, etc.
- Address: Must enter the Address.
- Pin code: Must Enter the Pin code.
- City: Must enter the city name.
- Area (Square Feet): Must enter an Area in numeric value like: 100,250,500, etc..
- Application No.: Must enter Application number. Example: Test/0001/154, test0001154, enter any format in prior case. (After approving site by government you can update this number).
- Installation Capacity: This is read-only field. Once you enter the area value, installation capacity calculated automatically and display.
- Investment: This is read-only field. Once you enter area, Investment will be calculated automatically and display.
- Current Installation: Must enter Current installation in numeric value.
- Site Type: Must select Site type.
- Latitude: Must Enter Latitude in numerical value between range [-90,90].
- Longitude: Must Enter Latitude in numerical value between range [-180,180].
- Click on the “Reset” button to rest the form (If any validation error visible then it will also reset)
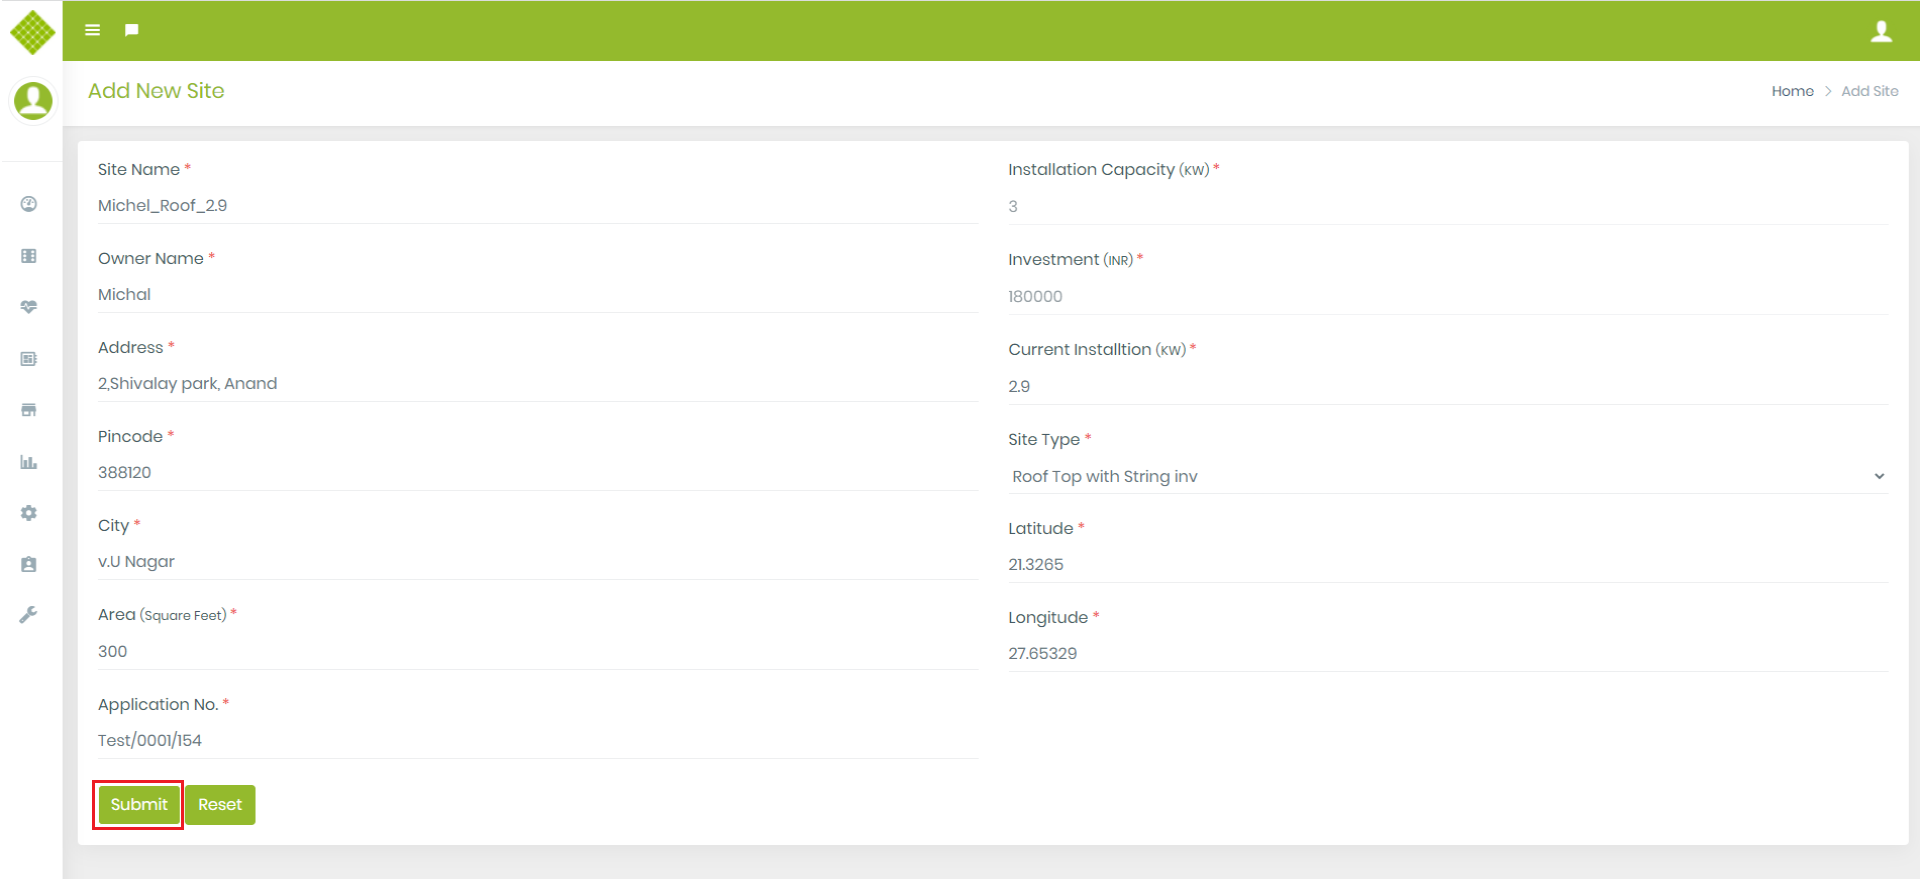
- Fill the form with valid information and click on the "Submit" button.
- If Site added successfully then get a message and the form will be reset
-
In the following cases, you are not able to add the site successfully and get an error.
- If you try to add the same site with the same details again.
- If you try to add a Different site with the same site name that exists for the same customer
- If you try to add a different site with a different site name but the same Latitude/Longitude.

-
Click on Remove User
 button of the specific customer for whom you want remove.
- It will ask for confirmation.On clicking Yes it will remove the user and on clicking No it will cancel it.
- If user is deleted than it will not display on user list.
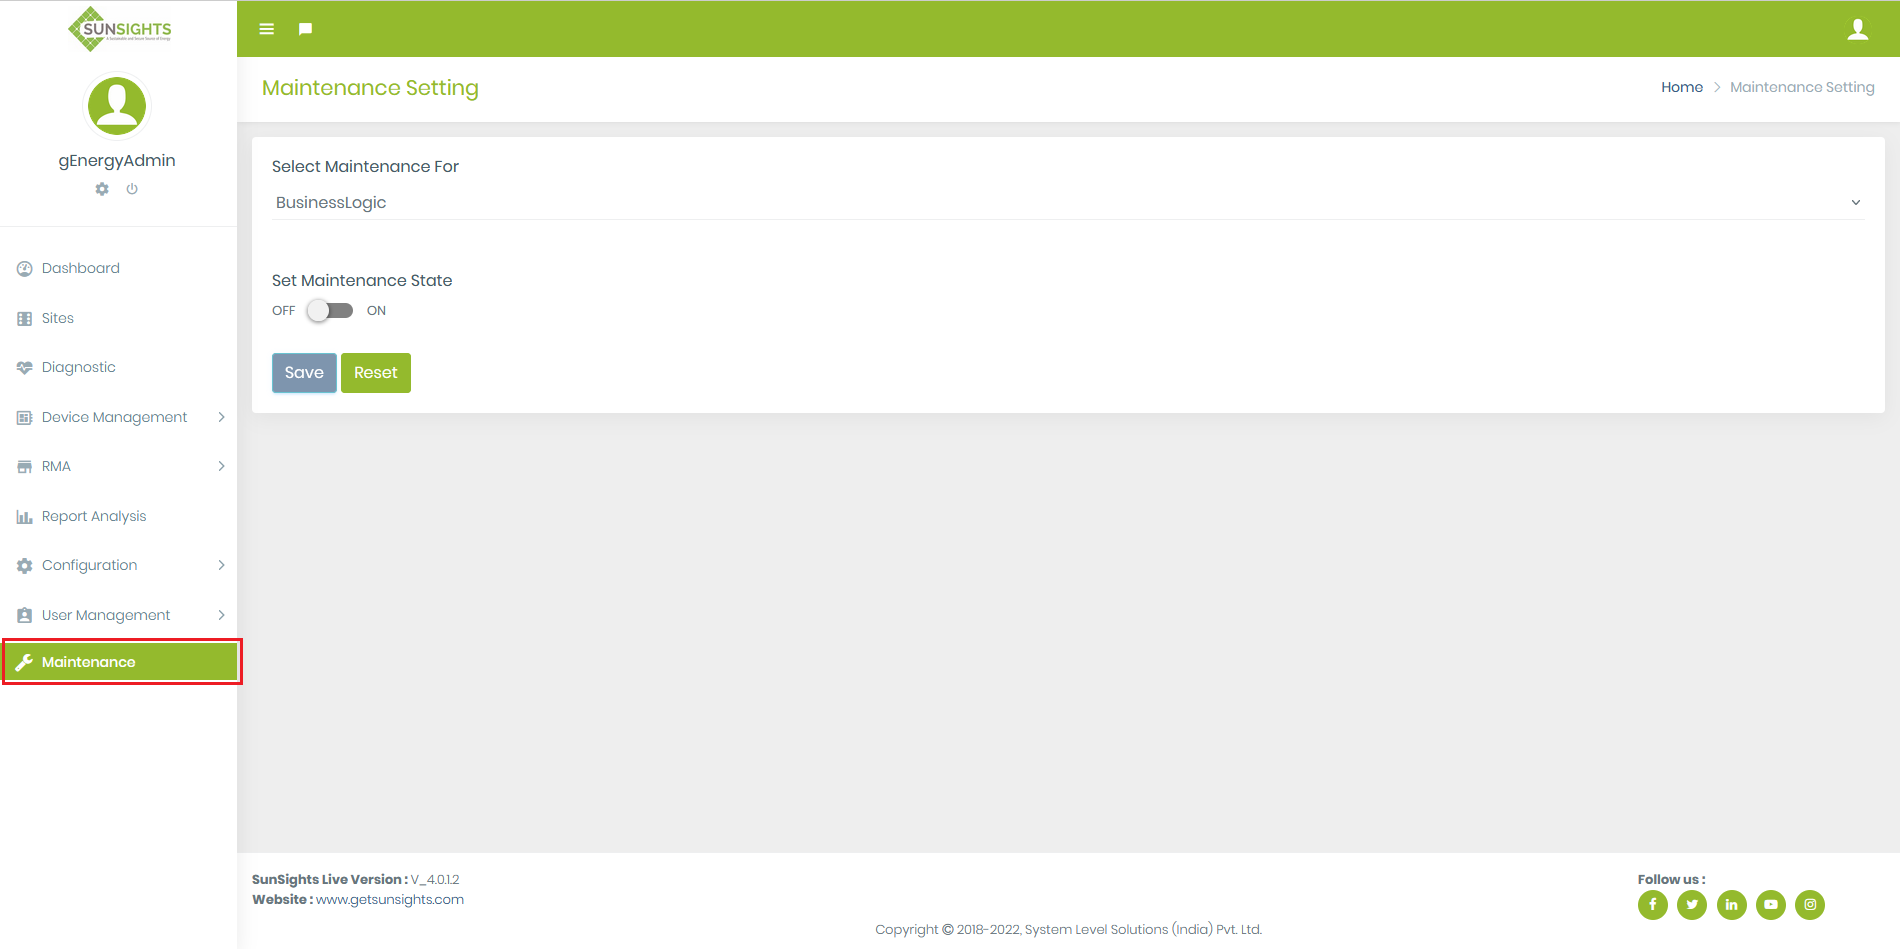
Maintanance
- Only admin allow to set maintance status.
- Click on the maintance menu, it will give following form.
- Admin can select maintance for Middleware,BusinessLogic or WebApplication.
- Admin have to set maintance on and have to click on save button if team want to put the site under maintance.
- If site is under maintance than whenever user will open the portal than it will get Site is under maintance message rather than login page.